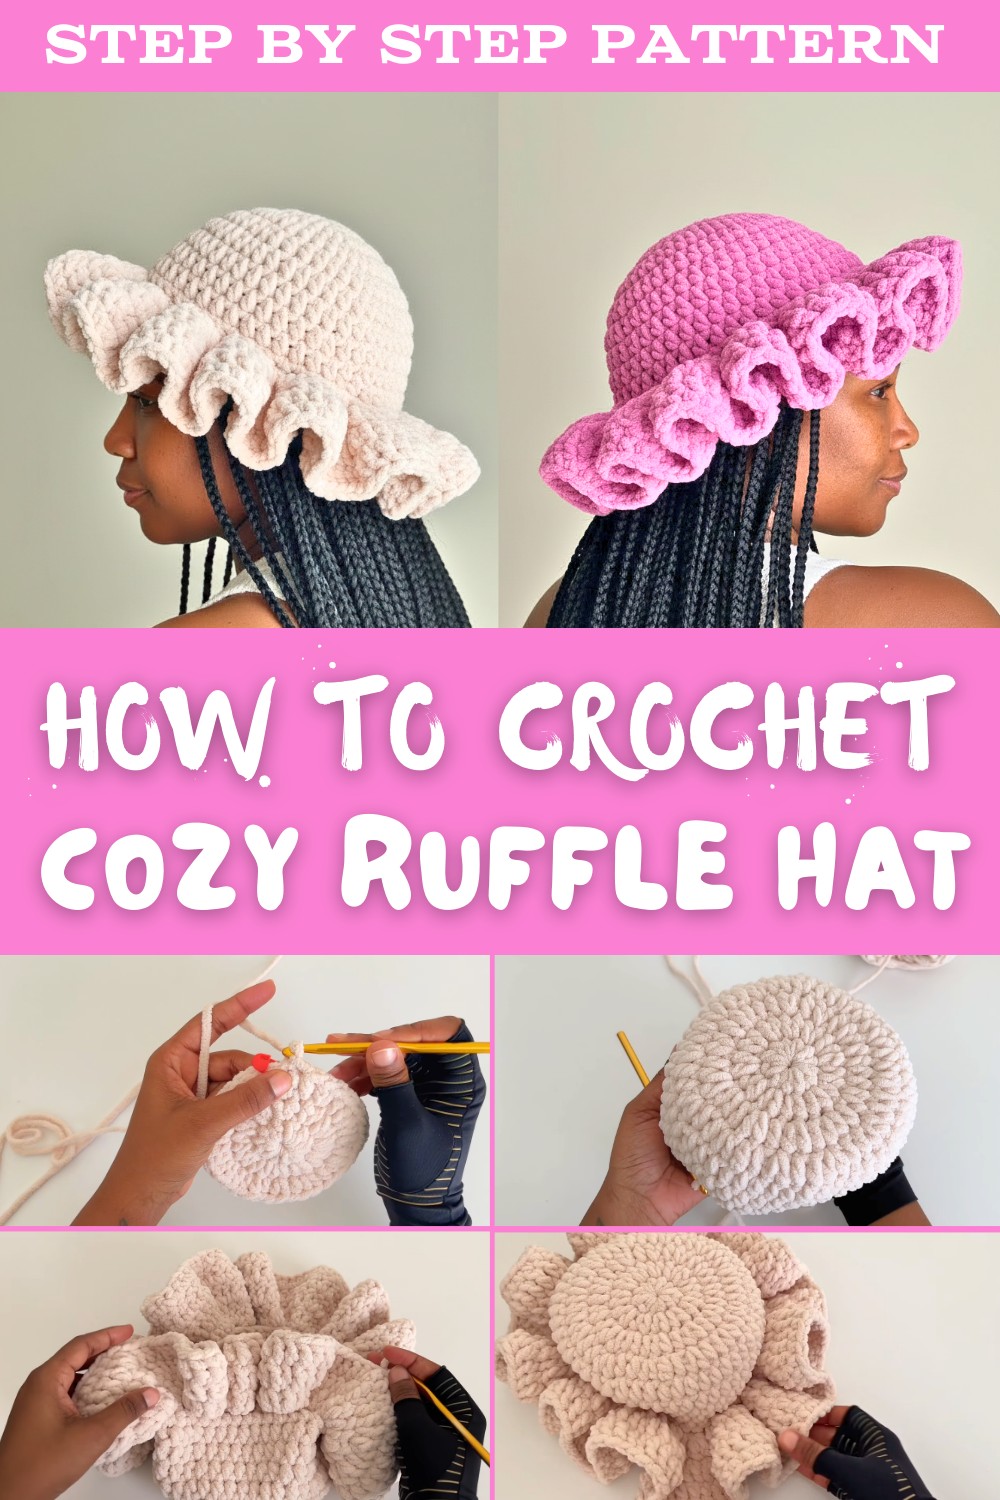
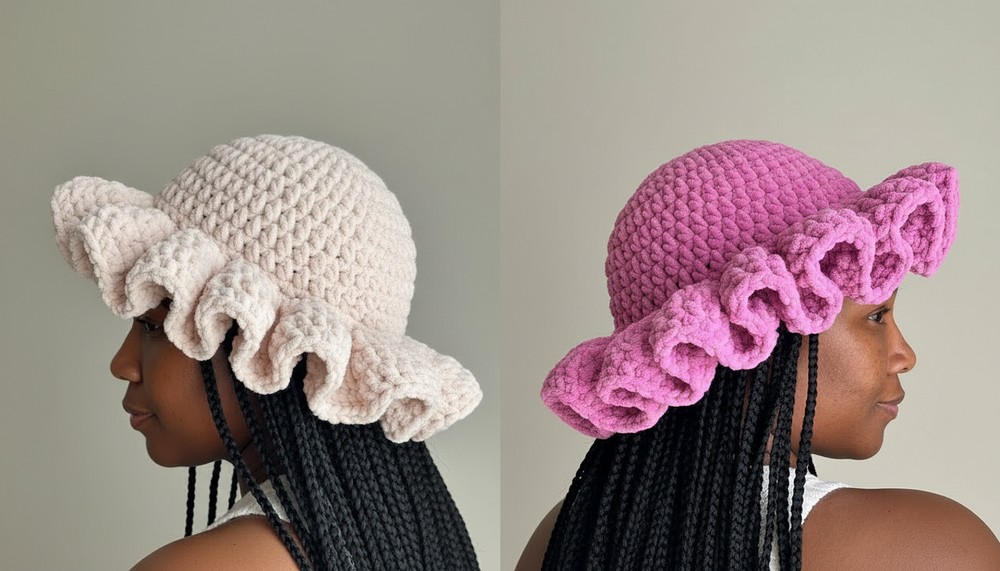
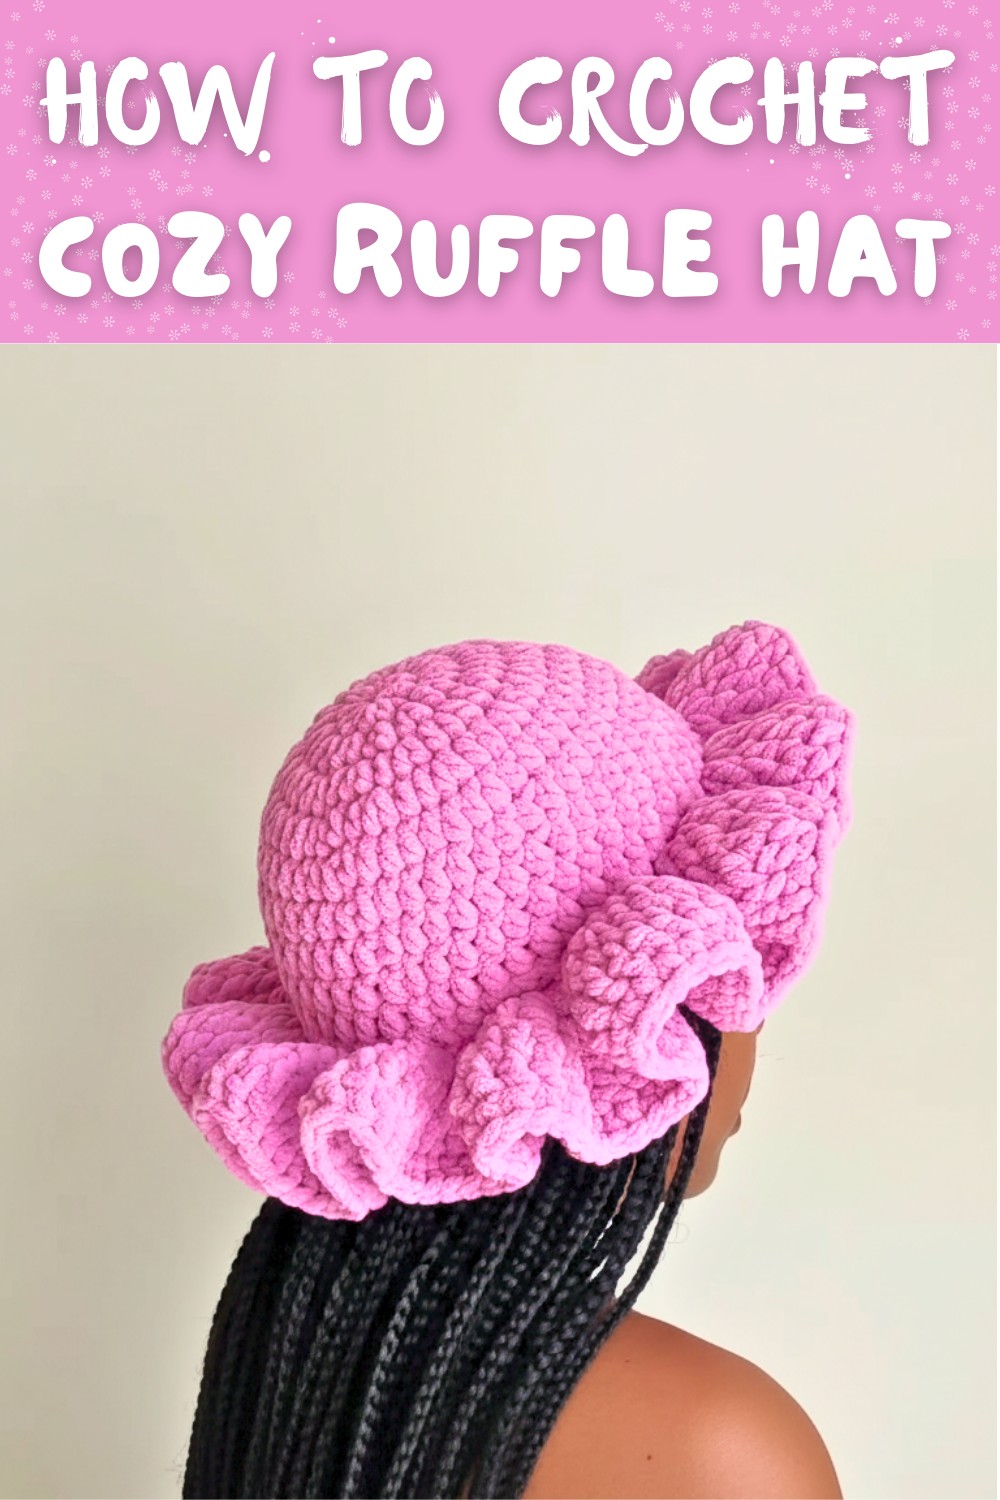
Quick Free Crochet Ruffle Hat Pattern for Stylish Looks
Wear a playful and stylish accessory with this FREE Crochet Ruffle Hat Pattern, ideal for sunny days, casual outings, and unique handmade charm.
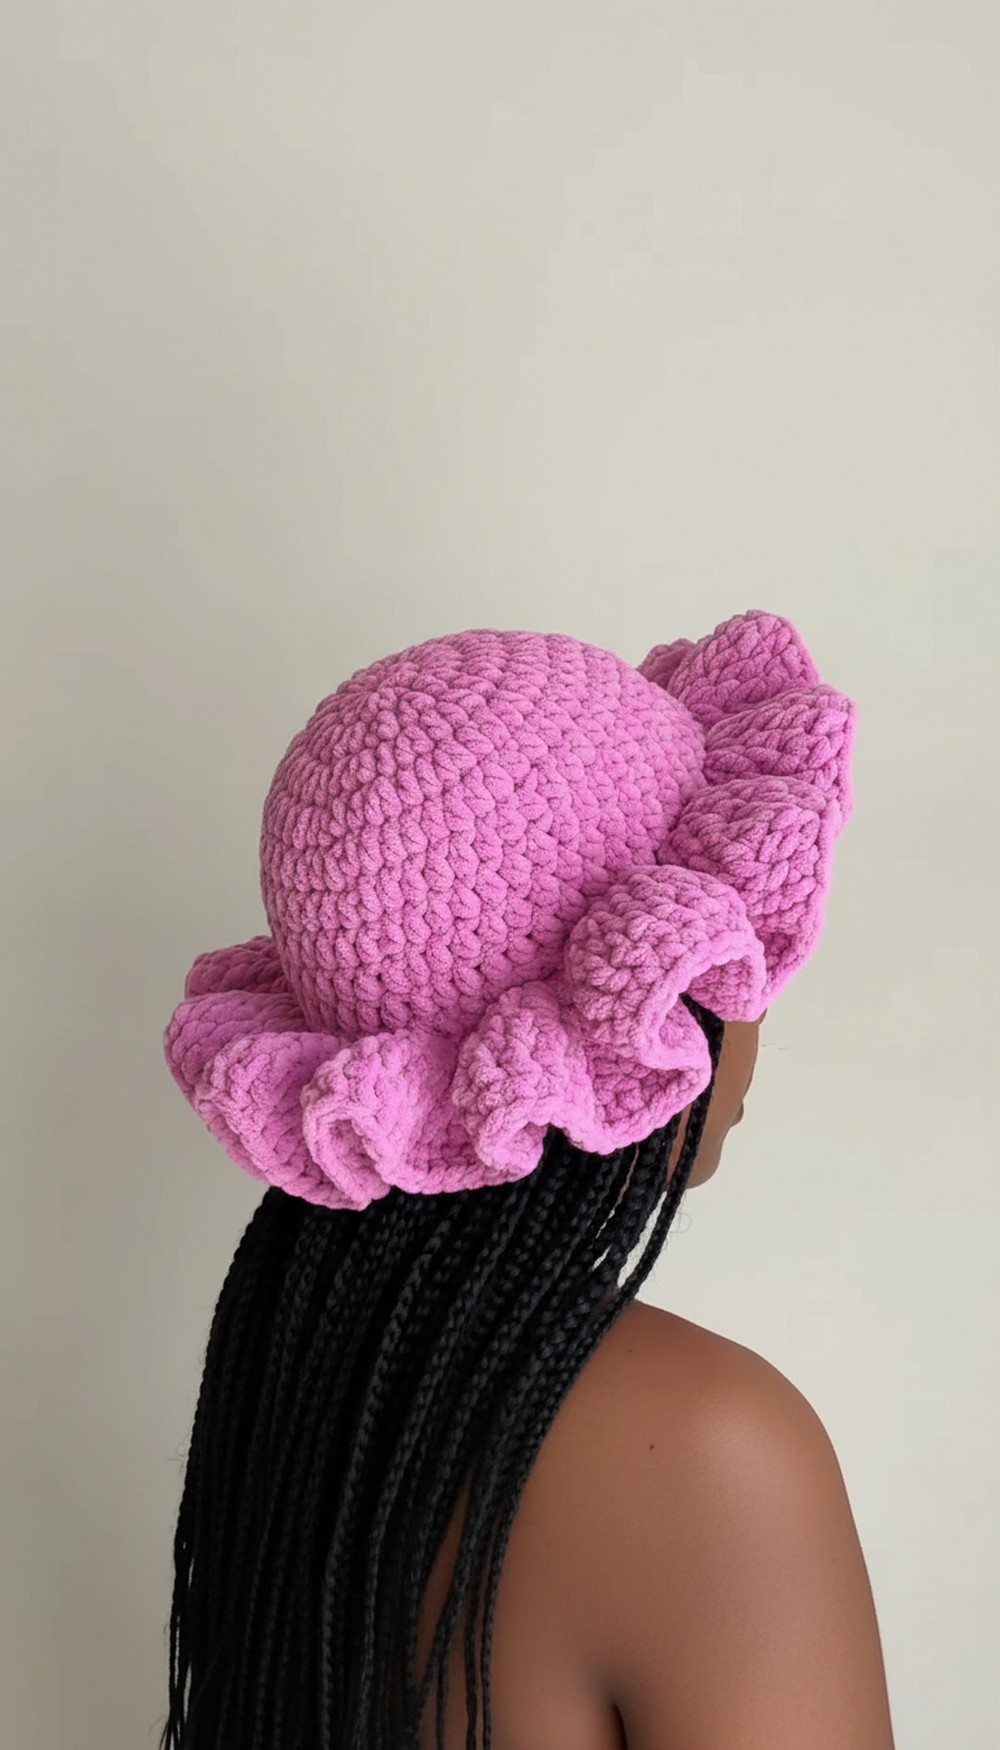
A crochet project that effortlessly blends charm with function always sparks excitement. Whether you're looking to add a playful touch to an everyday outfit or protect yourself from the sun on a breezy day, a ruffle hat is the perfect accessory. With this Free Crochet Ruffle Hat Pattern, you'll crochet a lightweight yet stylish hat featuring delicate ruffled edges that add a whimsical flare to your look.
Fun Free Crochet Ruffle Hat Pattern to Try
Perfect for spring outings, beach trips, or casual afternoons, this hat is versatile and easy to dress up or down. Pair it with flowy dresses for a romantic vibe or jeans and a tee for a relaxed, boho aesthetic.
Making a ruffle hat also offers creative freedom, experiment with bold shades or soft pastels to match your wardrobe. Functional, fashionable, and beginner-friendly, this project is a delightful way to add handmade charm to your accessory collection.
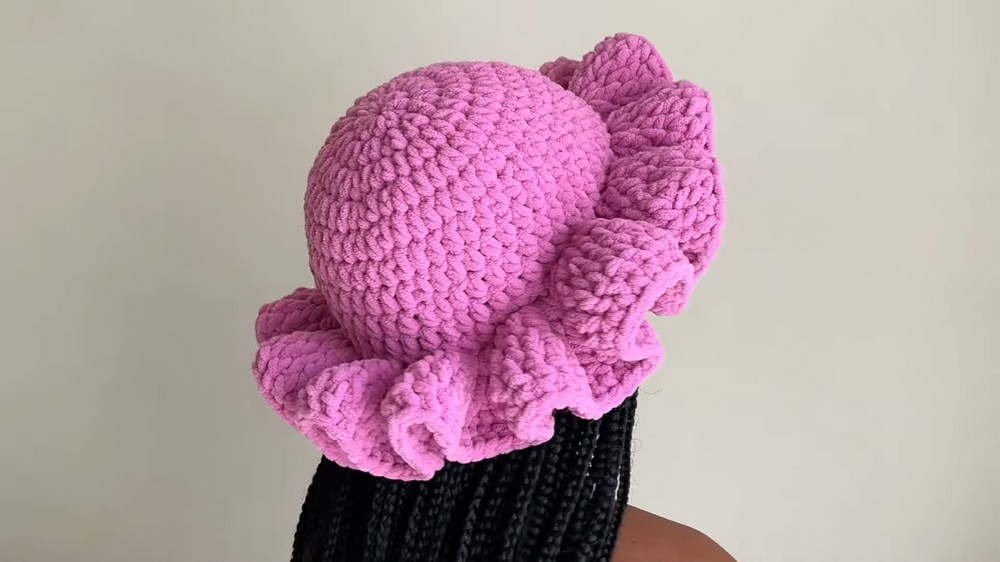
Crochet Cozy Ruffle Hat Pattern
Materials
- Yarn:
- 2 skeins of polyester chenille yarn (medium weight).
- Note: If you prefer a longer brim, use 3 skeins.
- Hook:
- 6.5 mm crochet hook (or as recommended by your yarn label).
- Additional Tools:
- Stitch marker.
- Scissors.
- Measuring tape.
- Tapestry needle (for sewing ends).
Skill Level
- Intermediate: Requires familiarity with magic rings, half double crochet (hdc), double crochet (dc), working in front loops, and seamless finishes using a tapestry needle.
Key Abbreviations (US Crochet Terminology)
- ch: Chain
- sc: Single Crochet
- hdc: Half Double Crochet
- dc: Double Crochet
- st: Stitch
- sl st: Slip Stitch
- inc: Increase (2 stitches in the same stitch)
Special Notes
- Raffle Formation: The brim section uses double crochets worked in the front loops, creating a stunning layered ruffle effect.
- Tension: Maintain consistent tension throughout to avoid uneven stitches.
- Stitch Marker Use: Always place the stitch marker in the second stitch of each round to mark the starting point, ensuring accuracy as you build each round.
Pattern Instructions
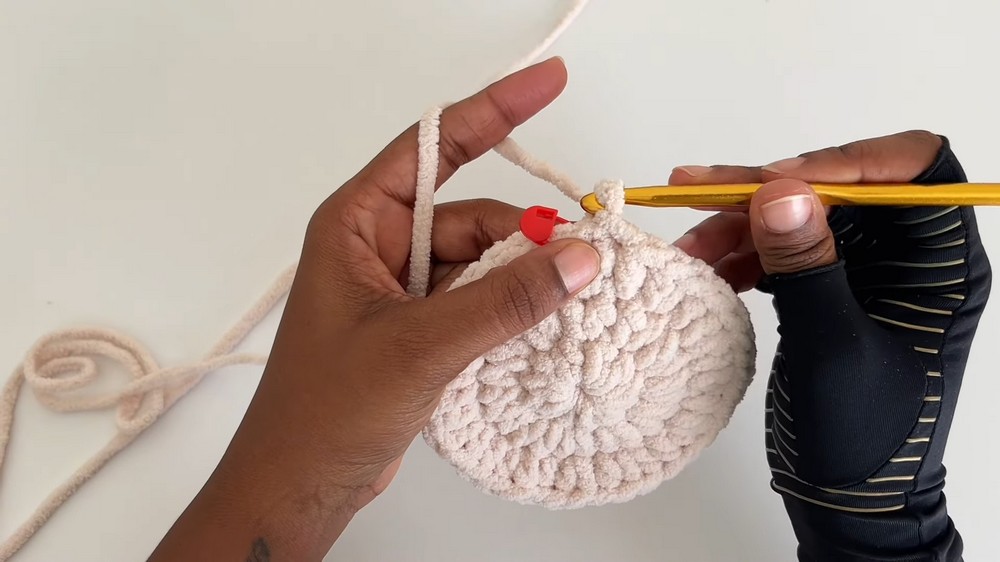
Step 1: Hat Base (Rounds 1-4)
Round 1:
- Start with a magic circle.
- Work 1 sc (counts as the first hdc), followed by 11 hdc into the magic circle. (12 hdc total).
- Place a stitch marker in the second hdc for reference.
- Close the round with a sl st into the top of the second hdc.
- Chain 1 to fasten off the round.
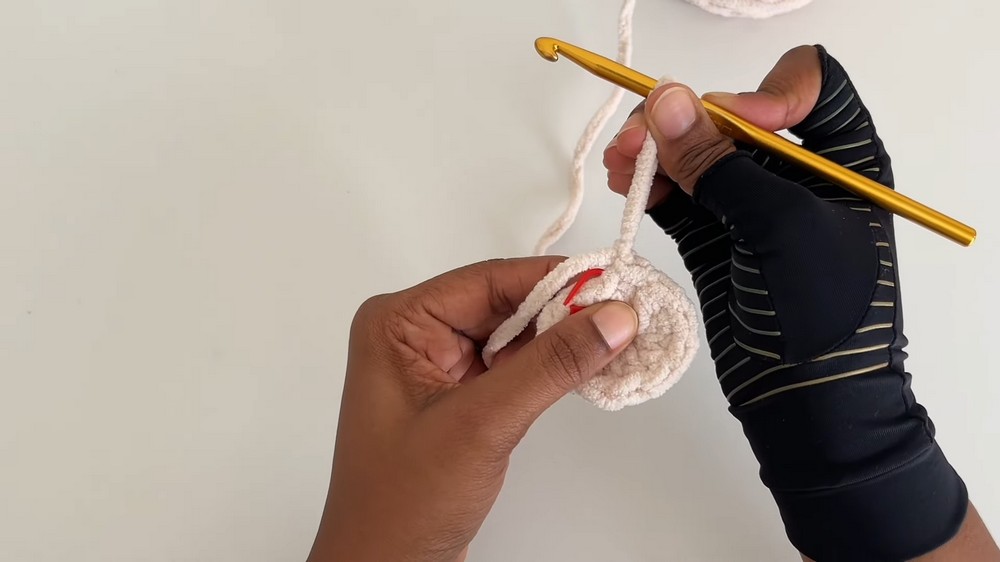
Tip: Count your stitches to ensure accuracy. Pull the tail of the magic circle gently to close the center hole tightly.
Round 2:
- Into the same st as the join, sc (counts as first hdc), followed by 1 hdc in the same st (first increase).
- Place a stitch marker in the second hdc of this round.
- Inc into each st around (2 hdc in each st). (24 hdc total).
- Close the round with a sl st into the second hdc. Chain 1 to fasten off.
Round 3:
- Sc (counts as first hdc) and place a hdc in the same st.
- Place a stitch marker in the second hdc.
- 1 hdc into next st, then 2 hdc in the next st (pattern: 1 hdc, inc). Repeat this sequence around. (36 hdc total).
- Close the round with a sl st into the second hdc. Chain 1 to fasten off.
Round 4:
- Sc (counts as first hdc) and place a hdc in the same st.
- Place a stitch marker in the second hdc.
- 1 hdc into the next 2 sts, then 2 hdc in the next st (pattern: 2 hdc, inc). Repeat this sequence around. (48 hdc total).
- Close the round with a sl st into the second hdc. Chain 1 to fasten off.

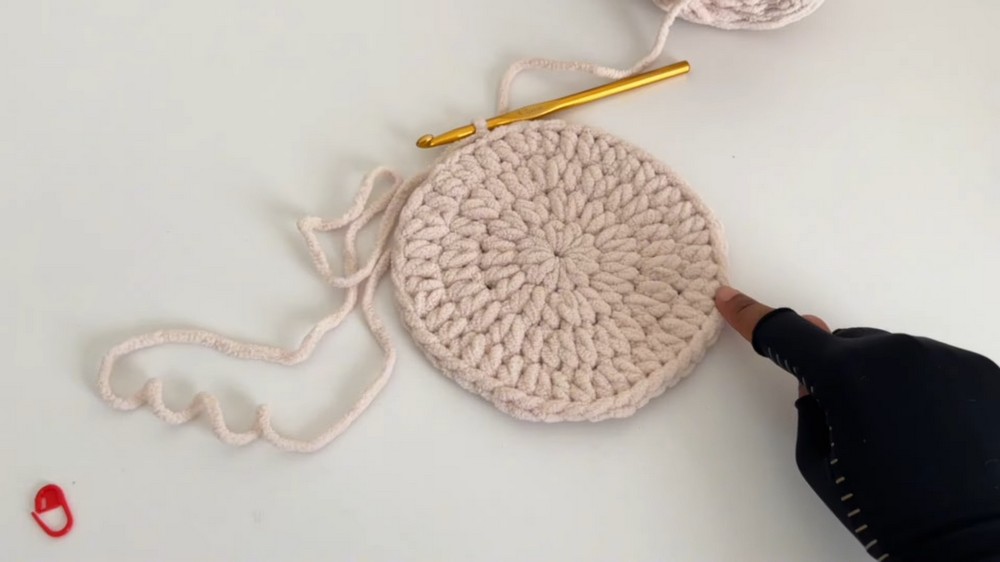
Measuring the Base:
The completed base diameter should measure 6 - 6.5 inches. If it's smaller, size up your hook. If it's larger, size down your hook.
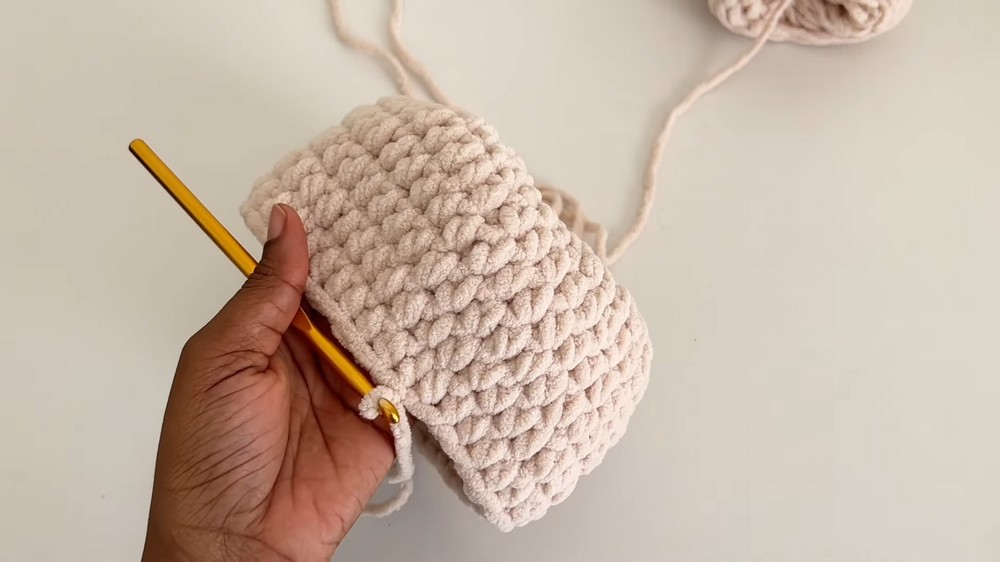
Step 2: Hat Body (Rounds 5-10)
Rounds 5-10:
- Work 1 hdc in each st around (48 hdc per round).
- Close each round with a sl st into the second hdc. Chain 1 to fasten off.
Note: The goal is to create a domed "hat-like" shape, where the body length reaches approximately 3.5-3.75 inches.
Optional: Add more rounds if you desire a longer hat body (e.g., 4 inches).
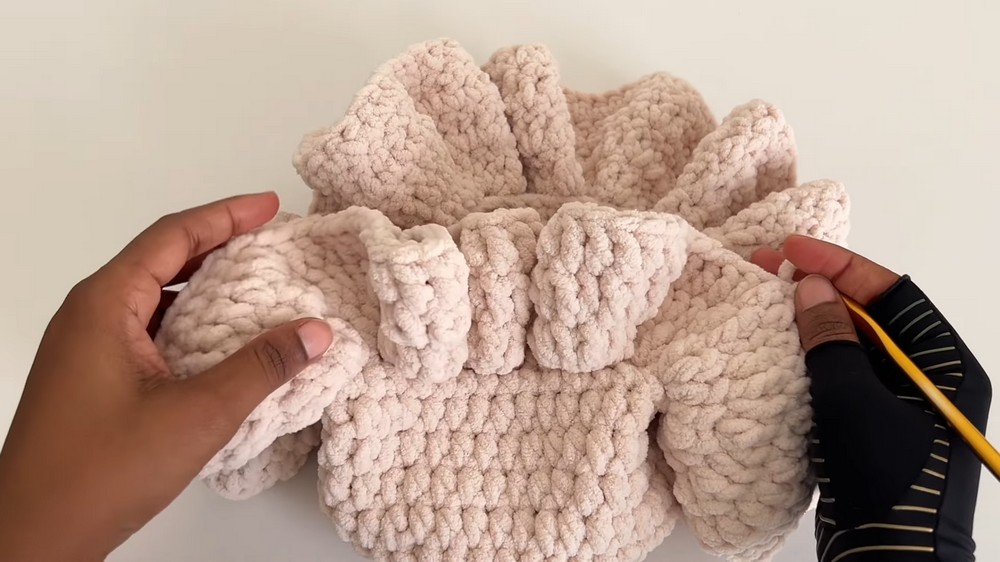
Step 3: Ruffled Brim (Rounds 11-13)
Round 11:
- Work this round in the front loops only.
- Sc (counts as a dc), ch 1 in the first st (counts as the first dc).
- Place 2 more dc in the same st.
- Place a stitch marker in the second dc.
- 3 dc in every st around (144 dc total).
- Close the round with a sl st into the second dc. Chain 1 to fasten off.
Round 12:
- Work 1 sc (counts as a dc), ch 1 in the first st (counts as the first dc).
- Place a stitch marker in the second dc.
- 2 dc in the next st, 1 dc in the following st.
- Continue the pattern: (2 dc, 1 dc) around.
- Close the round with a sl st into the second dc. Chain 1 to fasten off.
Round 13:
- Work 1 dc in each st around (216 dc total).
- Fasten off with a seamless finish using a tapestry needle.
Optional Step: Finishing Extra Rounds
If you have leftover yarn, add 1 round of sc for a neat edge. You can also increase the ruffle brim by adding additional rounds of dc.
Finishing
- Weaving In Ends: Use a tapestry needle to weave in all loose ends securely.
- Ruffle Styling: Spread out ruffles evenly or leave them loose for an organic look.
Conclusion
Congratulations! Your cozy ruffle hat is now complete. This hat is designed to provide both warmth and style, making it a perfect addition to your wardrobe. Feel free to customize the brim length or colors to better suit your personal style.
Pattern Corrections & Tips
- Tight Slip Stitches: Ensure slip stitches at the end of each round are tight but not overly pulled, avoiding uneven tension.
- Brim Adjustments: If you want a wider brim, continue adding rounds of increases or simple double crochets.
- Stitch Count: Always recount stitches at the end of each round to avoid errors in your base shape or ruffle formation.