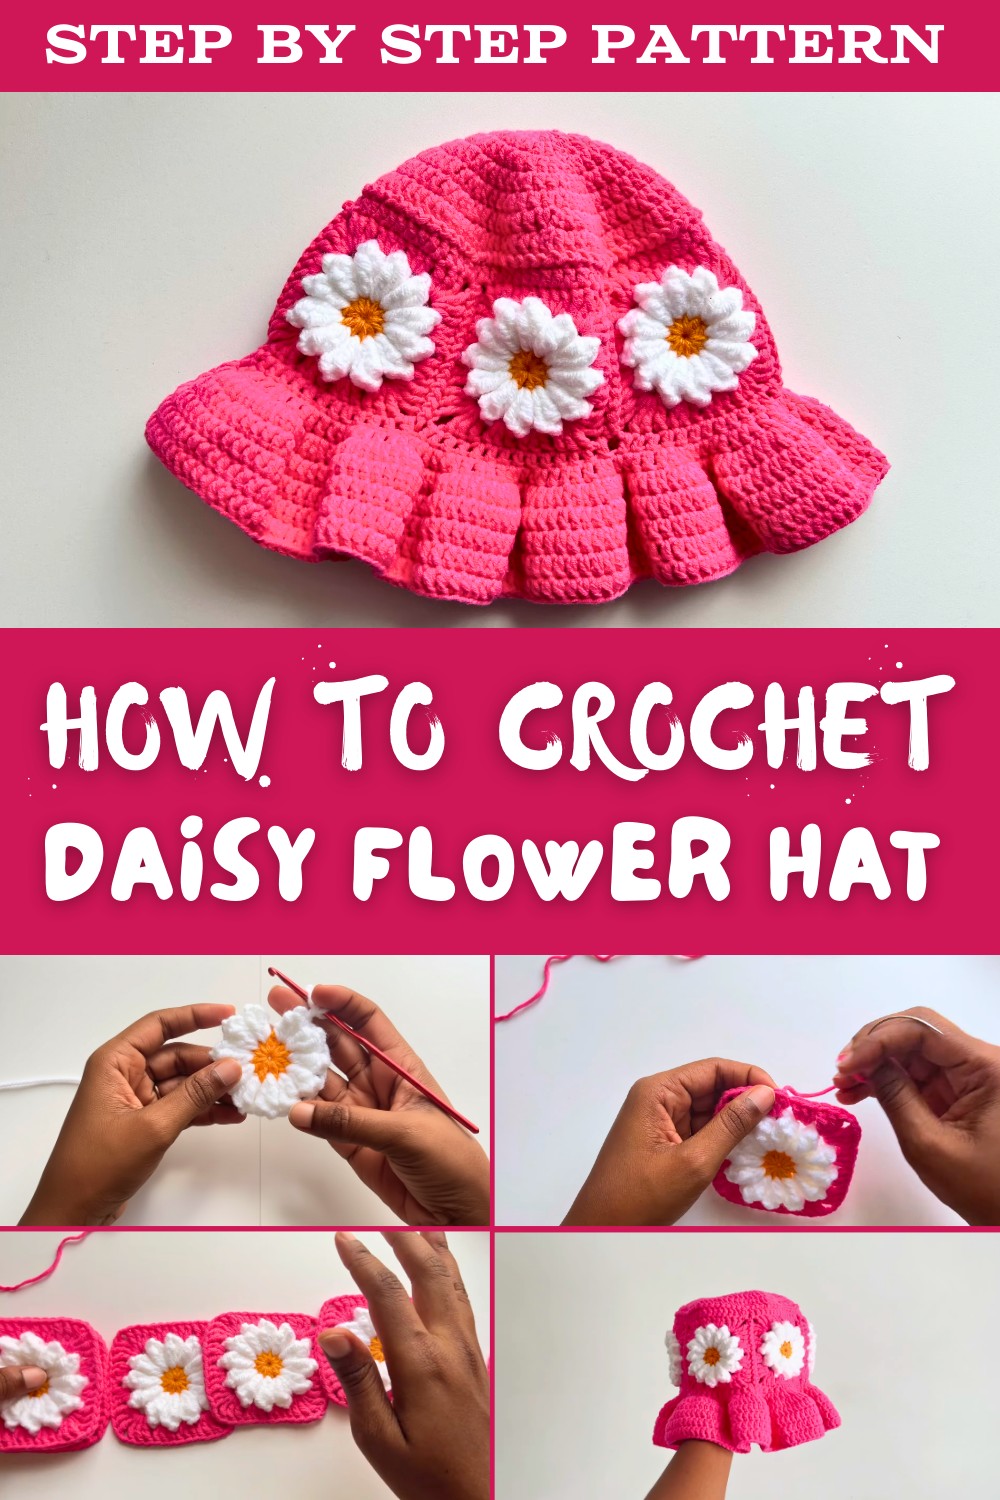
Cute Free Crochet Daisy Flower Hat Pattern for Stylish Outings
Stitch a playful style with this FREE Crochet Daisy Flower Hat Pattern, perfect for sunny days, picnics, and adding charm to any outfit.
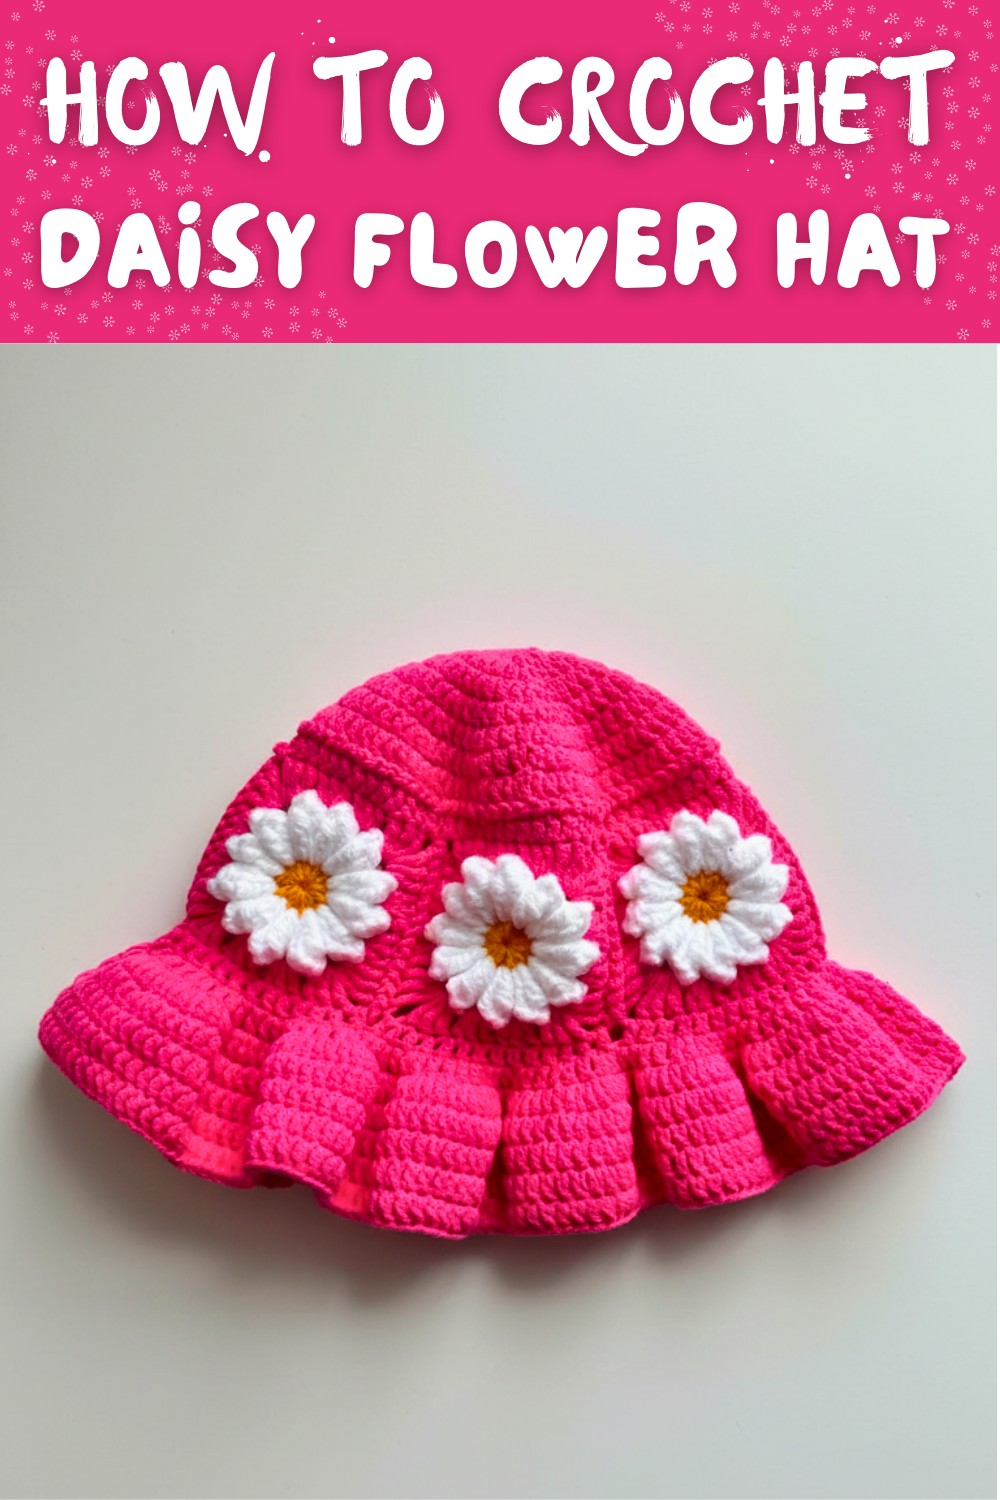
Sunny days and picnics in the park just got a whole lot brighter with a touch of handmade charm. The Free Crochet Daisy Flower Hat pattern brings that cheerful energy to your wardrobe, offering a fun way to add personality to your spring and summer outfits. This lightweight, airy hat is perfect for garden strolls, beach trips, or casual weekend adventures, and its delicate daisy motifs make it a standout accessory for both teens and adults.
Free Crochet Daisy Flower Hat Pattern for Sunny Adventures
You can style it with flowy dresses, denim jackets, or even simple tees to instantly elevate a casual look. Beyond its cute factor, crocheting this hat is a relaxing project that sharpens your skills, encourages creativity, and results in a wearable piece of art. Ideal for gifting or personal use, this pattern combines style, function, and joy, making every sunny outing a little more special.
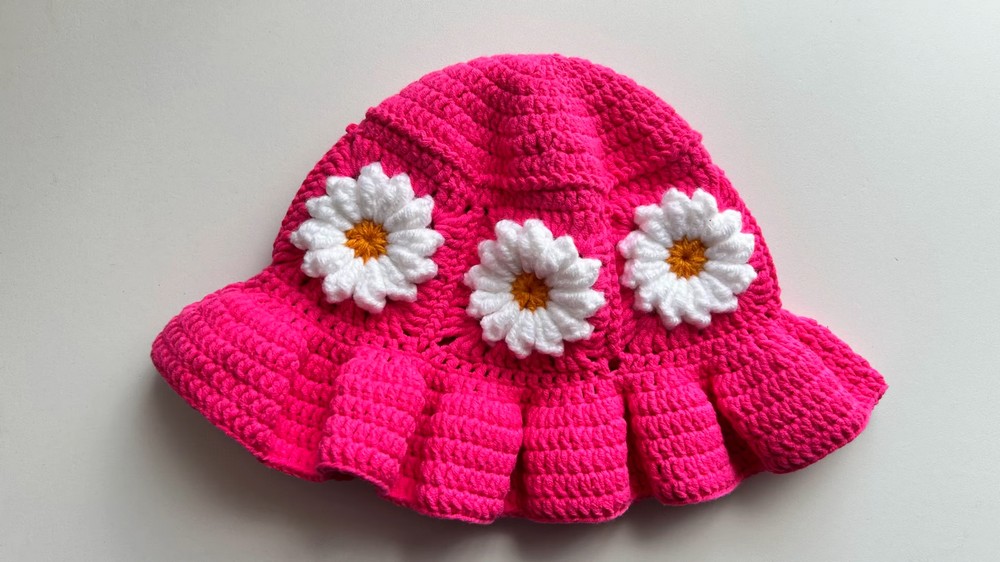
Crochet Daisy Flower Granny Square Hat Pattern
Skill Level
- Intermediate
Finished Size
- This hat fits most adults and teenagers with a head circumference of 21 to 24 inches.
Materials Needed
Yarn:
- DK weight yarn in three colors:
- Main color: (for the majority of the hat).
- Center color (orange): for the center of the daisy motif.
- Petals color (white): for the daisy petals (a chunky yarn is used for puffier petals, but DK yarn is also suitable).
Hook Sizes:
- 3.75mm crochet hook
- 4.0mm crochet hook (optional, for a slightly larger size and looser fit).
Additional Tools:
- Scissors
- Tapestry needle
- Stitch markers
- Measuring tape
Gauge
- Granny square: Each completed daisy granny square should measure approximately 3.5 inches.
- Base of the hat: Diameter should measure 6 to 6.5 inches after completing the seventh round.
Key Abbreviations (US Terminology)
- ch: Chain
- dc: Double Crochet
- tr: Treble Crochet
- sc: Single Crochet
- sl st: Slip Stitch
- inc: Increase
- sts: Stitches
- FPdc: Front Post Double Crochet
- BPdc: Back Post Double Crochet
- rep: Repeat
Special Techniques:
Chainless Double Crochet:
- Create a loop, hook your yarn, and insert it into the ring.
- Yarn over, pull through the yarn (2 loops on the hook).
- Yarn over again, pull through both loops (creates a double crochet).
Chainless Treble Crochet:
- Begin similarly as when making the chainless dc, but yarn over twice.
- Insert into the ring, yarn over, and pull through (3 loops on the hook).
- Yarn over, pull through two loops, yarn over again, and pull through remaining loops.
Pattern Instructions:
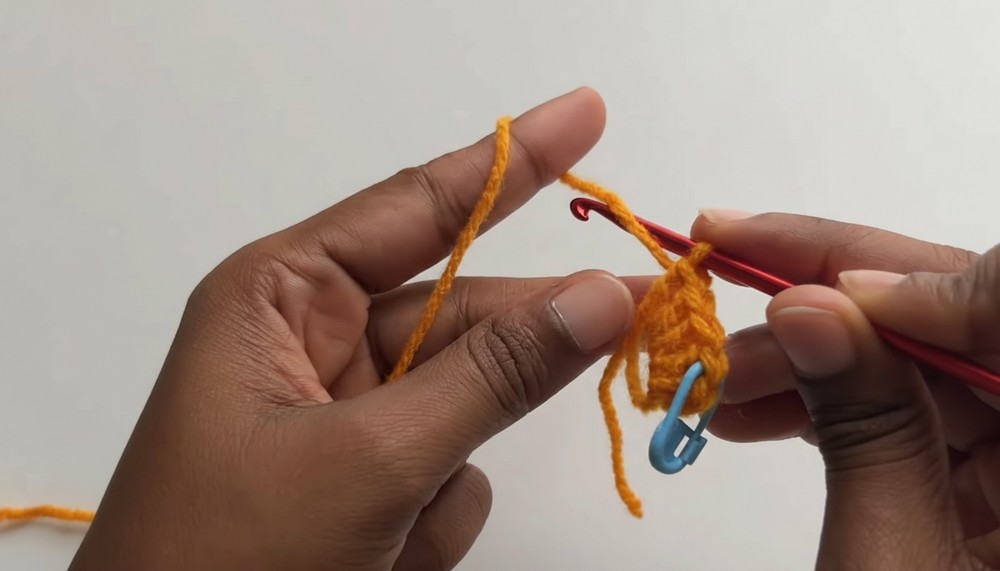
Step 1: Center of the Daisy Flower
- Magic Ring:
- Make a magic ring and work 12 double crochets into it.
- If you prefer, chain 2 initially to substitute for the first dc.
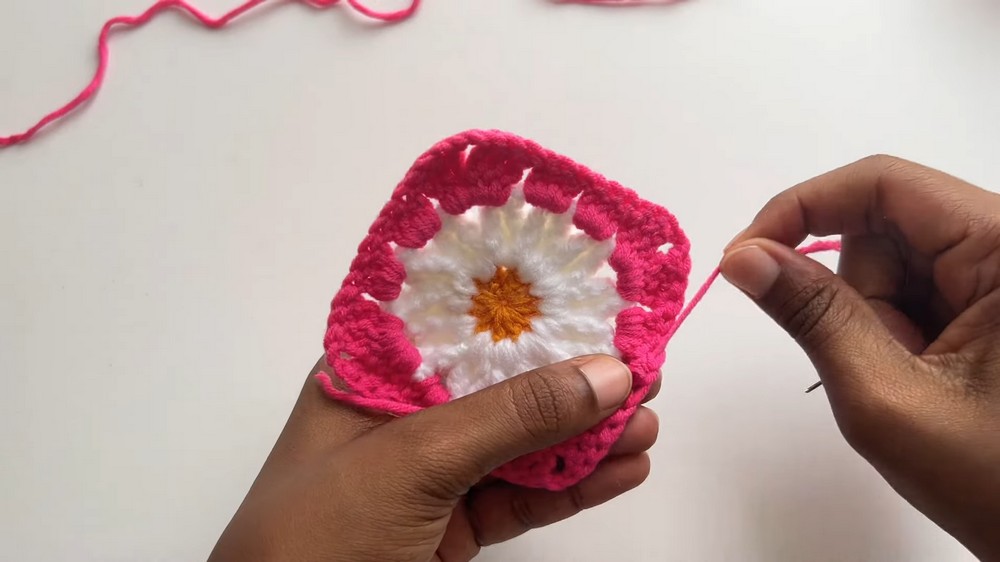
- Invisible Join: Fasten off by pulling the yarn through the last stitch, threading it through a tapestry needle, and weaving to close the gap tightly and invisibly.
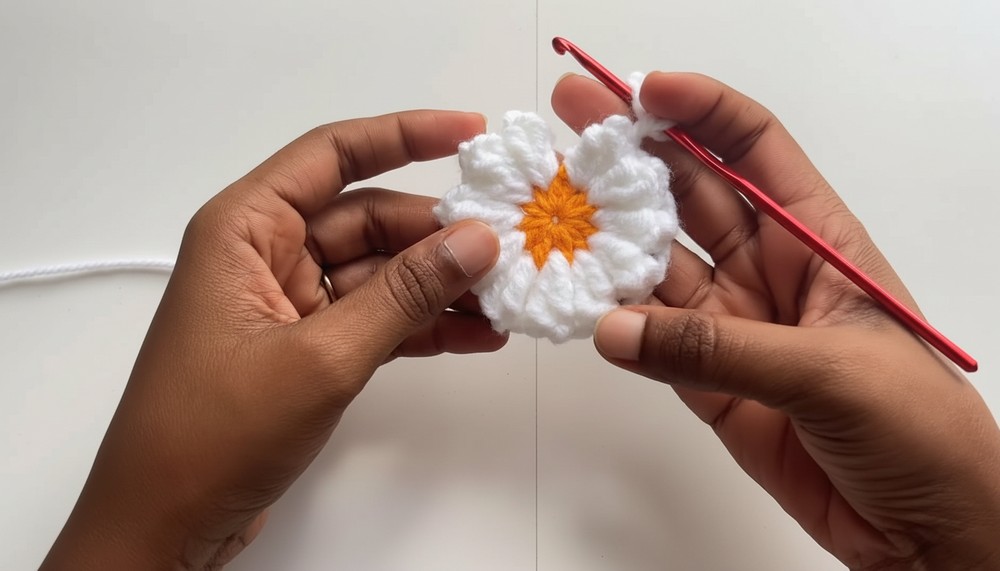
Step 2: Petals
- Attach White or Chunky Yarn:
- Using the chainless method, create chainless treble crochets.
- First Petal Cluster:
- Work 4 trebles into the space between double crochets (not the top of the chains).
- Slip stitch into the top of the first treble to form a petal, then chain 2.
- Repeat Petal Clusters:
- Continue around, creating a total of 12 petals.
- Finish by fastening off securely, making sure there are exactly 12 petals.
Step 3: Granny Square Formation
Using the Main Color:
- Join Yarn:
- Attach the main color yarn using a slip knot to any space around the petals.
- Cluster of Double Crochets:
- Work 3 double crochets (dc) into the first space.
- This is called a cluster.
- Corner Creation (Treble Crochets):
- In the next space, work 3 treble crochets (tr), chain 2, 3 tr to form the corner.
- Continue Around:
- Between each corner, work clusters of 3 dc.
- At corners, work 3 tr, ch 2, 3 tr.
- Finish the Round:
- Slip stitch into the first dc to close the round securely.
- Ensure an even finishing with no tightness.
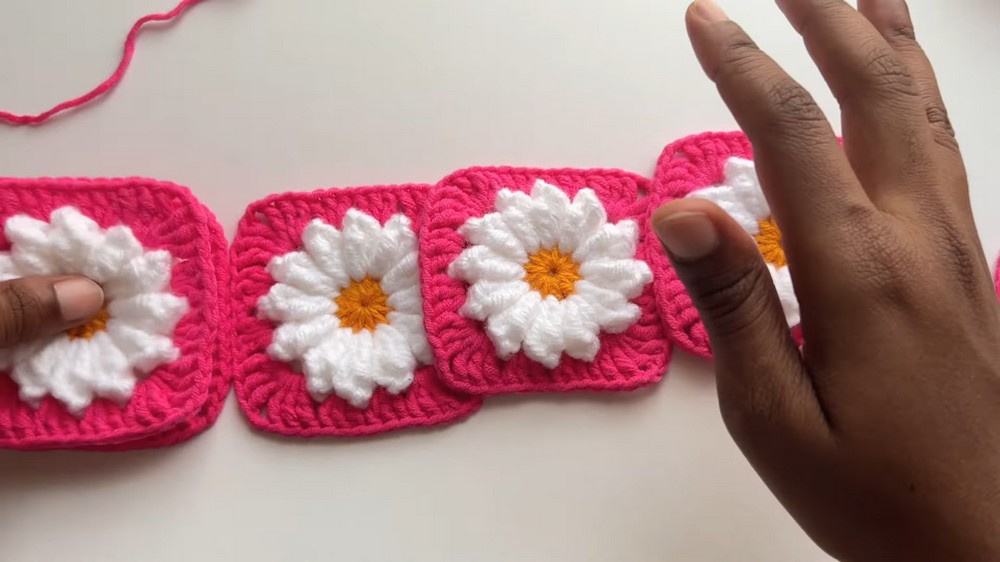
Step 4: Assembly of Granny Squares
- Create a Total of Six Granny Squares.
- Joining Method (Zigzag Slip Stitch):
- Place two squares together with wrong sides facing.
- Using slip stitches, join the squares along one edge, alternating pulling yarn from both sides for a zigzag effect.Zigzag Slip Stitch Joining:
- From one edge, insert hook into both loops of each stitch on both squares, alternate sides while slip stitching.
- Forming the Loop:
- Join all six squares edge to edge to form a loop pattern.
Step 5: Top of the Hat (Crown)
Round 1:
- Magic Ring:
- Start with a magic ring. Work 12 double crochets (dc) into the ring.
- Slip stitch into the first dc to close.
Round 2:
- Increases:
- Work 2 dc in each stitch around.
- Should have 24 double crochets at the end.
Round 3:
- Incremental Increase:
- (2 dc in the first stitch, 1 dc in the next stitch) around.
- Should have 36 double crochets at the end.
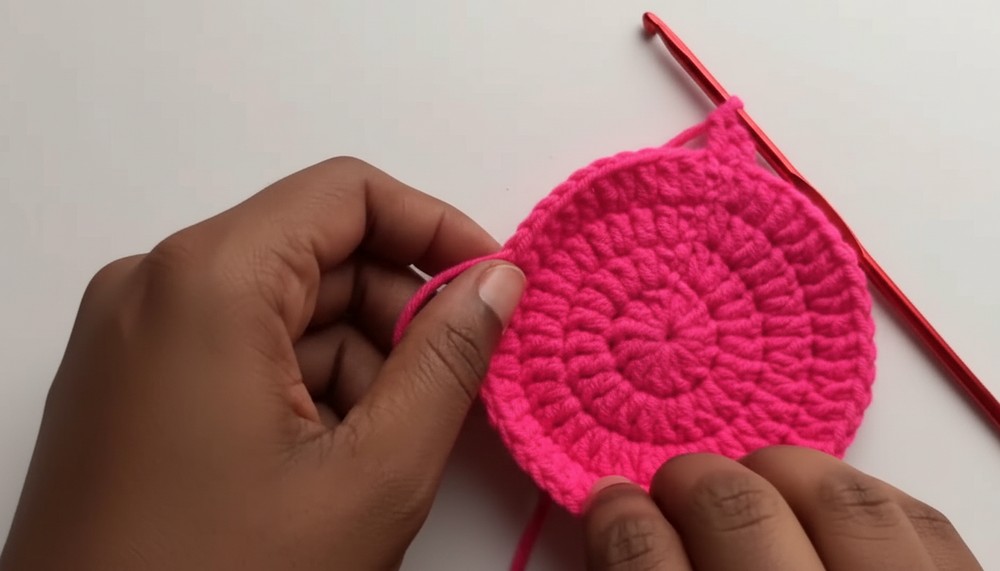
Rounds 4-7:
- Continue Increasing:
- Each round follows this pattern: (2 dc in the first stitch, 1 dc next 2 stitches), (2 dc in the first stitch, 1 dc next 3 stitches), and so on.
- Should have worked up to a diameter of 6-6.5 inches after 7 rounds.
- Attach to Squares:
- Place the crown on top of the loop of squares.
- Join securely using slip stitches through both the edge of the crown and top edges of the granny squares.
Step 6: Hat Base Ribbing
- Single Crochet Round:
- Work single crochets into every stitch around the lower edge of the joined granny square loop.
- Double Crochets Base:
- Work a round of double crochets.
- Front and Back Post Double Crochet Ribbing:
- Work alternating FPdc and BPdc around the base of the hat for comfortable ribbing.
- Repeat Ribbing:
- Continue front and back post double crochets until the ribbing reaches the desired height.
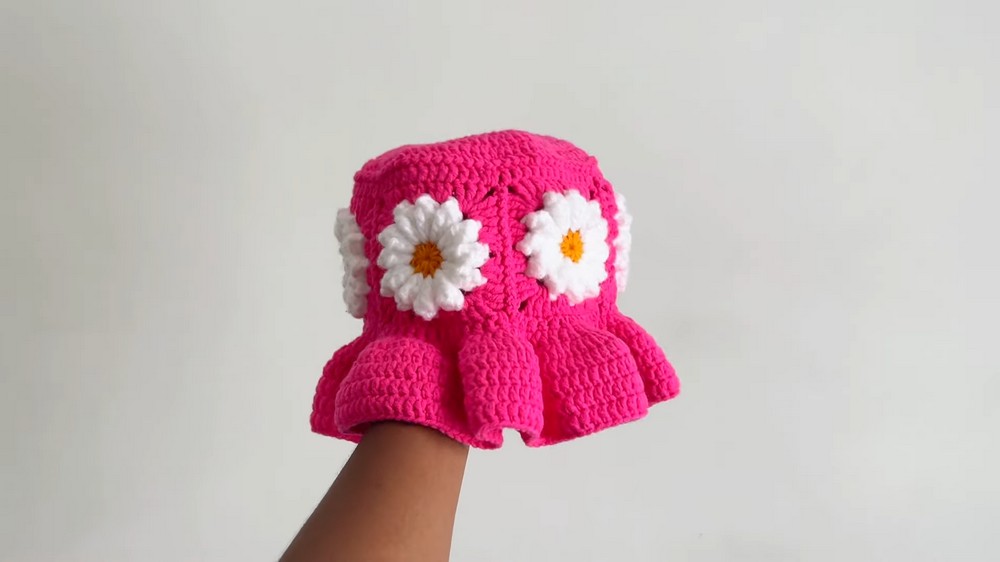
Conclusion
Congratulations on completing your Daisy Flower Granny Square Hat! This unique and charming hat is sure to turn heads and provide warmth and comfort. Whether paired with casual attire or used as a stylish accessory, your handcrafted hat will be a beloved addition to any wardrobe.
Tips and Customization Ideas:
- Adjusting Size:
- Use a larger hook for a slightly bigger hat.
- Add or reduce rounds for a taller or shorter hat.
- Color Variations:
- Experiment with different petal and center colors.
- Create themed hats with seasonal or favorite color combinations.
- Finishing Touches:
- Add a pom-pom to the top for a playful touch.
- Weave in all loose ends carefully for a professional finish.