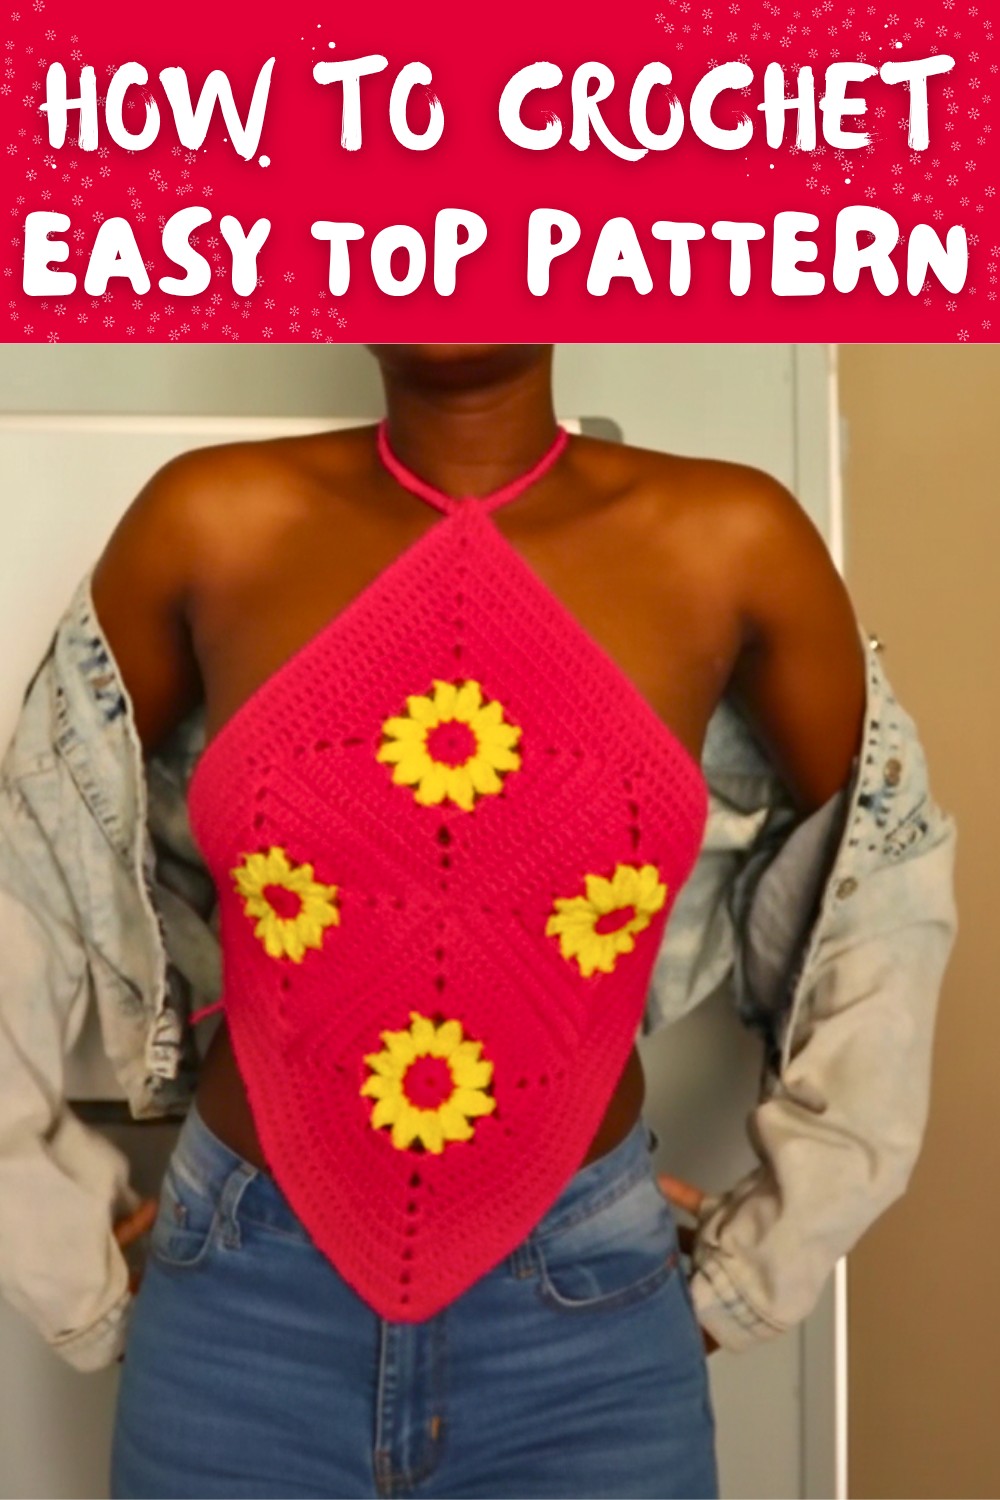
Free Crochet Top Pattern for a Chic Everyday Look
Stitch your way to a stylish, breathable crochet top that's perfect for casual outfits or sunny days, combining comfort and charm in every detail.
What about something simple yet stunning that stands out from the first glance? A free crochet top pattern allows anyone to stitch a lightweight and stylish top perfect for any occasion. The soft texture and elegant stitches form a charming piece that feels comfortable and looks effortlessly fashionable. It pairs wonderfully with jeans, skirts, or shorts, making it suitable for casual outings, beach days, or even a cozy moment at home.
Stylish Free Crochet Top Pattern for All Sizes
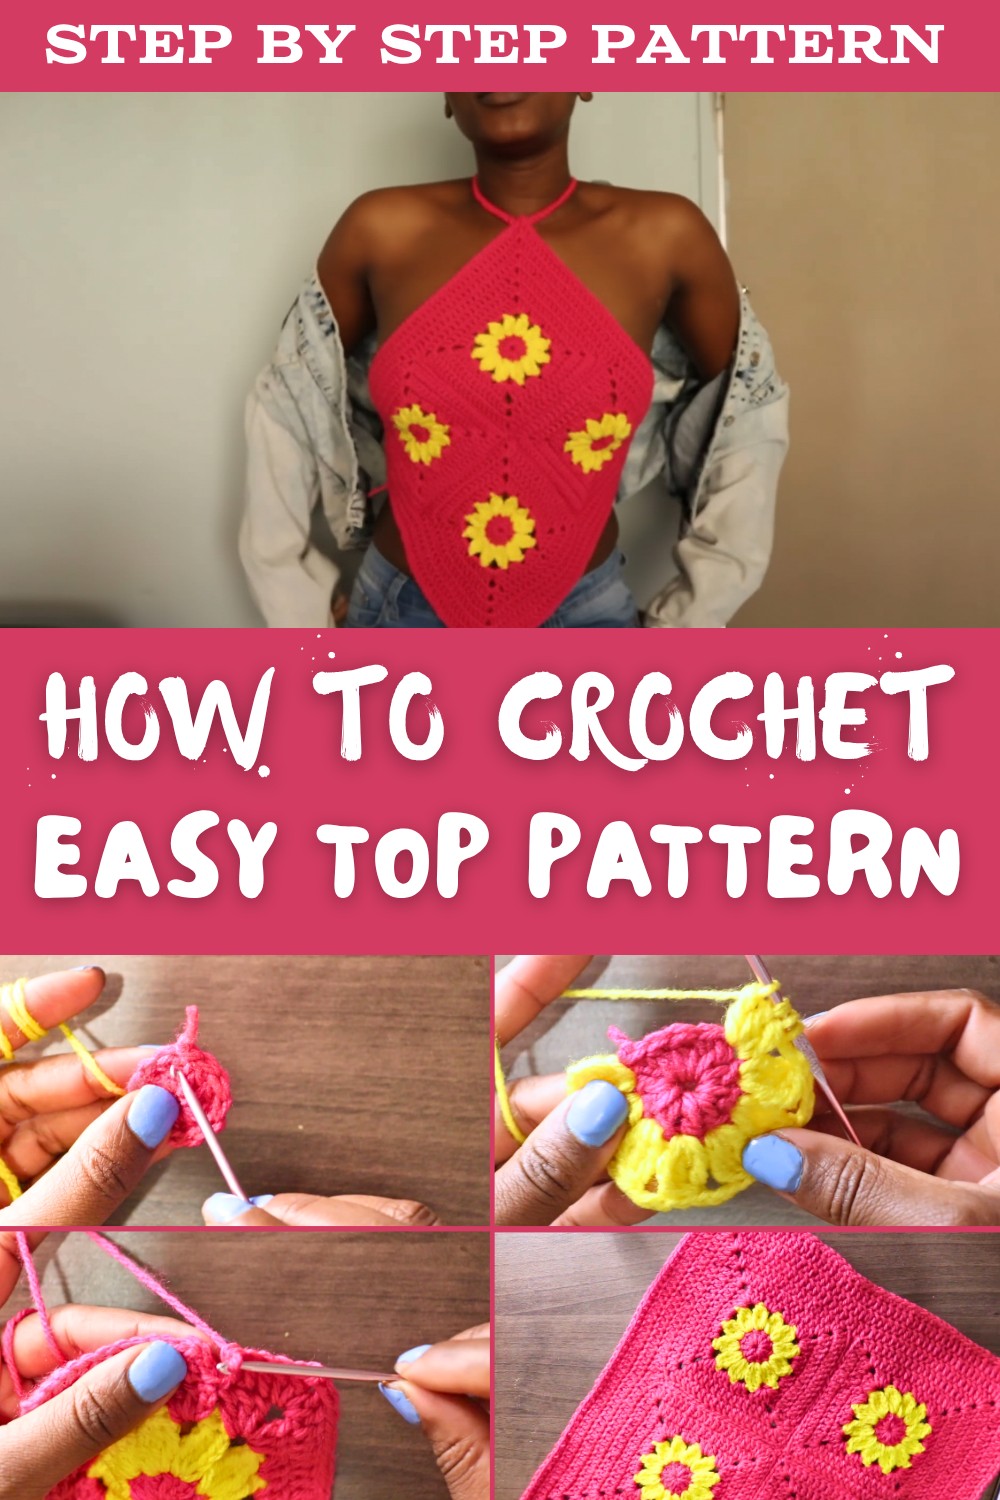
This top can be adjusted with different yarn colors or stitch combinations, offering endless possibilities to suit any personal preference. The beauty lies in the fine details, turning an ordinary garment into something truly special. A handmade crochet top isn't just for wearing but also showcases skill, patience, and creativity, making it even more meaningful. Whether for yourself or as a gift, this crochet top becomes a timeless and personal treasure.
Free Crochet Top Pattern
Materials Needed
- Yarn Type:
- Size: Medium-weight yarn.
- Recommended: Acrylic yarn.
- Amount: Two colors (main color for the square border and secondary contrasting color for the flower petals).
- Hook Size:
- 3.5 mm crochet hook-is slightly larger than the recommended 3 mm hook mentioned for this yarn size, which ensures ease of stitching.
- Additional Tools:
- Scissors (ensure blades are sharp).
- Measuring tape (optional for checking triangle/square measurements).
Pattern Overview
This pattern is constructed by creating flower-granny squares and joining them into a structure suitable for a top. The design consists of double crochets, chain spaces, treble crochets, and slip stitches.
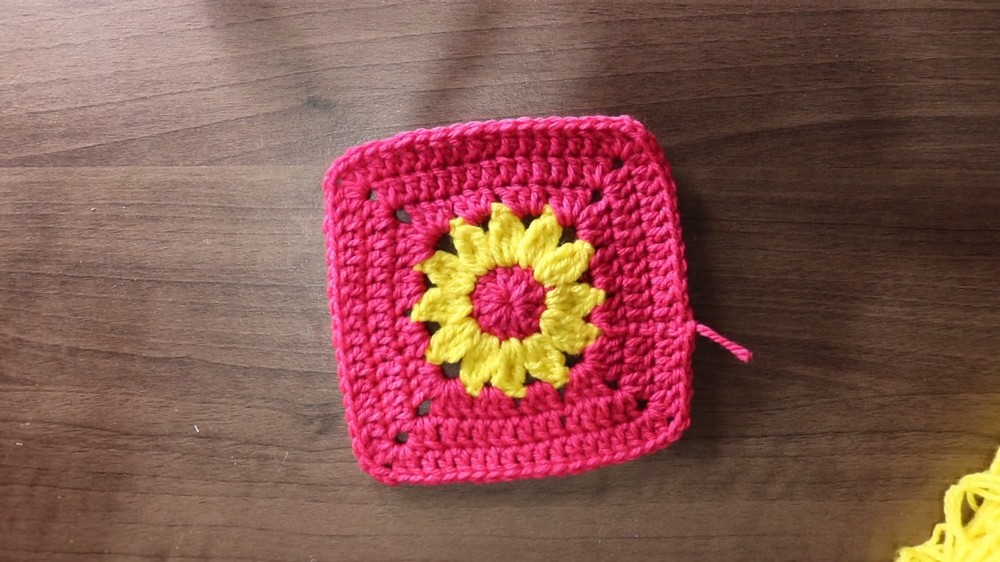
- Central Flower Design:
Each square begins with a flower motif comprising petals and chains. - Square Border Expansion:
To achieve the square shape, double crochets are added around the flower's edges with strategically placed corners for expansion. - Joining Squares:
The squares are slip stitched on their edges to form the front and back structure of the top. - Expanding with Rows:
Double crochet rows are added to increase the size depending on individual's fit preferences. - Finishing Details:
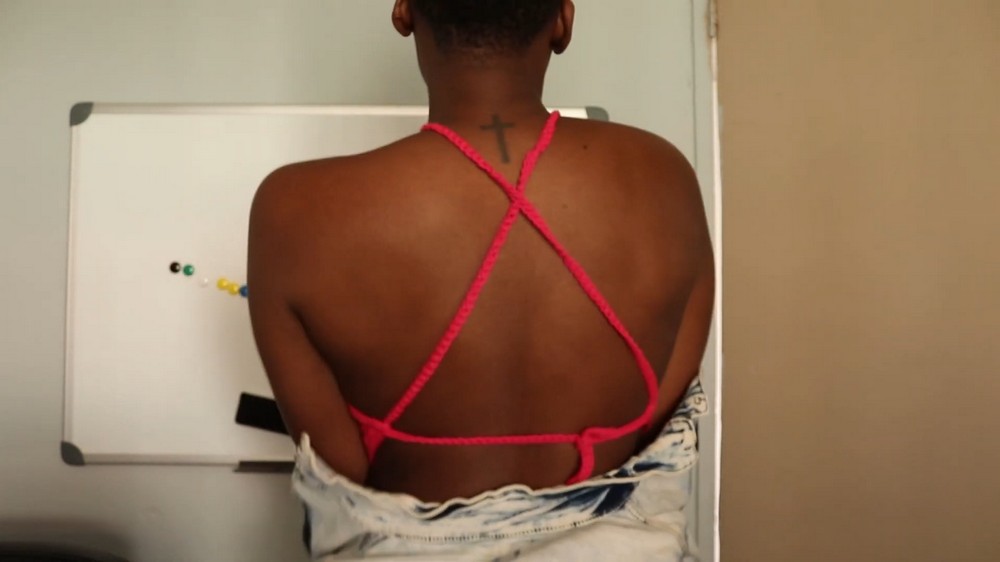
The top is stabilized with criss-cross straps made from chained and single-crocheted cords.
Pattern Instructions
Step 1: Central Flower Development
Begin crafting the flower shape at the center of the square.
- Starting with Main Color Yarn:
- Chain 4 loops and slip stitch into the first chain to create a loop circle.
- Chain 3 (acts as the first double crochet). Create 11 more double crochets into the circle (12 total).
- Slip stitch into the base of the initial chain to close. Cut and secure the yarn.
- Switch to Flower Petal Yarn:
- Attach the petal color yarn into any chain space between two double crochets.
- Chain 4 and work 3 treble crochets in the same space. Pull yarn through all loops to form a petal.
- Chain 3, move to the next space, and create another cluster of 3 treble crochets for each petal. Repeat this for a total of 12 petals, ensuring each petal is evenly spaced in every chain gap.
- Slip stitch the last petal loop into the base of the first petal cluster and finish this flower section.

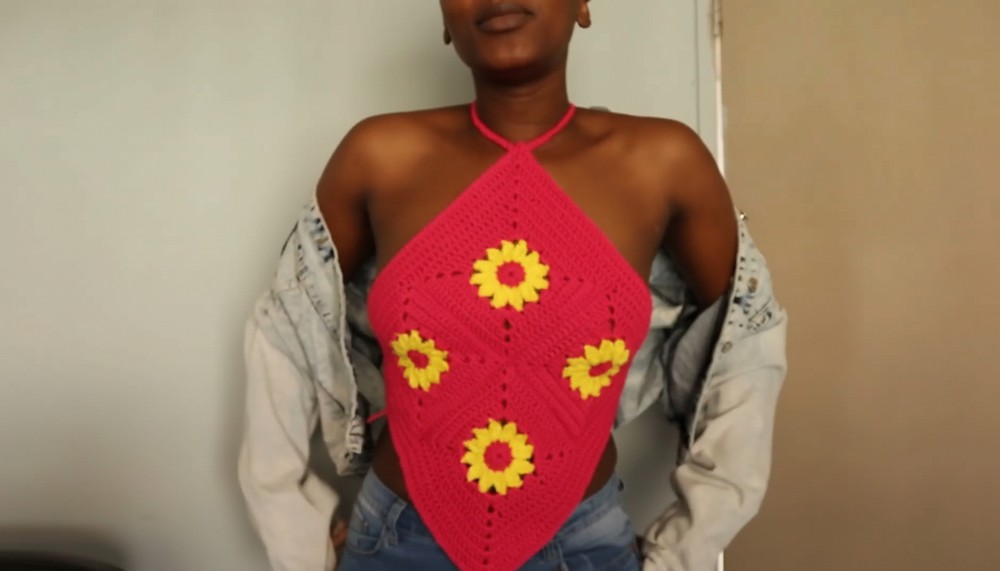
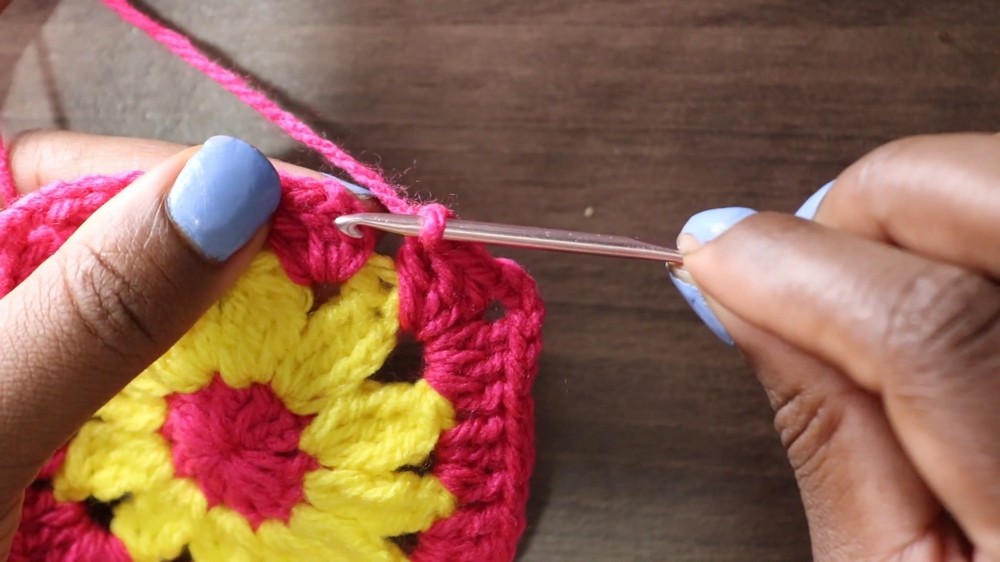
Step 2: Extending the Border for Square Formation
Use the main color yarn for creating the edges of the square around the flower. This gradual expansion into corners solidifies the form.
- Attach the main color yarn into any petal gap (between petal clusters).
- First Row of the Square:
- Create a cluster of 3 double crochets into each petal gap except at four corners.
- At each corner gap:
- Add 3 double crochets, chain 3, and then another 3 double crochets into the same gap. This creates prominent corners for the square.
- Slip stitch into the top of the first double crochet cluster of the row to join.
- Second Row of Expansion:
- Add double crochets into all spaces between clusters, maintaining corner clusters as in the previous row.
- Continue adding rows until the squares are the desired size. For the provided pattern, two to three rows are sufficient for a medium size.
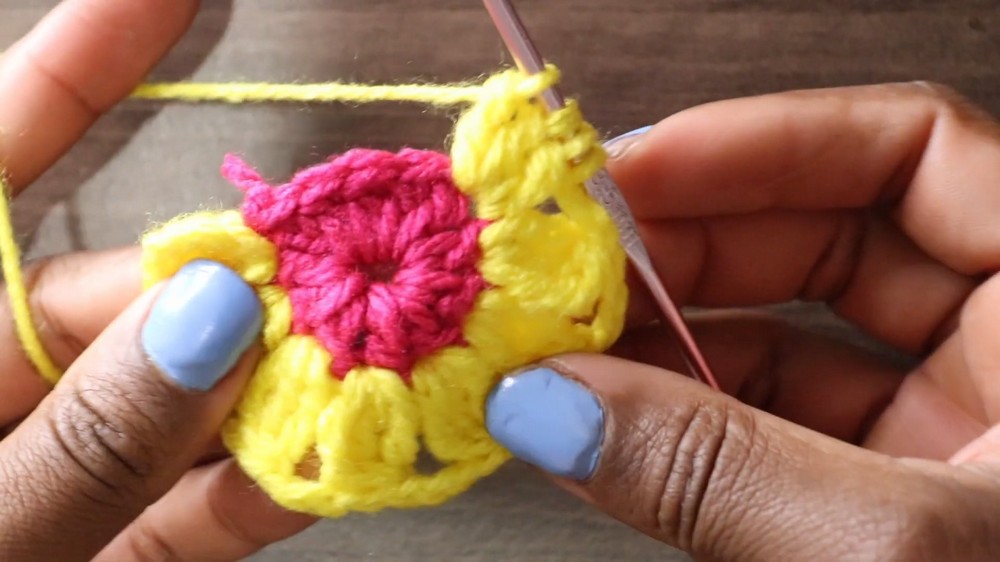
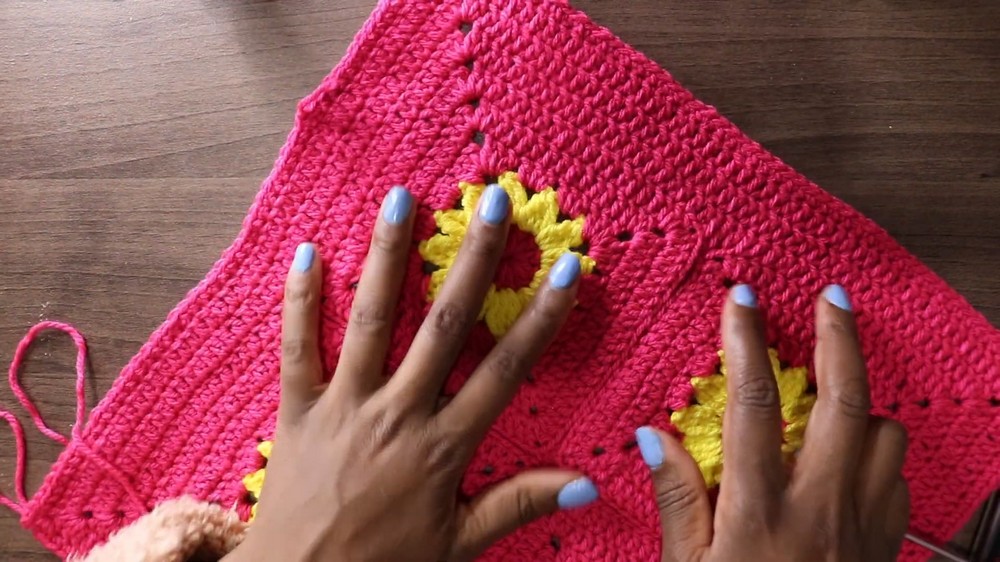
Step 3: Joining the Squares
Make 4 squares (or more if needed for larger size or personal preference).
- Align two squares with right sides (nice sides) facing inward, ensuring edges match perfectly.
- Using slip stitches, join along the edges by working only through the top loops of the crochet pieces. This gives a clean, uniform seam.
- Join all four squares together by repeating the process to assemble the front and back structure of the top.
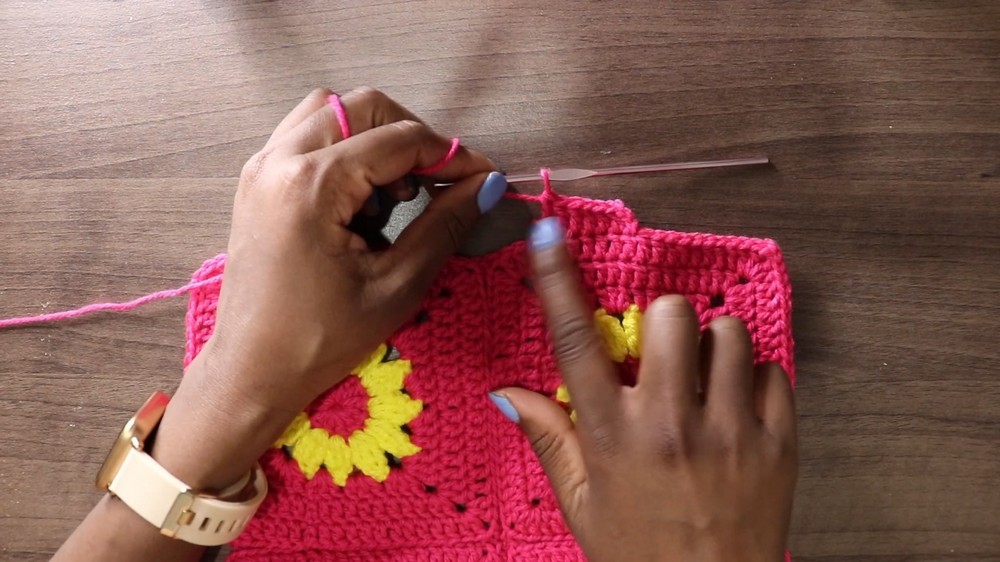
Step 4: Expanding the Size
To ensure proper fit:
- Start at one side of the assembled squares to extend the body.
- Use the main color yarn and double crochet rows along the top and sides until the body of the top reaches the desired length and width.
- For clean edges, finish with a single crochet row to stabilize the structure and give a polished look.
Step 5: Adding Straps
The top has criss-cross straps for adjustment.
- Strap Construction:
- Chain 120 loops (or adjust for desired length) to form the strap.
- On returning, single crochet into each chain to make the strap thicker and more comfortable.
- Attachment:
- Insert the strap through holes created in the top section, criss-cross it at the back, and secure the ends.
Finishing the Pattern
Carefully weave in all loose ends using the crochet hook or a yarn needle. Ensure corners and edges are smooth. Check the fit, and adjust rows or straps as necessary for comfort and appearance. Give the top a gentle steam block to relax stitches and refine the structure before wearing.
Final Words
This crochet top pattern is an elegant addition to any wardrobe, allowing personalization with different yarn colors and textures. It's beginner-friendly yet yields a professional-looking garment. Whether used as beachwear or casual attire, the result is stunning and versatile.
Tips for Maintaining the Crochet Top
- Wash Care: Hand wash with mild detergent and lay flat to dry to preserve shape and texture.
- Storage: Fold the top neatly to prevent yarn stretching in prolonged hanging storage.
- Repairs: Use leftover yarn from your project for quick fixes or to replace worn-out sections in the future.
- Customization: Add more squares, rows, or decorative stitches for larger sizes or unique embellishments.