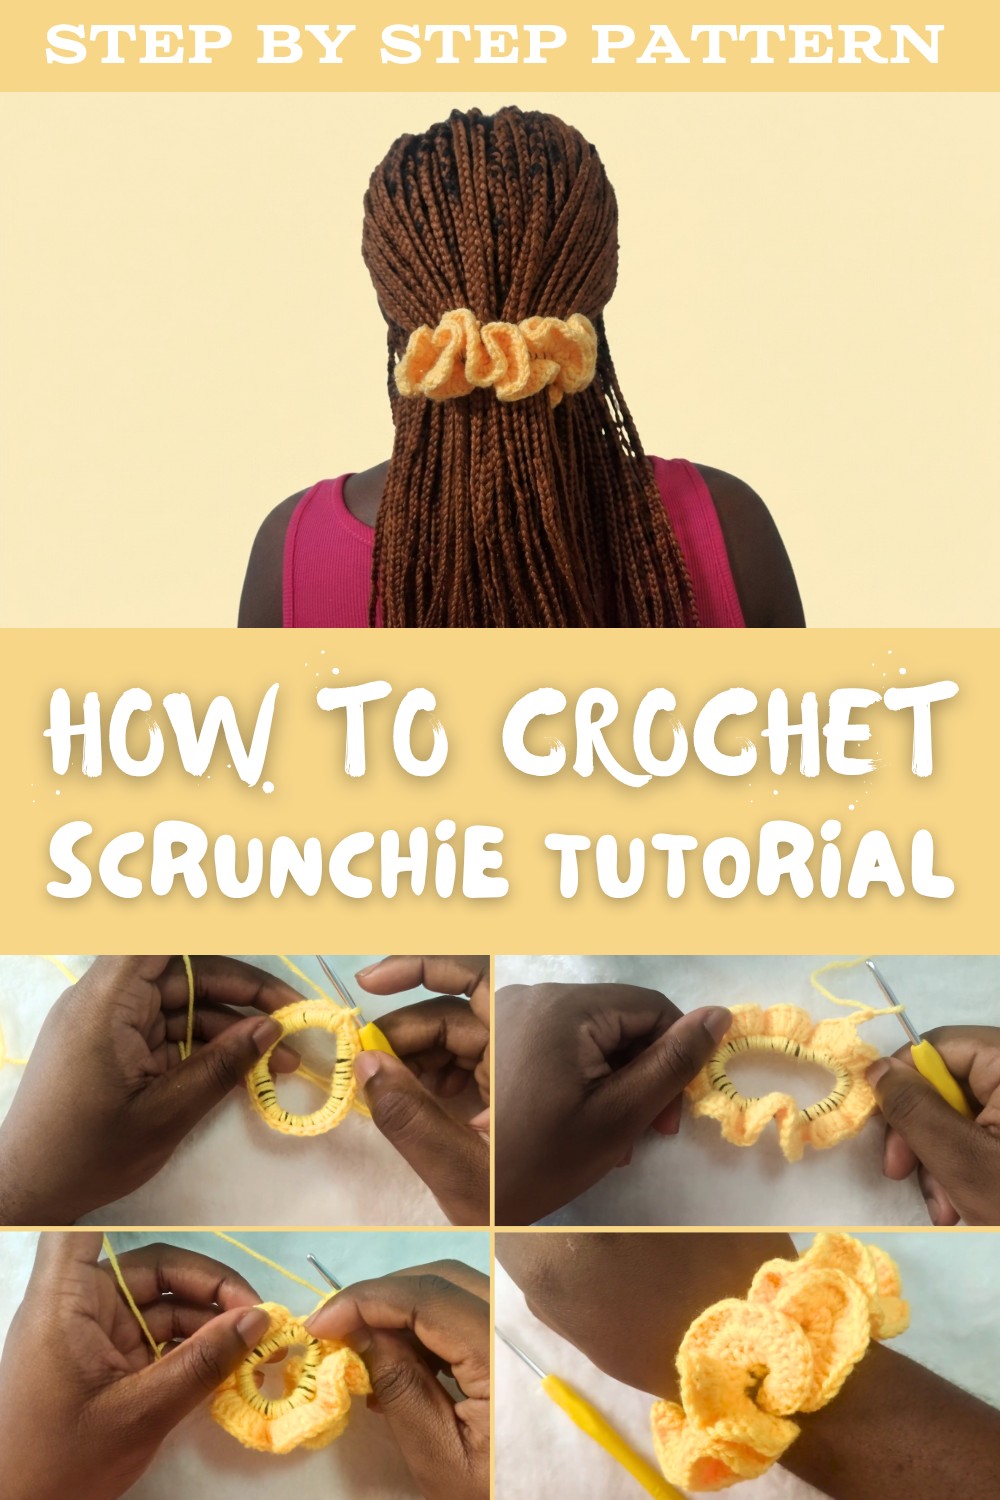
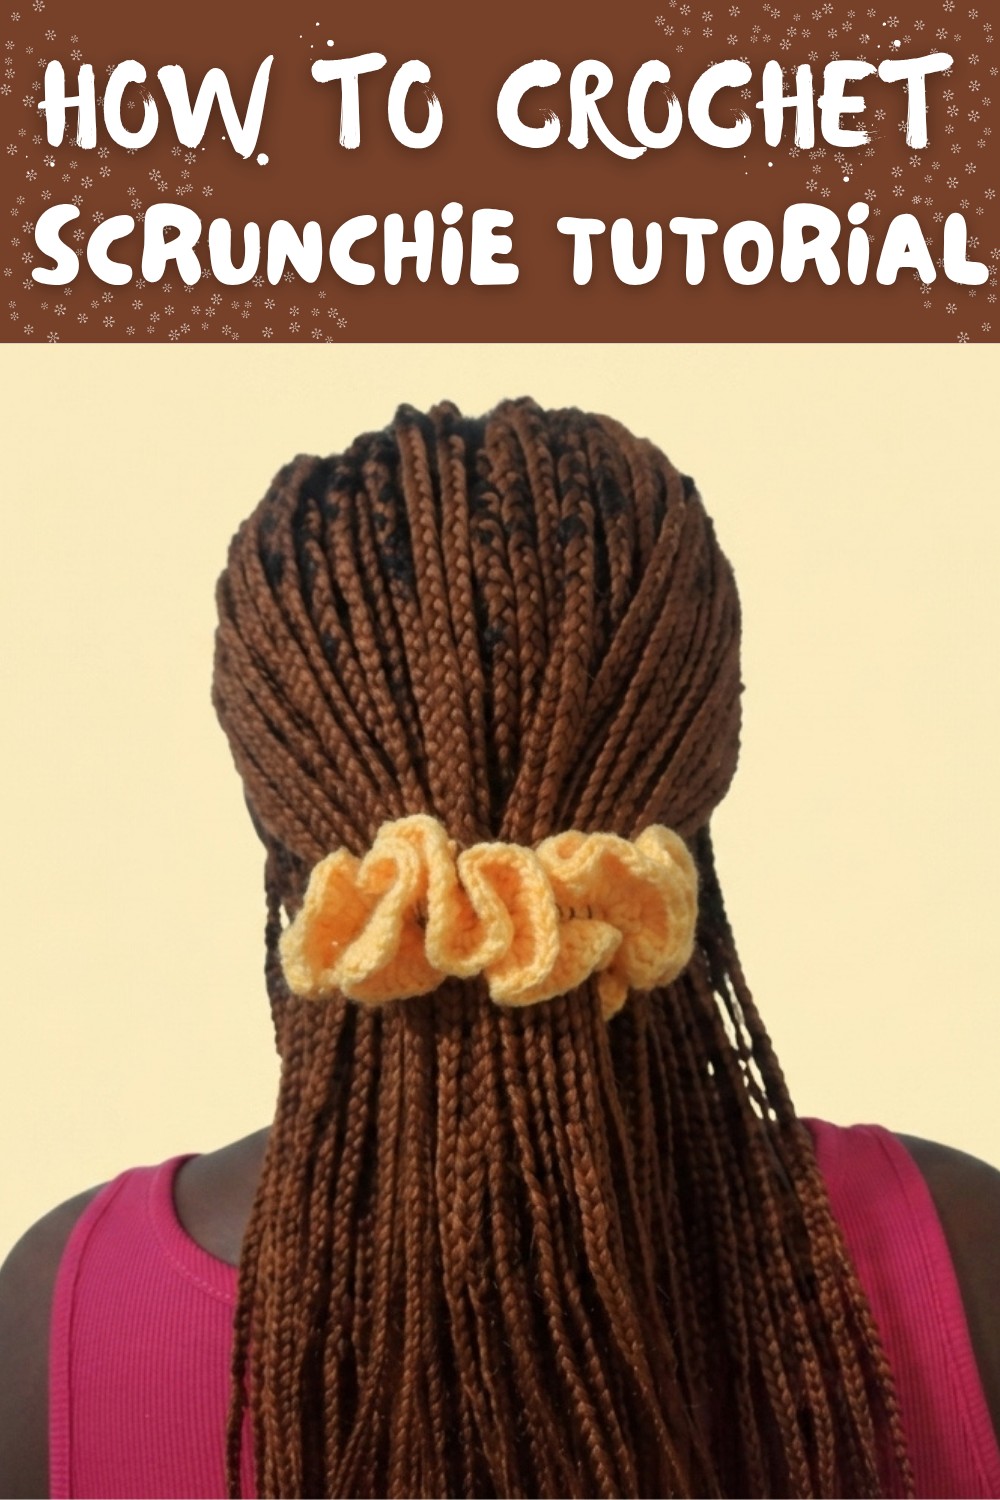
Free Crochet Scrunchies Pattern To Match Every Outfit
Hook a playful crochet scrunchie pattern that mixes bold colors, easy stitches and cute texture for hair accessories full of charm and personality
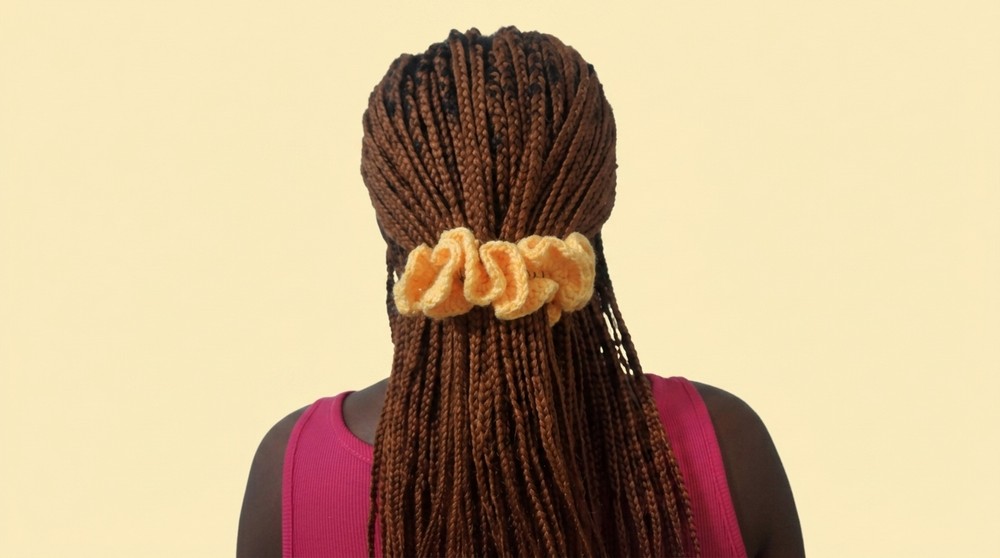
A handmade crochet accessory offers practicality with a touch of individuality. A scrunchie, worked with soft yarn and an elastic band, serves as a versatile hair tie that combines function with visual appeal. The process allows for endless possibilities-choosing vibrant colors for a playful style or textured yarns for a more refined look.
Free Crochet Scrunchie Pattern to Upcycle Yarn Scraps
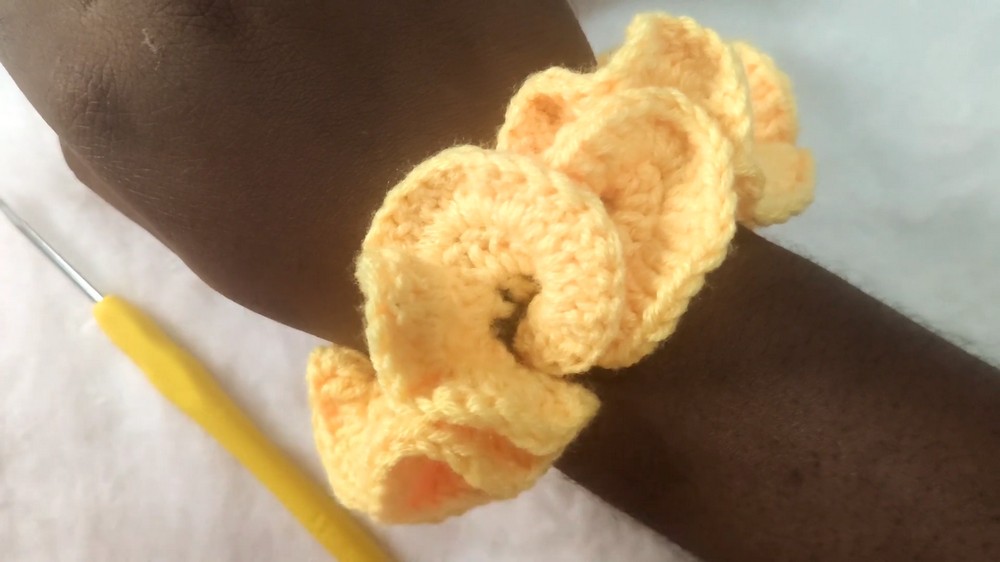
Aside from serving as a handy hair accessory, a scrunchie can also act as a stylish wristband, showcasing its unique charm when not in use. This project provides a thoughtful way to repurpose leftover yarn, turning small amounts into functional and decorative items. Including small details such as beads or experimenting with different yarn materials further enhances the character of each piece, making them special for gifting or personal use. The practicality, adaptability, and ease of assembly make the crochet scrunchie an enjoyable and useful project for any crochet enthusiast.
Detailed Crochet Pattern: Scrunchie
Materials
- Yarn: Regular scrap yarn (a 50g ball will suffice; choose the type of yarn based on your preference, thinner yarns will require slight adjustments).
- Crochet Hook: 3mm crochet hook.
- Elastic Hairband: A basic elastic hairband (black or colored; note that a darker color may show through, but this is expected).
- Scissors: For cutting yarn ends.
- Tapestry Needle: For weaving in ends after finishing.
Gauge
Gauge is not critical for this project since scrunchies stretch and adjust to fit different hair elastic sizes. However, here are approximate stitches per inch in single crochet for typical worsted-weight yarn and a 3mm hook:
- Row Gauge: About 6 single crochets per inch.
You may adjust the tension or hook size if a denser or airier scrunchie is desired.
Finished Size
- Small Scrunchie: Approximately 3-4 inches in diameter (single layer).
- Large Scrunchie: 5-6 inches in diameter with additional layers of frill.
Sizes may vary depending on yarn thickness and the number of rows worked.
Special Techniques Used
- Slip Knot: The starting knot for crochet projects.
- Single Crochet (SC): Insert hook, yarn over (YO), draw through, yarn over, pull through both loops.
- Double Crochet (DC): YO, insert hook, YO, pull through, YO, pull through two loops, YO, pull through remaining loops.
- Slip Stitch (SS): Insert hook, YO, pull through all loops.
Step-by-Step Pattern
Step 1: Attach Yarn to Elastic Band
- Begin with a slip knot on your crochet hook.
- Insert the hook through the middle of the elastic hairband.
- Yarn over (YO) and pull through one loop on the hook.
- This step attaches the yarn to the hairband securely.
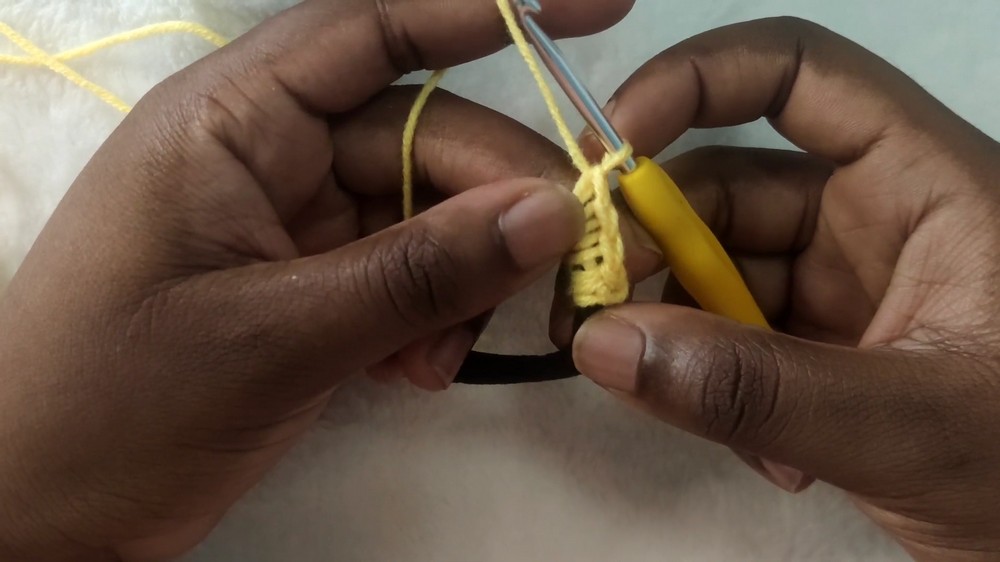
Step 2: Single Crochet Around the Elastic Band
- Hold the loose yarn end tight against the elastic band to weave in as you work.
- Work 30-40 single crochet (SC) stitches around the band, ensuring uniform spacing.
- Note: The exact number of stitches depends on the thickness of your yarn and the size of the band. For regular worsted-weight yarn, stick to this range.
- Do not exceed 40 single crochets, as too many stitches will stretch the elastic and cause the scrunchie to look stiff rather than flowy.
- Once all stitches are worked, join the round with a slip stitch into the very first single crochet.
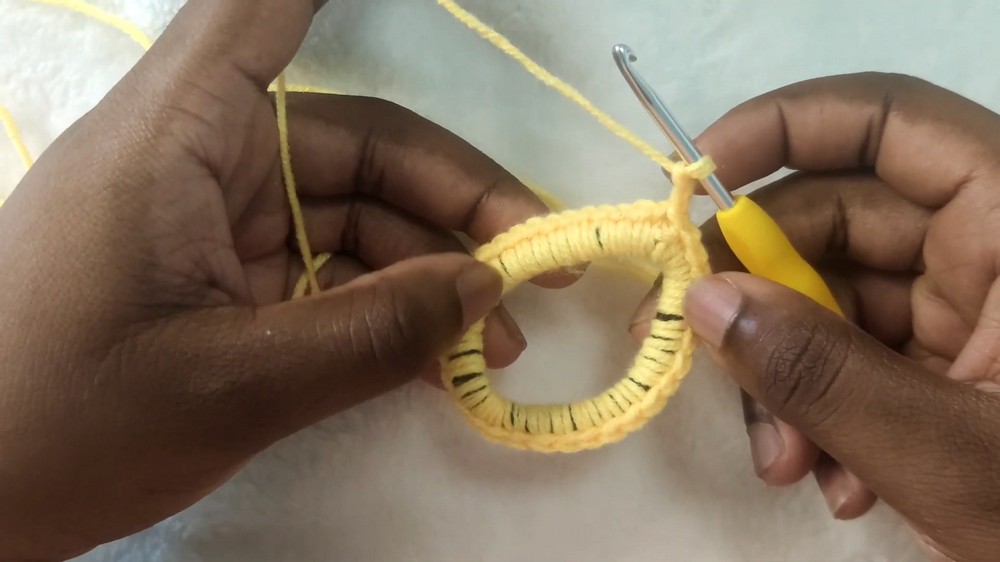
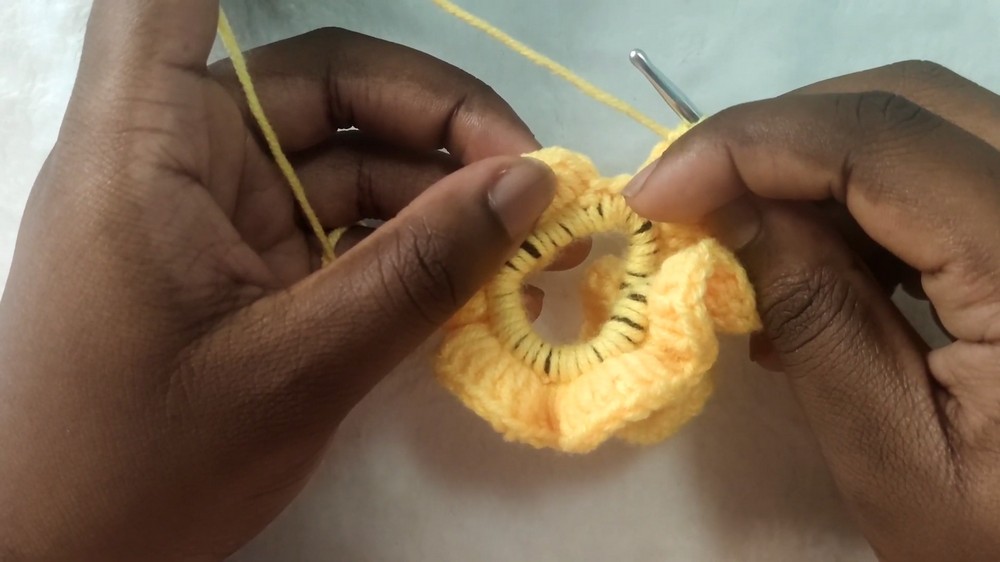
Step 3: Double Crochet into Each SC (Layer 1)
- Chain 2 (counts as the first DC) to begin the round.
- Work 3 double crochet (DC) stitches into each single crochet from the previous round.
- Tip: Start with 2 DCs in the first single crochet to pair with the chain-2.
- Continue around the band.
- Join the round with a slip stitch into the 2nd chain of the starting chain-2.
- At this stage, your scrunchie should already start to look frilly and textured.
Step 4: Optional Second Layer of Double Crochet
- If a larger scrunchie is desired, create another round of frills:
- Chain 2 (counts as the first DC).
- Work 3 double crochet into each double crochet stitch from the previous row.
- Repeat for all stitches in the round.
- Join with a slip stitch into the 2nd chain of the starting chain-2.
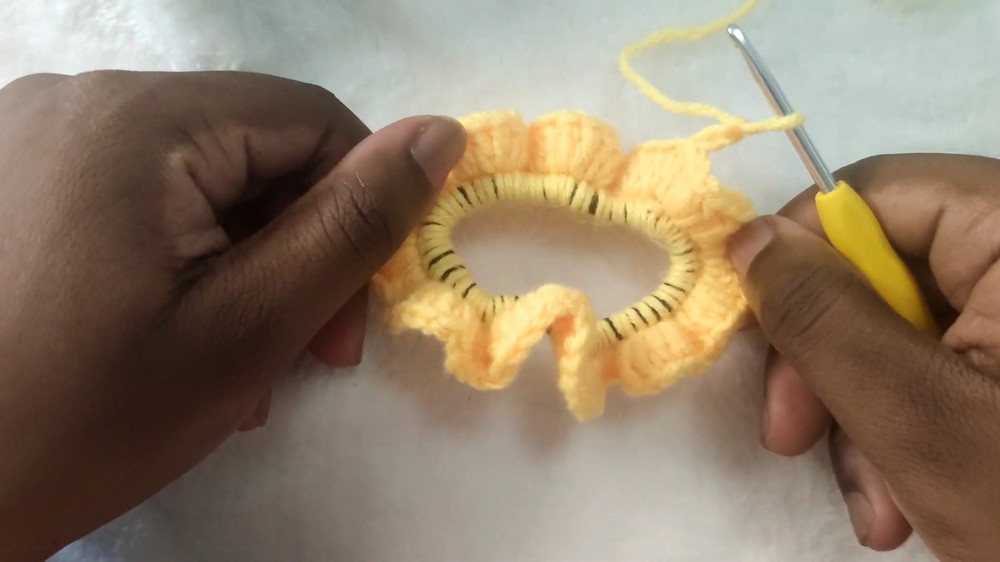
Step 5: Finish Off
- Chain 1 and pull the yarn tight to finish the scrunchie securely.
- Cut the yarn, leaving a short tail for weaving.
- Use the tapestry needle to weave in any remaining loose ends, ensuring they are hidden around the back of the stitches.
Customization Ideas
- Change Colors: Switch yarn colors when starting a new round to create multi-colored scrunchies.
- Increase Stitches: Instead of 3 DCs per stitch, try 4 DCs for larger, fluffier frills.
- Texture Variations: Experiment with alternate stitch patterns like half-double crochets (HDC) or triple crochets (TC).
- Add Sparkle: Use a metallic or glitter yarn for added glamour.
Tips for Success
- Number of Stitches: Avoid overloading stitches in the base row (don't go beyond 40 SCs). Excess stitches lead to stiffness and deformation.
- Elastic Band Visibility: Remember that some elastic may peek through during regular use; this is normal, especially as the scrunchie stretches.
- Thickness of Yarn: Adjust the number of SC stitches based on yarn weight - thicker yarn requires fewer stitches.
Conclusion
Your scrunchie is now complete! Depending on your preferences, you have the option to keep it as a smaller single-layer scrunchie or work additional rounds for a larger, more dramatic design. This project is quick, customizable, and beginner-friendly.
Final Remarks
- Versatility: Scrunchies make great gifts, accessories, and even an eco-friendly alternative to store-bought hair ties.
- Customization: Experiment with yarn weights, colors, and stitches to create personalized pieces.
- Reusable: Take advantage of scrap yarn and leftover supplies to make scrunchies in bulk.