Whimsical Crochet Snoopy Amigurumi Pattern for Classic Vibes
Get inspired with this Free Crochet Snoopy Amigurumi Pattern and make a durable Snoopy plush that's perfect for gifting or personal decor.
Celebrate the lasting charm of Snoopy with this cheerful crochet project that brings your favorite Peanuts character to life. A Snoopy amigurumi pattern not only makes a playful addition to any home but also serves as a thoughtful handmade gift for fans of all ages. Designed for beginners and beyond, this pattern is perfect for mastering basic stitches while working on an adorable character. Small yet full of personality,
Adorable Crochet Snoopy Amigurumi Pattern for Handmade Keepsake

This project is a wonderful way to practice shaping techniques and experiment with creative finishes, giving you a unique result every time. Made with lightweight yarn, the final product is soft, compact, and easy to display, whether sitting on a shelf or tucked inside a cherished collection. The pattern's step-by-step instructions ensure every feature, from his smiling face to his cuddly body, turns out perfectly.

A great way to relax while adding a touch of nostalgia to your day, this pattern is sure to win hearts wherever it goes. Make something special that's both a joy to crochet and a treasured keepsake for years to come.
Special Features
- Simple Construction: Head and body designed with beginner-friendly increases and decreases.
- Charming Details: Includes ears, patitas, collar, eyes, nose, and mouth for a realistic Snoopy aesthetic.
- Versatile Uses: Perfect as a gift, collectible, or home decor.
- Material Optimality: Uses soft yarns and customizable colors for a variety of creative options.
Pattern Difficulty Level
Difficulty: Beginner to Intermediate
While simple in its structure, intermediate crocheters will enjoy learning details, such as switching yarns seamlessly and creating facial embroidery with precision.
Materials Needed
- Yarn: White, black, and red yarn (recommended: Silvigurumi).
- Hook Size: 2.5 mm crochet hook.
- Tapestry needle and marker.
- Stuffing: Hydrolized fiberfill for shaping.
- Alfileres (pins): To position pieces accurately.
Step-by-Step Crochet Pattern
I. Head
1. Round 1: Make a magic ring and crochet 6 single crochet (sc) stitches.
- Pull the tail tight to close the ring, avoiding breaking the yarn.

2. Round 2: Crochet 6 increases, meaning two single crochet in each stitch.
- End round with 12 sc in total.

3. Round 3: Alternate 1 single crochet, 1 increase across the round.
- Use a stitch marker to track your starting point.
- End round with 18 sc.
4. Round 4: Crochet 2 single crochet, 1 increase, repeat until the end.
- End round with 24 sc.
5. Rounds 5-10: Crochet plain single crochet without increases, maintaining 24 sc per round.

6. Round 11: Begin shaping with 1 increase, 2 sc, repeat. Then work:
- 5 increases, followed by 1 sc, 1 increase, and repeat sequences.
- End round with 36 sc.
7. Rounds 12-15: Crochet plain single crochet throughout with 36 sc per round.
8. Closing Shape (Rounds 16-19):
- Round 16: Alternate 1 decrease, 3 single crochet six times.
- End round with 29 sc.
- Round 17: Plain single crochet, maintaining 29 sc.
- Round 18: Work 14 decreases, fill head with stuffing mid-way.
- Round 19: Alternate seven decreases, leaving just 8 stitches remaining.
- Close the circle by weaving through front loops with a tapestry needle, tighten, and tuck thread ends inside.


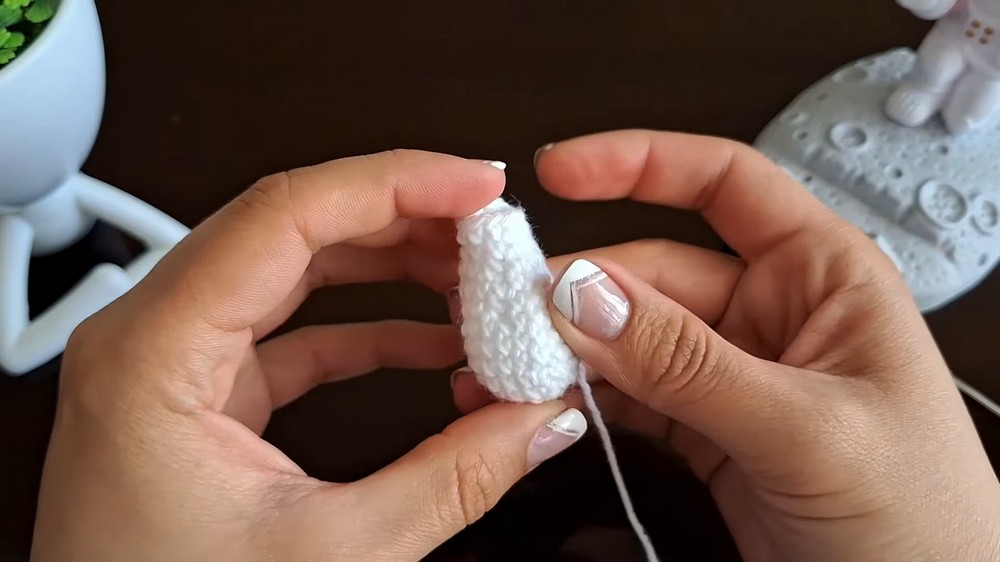
II. Body
1. Round 1: Begin with a magic ring of 5 sc.
- Close the ring tightly.
2. Round 2: Crochet 5 increases to end with 10 sc.
3. Round 3: Alternate 1 sc, 1 increase to end with 15 sc.
4. Round 4: Work 2 sc, 1 increase, repeat the sequence until 20 sc.
5. Rounds 5-7: Crochet plain 20 sc, ensuring even shaping.
6. Rounds 8-12: Gradual decreases:
- Round 8: Alternate 1 decrease, 2 sc to reduce to 15 sc.
- Round 10: Alternate 1 decrease, 1 sc till you reach 10 sc.
- Rounds 11-12: Maintain 10 sc per round.
- Shape and fill the body securely; leave thread length for sewing.
III. Limbs - Patitas (Feet)
1. Foundation (Rounds 1-2):
- Begin with 6 chains, work sc back across to form a oval edge.
- Turn and crochet 10 sc into round edges.
2. Expanded Shape:
- Round 3: Work alternating 3 increases, 3 sc.
- End round with 14 sc.
3. Gradual Decreases:
- Work 1 decrease, 2 sc, then repeat 5 decreases along edges.
- Leave tail for sewing, repeat to create two patitas.
IV. Additional Features
1. Ears: Magic ring of 5 sc, increase in round 2 (10 sc) followed by rows 3-7 keeping same stitch counts. Decrease slightly at end for shaping.
2. Nose: Refer to screen patterns provided for stitching and shaping.
3. Collar: Make 10 chains and crochet single stitches along length for Snoopy's signature look.
Assembly
- Use pins to pre-place pieces: attach head, body, ears, patitas, and nose.
- Sew securely using tapestry needles; work thread ends into stuffing.
- Embroider facial details, such as Snoopy's eyes and smile, using black yarn for fine precision.


Conclusion
Congratulations! Your Snoopy amigurumi is now complete-a tribute to the beloved Peanuts character. Use it as a gift, decor, or collectible item, guaranteed to bring smiles to everyone it meets.
Tutor's Suggestions
- Use contrasting stitch markers to track progress at critical assembly steps.
- Adjust collar size to fit snugly without distorting the body's shape.
- Tighten stuffing to enhance plush robustness.
Tip for Mastery
Always test stitch tension and yarn compatibility on a small swatch beforehand to ensure perfect proportions for Snoopy's key features. This ensures a polished result every time.

Final Remarks
This step-by-step Snoopy amigurumi pattern is designed to deliver joyful crafting results effortlessly. With the correct materials and patience, you'll enjoy crocheting this cozy, lovable design.