
Free Crochet Beanie Pattern That You’ll Want to Wear Everywhere
Stylishly redefine winter wear with this free crochet beanie pattern that combines elegance, texture, and functionality for all skill levels.
Crocheting a beautiful beanie has never been easier than with this free crochet beanie pattern, perfect for beginners and experts alike. This isn't your ordinary beanie it combines the beauty of a hand-knitted look with the simplicity and charm of crochet. Achieving such a pattern is possible using front post double crochet (FPdc) and back post double crochet (BPdc) stitches.

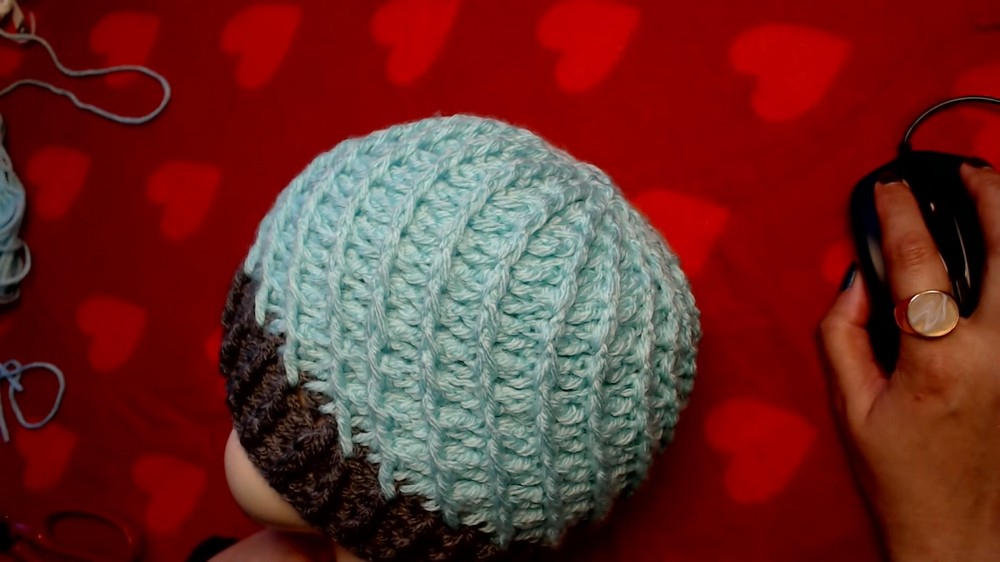
These special stitches give the brim a flexible, ribbed texture that creates a snug fit and adds personality to the overall design. The body of the beanie features a stunning spiral texture, offering style and functionality in one. Whether you want to add a pom-pom for a playful touch or keep it minimal, this beanie is wonderfully versatile and a great accessory for children aged 6 to 12 months (or as a customizable gift for any age).
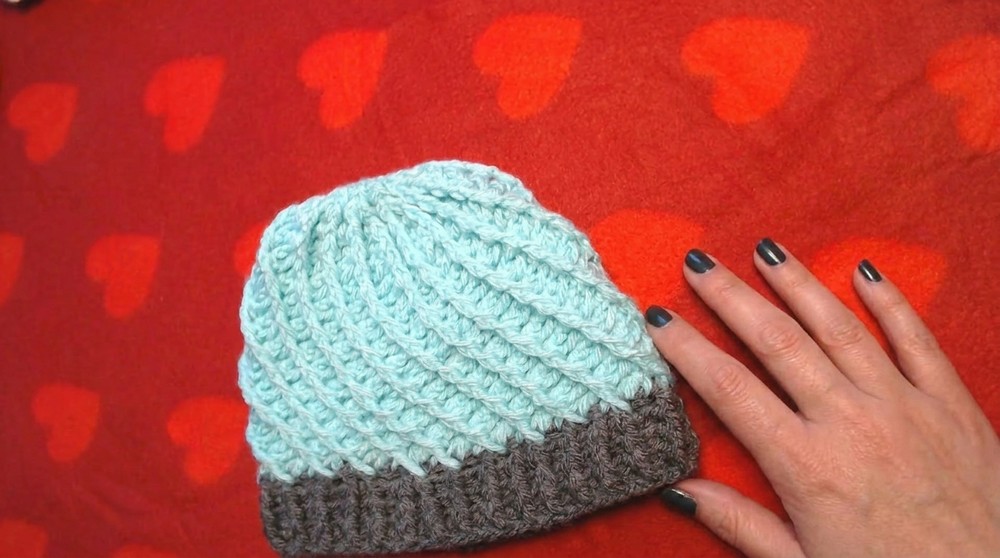
This pattern is easy to follow and feels creative and enjoyable throughout. You can use medium-weight yarn coupled with a 4mm crochet hook, making it a quick yet satisfying project for relaxing evenings or weekend crocheting. Not only does this pattern teach texture-rich design, but the FPdc and BPdc stitches can open the door to even more possibilities to think cozy scarves, warm gloves, or elegant sweater cuffs. With just a few simple steps, you can crochet a stylish, warm, and cozy look that's perfect for chilly weather.

From this pattern, you'll learn how to incorporate textured stitches to mimic knitting effects while mastering the art of shaping and decreasing rounds. It's a fantastic way to build confidence in crochet and learn new techniques. Once mastered, the skills you gain can help you create other amazing projects like textured headbands, ribbed cowls, or even warm baby mittens! This beanie pattern is not only practical but also a gateway to a world of crochet creativity.
Modern & Charming Free Crochet Beanie Pattern That'll Add Flair to Your Wardrobe
Detailed Step-by-Step Crochet Pattern for Beanie
This free crochet beanie pattern is beginner-friendly and stylish, a perfect project to enhance your crochet skills. Whether you're new to crochet or have some experience, this pattern offers just the right mix of simplicity and creativity. The beanie imitates crocheted designs through the clever use of front post and back post stitches, creating a unique texture that's both functional and fashionable. From providing warmth to being an adorable accessory, it's ideal for infants aged 6-12 months, and you can easily customize the size if needed.
Table of Contents
- Introduction
- Materials Needed
- Abbreviations
- Special Features of the Beanie
- Step-by-Step Instructions
- Tips for Beginners
- Conclusion & Final Thoughts
Materials Needed
- Yarn: 50g (approximately 133 meters) of medium-weight yarn. Alize yarn is recommended for a beautiful finish.
- Crochet Hook: Size 4mm (the tutor's favorite hook).
- Yarn needle: For sewing the beanie's top.
- Scissors.
- Optional: Pom-pom maker or pre-made pom-poms.
Abbreviations
- Ch: Chain
- St/Sts: Stitch/Stitches
- Dc: Double Crochet
- Sl St: Slip Stitch
- FPdc: Front Post Double Crochet
- BPdc: Back Post Double Crochet
Special Features of the Beanie
- Knitting-like texture: This unique crochet technique imitates the look of a knitted item.
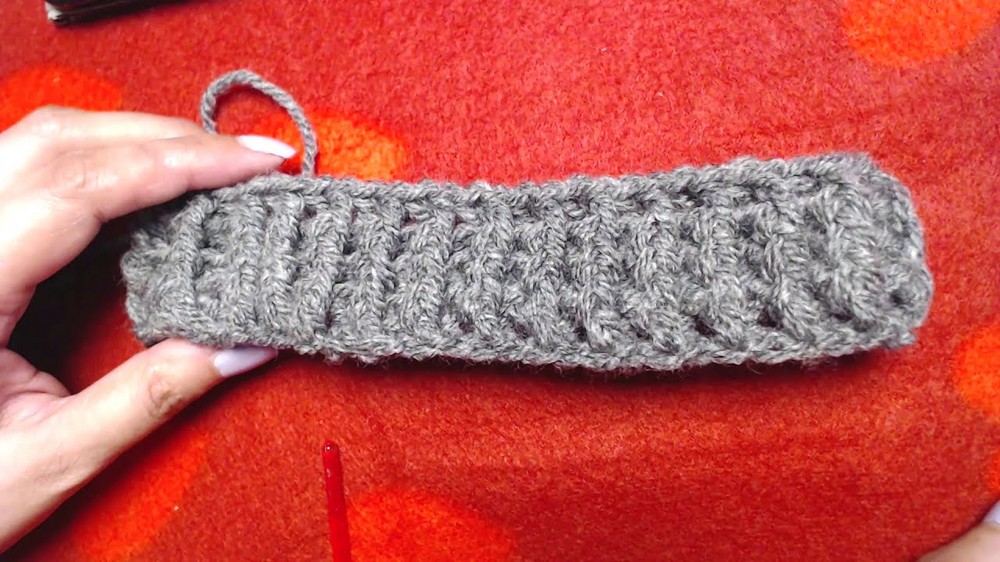
- Ribbed base (brim): Created using alternating FPdc and BPdc stitches for a stretchy and snug fit.
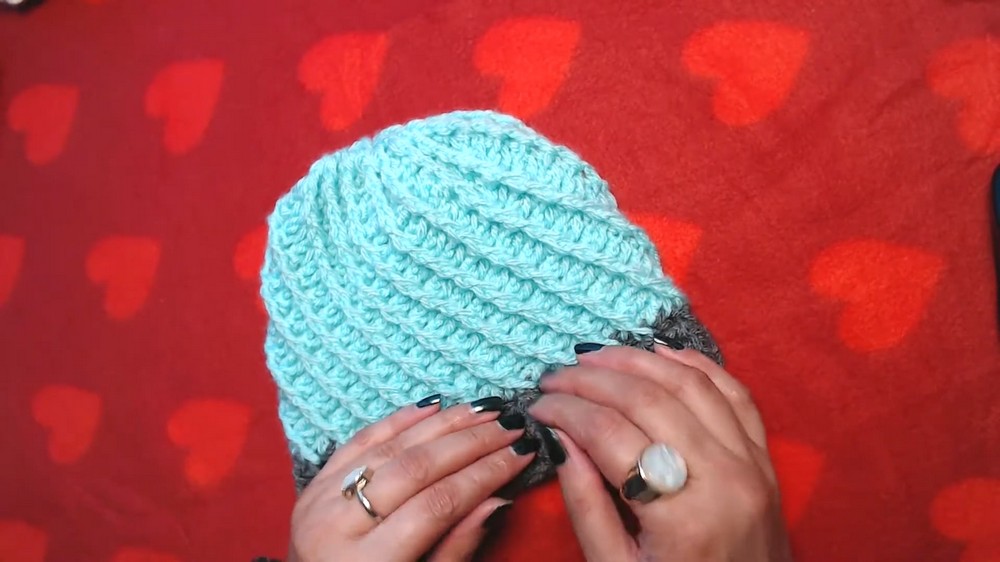
- Swirly pattern: The top of the beanie features a textured spiral look.
- Versatile design: Add a pom-pom or keep it minimal based on your style preference.
- Customizable size: Easily adjust the chain count to create a larger or smaller beanie.
Difficulty Level
This pattern is rated easy to intermediate. The FPdc and BPdc techniques may require practice for absolute beginners, but once mastered, they add a fantastic dimension to your design.
Step-by-Step Instructions
Step 1: Create Chains and Base Round
- Start with a slip knot on your hook. Make chains depending on the desired size of your beanie. For a size suitable for 6-12 months old babies, make 60 chains. Ensure the number of chains is divisible by 6.
- Sl St into the first chain to form a circle.
- Make Ch 3 (does not count as the first Dc). Then, place one Dc in each chain around the circle.
- Finish the round: Sl St into the top of the first Dc, ignoring the starting Ch 3.
2: Create the Ribbed Brim
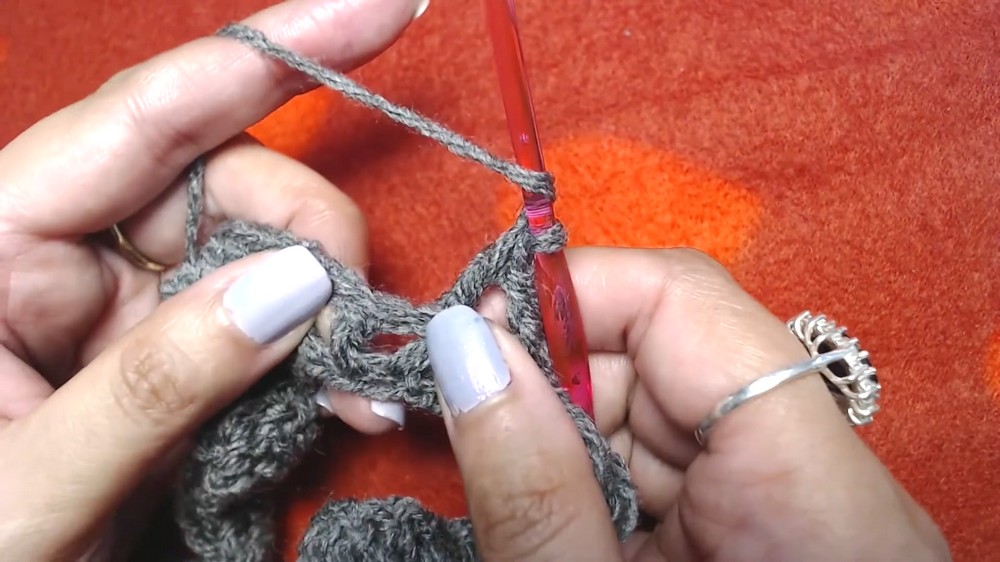
- Ch 3 (this does not count as the first Dc in the ribbing round).
- Work one FPdc into the first Dc from the previous round. Then make a BPdc into the next Dc.
- Alternate between FPdc and BPdc until the end of the round.
- Finish the round: Sl St into the first FPdc, ignoring the starting Ch 3.
- Repeat this pattern for 4 rounds to complete the ribbing.
3: Work the Body of the Beanie
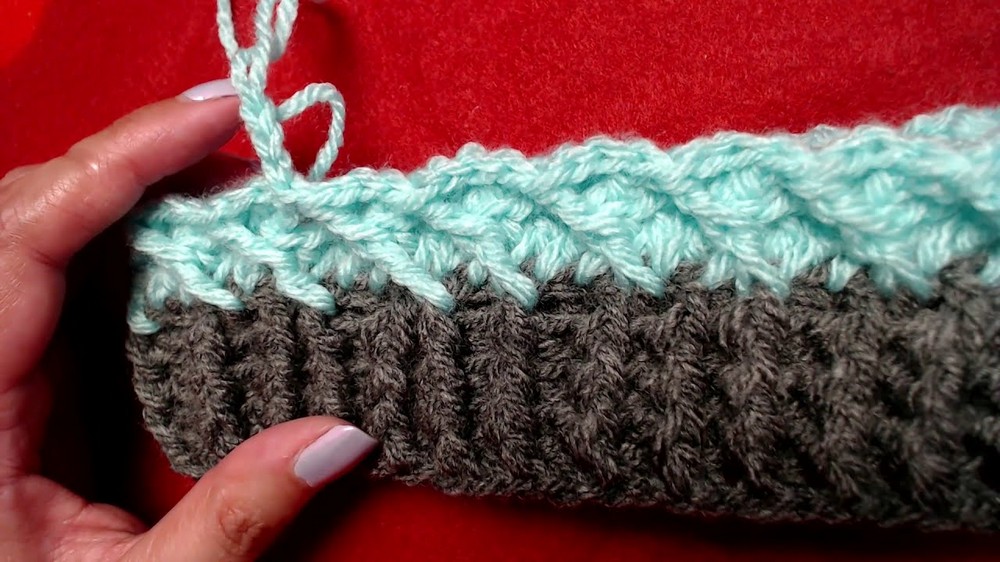
- After completing the ribbing, change the yarn color if desired. Cut the previous yarn and attach the new color to any Dc from the last round.
- Ch 3 (this counts as the first Dc). Place 1 Dc into the next 2 stitches.
- Go back to the first Dc in this set of 3 stitches. Make a FPdc around the post of this first Dc.
- Skip the next FPdc and make 1 Dc into each of the following 3 stitches.
- Go back and make a FPdc around the first Dc of the new set of 3 stitches.
- Repeat steps 2-5 until the desired height of the beanie is achieved. For the sample beanie, repeat the pattern for 11 rounds after the ribbing.
4: Decreasing for the Top
- To shape the beanie, decrease stitches in the final rounds. Make Ch 3 (counts as first Dc) and place Dc into the next stitch, skipping the third. Then make FPdc into the next available FPdc on the previous round.
- Skip the next double crochet and FPdc, and place Dc into the two plain stitches. Make FPdc around the previous FPdc post. Continue this pattern until the round is complete.
- Repeat this decreasing method for each round until you have a small opening at the top.

Step 5: Close the Top of the Beanie
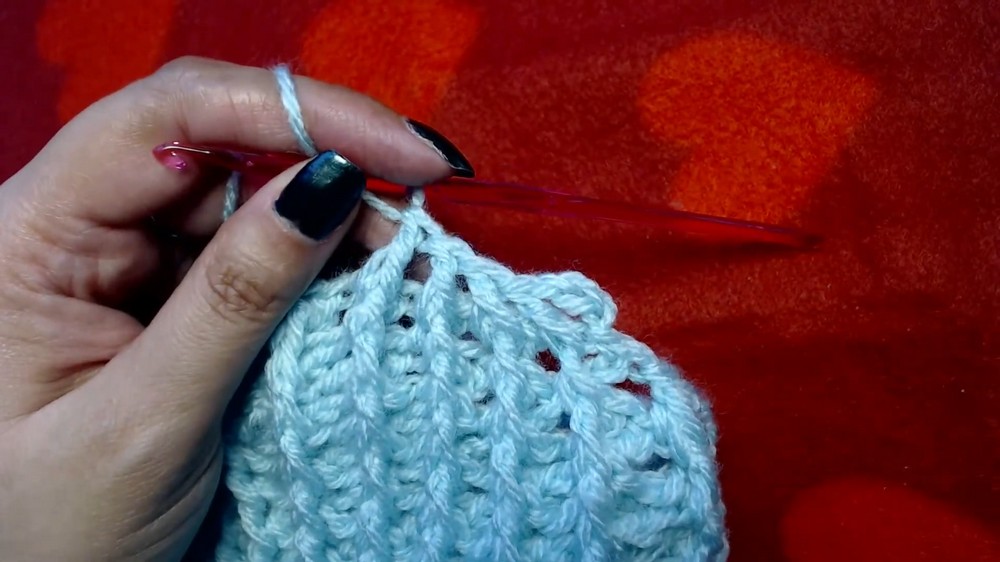
- Cut the yarn, leaving a longer tail for sewing the top.
- Thread the yarn tail through a needle. Turn the beanie inside out and zigzag around the top stitches to tighten the opening.
- Pull the yarn snugly, tie knots to secure, and weave in the ends of the yarn to hide them.
Optional Step: Add a Pom-Pom
- Attach a pom-pom to the top of the beanie using the yarn needle and remaining tail. Or, leave the beanie as is for a finished look with the swirly top design.
Tips for Beginners
- Count your stitches: Keeping track of stitches is crucial to maintaining the pattern's accuracy.
- Practice FPdc and BPdc: If you're unfamiliar with these stitches, take some time to practice before starting the project.
- Check size after ribbing: Measure your beanie to ensure it fits before continuing with the main body section. You can adjust the size at this stage by adding or subtracting chains or rounds.
- Secure the top tightly: When closing the top of the beanie, weave the yarn tail carefully to avoid unraveling.
Conclusion & Final Thoughts
This crochet beanie pattern combines aesthetic appeal with practical uses, making it a favorite among crocheters of various experience levels. Whether used for gifting or personal wear, the design is both versatile and customizable. The ribbed brim adds stretchiness for a snug fit, while the swirly top design is enhanced by creative use of FPdc stitches. The tutor emphasizes flexibility, allowing you to adjust the size and style to suit your needs.
What I Learned from This Pattern
This pattern taught me the beauty of combining front post and back post stitches to create textured designs that truly stand out. I appreciated how customizable and beginner-friendly the pattern is, despite its intricate appearance. It also reinforced the importance of attention to detail, especially when working with ribbing and swirls. Most importantly, I learned how versatile crochet techniques like FPdc could be-not just for beanies, but also for creating other textured projects like blankets and cuffs.