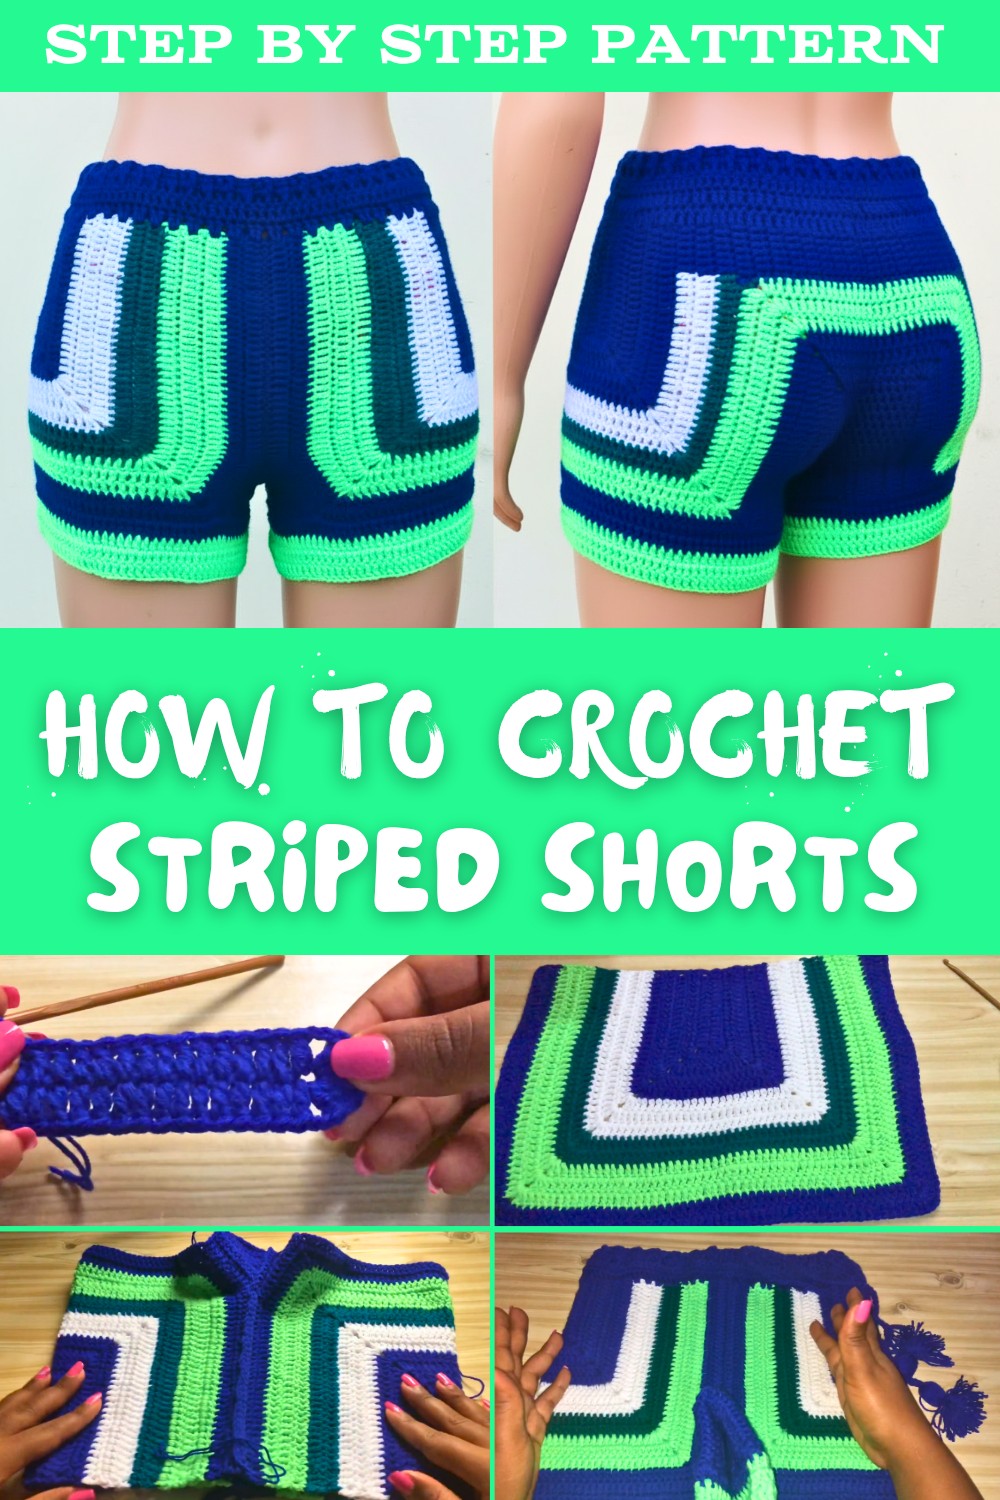
Crochet Striped Shorts Free Pattern Using Double Crochet Only
Try this free crochet striped shorts pattern, perfect for casual wear or beach days; customize colors and fit to match your unique style effortlessly.
A warm sunny day calls for lightweight and breathable clothing, and a free crochet striped shorts pattern is the perfect solution to stay stylish while staying cool. This comfortable piece is ideal for casual walks, beach outings, or even a cozy day at home. The striped detail allows for experimenting with fun color combinations to suit your personal style.
How to Crochet Striped Shorts – Free Pattern for Everyday Wear
Pair it with a simple tee, a flowy blouse, or even a crocheted crop top for an effortlessly chic look that works for any occasion. Customizing the fit ensures it feels just right, offering comfort without compromising style. This versatile project is perfect for adding a personalized touch to your summer wardrobe while enjoying a functional and rewarding crochet experience.

Step-by-Step Detailed Pattern for Crochet Striped Shorts
Finished Size
The crochet striped shorts are designed for Size Medium. The size can be adjusted easily by following the measurement-based approach in the instructions.
- Unstretched Waist Width: 14 inches
- Stretched Waist Width: Approx. 18 inches
- Leg Opening: Adjustable based on your preferences
Materials
- Yarn: Robin Yarn in multiple colors (choose four to five contrasting or complementary colors). You’ll need approximately 1 ball of each color.
- Crochet Hook: Size 4mm (G6) hook.
- Scissors: For trimming and finishing.
- Darning Needle: For weaving in ends and creating drawstring.
- Stitch Markers: (Optional) For marking key points like crotch or seams.
Gauge
The gauge is not explicitly mentioned in the tutorial, but as a measurement-based pattern, you will work until the panels meet your required hip circumference and desired length. Test stitch gauge:
- Double Crochet (dc): 16 stitches x 5 rows = Approx. 4 x 4 inches.
Techniques Used
- Basic Stitches:
- Chain (ch)
- Double Crochet (dc)
- Slip Stitch (sl st)
- Single Crochet (sc)
- Special Stitches:
- Front Post Double Crochet (fpdc)
- Back Post Double Crochet (bpdc) – optional for waistband.
- Panel Construction: Two identical panels.
- Crotch Formation: Additional rows for shaping to provide coverage.
Pattern Instructions
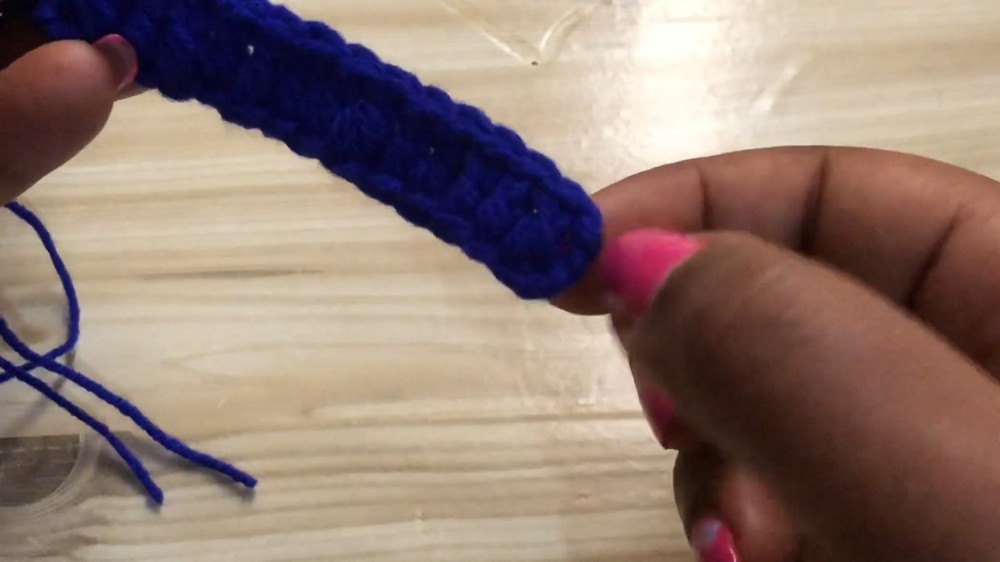
Step 1: Create Two Panels
- Foundation Row:
- Make a knot and chain (ch) 15.
- Add 3 additional chains for turning (total: 18 chains).
- Yarn over and skip the first 3 turning chains. Work into back bumps for a cleaner edge.
- Make your first double crochet (dc) into the 4th chain.
- Continue making dc stitches across the chain until you end with 16 dc stitches (including turning chain).
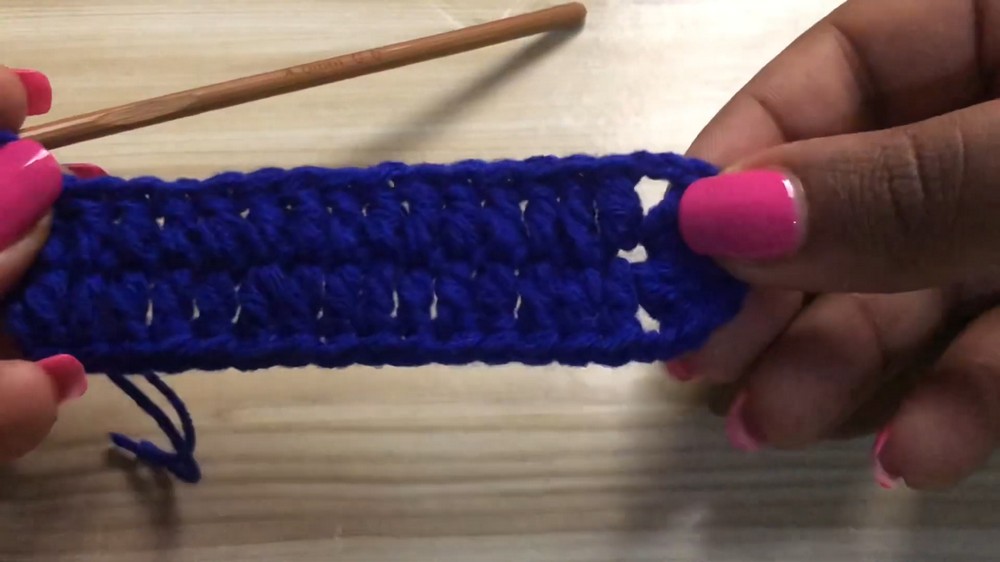
- Row 2:
- Ch 3 for turning (counts as the first dc).
- Work dc into each stitch across until you reach the end.
- At the corner (chain-2 space), add shaping:
- Work 2 dc, ch 2, 2 dc in the chain-2 space.
- Row 3 and Beyond:
- Repeat Row 2 instructions for consecutive rows.
- Change colors as desired, ensuring 2-5 rows per color to create stripes.
- Repeat the pattern until the panel reaches half your hip circumference measurement when lightly stretched.

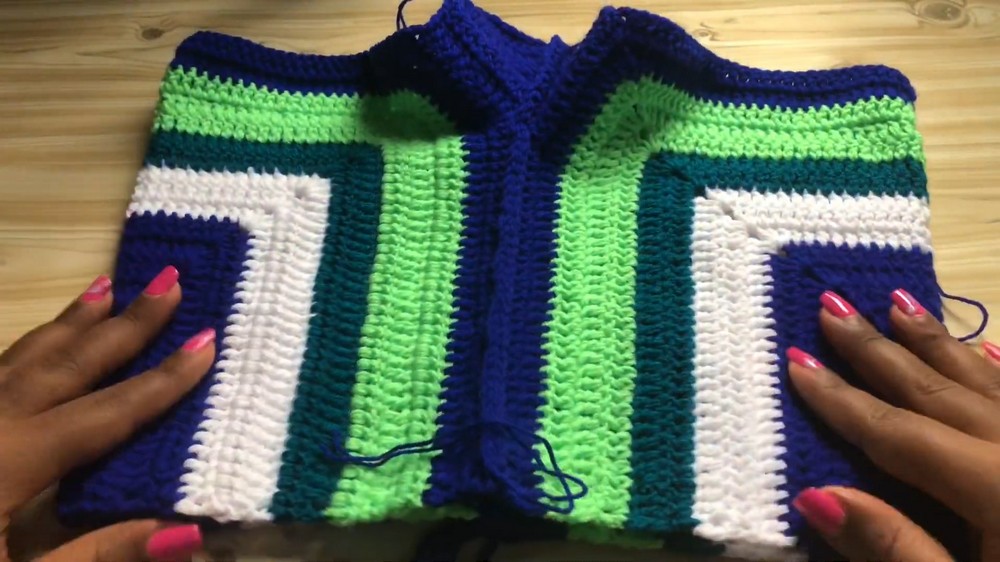
Step 2: Crotch Formation
- Mark stitches for crotch rows:
- Skip the central chain-2 space in your panel.
- Count 15 stitches on either side of the chain-2 space and place stitch markers.
- Working the Crotch Sections:
- Attach yarn at the first marked stitch after the chain-2 space.
- Work 15 stitches in double crochet for 5-6 rows, building the crotch section.
- Repeat the same steps on the opposite edge of the panel.

Step 3: Join the Panels
- Joining the Crotch Section:
- Place panels wrong side facing up.
- Use slip stitches or a darning needle to join the crotch sections, ensuring a clean seam.
- Joining the Sides:
- With panels still wrong side up, align the center seams.
- Join the sides using single crochet (sc) or slip stitches.
Step 4: Create Waistband
- Row 1:
- Attach yarn near the top edge of the shorts.
- Work 2 double crochets into each row edge around the waistband for a snug fit.
- Slip stitch at the end and chain 3.
- Row 2 & 3 (Optional Front & Back Post Stitches):
- Alternate between front post double crochet (fpdc) and back post double crochet (bpdc) for a textured waistband.
- Slip stitch, fasten off, and weave in ends.
Step 5: Finishing the Leg Openings
- Row 1:
- Begin at the crotch and turn the shorts right-side out.
- Work 2 double crochets into each row edge around the leg hole for the first round.
- Row 2 & 3:
- Continue working even double crochets into each stitch.
- Slip stitch and fasten off the yarn when complete.
- Repeat for the second leg opening.
Step 6: Add a Drawstring
- Create Long Chain:
- Make a chain of approximately 200 stitches.
- Add tassels by folding strands in half and tying them securely to the chain ends.
- Insert the Drawstring:
- Use a darning needle to weave the drawstring through the waistband.

Tips for Customization
- Adjustments for Size:
- Make longer panels for a larger size or shorter panels for a small size.
- Add extra rows for more crotch coverage.
- Color Variations:
- Experiment with ombre effects, stripes, or solid colors.
- Add Embellishments:
- Add small appliques, edging, or trim to the pockets or hem for a unique flair.
- Stretchy Yarn:
- Use a stretchy yarn if desired for better fit and comfort.
Conclusion
Once completed, you will have a pair of vibrant striped crochet shorts with a drawstring waistband and snug leg openings—perfect for summer outings and beachwear! This pattern is beginner-friendly, yet versatile enough for advanced crocheters to customize as desired.

Final Remarks
- Fit Test: Ensure proper fit before finishing seams.
- Sharing: Share your creations on crochet groups for inspiration and feedback!
- Pattern Credit: This pattern is inspired by a Facebook post and adapted into a tutorial. Original designer remains unidentified.