Simple Free Crochet Granny Square Pattern for Home Decor
Create vibrant vibes with this Free Crochet Granny Square Pattern and build colorful, cozy squares that brighten blankets, décor, or fun handmade gifts.
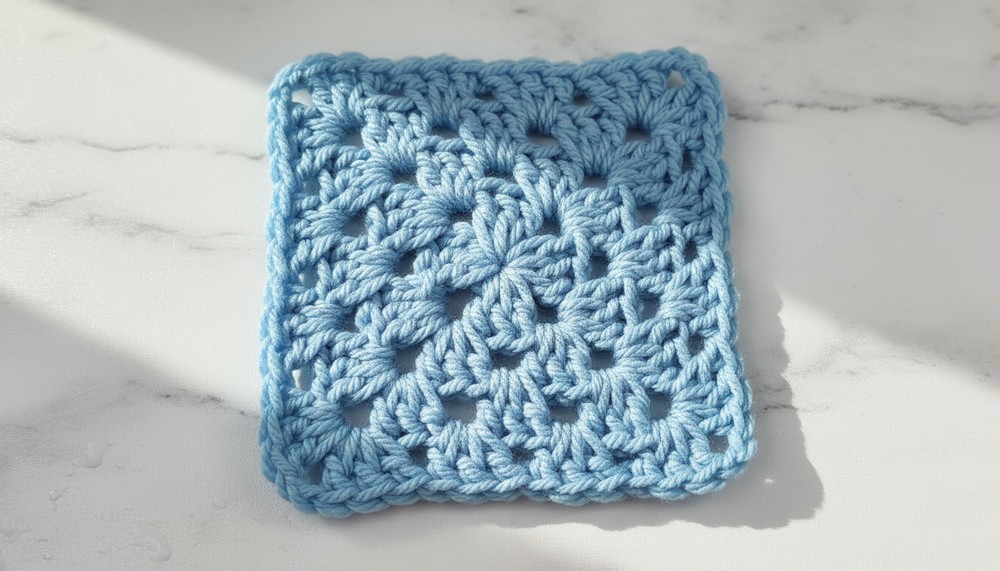
A small, beautiful square that holds endless possibilities for creativity and charm. That's exactly what a crochet granny square offers, a simple, timeless design that has been loved for its versatility and classic beauty. With its intricate yet easy-to-follow pattern, it features a combination of elegant stitches forming a delicate square, perfect for beginners and experienced crocheters alike. Its unique appeal comes from the ability to customize it with vibrant colors, textures, and patterns to suit any style.
Colorful Free Crochet Granny Square Pattern for Fun Creations
The granny square is not just a pretty piece but also incredibly useful. It can be combined to create blankets, scarves, bags, decorative pillows, or even wall art. Its compact size makes it travel-friendly and ideal for quick, enjoyable projects. Whether aiming to add warmth to your decor or create heartfelt handmade gifts, the crochet granny square is a perfect blend of beauty, practicality, and artistic expression.

How To Crochet A Granny Square Pattern
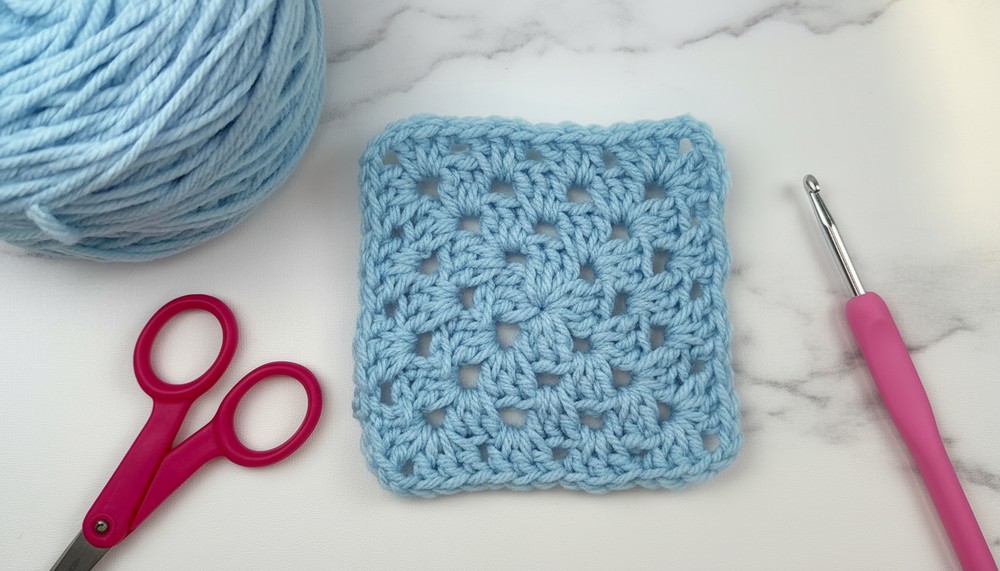
Materials Required
- Yarn:
- Worsted weight (4) acrylic yarn (any color or multiple colors as desired).
- Hook:
- 5mm crochet hook.
- Additional Tools:
- Scissors.
- Tapestry needle (optional, for weaving in yarn ends).
Gauge
- Gauge is not critical for this pattern. The square size will vary based on your yarn weight and hook size. Using the specified materials, your square will measure approximately 5-6 inches wide after 4 rounds.
Finished Size
The granny square's finished size depends on the number of added rounds:
- After 4 rounds: Approx. 5-6 inches.
- For a larger square, you can continue adding rounds by following the same pattern.
Special Techniques
- Slip Knot: Used to begin the project.
- Chain (ch): Forms the foundation of the granny square.
- Slip Stitch (sl st): Used to seamlessly join rounds and move to appropriate starting points.
- Double Crochet (dc): Creates the body of the granny square.
- Working in Chain Spaces: Ensures easy creation of corners and spaces between clusters.
Pattern Instructions
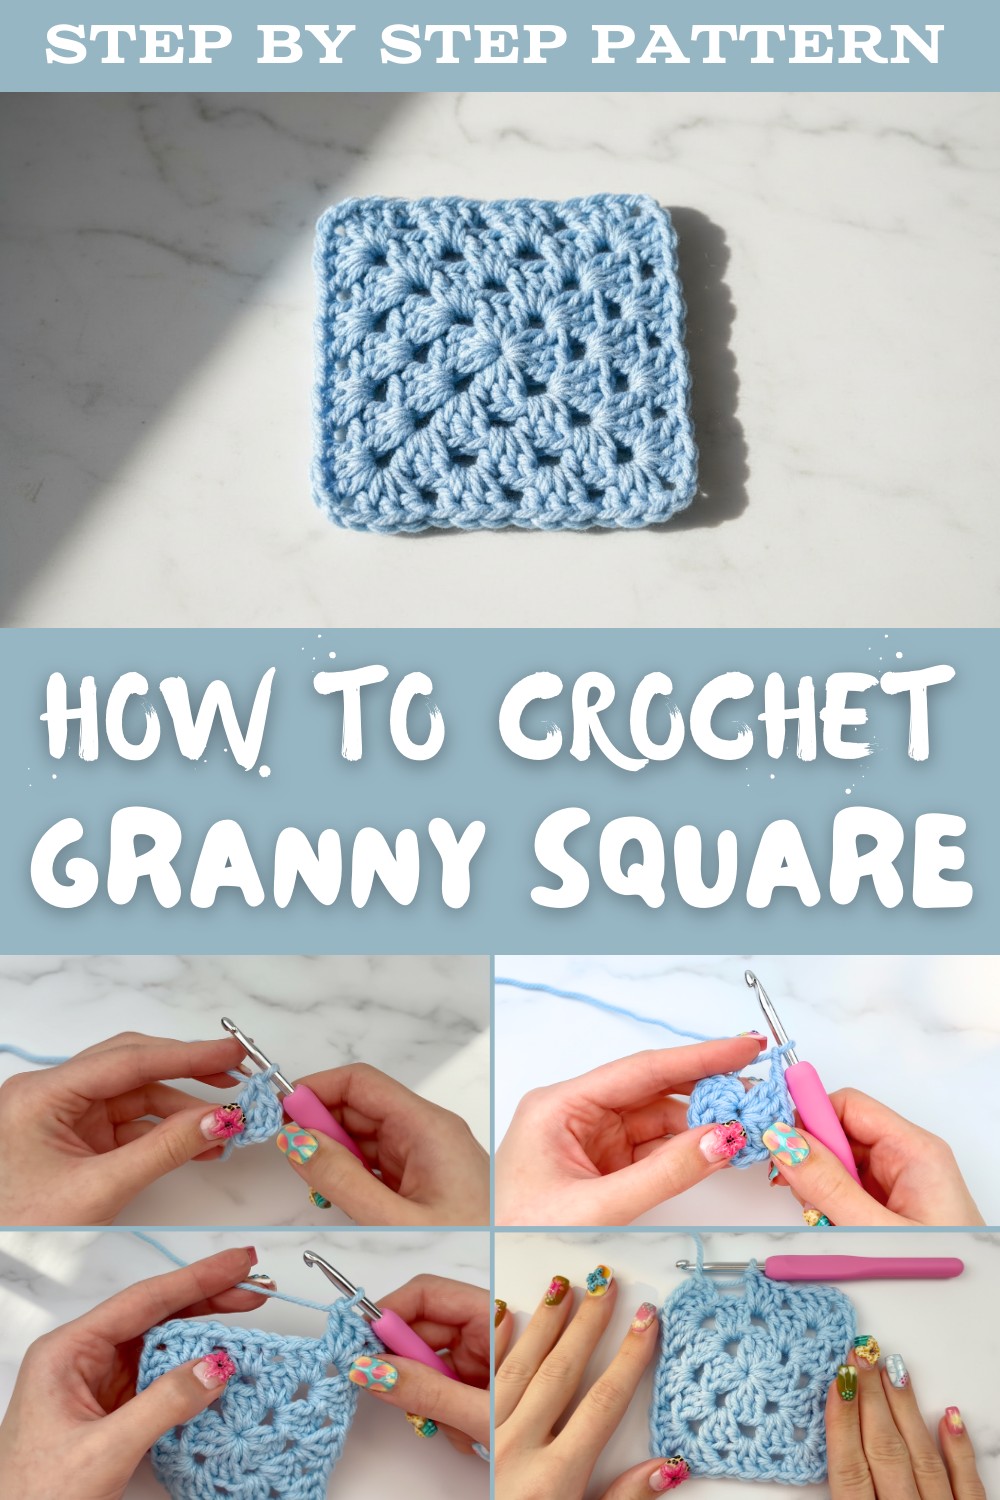
Step 1: Start the Center of the Granny Square (Foundation and Round 1)
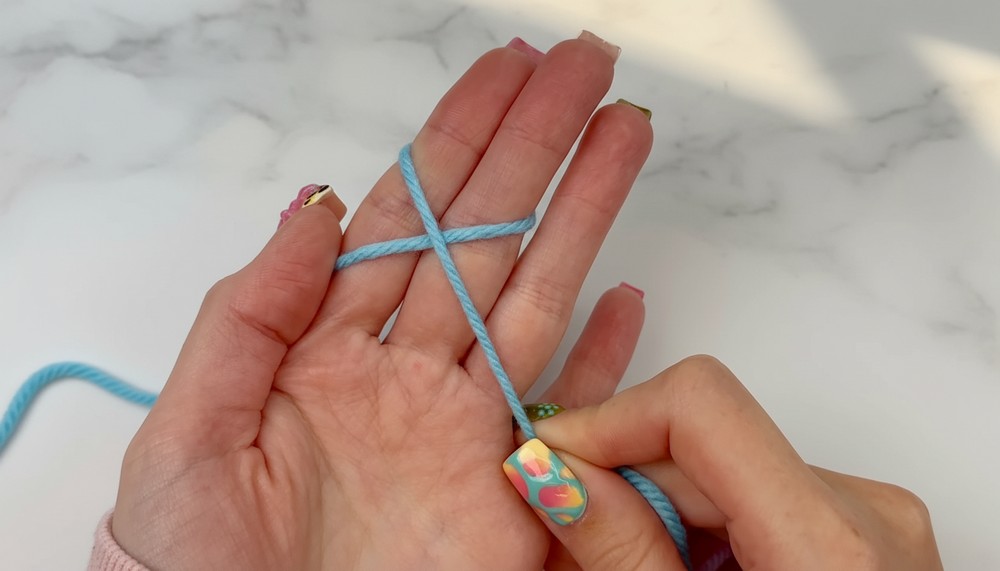
- Make a Slip Knot:
- Wrap your yarn around two fingers, cross it, and form a loop. Insert your hook under the first strand, pull the second strand through, and tighten to form a knot.
- Chain 4 (ch 4):
- Yarn over, pull through the loop on your hook four times to create a loose chain.
- Form a Circle:
- Insert your hook into the first chain, yarn over, and pull through both loops on the hook to form a slip stitch (sl st). This creates a small circle which you'll work into.
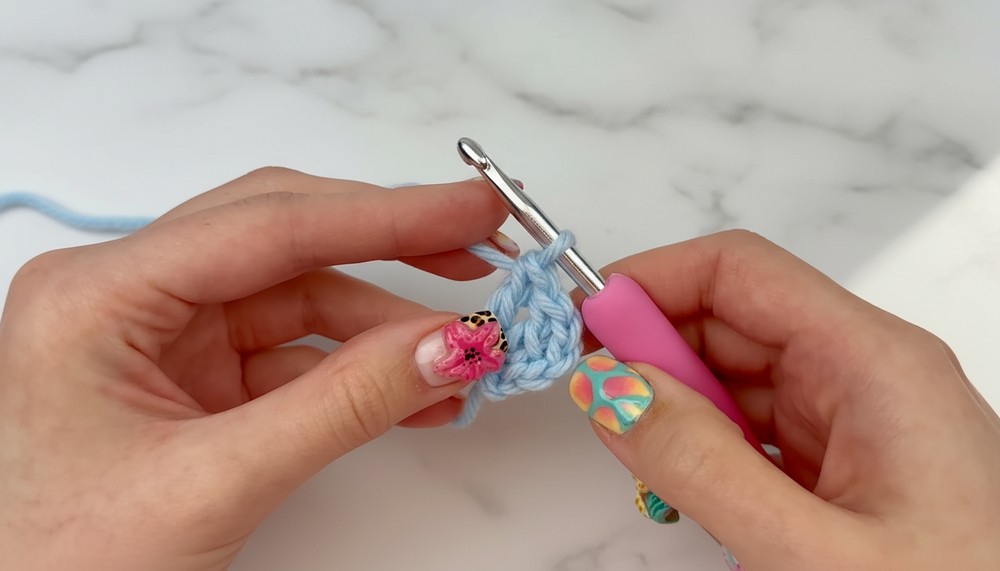
- Start Round 1:
- Chain 3 (ch 3): This counts as your first double crochet (dc).
- Make 2 double crochets (dc) into the circle.
- First Corner (Chain 2):
- Chain 2 (this forms a corner).
- Make a cluster of 3 double crochets (dc) into the circle.
- Repeat for 2 More Corners:
- Chain 2, work 3 double crochets (dc) into the circle. Repeat this one more time for your third corner.
- Final Corner:
- Chain 2, work 3 double crochets (dc) into the circle, and chain 2 again.
- Close the Round:
- Join the round by inserting your hook into the top chain of your starting chain (the third chain from the bottom) and making a slip stitch (sl st).
- Optional:
- Pull the starting yarn tail to tighten the center hole if it's too large.

Step 2: Round 2 - Building the Corners
- Prepare for Round 2:
- Slip stitch across the double crochets to reach the first chain 2 space (a corner).
- Start Round 2:
- Chain 3 (ch 3) (counts as the first double crochet).
- Work 2 double crochets (dc) into the same chain 2 space.
- Form the Corner:
- Chain 2.
- Work 3 more double crochets (dc) into the same chain 2 space.
- Move to the Next Corner:
- Skip the 3 double crochets from the previous round and continue directly into the next chain 2 space.
- Work: 3 double crochets (dc), chain 2, and 3 more double crochets (dc) into the same space.
- Repeat for Remaining Corners:
- Work into each chain 2 space, forming the corner clusters.
- Close the Round:
- Slip stitch into the top chain of the starting chain 3 to complete the round.

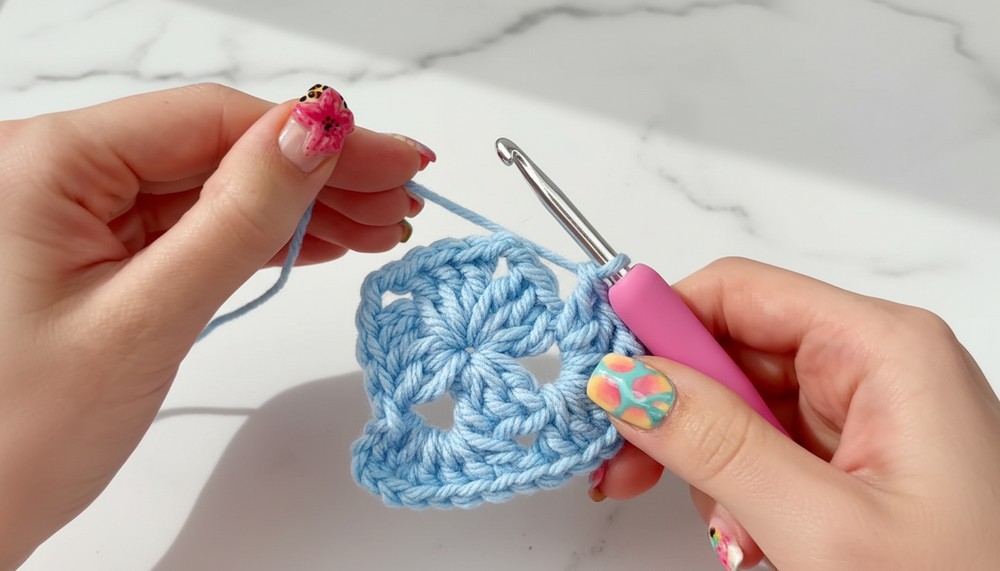
Step 3: Rounds 3 and Beyond - Expanding the Square
- Move to the Next Chain Space:
- Slip stitch into the stitches until you reach the next chain 2 space (corner space).
- Start the Round:
- Chain 3 (ch 3) (counts as the first double crochet).
- Work 2 double crochets (dc) into the corner space.
- Repeat the Corner Structure:
- Chain 2, work 3 more double crochets into the same space.
- Work the Middle Spaces (between corners):
- For each chain space between corner clusters, work 3 double crochets (dc) into the space.
- Continue Around the Square:
- In each corner, work 3 double crochets (dc), chain 2, and another 3 double crochets (dc).
- For each side space, make 3 double crochets (dc).
- Close the Round:
- Once you finish the round, slip stitch into the top chain of the starting chain 3.
- Repeat for Additional Rounds:
- Continue this pattern, increasing the number of side spaces as the square grows.

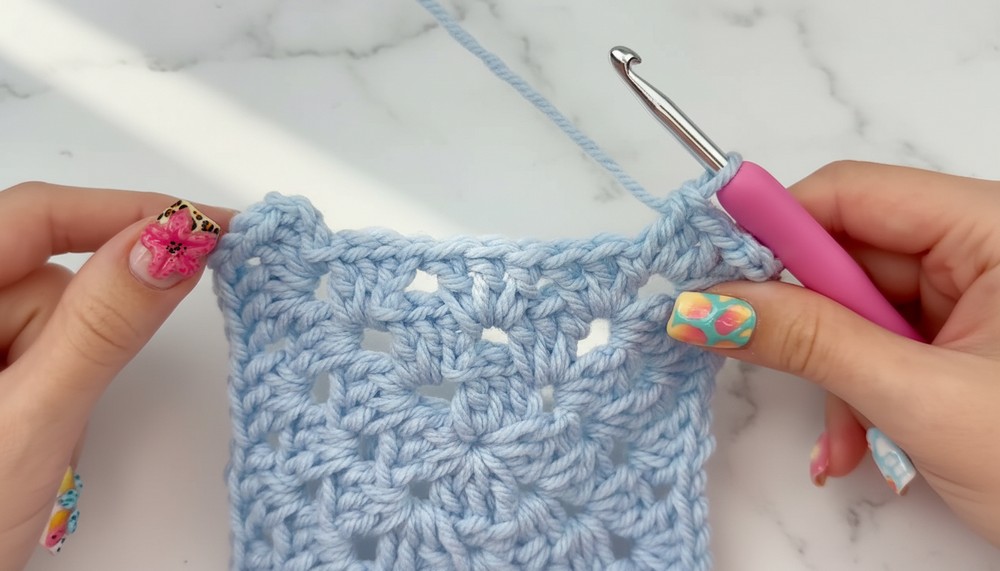
Step 4: Finishing Your Granny Square
- Final Touch:
- To finish the square, slip stitch to the starting chain, chain 1, and cut the yarn.
- Pull the yarn through the loop and tighten.
- Weave in Ends:
- Use a tapestry needle or the crochet hook to weave in the yarn ends on the back.
Customization Ideas
- Color Changes:
- Change colors every round for a vibrant, multi-colored granny square. To change colors, tie off the old color at the end of a round and join the new color in a chain 2 space using a slip stitch.
- Size Adjustments:
- Add more rounds to create larger squares for any project like blankets, bags, or pillows.
- Textured Yarn:
- Use textured yarn (e.g., variegated or chunky) for a unique and modern look.
- Different Yarn Weights:
- Switching to thinner or thicker yarn combined with an appropriate hook can create delicate or bold squares.
Tips to Enhance Your Work:
- Consistent Tension:
- Maintain consistent tension throughout to ensure uniform stitches and prevent distortion.
- Blocking:
- To achieve a flat and clean square shape, block your granny square by lightly stretching and pinning it to shape, then lightly steaming it with an iron or spraying it with water.
- Experiment:
- Use granny squares of different colors and stitch patterns to create unique designs.

Conclusion
Congratulations on completing your granny square! This classic, timeless pattern is simple yet incredibly versatile. Granny squares are building blocks for larger projects or stand-alone pieces. They can be used to make blankets, scarves, bags, or even garments.