
Free Crochet Mini Crossbody Bag Pattern For Keys Phone And Cards
Shine with handmade fashion using this free crochet mini crossbody bag pattern, a simple and stylish way to carry your favorite essentials every day.
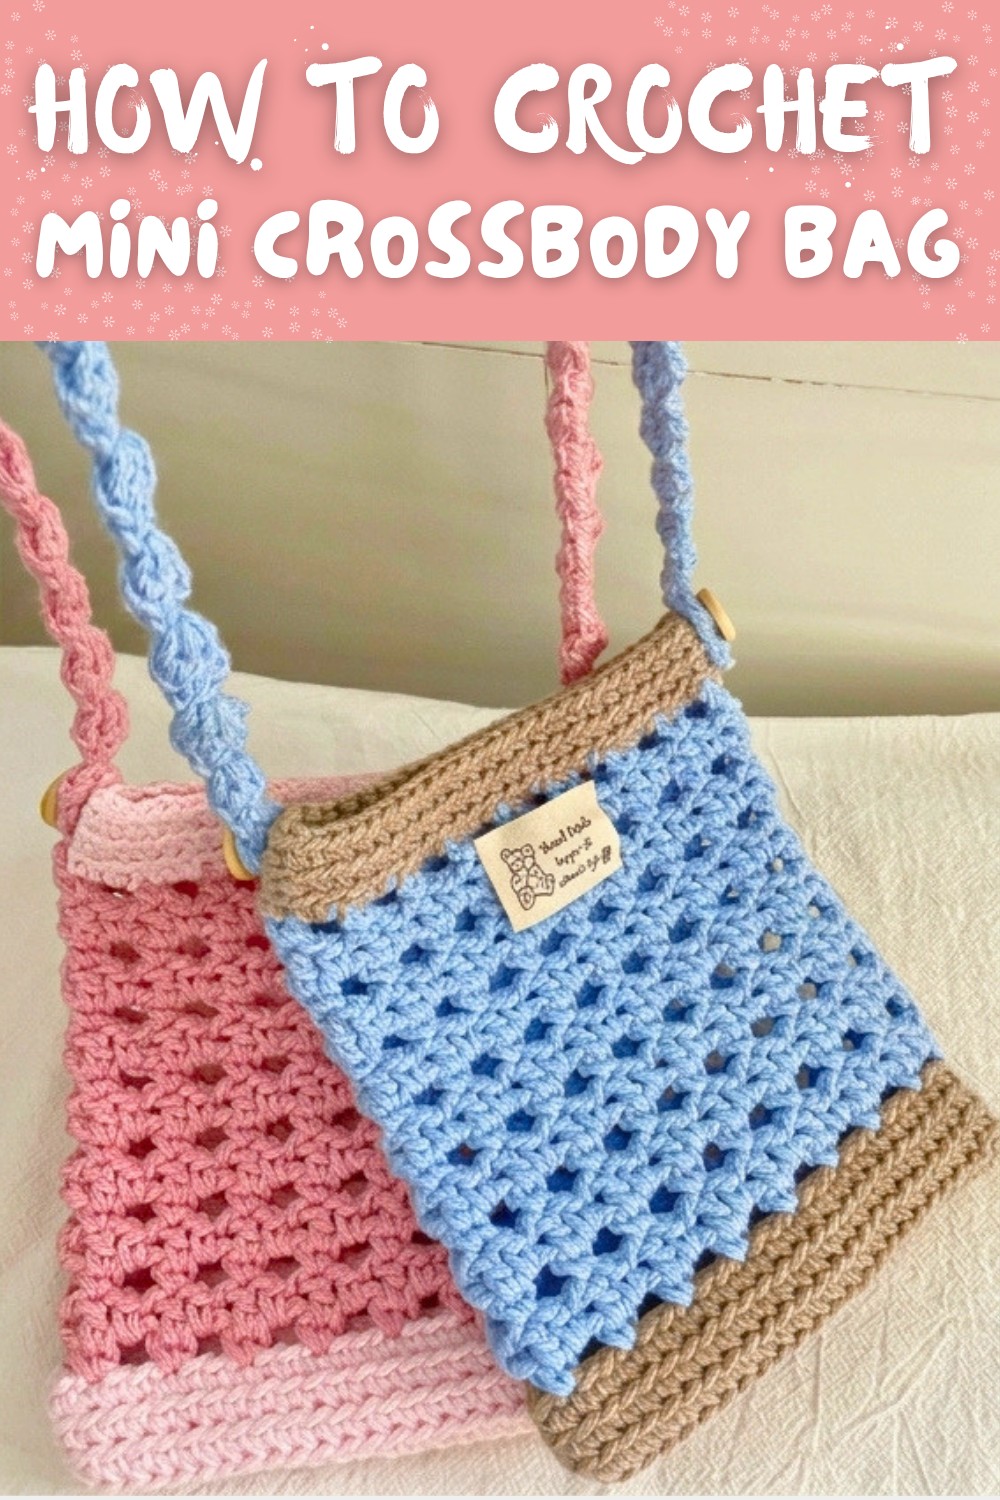
If you love making pretty and useful things with your hands, then this crossbody bag pattern is perfect for you. It's easy to make and so much fun. This mini bag is not only cute but also very handy. It's the perfect size to carry your phone, keys, or small accessories. You can use it every day or even gift it to someone. The design includes a lovely textured body with a stylish openwork flap, making it look modern and attractive. You can choose your favorite yarn colors, giving your bag a personal touch that matches your style. Whether you go for soft pastel shades or bold contrasts, this bag will definitely stand out.
Free Crochet Pattern to Make Your Own Stylish Crossbody Bag

The strap is braided and strong, allowing you to wear the bag comfortably across your body. This makes it great for traveling, shopping, or casual outings. The decorative buttons on the flap are not just functional but also add a fun element to the design.
This pattern is beginner friendly, so even if you are new to crochet, you can make it. The instructions are clear and easy to follow, and the materials are simple-just yarn, a crochet hook, and basic tools. You'll love how quickly this bag comes together, and the end result is so rewarding.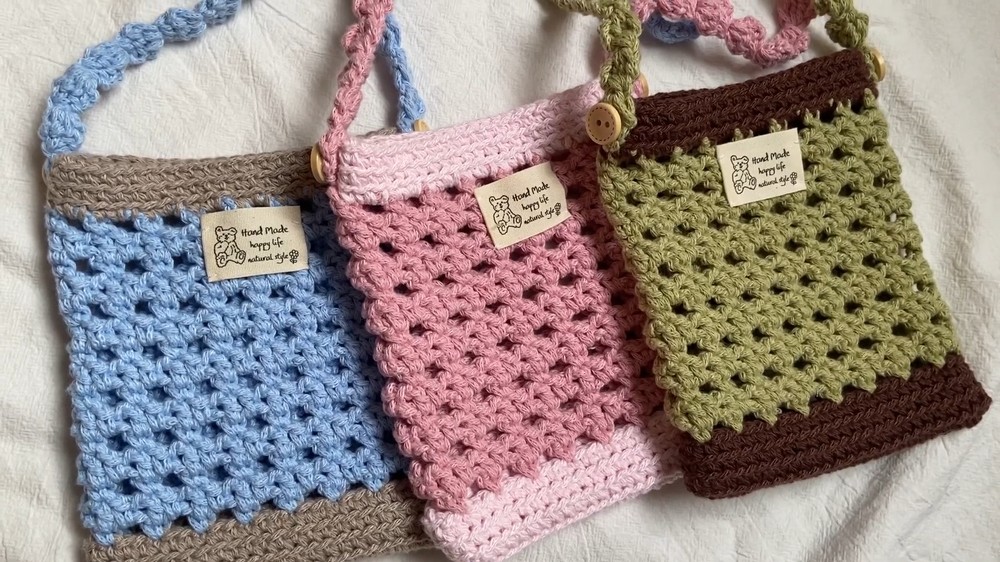
It's a stylish accessory and a functional bag, all in one. Start crocheting today and create something you'll love to wear or proudly gift to a loved one. This mini crossbody bag will be your favorite DIY project.
Step by Step Crochet Pattern for Crossbody Mini Bag
Materials Needed
- Yarn:
- Two skeins of medium weight yarn in colors of your choice.
- Choose durable yarn suitable for accessories, such as cotton or acrylic blends.
- Crochet Hook:
- 4.0 mm crochet hook.
- Additional Tools:
- Tapestry needle.
- Two buttons (depending on flap design).
- Stitch markers.
- Scissors.
Pattern Instructions
Base of the Bag
- Foundation Chain:
- Begin by chaining 25 stitches.
- Ensure you maintain even tension throughout for a neat base.
- First Round:
- Work one single crochet into the second chain from the hook.
- Continue crocheting one single crochet into each chain across until you reach the last chain.
- End of Row Adjustments:
- In the last chain, create three single crochets into the same stitch. This will form a rounded corner at the end of the row.
- Turn your work so you are now working along the opposite side of the foundation chain.
- Make single crochets into each chain across.
- Joining the Round:
- Slip stitch into the first single crochet at the start of the row to join the round.
- Chain 1 to begin the next round.
- Subsequent Rounds for Base:
- Work one single crochet into the back loops of the stitches (to create a slight ridge along the edge).
- At each curved end (where three single crochets were worked), add two single crochets in each stitch. This ensures the base lies flat.
- Repeat this process until the base is approximately four rows high or the desired width for your bag.

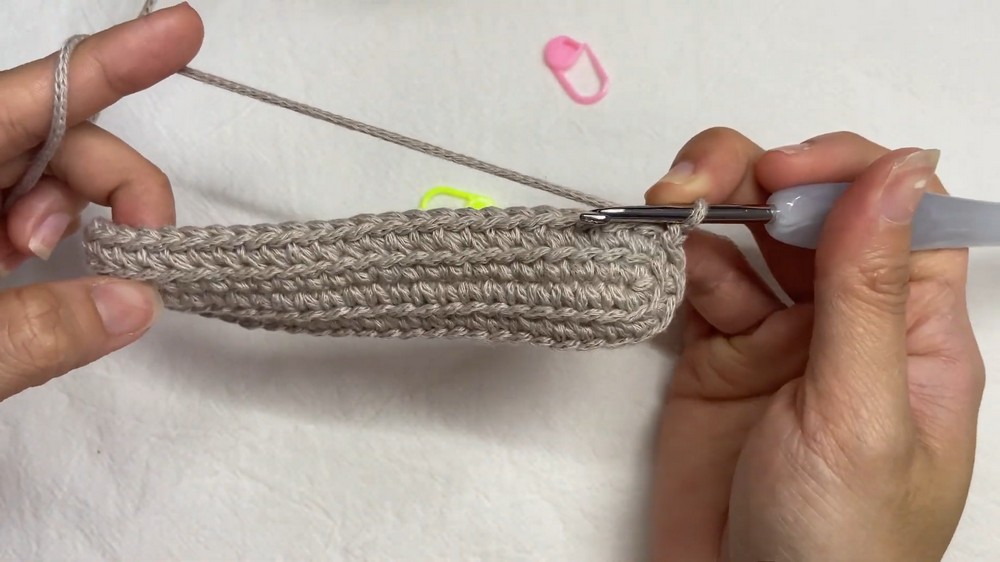

Body of the Bag
- Building the Bag Height:
- Start crocheting single stitches into the back loop of the base's final row.
- This helps transition from the flat base to the cylindrical shape of the bag body.
- Place a stitch marker in the first stitch of the round to keep track of each row.
- Continuing the Body:
- Crochet one single stitch into each stitch around without any increases or decreases for several rows.
- Work in continuous rounds to avoid a visible seam.
- Continue until the bag reaches your desired height. The pattern suggests a total of 19 rows for an ideal depth.
- Changing Yarn Colors (Optional):
- If you'd like a two tone effect, fasten off the current color and attach a new yarn at the start of a row.
- Securely weave in the ends using a tapestry needle to avoid loose strands.

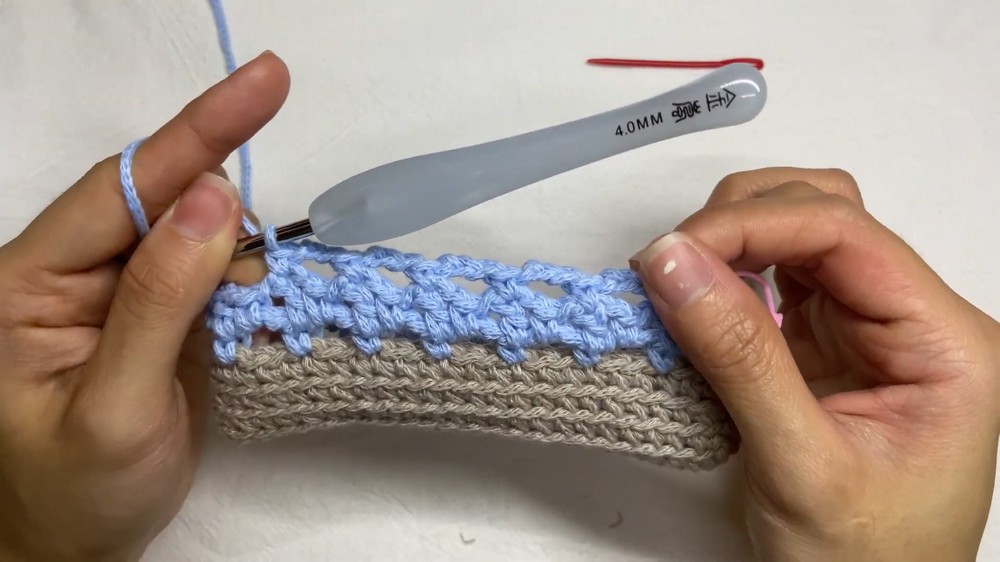
Creating the Flap
- Starting the Flap:
- Begin with the same or a contrasting yarn at the top edge of the bag.
- Make single crochets across the last row of the bag opening.
- Decorative Openwork Pattern:
- Chain 3, skip two stitches, and make a single crochet into the third stitch. Repeat this pattern across the row to create decorative gaps.
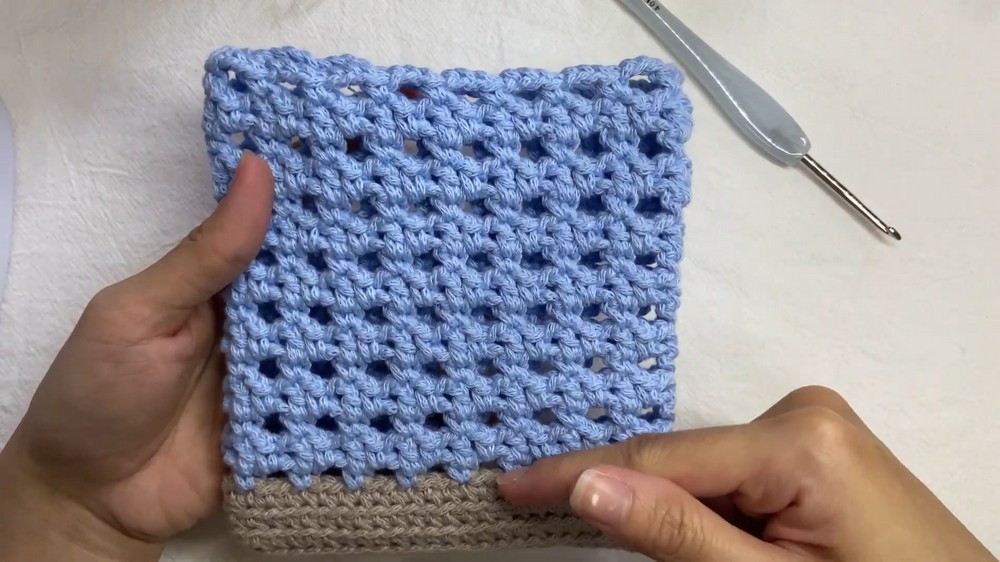
- Subsequent Rows:
- Chain 1, and alternate crocheting single stitches into chain spaces and forming decorative gaps using chain stitches.
- Adjust the placement of stitches as necessary to maintain the openwork and alignment.
- Tapering the Flap:
- For the final rows of the flap, gradually decrease stitches by skipping one stitch at the beginning and end of each row.
- This will form a rounded or narrower flap edge.

Strap of the Bag
- Making the Strap:Use yarn matching the bag body.
- Foundation: Chain 4 stitches and slip stitch into the first chain to form a circle.
- Technique: Work slip stitches in the round to create a braided looking strap:
- Insert the hook into the first chain, yarn over, then pull through to create a tight knot. Continue looping the stitch.
- Repeat this process until the strap measures approximately 87 to 88 cm. Adjust the strap length based on your preferred fit.
- Attaching the Strap:
- Using a tapestry needle, sew the strap's ends securely to the bag's sides near the top opening.
- Ensure the stitch placement is symmetrical for proper balance.

Final Finishing Details
- Adding Buttons:
- Attach two buttons or decorative fasteners to the front of the bag. Place them in alignment with the flap's open holes for easy closure.
- Use a strong adhesive or thread to secure the buttons firmly in place.
- Securing Loose Ends:
- Use the tapestry needle to weave in all loose ends from color changes and strap attachment. Keep the work tidy and invisible from the exterior.
- Optional Decoration:
- Use fabric patches, embroidery, or simple appliques to add a personal touch to the bag. This is a lovely option if the bag might feel too plain.

Tips for Maintaining Your Bag
- Washing Instructions: Handwash in cold water with mild detergent to maintain the yarn's softness and vibrant color. Avoid machine washing as it may stretch the bag or damage the yarn.
- Drying: Lay the bag flat on a towel to air dry. Do not hang it up while wet, as this could distort its shape.
- Storage: Keep the bag in a dust free area when not in use. If storing for an extended time, insert tissue paper into the bag to help retain its shape.
- Repairs: If you notice loose stitches or fraying over time, repair them with a matching yarn using simple whip stitches.
Final Thoughts
Congratulations on completing your crossbody mini bag. This functional and stylish accessory is perfect for everyday use. With its decorative flap and customizable strap length, it's a versatile piece designed to meet your needs.
If this pattern inspired your creativity, you can experiment with different yarn textures, colors, or accessories to make the design uniquely yours. For instance, consider adding beads, embroidered motifs, or tassels for extra flair.
The steps provided are beginner friendly, but if you're new to crochet techniques like openwork or strap braiding, take your time and practice along the way. Remember to use tools like stitch markers to stay organized and avoid mistakes.
Feel free to share your completed piece with others or pass it as a thoughtful handmade gift to someone special. Crocheting is not only about the final product but also about the enjoyment of the process itself.
Thank you for taking on this project, and we hope it brings beauty and practicality to your day.