
Free Crochet Cat Hair Tie Pattern for Cozy Indoor Days
Showcase your playful side with this free crochet cat hair tie pattern introduce to add charm and creativity to your daily fashion or school outings.
Searching for a special accessory to add a spark to your everyday look? The Crochet Cat Hair Tie is an adorable and creative way to style your hair with charm and personality. This delightful hair tie, shaped like a cute cat, blends fashion with functionality to make your hairstyle stand out. It's a perfect mix of creativity and usefulness, ideal for people of all ages who want to add a touch of fun to their look.
Free Crochet Cat Hair Tie - Great for Dressing up Simple Buns

This adorable hair tie is shaped like a cute cat with two ears, giving it a fun and trendy look. It can be made in different sizes and colors based on your preference. Use it to secure ponytails, messy buns, or braids for a neat yet stylish appearance.
What makes it even more special is that it is soft, lightweight, and gentle on your hair, ensuring it doesn't cause any damage or pull uncomfortably. The hair tie is made using acrylic yarn, which gives it flexibility, durability, and a smooth finish.
It is perfect for kids, teens, and even adults who love cute and trendy accessories. Another wonderful feature of this pattern is that it is great for gifting, personal use, or even selling as a small business idea. The combination of its unique cat design and practical use makes it a thoughtful and creative handmade gift. Try this pattern today and enjoy bringing more color and fun to your hairstyles.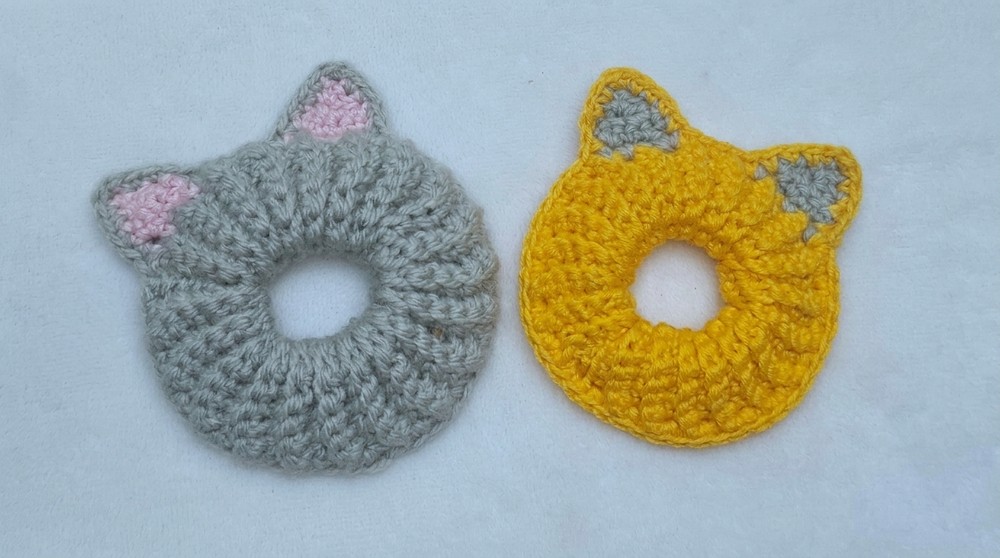
Crochet Cat Hair Tie Pattern
Materials Required
- Acrylic yarn:
- 2 mm thickness for larger pieces (e.g., adolescent or adult scrunchie).
- 1 mm thickness for smaller, child sized scrunchies.
- Crochet hooks:
- 3.5 mm hook for 2 mm yarn (provides a loose and flexible finish).
- 2.75 mm hook for thinner yarn (1 mm thickness).
- Elastic bands:
- Fabric covered elastic bands. These are gentler on hair and provide a sturdy base for the scrunchie.
- Needle for sewing:
- Use a yarn needle to sew pieces together and hide threads.
- Scissors: To trim excess yarn.
- Optional: A second yarn color for the inner part of the cat's ears (lighter shades work beautifully).
Gauge
- Loose stitching is preferred in this project to keep the scrunchie flexible and comfortable.
- Gauge is not critical but aim for stitches that are not overly tight or stiff.
Finished Size
The final size of the scrunchie depends on the number of chains and the yarn thickness:
- For a child sized piece, use thinner yarn (1 mm) and up to 13 base chains.
- For larger sizes, increase chain count to 17 or more, depending on preference.
Pattern Instructions
Step 1: Starting the Base Shape
- Start with a slip knot on your hook.
- Chain the required number of chains:
- For a child: 13 chains.
- For an adolescent or adult: 17 chains.
- Skip the last chain and start working along the back loops of the remaining chains.

Step 2: Creating Rows
- Work single crochet stitches into the back loops of the chains. The back loops are horizontal strands visible when the chain is slightly rotated.
- Complete 12 single crochet stitches in total (or adjust according to the size you want).
- Chain 1, turn your work, and continue working single crochet stitches into the back loops only.
- Repeat this process for 42 rows to create the base strip. This strip will eventually wrap around the elastic band.

Tip: Use a stitch marker to track the row count if necessary.
Step 3: Closing the Base
- Once the strip is completed, leave a long tail of yarn for sewing.
- Fold the piece in half, ensuring the right sides are touching.
- Use a yarn needle to sew the edges together:
- Match stitches carefully by joining the front and back loops of each point.
- When finished, add a small knot to secure the seam.
- Turn the piece right side out to hide the seam neatly.
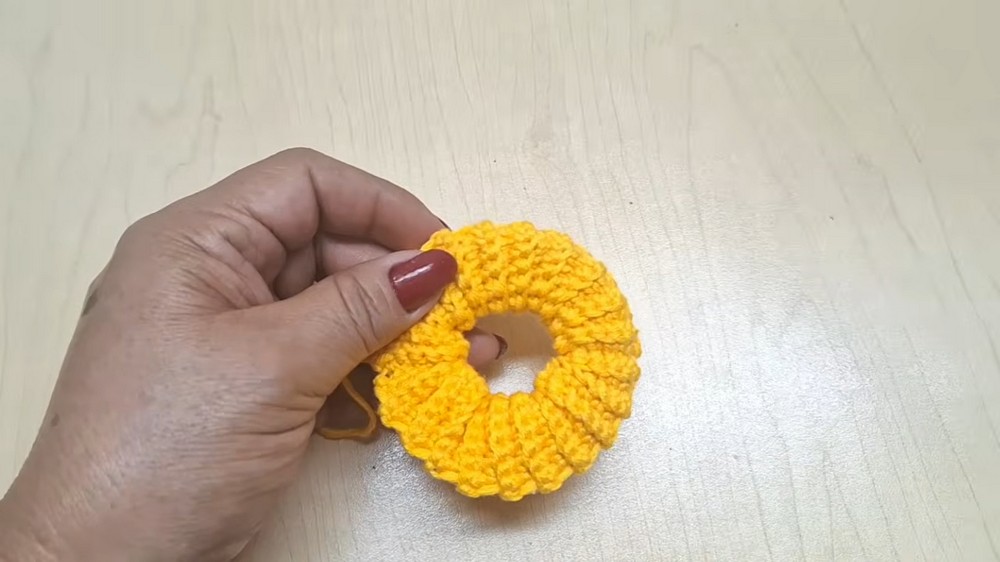
Step 4: Adding the Elastic
- Insert the fabric elastic band into the cylindrical crochet strip.
- Stretch the strip slightly to cover the entire band. Adjust the positioning as needed.
- Fold and smooth the crochet piece down securely over the elastic, ensuring it fits well.
Step 5: Creating the Ears
The ears are what give the scrunchie its adorable cat like design. Follow these steps carefully:
- Attach your yarn at the chosen starting point near the top edge.
- Begin working single crochet stitches along the edge:
- Insert your hook and pull the yarn through.
- Work 4 single crochet stitches in total at the base of each ear.
- Chain 1, turn your work, and follow this sequence for shaping the ears:
- Row 2:
- Increase in the first stitch (work 2 single crochets into the same stitch).
- Crochet 1 single stitch each into the next two stitches.
- Increase in the last stitch (work 2 single crochets).
- Row 3:
- Start with a decrease (skipping the first stitch).
- Work single crochets into the next two stitches.
- End with a decrease.
- Row 4:
- Start with a decrease.
- Work 1 single crochet in the middle stitch.
- End with a decrease.
- Row 2:
- Fasten off and weave in your ends neatly.
Step 6: Adding the Second Ear
Create the second ear by skipping 4 stitches horizontally from the first ear's base. Follow the same steps to crochet the ear as outlined above.

Customization Idea:
- For added character, use a contrasting yarn color (e.g., pink or white) for the inner ear sections.
Step 7: Border and Finishing
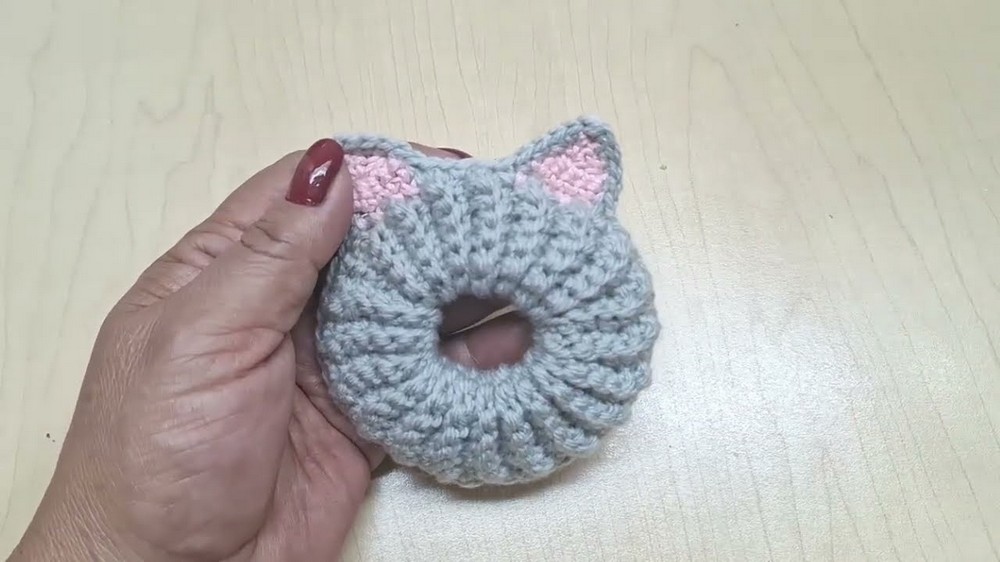
- Using a lighter or matching yarn color, crochet a neat border along the edges:
- Begin at a corner and attach yarn with a slip stitch.
- Work single crochets evenly around the outer edge of the ears and base.
- Add an increase at each ear tip so they stay upright and defined.
- Secure the border by hiding any loose ends inside the stitching.

Tips for Success
- Adjustments: Customize the number of chains and rows as needed to suit various age groups or preferences.
- Match colors: Use complementary or playful color combinations to make the scrunchie more attractive.
- Gentle handling: Ensure all seams are tight yet flexible to withstand frequent wear and pulling.

Special Techniques
- Back Loop Stitches: Working in the back loops gives the base a textured, ribbed effect, enhancing the scrunchie's elastic comfort.
- Increases and Decreases: Shape the ears precisely by correctly adding and reducing stitches.
Finished Look
The completed scrunchie has a lovely textured band that snugly wraps around hair, featuring two charming cat ears on top. The stitches provide a clean and polished look, and the lightweight design ensures it stays comfortable all day. Whether worn casually or for special occasions, this scrunchie is bound to draw attention.
Conclusion
This adorable crochet cat scrunchie is not only a practical hair accessory but also a creative project that beginners and experienced crocheters alike can enjoy. Whether gifting, selling, or making one for personal use, this scrunchie adds style and a splash of fun to any outfit.
Important Remarks
- Always test yarn thickness and tension with the hook you choose to ensure compatibility.
- For extra durability, consider double-layering the crochet strip.
- Store completed scrunchies neatly to preserve their shape and appearance.
With these instructions, feel confident in creating a functional and heartwarming accessory that will be loved by anyone who uses it.