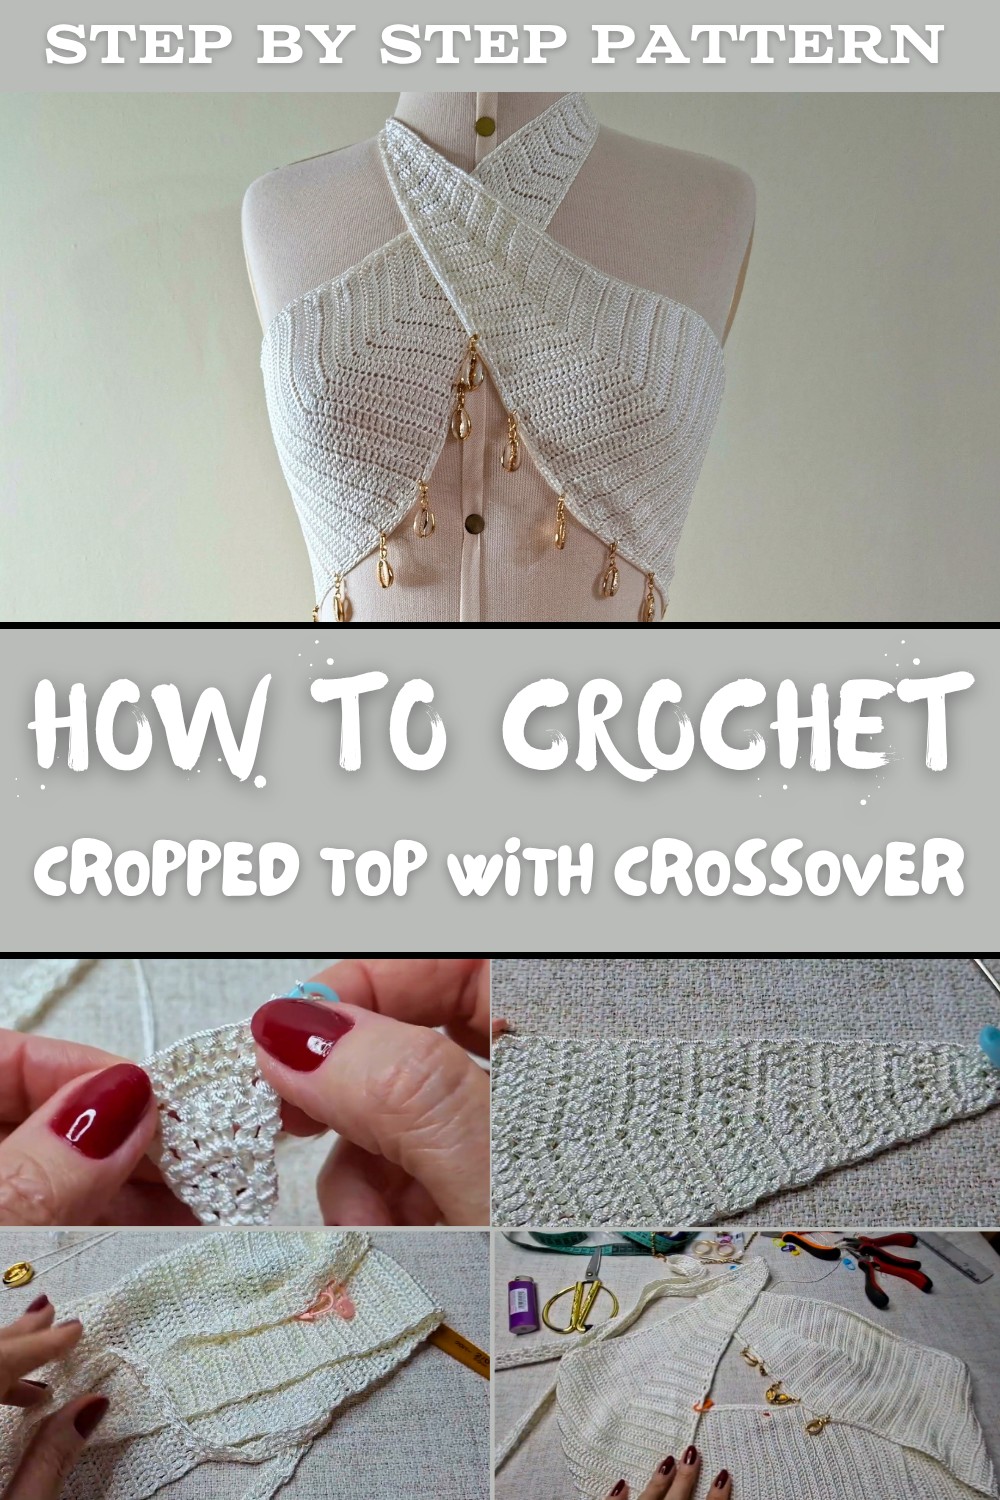
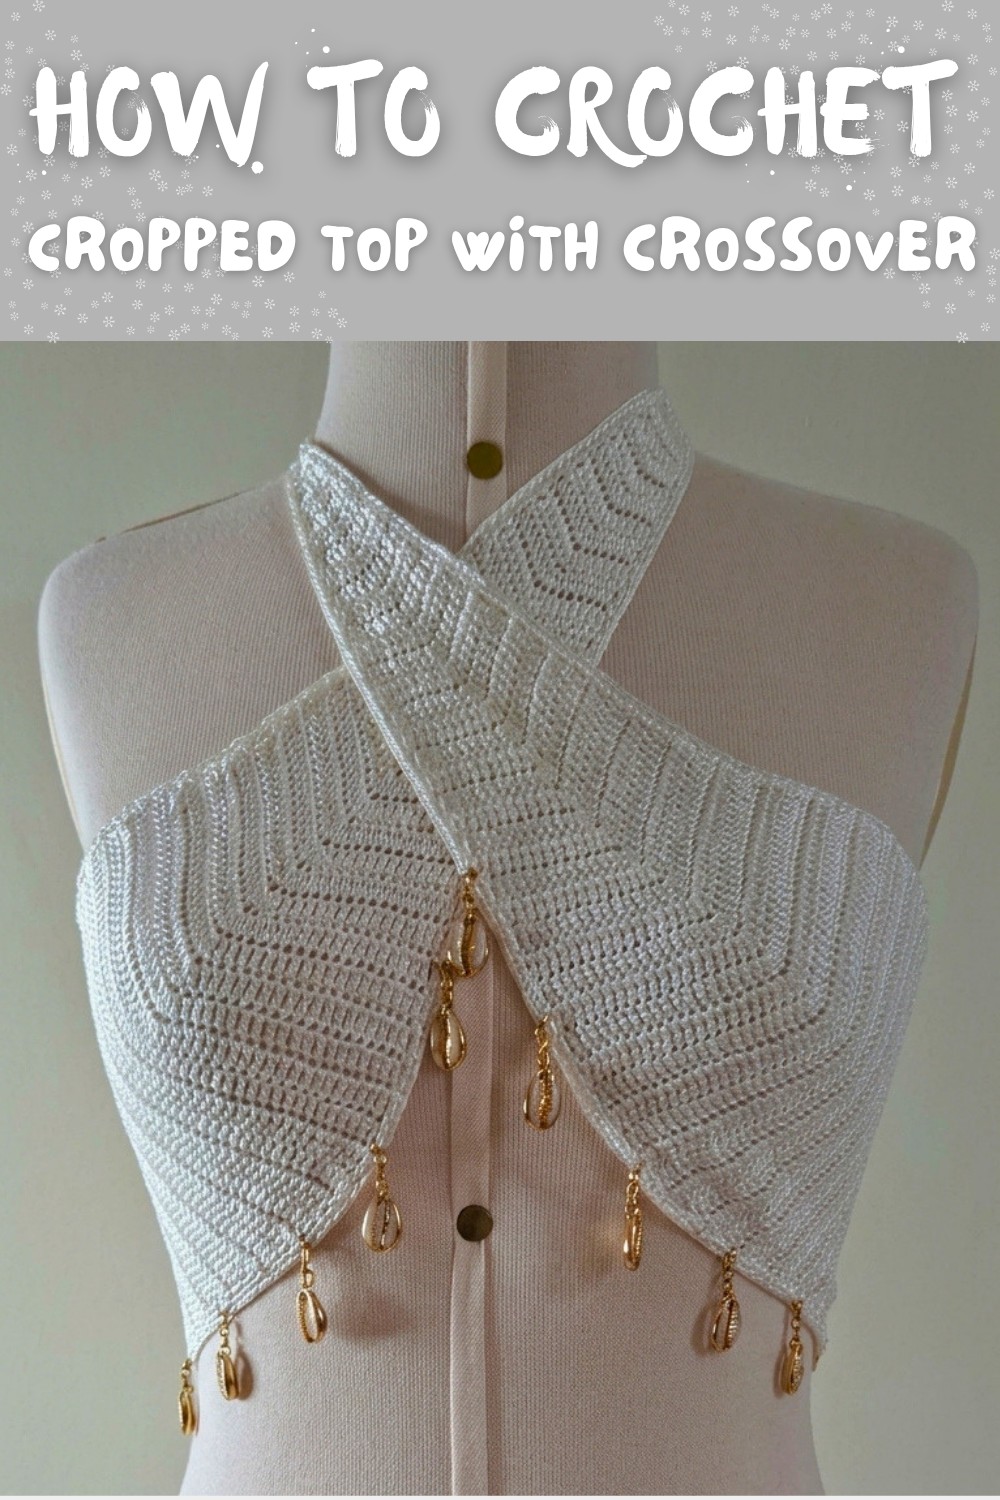
Free Crochet Cropped Top With Crossover Pattern for a Fun Summer Look
Stitch a stylish crochet cropped top with this free crossover pattern, a fun and trendy touch to your wardrobe with minimal effort.
Featuring a stylish crossover design, this Cropped Top pattern is a fun and easy project that anyone can try. This stunning top combines beauty, comfort, and modern fashion, making it the perfect wardrobe addition for casual outings or sunny summer days. It's designed to flatter your shape, with a unique curve under the arm that ensures a smooth and tailored fit. The highlight of this pattern is the crossover detail, which adds an elegant twist to a simple and classic cropped top style. Whether you love bright and bold shades or prefer subtle and soft tones, this top will look amazing in any palette.
Effortless Elegance: Free Crochet Cropped Top With Crossover Pattern
What makes this cropped top even more special is how customizable it is. You can easily adjust the size to suit your needs, creating a top that fits perfectly and comfortably. To add an extra touch of beauty, you can embellish it with beads, chains, or other accessories to transform it into a unique statement piece.
This crossover cropped top is also incredibly versatile, making it perfect to pair with high waisted jeans, skirts, shorts, or wear it as a layering piece under a jacket. Whether you're heading to the beach, going for a casual hangout, or looking for something stylish at home, this top fits every occasion. Easy to follow and beginner friendly, this pattern is a wonderful choice for crocheters who want to create something fashionable and functional.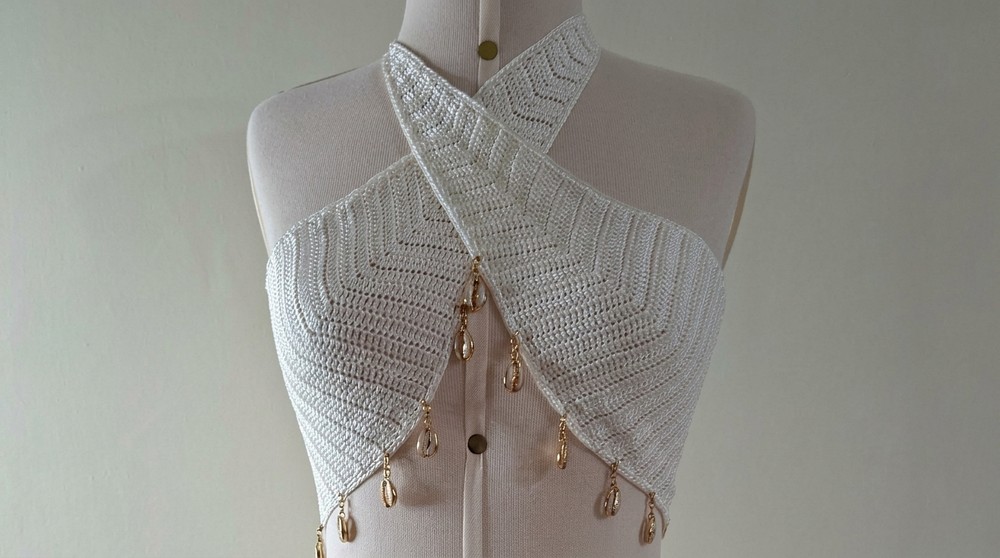
Trendy Crochet Cropped Top With Crossover Pattern
Necessary Materials
- Yarn: Two strands of cordoné yarn (quantity depends on size).
- Hook: Crochet hook size 2.0 mm.
- Tools:
- Scissors
- Tapestry needle
- Stitch markers/plastic pins (optional for marking adjustments).
- Optional Accessories:
- Steel and Mother of Pearl beads or embellishments (e.g., 5 on each side).
- Jewelry chain for pendant style decoration.
Gauge
- 10 cm x 10 cm: Achieved using 20 rows and 16 stitches of double crochet (dc) with a 2.0 mm hook.
(Check your gauge to ensure accurate sizing. Adjust hook size slightly if necessary.)
Finished Size
- Tamanho G (Large): Width: 19 cm (top), 21 cm (bottom); Length from strap start: Approximately 58 cm.
- Tamanho M (Medium): Adjust finished width proportions to 17.5 cm/19.5 cm.
- Tamanho P (Small): Reduce dimensions to approximately 15 cm wide at the top and 18.5 cm at the bottom.
Tips for Success
- Use stitch markers to track your starting and ending points, as well as any increases or decreases for clean results.
- Maintain tension consistently to prevent uneven edges.
- For custom measurements, take bust, underarm, and back widths before starting.
- Experiment with colors for straps or embellishments to match personal style.
Pattern Instructions
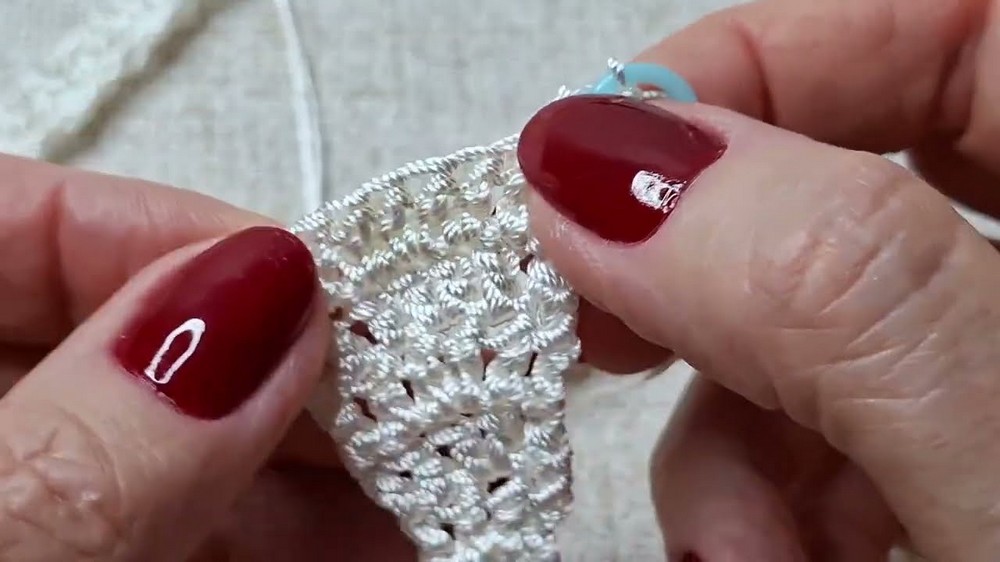
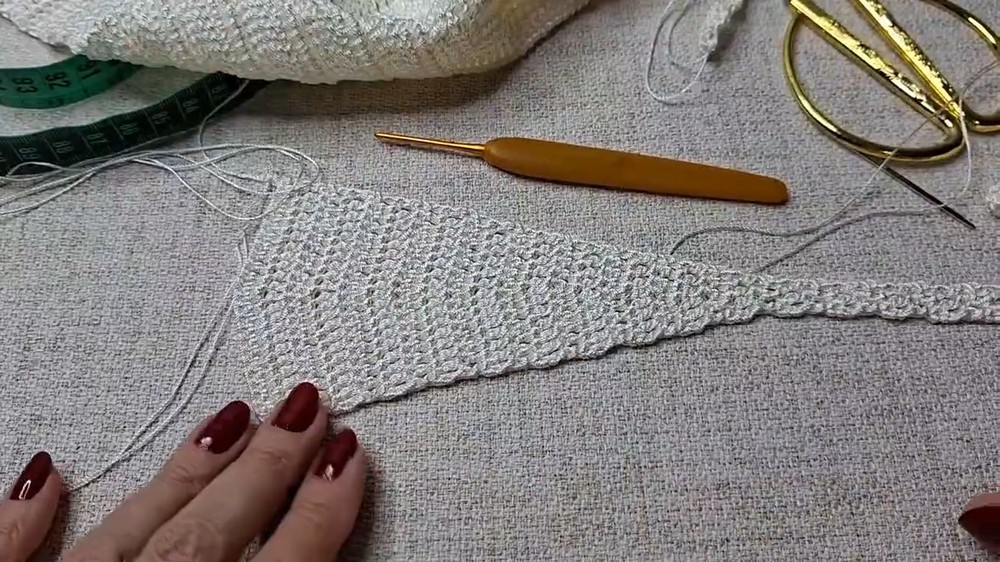
Step 1: Creating the Strap
- Foundation Setup:
- Start with a slip knot on your hook and chain the desired strap length. For reference:
- Size P: Approx. 40-45 cm.
- Size M: Approx. 48-53 cm.
- Size G: Approx. 58 cm.
- Start with a slip knot on your hook and chain the desired strap length. For reference:
- First Row:
- Chain 4.
- Turn. In the second chain from the hook, make 1 sc (single crochet).
- Make 3 dc across the row. Turn.
- Subsequent Rows:
- Continue working 3 dc in each row until the strap reaches desired length for tying, ensuring uniform tension.
- Use a stitch marker at edges for smooth alignment if adjustments are needed.
Step 2: Working the Body (Base Adjustment)
- Foundation Setup:
- At the strap's end, establish the base by adding increases in rows to form the curve below the arm.
- Step by Step Method for Body Start:
- Row 1: Chain 2, 2 dc into the first stitch, 1 dc in the next stitch. Repeat (increase only at edges).
- Row 2: Repeat the increase pattern from Row 1. Alternate between the first and second stitches for placing increases.
- Tip: Observe the middle "valley" where increases occur and alternate placements symmetrically to achieve the desired curve.
- Continue Building:
- Size G: Continue until the base measures 8 cm (approx. 20 rows).
- Adjust lengths accordingly for M (7.5 cm) or P (6.5 cm).
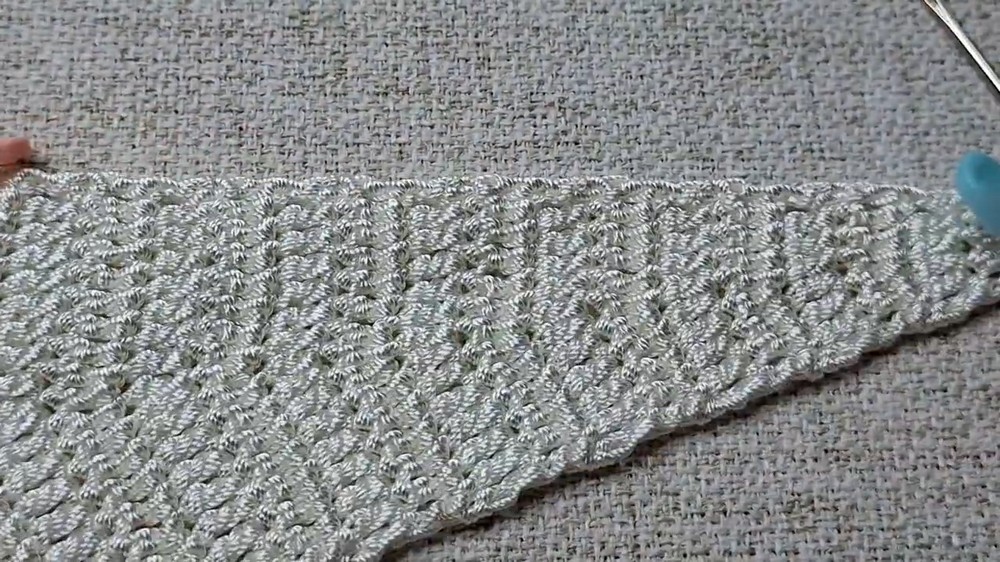
Step 3: Adding the Upper Contour with Additional Increases
- Transition to three increases per row at the armhole section for smoother curves.
- Insert 3 dc into the selected middle stitch.
- Continue this pattern for approx. 12 more rows.
- Ensure proper alignment by measuring frequently. Verify the armhole curve as follows:
- P: Approx. 9 cm.
- M: Approx. 9.5 cm.
- G: Approx. 10 cm.
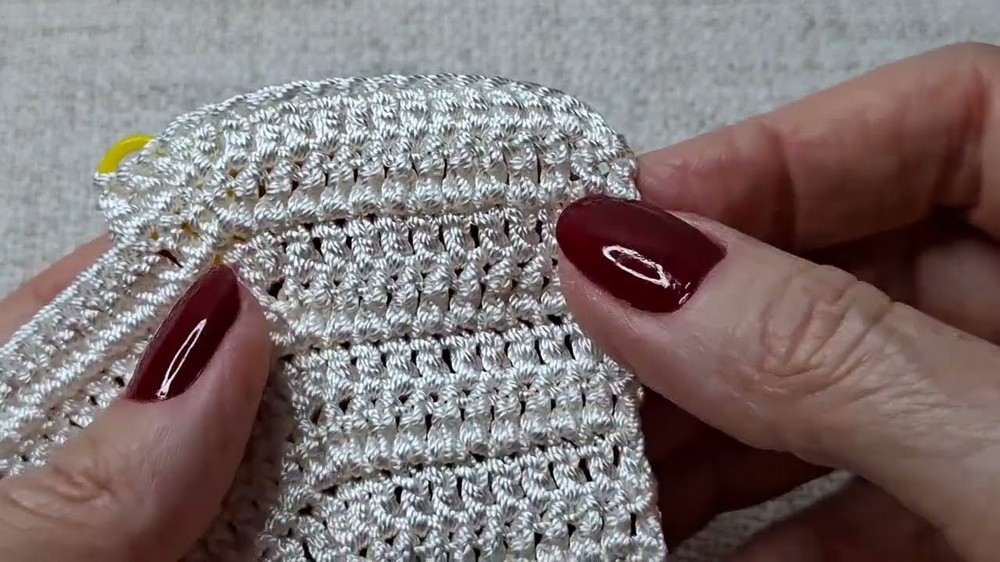
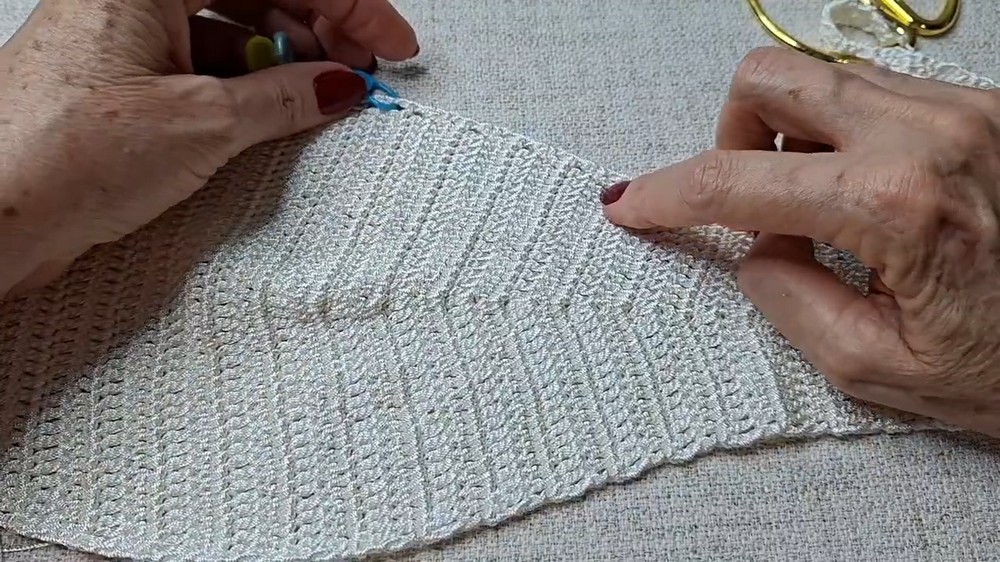
Step 4: Straight Sections for Bust Support
- Work four rows of dc without increases or decreases to create a smooth line across the bust.
- Ensure a flat and even transition before progressing to shaping the underarm curve.
Step 5: Underarm Curve Shaping (Decreases)
- Perform symmetrical decreases on both sides for six rows:
- At the beginning of each row, skip 1 dc.
- At the end of each row, finish with the second to last dc stitch for the decrease effect.
- Carefully track all decreases, ensuring symmetry.
- Mark the midpoint or edge points as a guide.

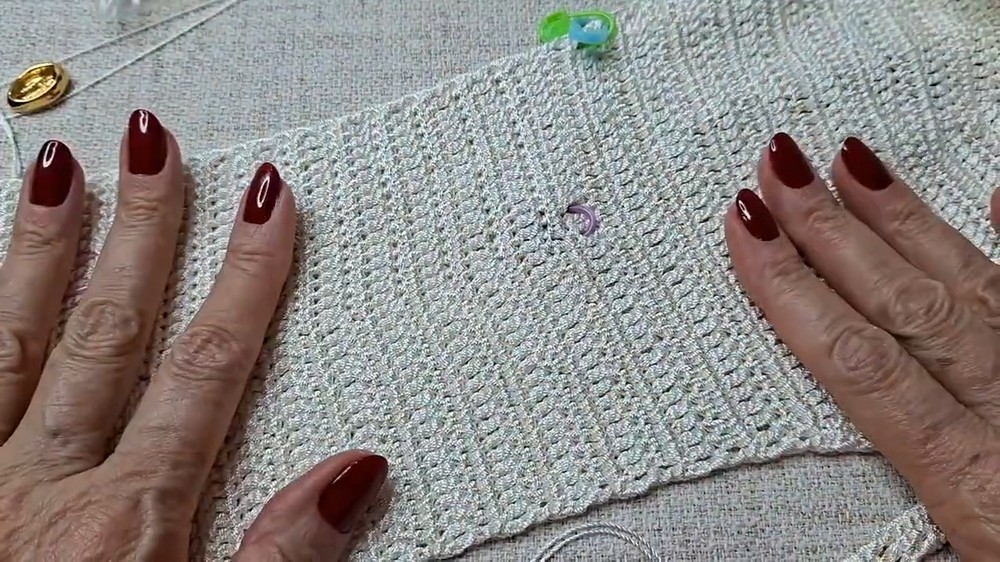
Step 6: Final Adjustments for Shoulder Slope
- Divide top width into two sections to accommodate the natural shoulder curve.
- Alternate between dc and hdc (half double crochet) as follows:
- Odd rows: Half the stitches in dc, the rest in hdc.
- Even rows: All dc across the row.
- Repeat this pattern alternation for a total of 20 rows (10 pairs).
- This provides the critical curve under the arms for a tailored, finished look.
Finishing Touches
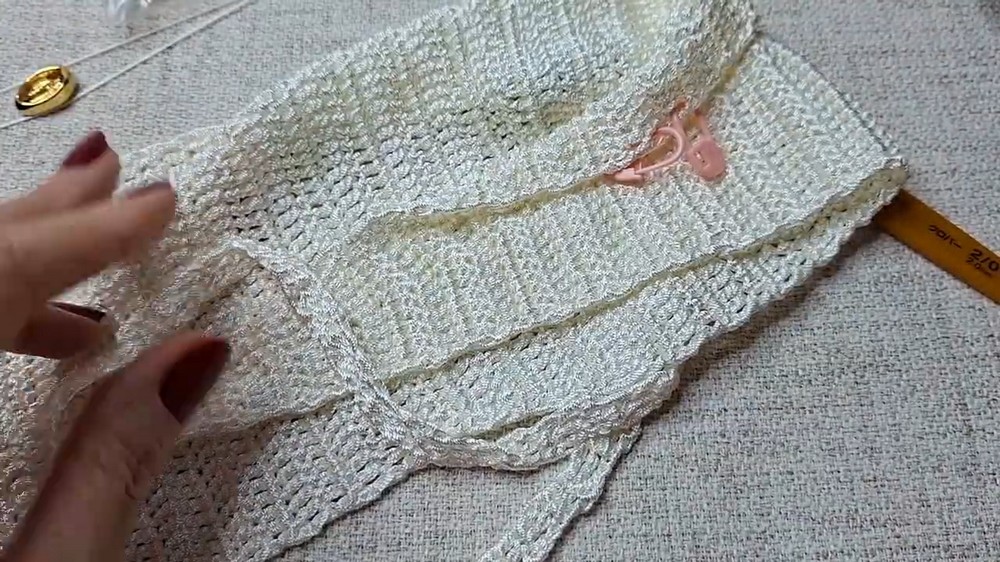
- Side Seams:
- Join edges using slip stitches or a tapestry needle for durable and smooth finishes.
- Use only the outer loops for a nearly invisible seam.
- Decorative Border:
- Add a border of sc around the entire crop top for a clean edge.
- Avoid tight tension to prevent puckering.
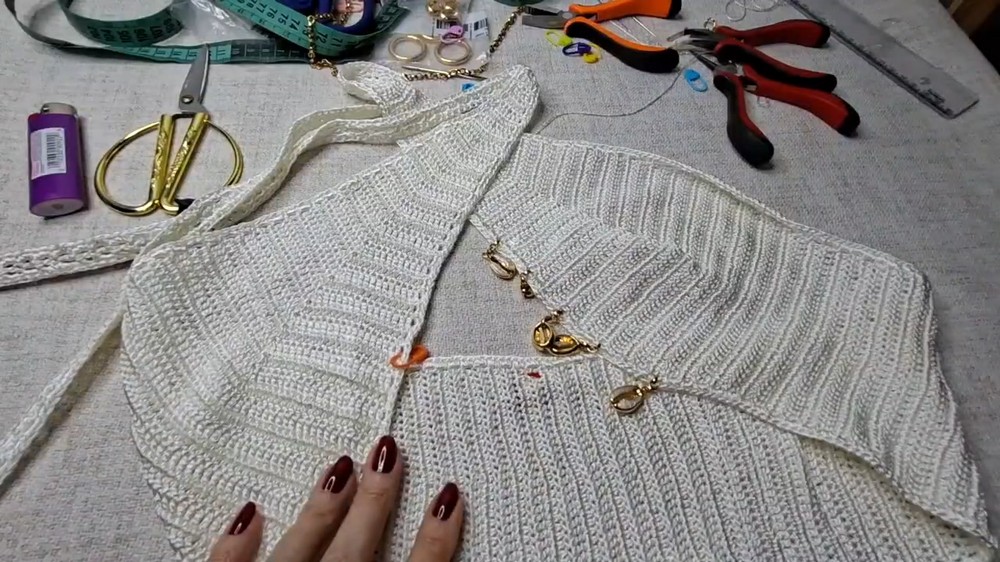
- Optional Embellishments:
- Attach beads or pendants along the edging. For example:
- Use jewelry chains and steel or Mother of Pearl beads.
- Alternate distances to match the overall aesthetic.
- Attach beads or pendants along the edging. For example:
Customization Ideas
- Use contrasting yarn colors for the strap or border to add visual interest.
- Expand or reduce the width increments in the body to accommodate specific sizing needs.
- Substitute heavier yarn with larger hooks for a winter ready texture.
- Add buttonholes instead of straps for a more secure fit.
Special Techniques
- Half Double Crochet:
- Yarn over, insert hook into stitch, yarn over, pull through a loop, yarn over, and pull through all 3 loops on the hook.
- Invisible Seam Joining:
- Use slip stitches on the back loop of stitches for clean, flat seams.
Conclusion
Congratulations, You've now created an elegantly tailored crochet crop top with precise measurements and beautiful accents. With a flowing underarm curve and optional jewelry inspired touches, this piece not only fits perfectly but also stands out as a creation of style and craftsmanship. Post pictures of your completed project, and don't forget to share your results on social media by tagging the creator.
Important Remarks
- Ensure equal increases and decreases for a symmetrical finish.
- Keep tension consistent, especially around curves.
- Always check for proper alignment before seaming garment sections.
Your finalized crop top will layer beautifully with other wardrobe pieces or shine as a standalone masterpiece-perfect for summer outings and casual gatherings.