Free Crochet Daisy Motif Bag Pattern: Brighten Your Style
See the magic of turning soft yarn into a charming daisy motif bag that's easy to make, perfect for your daily essentials, and adds a cheerful twist to your style.
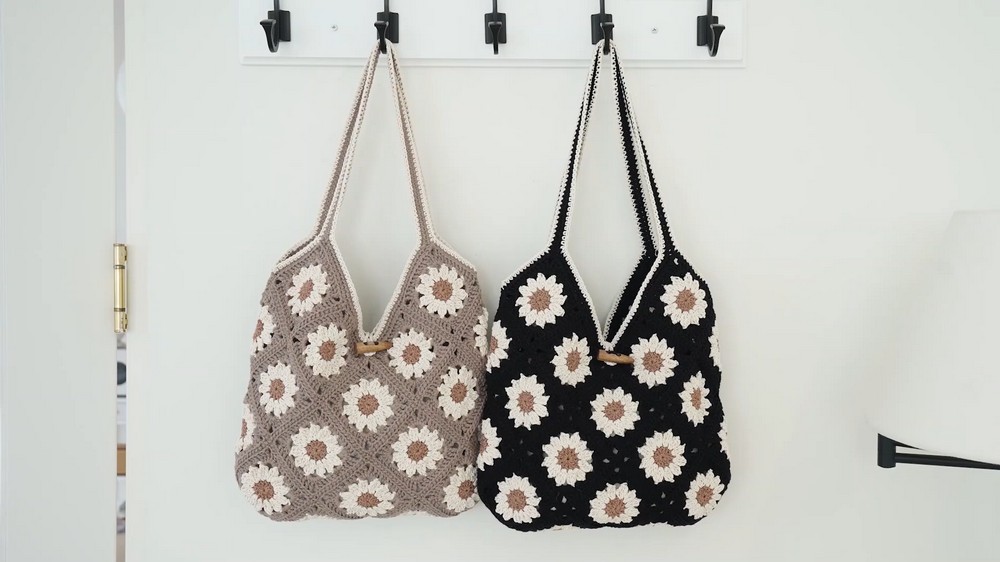
A charming bag with delicate daisy designs can bring a touch of nature's beauty to your everyday life. This bag stands out with its lovely floral motifs carefully crocheted to form a soft and cheerful appearance. Perfect for carrying small items like keys, wallets, and snacks, it is both lightweight and practical. Its unique design makes it a stylish choice for casual outings, shopping trips, or even as a cute gift for someone special.
Free Crochet Daisy Bag Pattern Perfect for Daily Use

The warm, sunny daisy shapes add a bright and happy feel, making it an eye-catching accessory wherever you go. Simple to crochet and fun to create, this bag combines functionality with art, giving you a useful yet elegant piece. The thoughtful details and soft materials make it ideal for all ages, adding beauty and value to your wardrobe. With an easy-to-follow pattern, it's an enjoyable project that lets you carry a piece of handmade joy every day.

Daisy Motif Crochet Bag Pattern
Materials
- Yarn:
- Main (Bag Base): 1 ball of cotton yarn (Base color, ~DK/Light Worsted, ~140m/ball)
- Flower Center (Linen Color A): ½ ball of linen yarn (~8g, yellow or contrasting center)
- Petals (Linen Color B): 2 balls of linen yarn (white or petal color, ~100g; for full motif coverage and finishing rounds)
- Hook: Size 6 (Japanese)-approx. 3.5-4 mm (adjust for gauge)
- Notions:
- Scissors
- Tapestry needle
- Ring stitch markers
- 4.5 cm wooden toggle button
Finished Size
- Width: 33 cm (when flat)
- Height: 34 cm (top), 25 cm (bottom)
- Handle Drop: 47 cm (approximately)
Gauge
- 1 completed daisy motif: 8 cm across
(Complete one motif and measure. If yours is larger than 8.5 cm, move to smaller hook size.)
Key Abbreviations & Special Techniques
- ch: chain
- sl st: slip stitch
- sc: single crochet
- dc: double crochet
- tr: treble crochet (double treble if stated)
- beg: beginning
- sp: space
- st(s): stitch(es)
- yo: yarn over
Special Techniques:
- Magic Ring: Adjustable loop for working motifs in the round.
- Bead Stitch: Grouped tall stitches worked together for petal puff.
- Back Loop Only (BLO): For surface texture and finishing.
- Invisible Join: For seamless motif joining and round ends.
Pattern
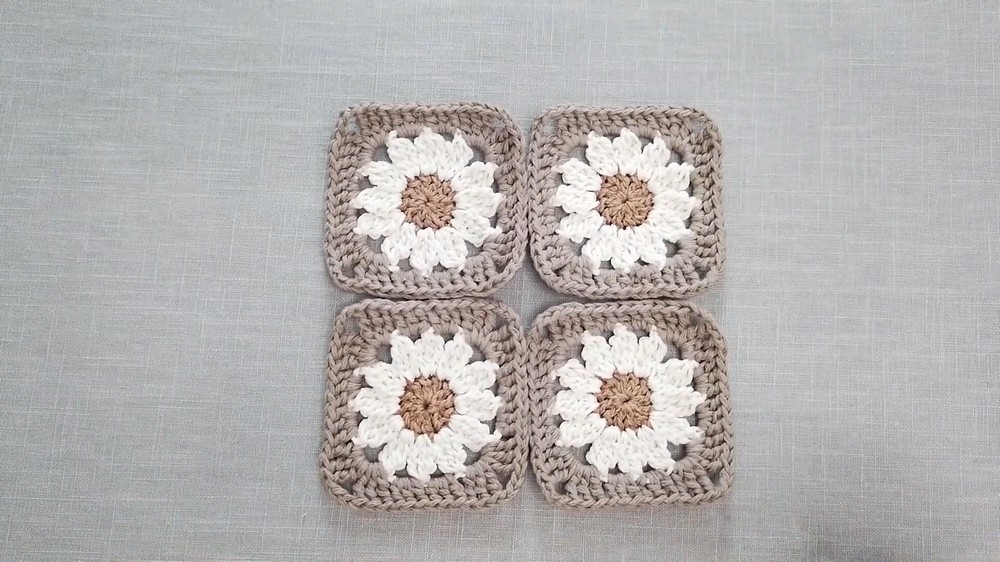
1. Daisy Motif (Make 30; Each 8 cm Wide)
Center (Color A - Linen, e.g., Yellow)
- Make a magic ring.
- Ch 3 (counts as dc), 11 dc into the ring. (12 dc total)
- Pull tail to close, sl st to top of ch-3 to join.
- Fasten off, leaving tail for weaving.

Tip: Do not tighten your slip stitches excessively in this round for a smoother join later.
Petals (Color B - Linen, e.g., White)
- Attach new color 6 stitches to the right of the previous join, or any space, for staggered petals.
- Ch 3.
- In the same st, work as follows for bead petal:
- [Bead Stitch]: [yo twice, insert into same st, yo, pull up loop, yo, draw through 2 loops] × 3, yo, draw through all loops.
- Ch 2.
- Repeat from Step 3 for the next st, working a bead petal and ch 2 all around (12 petals).
- At final petal, ch 2, join with sl st in top of start ch-3.
- Fasten off, tidy tails.

Petal tip: Work all tails in behind for a neat finish. Insert hook slightly to the right of ch-3s for less crowding.
Motif Base (Color C - Cotton/Main)
- Attach base color in the right-hand ch-2 sp of any petal.
- Ch 3 (counts as 1 dc), 2 dc in same sp.
- In next ch-2 sp:
- For corners: 3 tr, ch 3, 3 tr.
- For sides: 3 dc. - Repeat side and corner groups around:
- Sides: 3 dc in ch-2 sp,
- Corners: 3 tr, ch 3, 3 tr in single ch-2 sp - On last corner, stop before end-do not join with a sl st. Instead, finish with invisible join using tapestry needle for a neat edge.
- Weave in all ends.

Tip: Do not pull corners too tightly; this gives the square its shape.
2. Check Your Gauge & Make Motifs
- After finishing 1 motif, block and measure. If over 8.5 cm, switch to smaller hook.
- Complete a total of 30 motifs.

3. Motif Layout & Assembly
- Arrange motifs according to pattern diagram (not provided, so arrange as described: rows, verticals, folds).
- Connect horizontal rows first, then join vertical sections.
- Use whip stitch through back loops only, aligning corners and sides for a flat seam.
- At folded sections (bent lines), work each triangle and corner as described for clean finish.
- At intersections where three motifs meet, insert needle into the middle chain of all three chains/corners before proceeding.
Sewing/Joining Tips:
- Use a tail about 3.5 to 4 times the length of what you plan to join.
- Place markers in the middle chain of each corner as your guide.
- Join only back loops (for flat, seamless look).

4. Finishing the Bag Body
- After all motifs are joined, fold as described to connect bags' bottom and sides for 3D shape.
- Double-check the correct motifs connect to each other at sides and bottom.
5. Bag Top and Handles
Top Edge - Round 1 (Main/Bag Color)
- Join yarn at right-most top motif (side), in the right-most stitch of 3-dc group, BLO.
- Ch 1 (does not count as st), sc in BLO across top.
- When you reach a ch-3 sp at the edge-sc in sp, then ch 90 to form first handle.
- Join the chain to opposite corner with sc, careful not to twist.
- Continue sc, work 3-sc cluster (sc3tog) at each bag side valley (see video for insert points).
- At next ch-3 corner, repeat: sc in ch-sp, ch 90 for second handle, attach with sc in opposite corner.
- Continue sc around to start.
- Fasten off with invisible join.
Top Edge - Rounds 2 & 3 (Main Color)
- Attach yarn one stitch before valley, sc in BLO up to handle.
- On handles, sc tightly in each foundation ch (90 per handle).
- Over bag valleys: at the "valley" sc, work sc3tog as in first round.
- Repeat for both handles and all top edge stitches.
- Use markers at handle base and valleys for alignment.
- Finish with invisible join as above.

Top Edge - Round 4 (Petal Color, Linen)
- Repeat sc in BLO around as before, including valleys and handles.
- At one handle (opposite the planned closure), stop after valley to make button loop:
- Sc2tog at valley, ch 20 very tightly, sc2tog in next two sts. - Continue around, finish ends using tapestry join.
Top Edge - Round 5 (Petal Color)
- Work one last round of tight sc in BLO around outside edges of handles and top edge (gives finished look and reinforces).
- At the base or end of handle, or at valleys, work sc2tog as needed for smooth shaping.
- Finish off and weave all ends carefully into the bag.
6. Finishing Touches & Button Placement
- On inside of bag, run in and trim all remaining yarn tails invisibly.
- Attach Wooden Button:
- With bag flat, locate the center of the bag front, below the handle with no button loop.
- Place button just below valley where 3 motifs meet.
- Use tapestry needle and cotton yarn, sew button securely in place.
- Test loop and adjust if necessary for proper buttoning.

Tips, Customization & Final Remarks
- Color Play: Change petal or center colors for multi-colored daisies, or vary the background for patchwork effect.
- Strap Length: Adjust foundation chains to lengthen or shorten the bag handle for your comfort.
- Motif Size: For a larger bag, use a larger hook/yarn to increase motif size, but ensure you have enough yarn.
- Blocking: After assembly, lightly block the entire bag to even out edges and shape.
- Durability: If carrying heavier items, use tighter stitches, sturdy cotton, or reinforce the bag lining.
Conclusion
This Daisy Motif Crochet Bag combines structural interest with floral appeal and makes a stunning yet practical accessory. After completing 30 motifs, their assembly, and the finishing rows, you will have a beautiful, robust, and one-of-a-kind bag perfect for spring outings, casual events, or as a handmade gift. Attach the wooden toggle button for an artisan finish, and enjoy your striking, functional, and timeless creation.
Final Look:
The bag features a V-bottomed, softly structured body with distinct daisy motifs and sturdy flat handles, finished with a matching petal trim and a wooden toggle button at the front.