
Adorable Daisy Bucket Hat Pattern You Can Crochet Quickly
Enjoy sunny days with this free crochet daisy bucket hat pattern that featuring simple instructions for stylish, comfortable summer headwear.
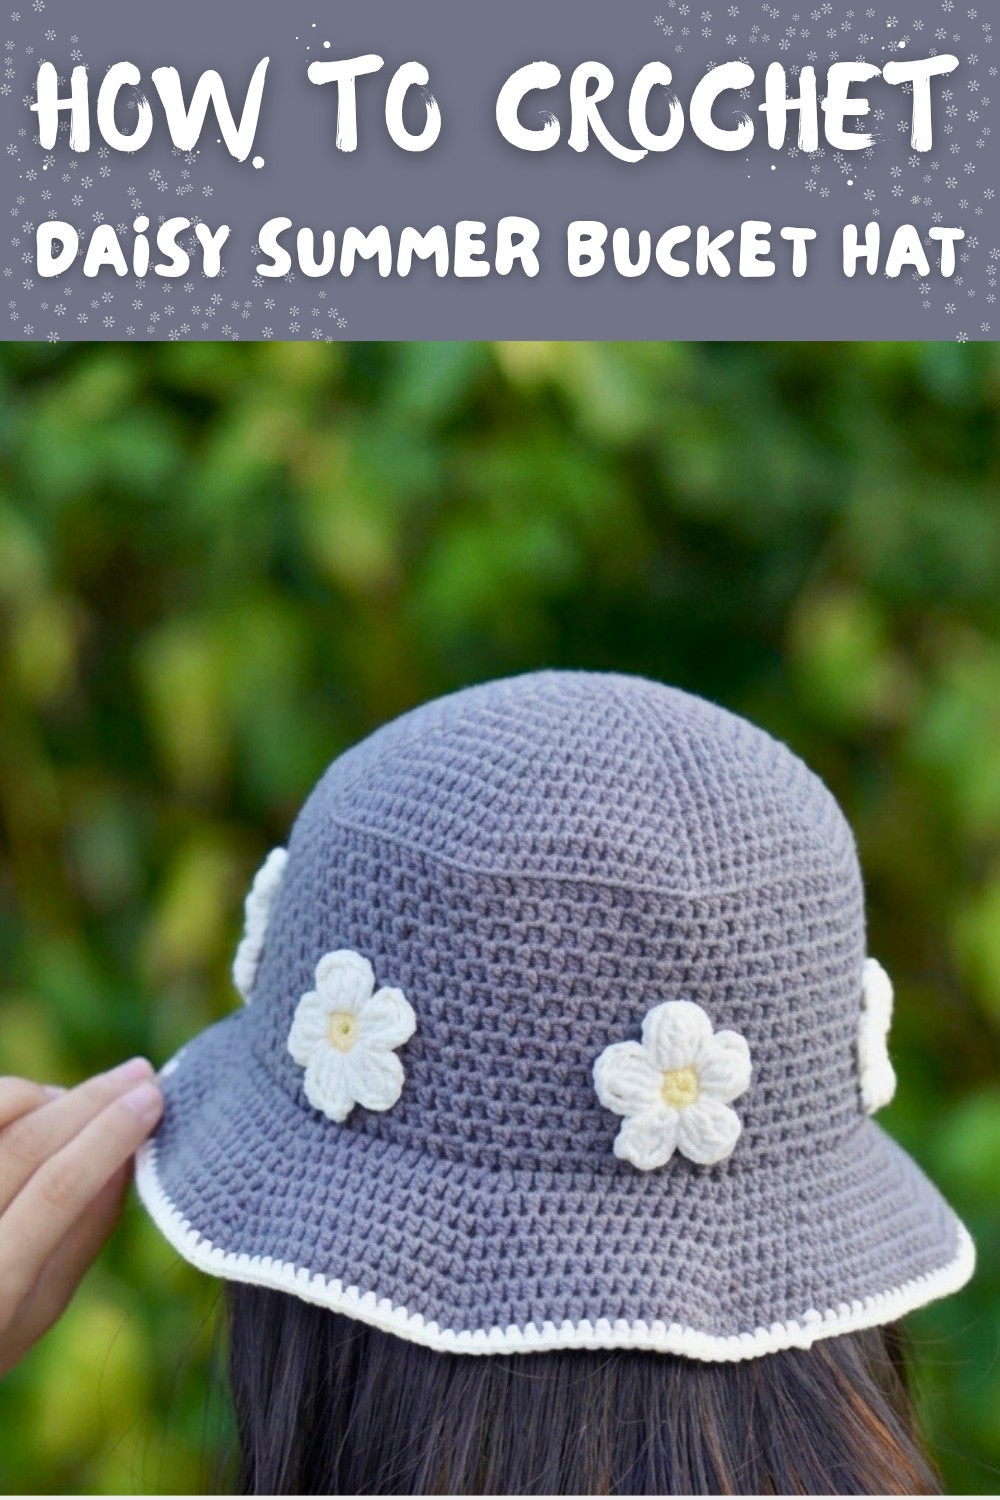
A charming accessory can brighten any outfit and give your look a fun twist. A crochet daisy bucket hat pattern is an exciting way to add a handmade touch to your collection while protecting your face from the sun. This hat is lightweight and soft making it very comfortable for daily wear during warm and sunny days. The lovely daisy motif adds a sweet and fresh vibe that works well in spring and summer. Using the crochet daisy bucket hat pattern allows you to customize colors and size to fit your style perfectly.
Crochet a Stylish Daisy Bucket Hat with This Easy Pattern

Besides offering shade and comfort this hat is very versatile. It pairs wonderfully with casual outfits like dresses shorts or jeans and can add flair to beachwear or festival looks. Making a crochet daisy bucket hat also helps beginners practice basic crochet stitches while creating something functional and pretty. The handmade feel of this hat gives it a unique charm that mass-produced hats cannot match.

You can style your crochet daisy bucket hat in many ways. Match it with light-colored clothes for a soft look or go bold by pairing it with vivid hues for contrast. This is an ideal project for anyone who wants to combine creativity with practicality. Whether gifting a friend or adding to your wardrobe the crochet daisy bucket hat pattern invites you to enjoy the fun of making a fashionable accessory that feels personal and cozy. With simple materials and a lovable design this hat makes every sunny day feel brighter and more cheerful.
Daisy Summer Bucket Hat Crochet Pattern
This charming and lightweight Daisy Summer Bucket Hat is an ideal project for beginners looking to expand their skills and enjoy a stylish, wearable accessory. Designed in Small and Medium sizes with a fun textured brim and decorative daisies, this hat combines simple stitches with a fresh summer vibe. Follow this detailed, easy-to-understand guide to bring your own version to life!
Preparation Tips & What to Know Before You Begin
- Review essential crochet techniques: magic ring, chain (ch), single crochet (sc), half double crochet (hdc), triple crochet (tr), slip stitch (sl st).
- Understand the difference between Back Loop (BL) and Front Loop (FL) crochet to create texture.
- Use lightweight, breathable yarn such as 5-ply milk cotton for summer comfort.
- Equip yourself with a 3.5 mm (size 6/0) crochet hook, scissors, yarn needle, and optional stitch markers.
- Maintain even tension and choose a comfortable hand position for consistent stitching.
- This pattern covers Small and Medium sizes; watch stitch counts closely for correct sizing.
- Know that stitch counts and join methods matter for shaping the hat properly.
Essential Pattern Information
- Worked in rounds from the top down, starting with the crown.
- The hat consists of three sections: top (crown), middle (body), and brim.
- Crown rounds gradually increase to fit the head's curve.
- Body rounds are created using half double crochets worked in back loops only for subtle texture.
- The brim is expanded with spaced increases in the front loop for structure.
- Separate crochet daisies are sewn on as decorative accents.
- Uses US crochet terminology.
- Each round concludes with a slip stitch; chain 1 usually initiates the next round.
- Keep track of stitch counts to achieve shape and size.
Overview of Construction
- Begin with a magic ring to form the crown.
- Increase half double crochets strategically for smooth growth.
- Crochet the middle section in back loop half double crochets for textured lines.
- Build the brim wider with repeated increases in front loops.
- Crochet daisy motifs separately and stitch onto the hat.
Difficulty Level
Perfect for beginners who know basic stitches and want to learn working in rounds and loop-specific crochet techniques.
Final Dimensions
- Small: Approximately 20 inches (51 cm) head circumference
- Medium: Approximately 22 inches (56 cm) head circumference
Required Materials
- 5-ply milk cotton yarn (lightweight for warm weather)
- Crochet hook 3.5 mm (US 6/0)
- Yarn needle for sewing and finishing
- Scissors
- Stitch markers (optional, for round tracking)
Gauge Information
- Approximately 12 half double crochet stitches x 10 rows = 4 inches (10 cm) in rounds
- Gauge is flexible; adjust hook size for tighter or looser fabric as needed
Common Crochet Terms Used
- ch: chain
- sc: single crochet
- hdc: half double crochet
- tr: triple crochet
- sl st: slip stitch
- MR: magic ring
- st(s): stitch(es)
- BL: back loop (crochet only in the back loop of the stitch)
- FL: front loop (crochet only in the front loop of the stitch)
- inc: increase (placing two stitches in the same stitch)
Unique Stitch Techniques Explained
- Magic Ring (MR): Create an adjustable loop that allows for a tight center in circular projects.
- Half Double Crochet Back Loop (hdc BL): Insert the hook only under the back loop of the stitch, forming a ribbed texture.
- Triple Crochet (tr): A taller crochet stitch made by yarning over twice before inserting the hook.
Detailed Stepwise Crochet Instructions
Top Section (Crown)
Round 1:
- Begin with a magic ring.
- Ch 1, crochet 8 half double crochets (hdc) into the ring.
- Join with a slip stitch to the first hdc (8 stitches).
Round 2:
- Ch 1.
- Crochet 2 hdc into each stitch around (increase in every stitch).
- Join with slip stitch (16 stitches).

Round 3:
- Ch 1.
- Hdc in first stitch, 2 hdc in next stitch. Repeat this 8 times.
- Join with slip stitch (24 stitches).
Round 4:
- Ch 1.
- Hdc in next 2 stitches, 2 hdc in next stitch. Repeat 8 times.
- Join with slip stitch (32 stitches).
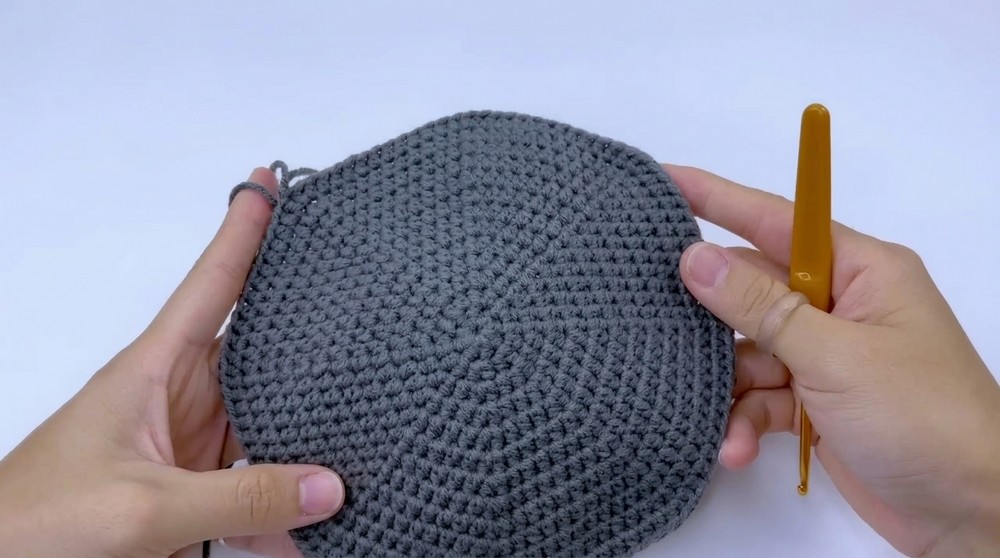
The top of the hat is complete here, shaped for the crown.
Beginner Tip: These rounds increase the circle smoothly to fit the top of the head. Half double crochet stitch gives flexible fabric while increasing each round widens the circle evenly.
Middle Portion (Body)
Round 1:
- Ch 1.
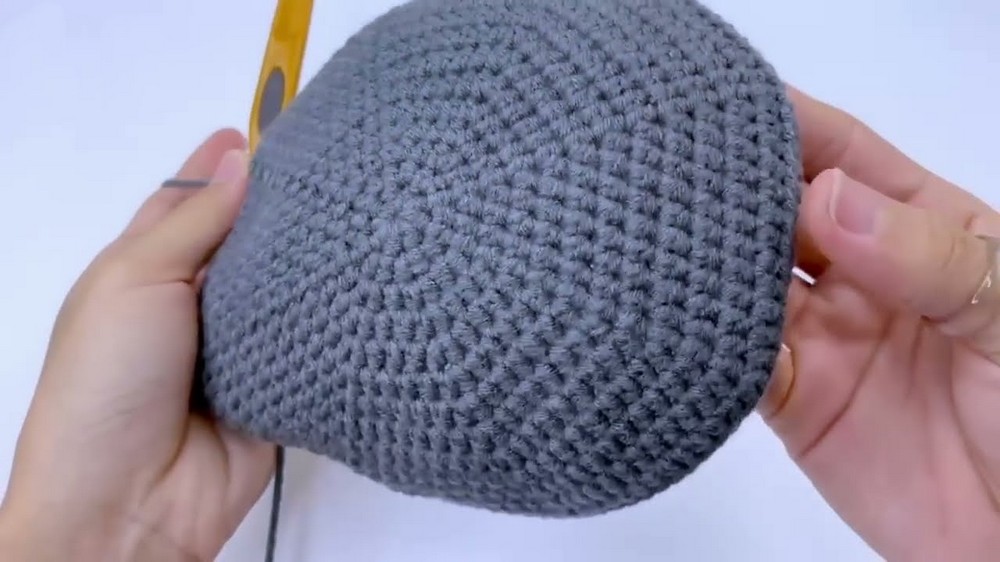
- Work hdc into every stitch, but only through the back loop (hdc BL) all around.
- Join with slip stitch (104 stitches for Medium size; adjust if making Small).
Round 2:
- Ch 1.
- Repeat: hdc, then hdc BL, alternating each stitch around.
- Join with slip stitch (104 stitches).
Round 3:
- Ch 1.
- Repeat: hdc BL, then hdc, alternating each stitch around.
- Join with slip stitch (104 stitches).
- Repeat this alternating pattern of rounds 2 and 3 continuously until you complete Round 13 in this section.
Clarification: Working only in the back loop creates a textured ribbing effect. Alternating the direction of half double crochets adds interest to the surface and provides greater stretch and comfort.
Brim Construction
Round 1:
- Ch 1.
- Hdc in next 10 stitches, 2 hdc in next stitch (increase). Repeat 9 times.
- Hdc in next 5 stitches.
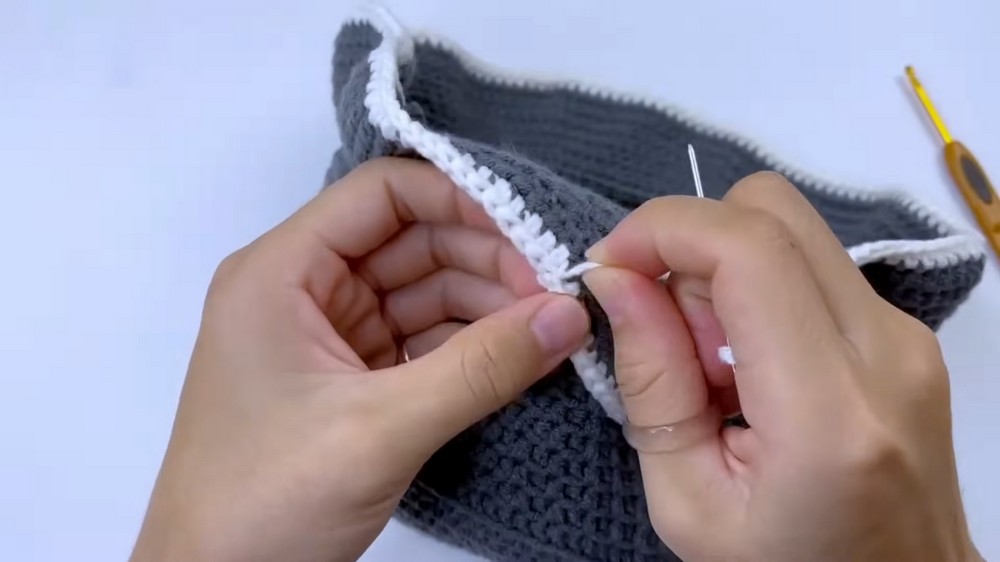
- Join with slip stitch, all stitches worked only in the front loops (FL).
- Stitch count: 113.
Round 2:
- Ch 1.
- Hdc in next 11 stitches, 2 hdc in next stitch. Repeat 9 times.
- Hdc in next 5 stitches.
- Join with slip stitch (122 stitches).

Rounds 3 to 7:
- Ch 1.
- Hdc in each stitch around.
- Join with slip stitch (149 stitches).
Brim is now complete.
Simple Explanation: The brim is made wider by increasing stitches evenly spaced throughout the round. Crocheting in the front loops only helps the brim gain flexibility and maintain shape.
Crafting the Daisy Flower
Round 1:
- Start with a magic ring.
- Ch 1, work 10 sc in the ring.
- Join with slip stitch (10 stitches).
Petals (Make 5 petals):
- Attach white yarn with slip stitch at any point on ring edge.
- Ch 4, make 2 triple crochets (tr) in the next stitch, then 1 tr, ch 4, slip stitch in the following stitch.
- Repeat the petal sequence until 5 petals are made in total.

Putting It All Together: Finishing Steps
- Evenly space and sew the daisy flowers around the middle section using yarn needle and matching yarn.
- Weave in all loose ends carefully for neatness.
- Lightly block the hat if desired to set shape and smooth out inconsistencies, focusing especially on the brim's curve.
- Trim any leftover yarn tails.
Common Issues and Simple Fixes
- Hat fits too snug or loose: Change hook size or yarn weight to adjust tension and fit.
- Shape distortion: Check stitch counts regularly to prevent accidental additions or drops.
- Difficulty with back loop stitches: Practice on small swatches before continuing the main project.
- Brim lacks flexibility: Ensure increases are spaced as directed and that stitches are worked only in the front loop.
Other Fun Projects Using These Techniques
- Use the half double crochet back loop method to make textured scarves or wrist warmers.
- Crochet textured bags or basket liners employing the same stitch technique.
- Craft matching hair accessories, like headbands or scrunchies, using daisy flowers.
- Create colorful coasters or placemats using the circular magic ring start and gradual increases.
- Try different flower motifs with triple crochet petals for decorative patches on clothing or blankets.