
Easy & Free Crochet Mesh Top Pattern to Try Today
Learn to make a lightweight and stylish crochet mesh top that is easy to wear, looks fashionable, and adds a touch of charm to your everyday outfits.
Crocheting a lightweight and stylish top is an exciting way to express creativity while making something useful and beautiful. This design creates a soft and airy piece of clothing that feels comfortable and looks fashionable. Featuring a delicate mesh style with open spaces, it allows air to flow, making it perfect for warm weather or layering over another outfit. The pattern includes simple stitches that come together like a puzzle, forming a textured yet elegant top.
Free Crochet Mesh Top Pattern That Looks Great

Its appearance can be as colorful or neutral as you want, giving you the freedom to choose yarn that matches your style. The beauty of this top lies in the intricate yet simple look that pairs well with jeans, skirts, or even shorts. It can be casual or added to a fancier outfit for special occasions. The design is lightweight and easy to wear, creating a piece of clothing that fits comfortably without feeling heavy, while looking like it came straight from a boutique.
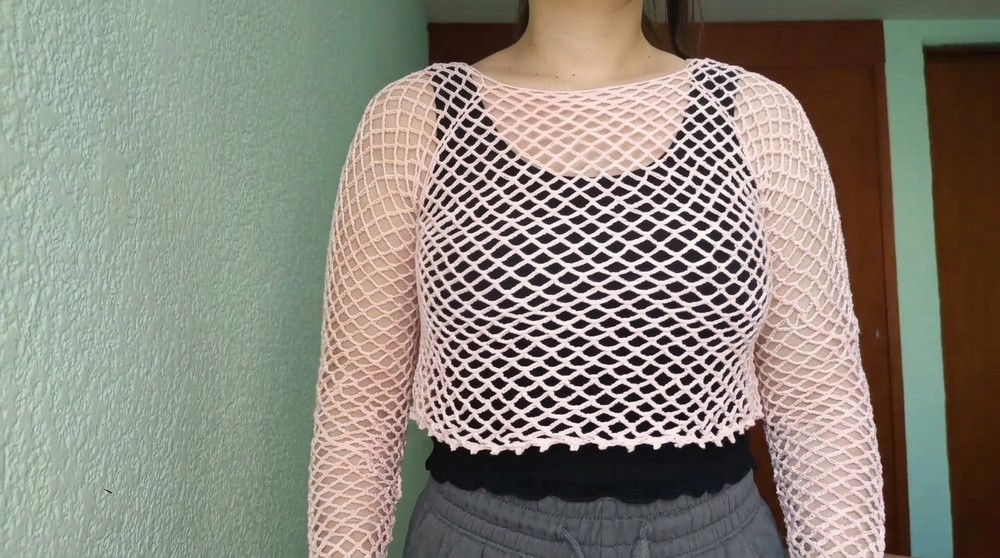
Long Sleeve Net Stitch Blouse Pattern
Materials
- Yarn: Thin cotton thread (e.g., mercerized Omega cotton #6). You may select comparable threads in similar thickness.
- Crochet Hook: 2.5 mm, or slightly larger than the hook recommended for your yarn. The larger hook creates an airy net effect.
- Stitch Markers: To mark increases and division points.
- Scissors
- Measuring Tape
- Yarn Needle: For sewing and weaving in ends.
Special Techniques
- Slip Knot & Foundation Chain
- Joining Chains in the Round
- Net Stitch: Alternating chains and single crochets to form mesh.
- Increases: Adding chains in key areas to shape the yoke and sleeves.
- Decreases: Skipping specific holes to taper the sleeves.
- Finishing Picot Edge: Creating peak edges for final rounds.
Step-by-Step Instructions
1. Foundation & Neckline
- Create a Slip Knot.
- Crochet Foundation Chain:
- Work chains in multiples of five (e.g., 130 chains = 45 cm for medium size).
- Tip: Adjust total chains for your head size. The chain ring must slip easily over your head.
- If uncertain, measure the circumference of your head and chain until you reach that length.
- Check: Divide total chains by 5. The result must be an even number to evenly distribute increases (e.g., 130 ÷ 5 = 26). If not, add/subtract chains as needed.
- Join Chain into a Ring:
- Ensure chain is straight and not twisted.
- Insert hook into first chain, slip stitch to join, forming a ring.
- Make a chain, then a single crochet into the same chain to begin the round.
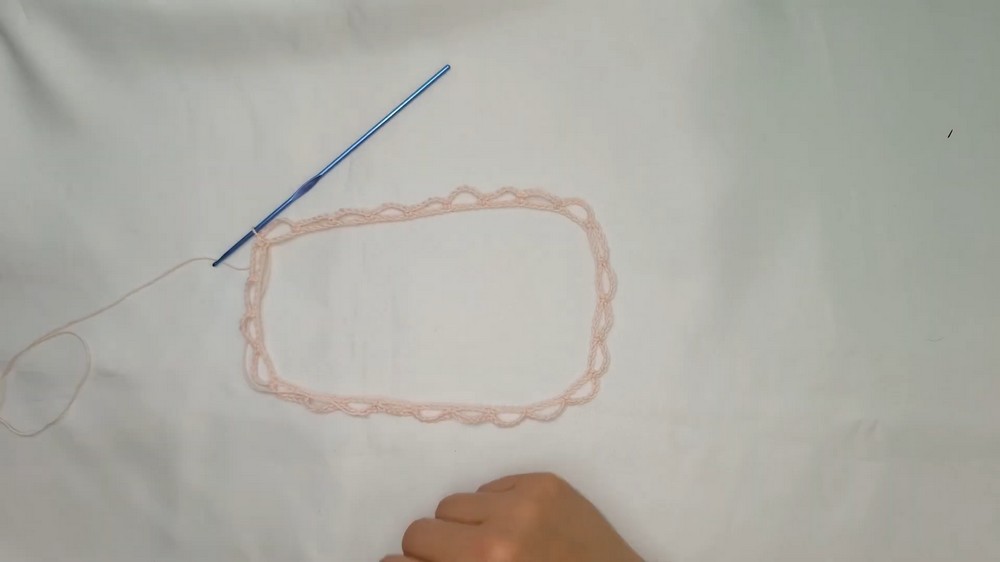

2. Net Yoke Formation (Top Part)
- Round 1-Set Up the Mesh:
- Repeat:
- Chain six.
- Skip five chains, single crochet in the sixth.
- Continue around.
- At end, slip stitch to join at starting single crochet.
- Repeat:
- Count Mesh "Holes":
- You should have one hole for every five chains (e.g., 26 holes for 130 chains).
- Divide for Yoke & Mark Corners:
- Using stitch markers, divide holes as below:
- From end/start point, count 4 holes, mark next.
- From marker, count 7 holes, mark next.
- Count 4 holes, mark next.
- Count 7 holes, mark next. Four corners should be marked.
- These marks designate increases and eventually sleeves.
- Using stitch markers, divide holes as below:
- Yoke Rounds & Increases:
- Begin each round with slip stitches into three chains (to reach mesh center).
- At each marked corner, work five chains between single crochets (instead of six) to create increases.
- Move marker to new increase at each round.
- All other spaces: Repeat six chains, single crochet in mesh center.
- Continue this process for 16 rounds for medium size, or fewer for small (12-13), more for large (18-19).
- Try on as you go: Fold work, check that corners coincide under the arms and garment comfortably fits over bust.

3. Body Construction
- Separate Body from Sleeves:
- Once yoke reaches desired size, cut yarn.
- Attach new yarn at either the front or back mesh hole.
- Begin working in rounds under the arms, skipping the mesh holes marked for sleeves.
- Continue Body in Net Stitch:
- Work six chains, single crochet in each mesh hole (except sleeve holes).
- At corners, chain six, then single crochet in corner mesh hole.
- Work in a continuous round until desired blouse length is achieved.

4. Waist Shaping and Finishing Edge
- Final Round for Waist Shaping: (Optional)
- At end of final round for body, work one chain.
- Repeat:
- Two single crochets,
- Chain three, slip into the tops of the previous two single crochets (forms a picot),
- Two more single crochets.
- Single crochet in center mesh, repeat pattern.
- This creates a gently scalloped "picot" edge and slightly reduces width.
- For a looser fit, work three single crochets between picots instead of two.
- Finish round, slip stitch to join. Cut yarn, weave in end.

5. Sleeves
- Attach Yarn at Underarm Mesh Hole.
- Repeat Sleeve Rounds:
- Begin with chain and single crochet in mesh center.
- Net stitch: Six chains, single crochet in next mesh hole.
- Sleeve shaping:
- To make wide sleeves: Continue this pattern for desired length.
- To taper sleeves: Every five rounds, decrease one mesh hole at sleeve end by skipping a mesh and joining next (i.e., after four rounds, in fifth, skip one hole at end).
- After decrease round, single crochet into both mesh holes together at join.
- Usual sleeve length: ~50-57 rounds for medium/long sleeves. By the final round, sleeve should have 8-10 mesh holes for a snug fit at the wrist.
- Repeat for Other Sleeve.
- Ensure decreases and length match for both sleeves.
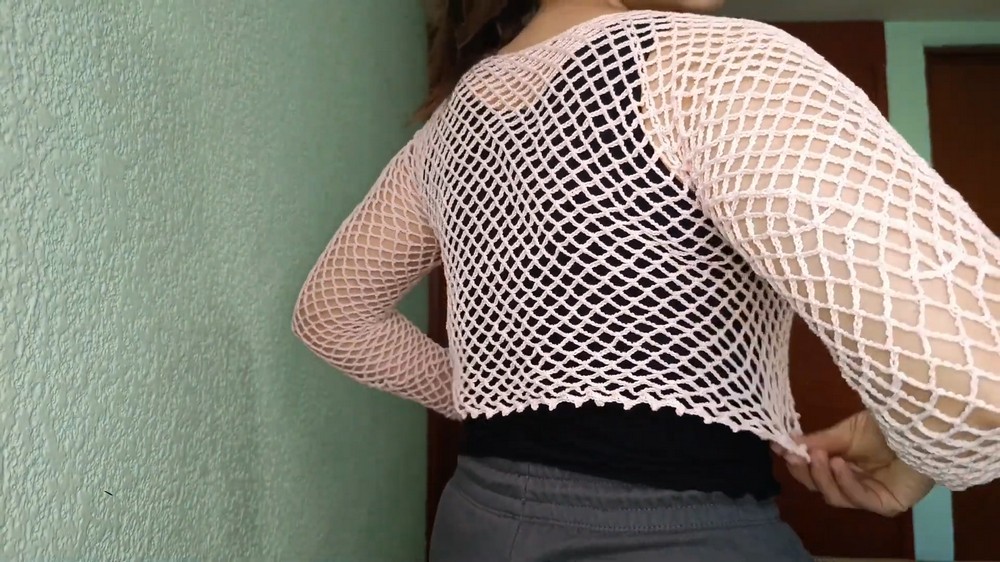
6. Finishing
- Weave in all ends with yarn needle.
- Block garment if necessary to shape.
- Try on your blouse to ensure desired fit and adjust picot or sleeve decreases as needed.
Pattern Suggestions & Tips
- Fit Adjustments: To create a looser or more fitted garment, alter chain counts and number of rounds in yoke.
- Yarn Choice: Cotton thread is recommended for breathability; select another fiber for warmth or drape.
- Hook Size: Using a hook larger than standard gives a softer, more flexible net.
- Mesh Customization: Adjust chains between spaces for a denser or airier fabric.
- Sleeve Width: For bishop sleeves, avoid decreases; for tapered sleeves, stick to decrease schedule.
Care & Maintenance Tips
- Gentle Wash: Use mild soap and cool water; air dry flat to preserve shape.
- Store Flat: Prevent stretching; do not hang.
- Repair: If mesh holes widen over time, re-crochet affected areas with matching yarn.
Final Words
Congratulations! You have successfully completed a lightweight, long sleeve blouse using the net stitch. This blouse is versatile, easy to customize, and fast to work. The open mesh pattern provides airflow, making it perfect for layering or wearing alone. With careful finishing and custom shaping, your blouse will be stylish, comfortable, and durable.