
Free Crochet Summer Ruffle Hat Pattern for Beach Days
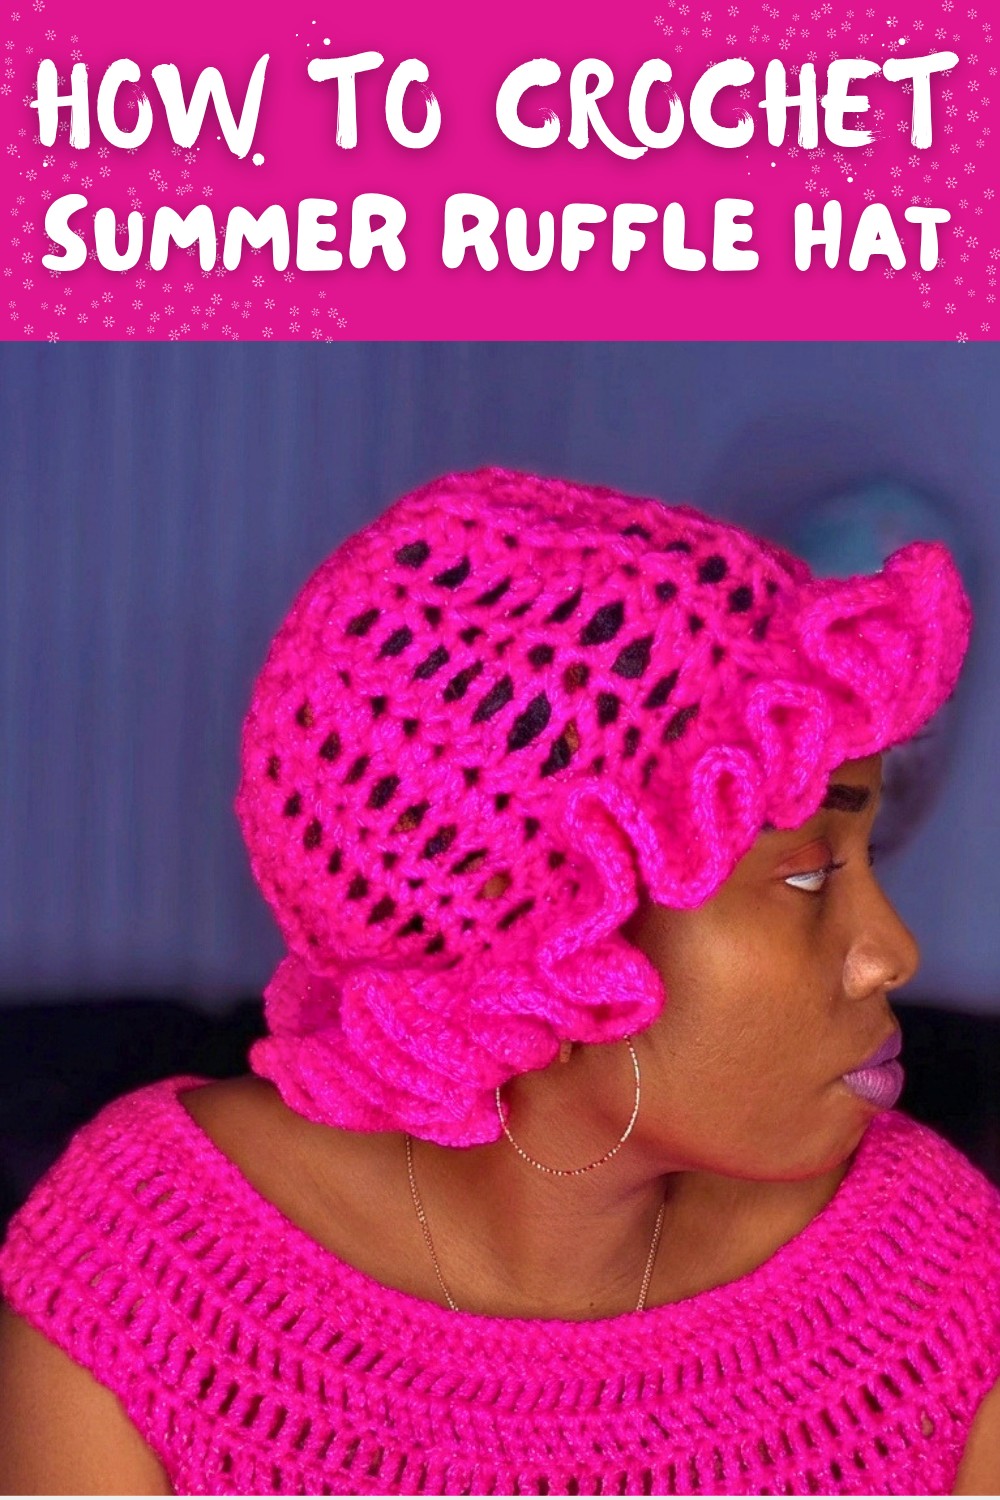
When the warm sunshine fills the days many people look for a stylish way to stay cool and comfortable while protecting themselves from the sun. This type of hat is not only practical for shading your face and keeping you cool but also adds a lovely touch to your summer outfit. Soft and breathable materials make it perfect for hot weather, allowing your head to stay fresh without feeling sweaty or heavy. What makes this hat special is its playful ruffled edge which gives it a lively and charming look that stands out in any crowd. Whether you are going to the beach enjoying a picnic or just taking a walk outside this hat offers both comfort and style.
Easy and Stylish Free Crochet Summer Ruffle Hat Pattern

The pattern designed for this hat is easy to follow making it a wonderful project for beginners or anyone looking to create something beautiful with their own hands. You will enjoy the satisfaction of seeing how simple stitches come together to form a neat and eye-catching accessory. Because it is lightweight you can fold it and carry it anywhere without any hassle. This design fits many head sizes and can be adjusted so the whole family can enjoy it. The ruffles add a fun bounce which makes the hat look lively and full of character.
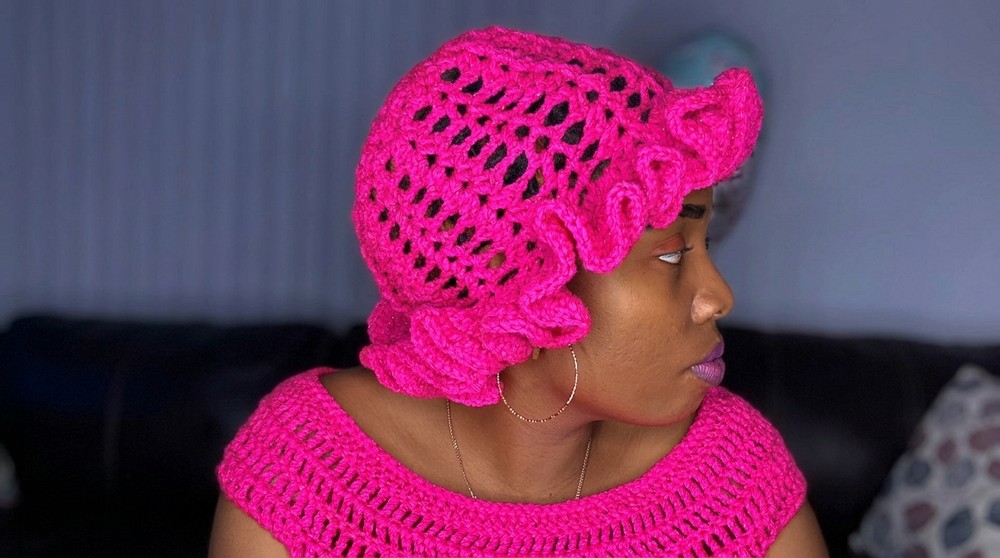
Those soft curves also help keep your skin safe from the sun's rays by providing extra shade around the edges. With this Crochet Summer Ruffle Hat Pattern you get a practical item that doesn't sacrifice fashion. It's ideal for warm days when you want to protect yourself while looking trendy. Plus it lets you add your own personal touch by choosing colors and yarn types that you love. This makes it a great gift idea too because every hat made with this pattern is unique and full of care. Your summer wardrobe becomes more vibrant and your days more comfortable with this beautiful handmade hat.
Before You Begin Your Crochet Hat Project
- Use a yarn blend of approximately 97% acrylic with 3% metallic fiber for sparkle and durability.
- Crochet hook size suggested: 5 mm (H-8).
- Have a yarn needle handy for weaving in ends at the end of your project.
- Keep a pair of scissors ready to cut yarn as needed.
- This pattern is beginner-friendly and can be completed in under an hour with focus.
- Light worsted weight (category 3) and medium worsted weight yarns both work well for different looks.
- Before starting, understand basic crochet techniques including the magic ring, double crochet, chains, and slip stitches.
Pattern Insights & Notes
- The hat is worked in rounds starting with a magic ring at the crown, increasing evenly to form a circle.
- Two main stitch patterns are used: Shell stitch and V stitch, alternating in later rounds.
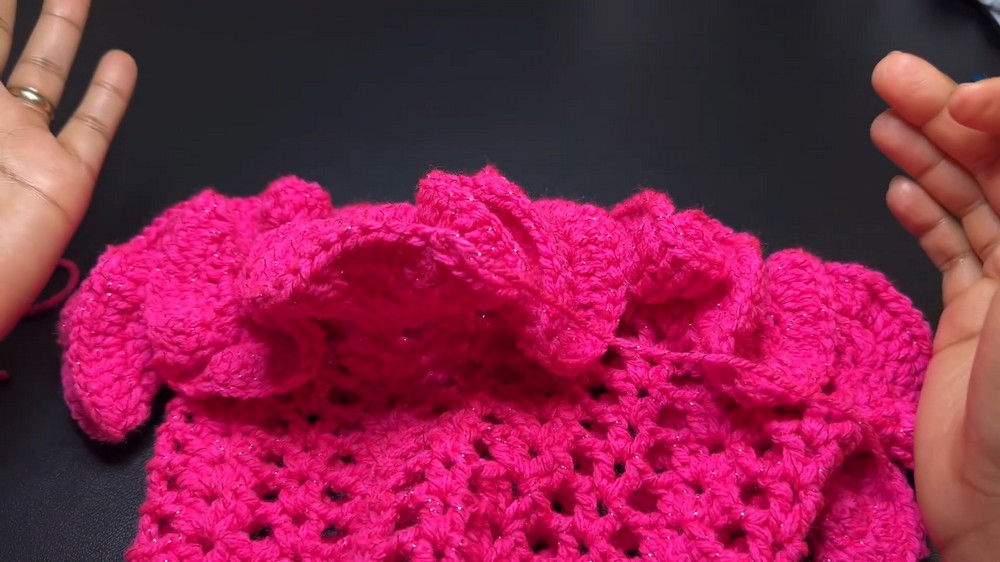
- The ruffle edging is worked last and involves layering double crochets for volume.
- Chain 3 at the beginning of rounds counts as the first double crochet.
- All rounds are joined with a slip stitch, and the starting stitch of each round is clearly marked.
- The project is constructed from the top down.
Overview of Construction
- Begin with a magic ring and a base of clusters of double crochets.
- Increase rounds alternate between shell stitches and V stitches for texture and shaping.
- Continue increasing until desired height and crown size is reached.
- Finish with layered ruffles worked around the bottom edge to create volume and flair.
Difficulty Level
Perfect for beginner crocheters looking for an introductory hat project with interesting stitch patterns.
Finished Dimensions
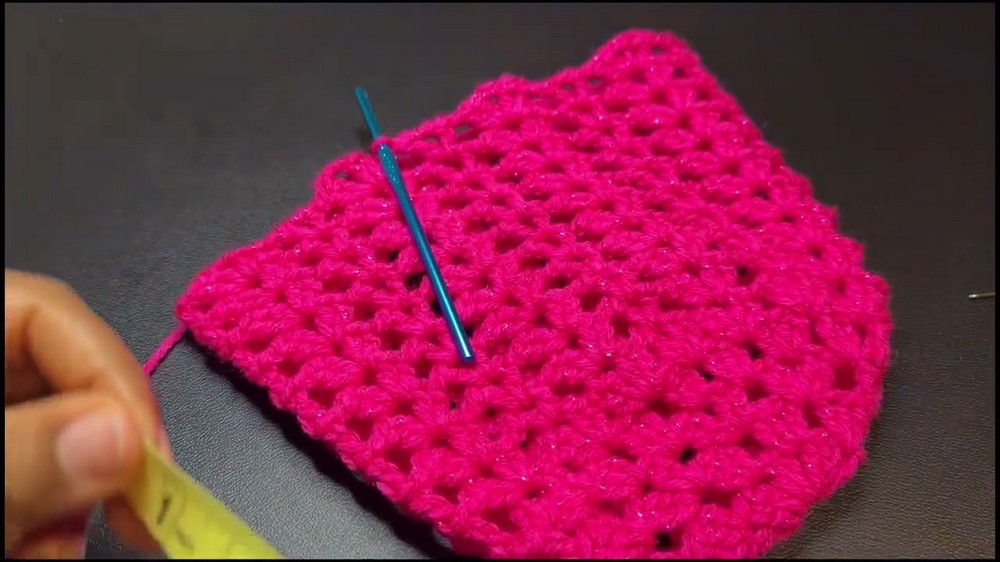
- Diameter approx. 6½ inches (16.5 cm) at crown after first 5 rounds.
- Total height will depend on number of repeated rounds, approximately adult size after 14 rounds before ruffles.
Materials Needed
- 1 skein (approx. 100g) worsted weight yarn (97% acrylic, 3% metallic fiber).
- 5 mm crochet hook (H-8).
- Tapestry needle for weaving ends.
- Scissors.
Sizing & Measurements
- Crown diameter after initial rounds: ~6½ inches (16.5 cm).
- Adjust size by adding or subtracting rounds.
- Ruffle width varies by number of ruffle rounds added.
Gauge Information
- Gauge is flexible but roughly: 12 double crochets and 6 rows = 4 inches (10 cm).
- Gauge is based on V and shell stitch pattern repeats.
Stitch Shortcuts Used
- ch = chain
- dc = double crochet
- sl st = slip stitch
- st = stitch
- sp = space
- sk = skip
Special Techniques Explained
- Magic Ring: Adjustable ring to start rounds tightly at the center, preventing a hole.
- Shell Stitch: 2 dc, ch 2, 2 dc worked into same stitch or space to form a fan shape.
- V Stitch: (1 dc, ch 2, 1 dc) worked into same stitch or space, creating a V shape.
- Cluster: 3 dc grouped closely, often separated by ch 1 spaces for texture.
- Ruffle: Multiple double crochets layered in the same stitch/space to create a frilly edge.
Crochet Instructions: Step-by-Step Making of Your Hat
Part 1: Starting the Crown (Rounds 1-2)
- Round 1:
- Make a magic ring.
- Ch 3 (counts as first dc).
- 2 dc in ring, ch 1, repeat until you have 8 ch-1 spaces total (this includes chaining one after second dc in first cluster).
- Sl st into top of the beginning ch 3 to close round.
- Pull tail tightly to close magic ring.
- Simple Explanation:
You start with a little circle called a magic ring. You crochet groups of two double crochets separated by chain spaces inside the ring to form a small round base. - Round 2:
- Sl st into next ch-1 space to position yourself.
- Ch 3 (counts as first dc).
- In the same ch-1 space, make 2 more dc (total 3 dc in this space forming a cluster).
- Ch 1.
- In each of the remaining ch-1 spaces around work clusters of 3 dc separated by ch 1.
- Join with a sl st to the top of the initial ch 3.
- Simple Explanation:
You make little groups of 3 double crochets in each gap around the circle which helps your hat get bigger and start taking shape.
Part 2: Creating Shells and Chains (Rounds 3-5)
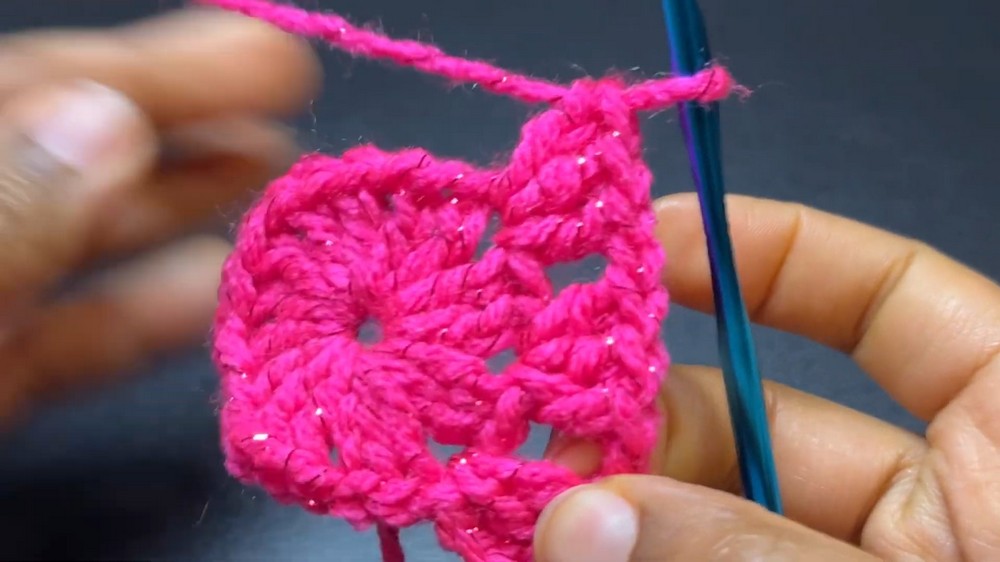
- Round 3:
- Sl st to next ch-1 space.
- Ch 3 (counts as first dc).
- In same space, (2 dc, ch 2, 2 dc) - this creates a shell stitch.
- Ch 1.
- Repeat shell stitch in each ch-1 space around, separated by ch 1.
- Join with sl st to top of starting ch 3.
- Simple Explanation:
This round adds 'shells' which look like little fans that spread out to widen your hat nicely. - Round 4:
- Repeat same stitch pattern as Round 2 (cluster stitches) but place clusters in each chain 2 space from previous round.
- Sl st to join.
- Simple Explanation:
You return to clustered double crochets to fill in spaces and keep the shape. - Round 5:
- Repeat the shell stitch round again like Round 3.
- Sl st to close.
- Simple Explanation:
You alternate between shell stitch rounds and cluster rounds for texture and stretch.
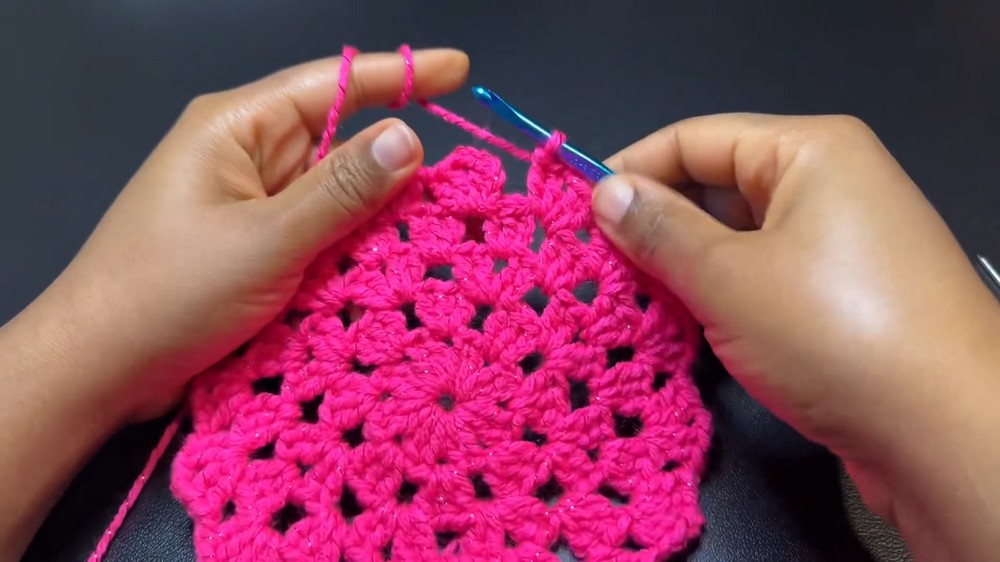
Part 3: Alternating Shell and V Stitch Pattern (Rounds 6-14)
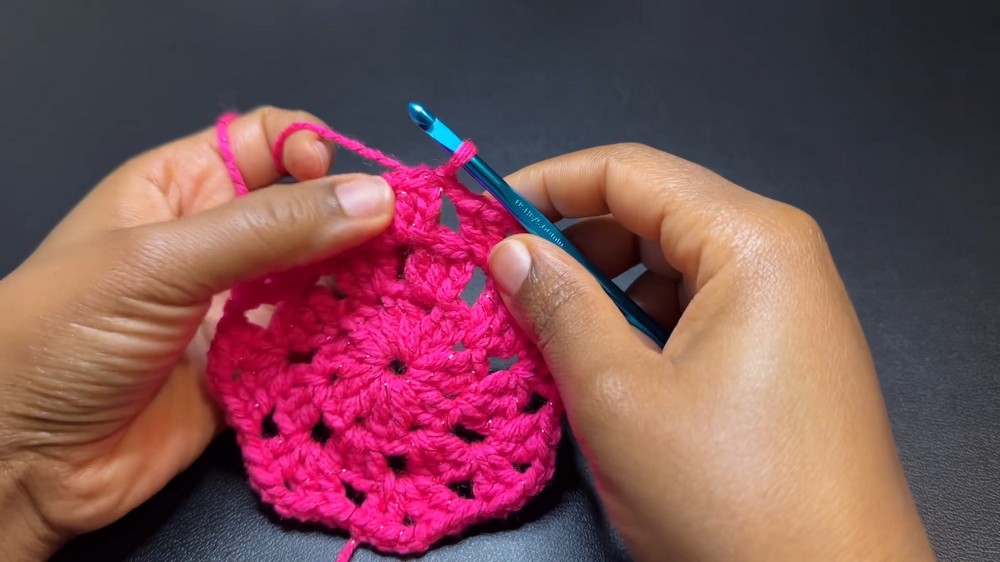
- Round 6 onwards:
- Start slip stitching to first ch-2 space.
- Chain 3 (counts as first dc).
- Create shell stitch (2 dc, ch 2, 2 dc) in ch-2 space.
- Ch 1.
- Skip next ch-1 space; in next ch-2 space make V stitch (1 dc, ch 2, 1 dc).
- Ch 1.
- Repeat alternating shell stitch and V stitch, separated by chains.
- Sl st to close round.
- Simple Explanation:
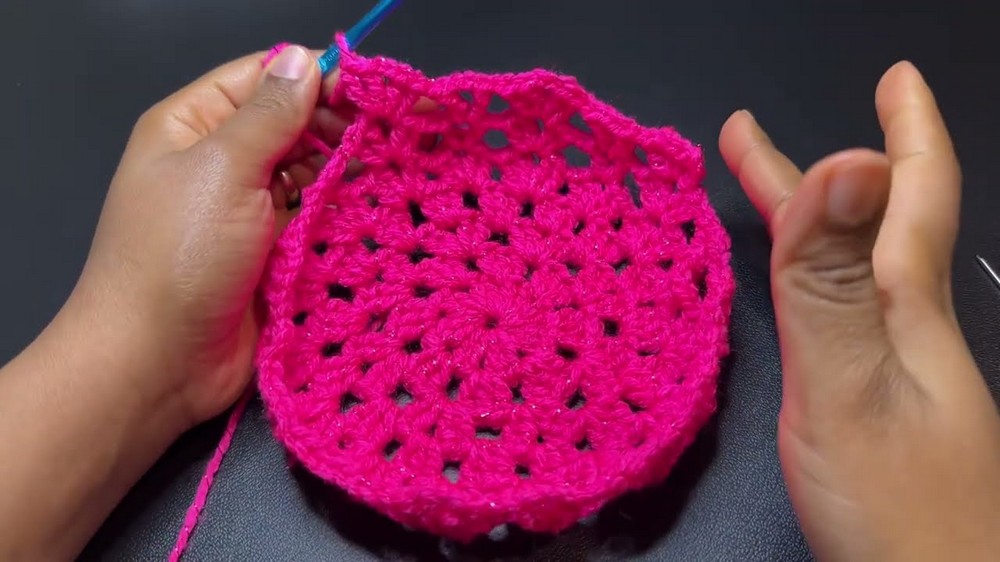
Now your hat pattern alternates shell stitches and V stitches for a beautiful textured finish, repeating these two rounds for a total of 14 rows including earlier rounds.
Part 4: Adding Ruffles (Final Edging)
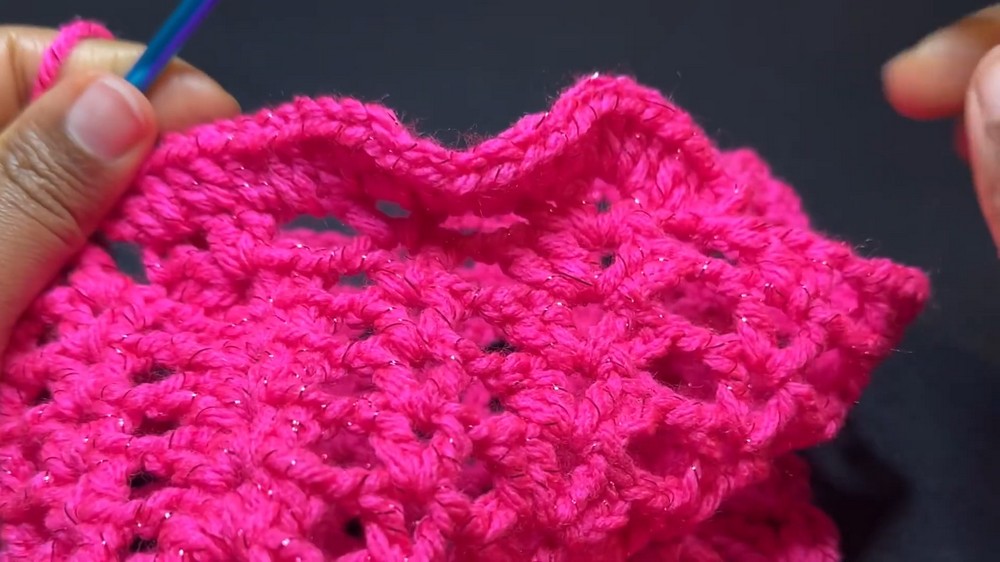
- Ruffle Round 1:
- Ch 3 (counts as first dc).
- In same space, 1 dc.
- 2 dc on next stitch, 3 dc in next ch-2 space, 2 dc on next 2 stitches, 2 dc in next ch-1 space, repeat pattern around.
- Sl st to join.
- Ruffle Round 2:
- Ch 3, in same stitch make 2 dc (3 dc total).
- Dc 1 on next stitch, dc 1 on next stitch, 3 dc in next stitch.
- Continue pattern (3 dc, dc on next two stitches) around.
- Sl st join.
- Ruffle Round 3 (optional for more volume):
- Dc 2 in every stitch around.
- Sl st to join.
- Simple Explanation:
The ruffles are made by piling lots of double crochets on the brim edge-this makes your hat fun and full of life. Stop after one or two rounds for a smaller ruffle, more rounds for a big frilly look.
Assembly & Finishing Touches
- Weave in all yarn tails carefully with your needle to secure stitches and prevent unraveling.
- Use scissors to trim excess yarn ends after weaving in.
- Optionally block your hat gently for shaping, but metallic fiber yarns usually hold shape well without blocking.
- Double-check for any loose ends or gaps and fix before wearing.
Troubleshooting Tips
- Gap at crown center: Pull magic ring tighter before starting first round to close hole completely.
- Hat too loose or tight: Adjust hook size or yarn for tighter or looser fabric.
- Uneven ruffles: Count your stitches each round carefully, follow pattern increments exactly.
- Stitches confusing: Refer to stitch abbreviation guide and special stitches section for clarity.
Fun Ideas For Using This Stitch Pattern
- Make matching fingerless gloves or wrist warmers using shell and V stitches.
- Create a coordinating scarf or cowl with repeated ruffle edges.
- Crochet decorative trims for blankets or pillows with the ruffle design.
- Customize hats with added appliques or buttons on shell spaces.
- Crochet baby hats or juvenile sizes by adjusting rounds and yarn weight.