
Crochet Summer Hair Cap Free Pattern for Beach Days and Fun
Beat the summer heat in style with this Free Summer Hair Cap Pattern that shape a light and comfortable accessory for sunny day outings.
Designed with soft, lightweight yarns, it is perfect for keeping cool during warm days. The Crochet Summer Hair Cap is made using a blend of sequined yarn and cotton yarn, which gives it a soft texture, a pretty sparkle, and a finish that is both stylish and comfortable. The uniqueness of this hair cap lies in its airy, light design. You don't need to iron it, yet it turns out effortlessly elegant. The mix of yarns creates a stunning color combination, enhanced by the shimmer of sequins. These materials not only make the cap attractive but also comfortable to wear all day. It feels gentle on your head and does not cause any discomfort.
Free Crochet Summer Hair Cap Pattern for Fresh Style
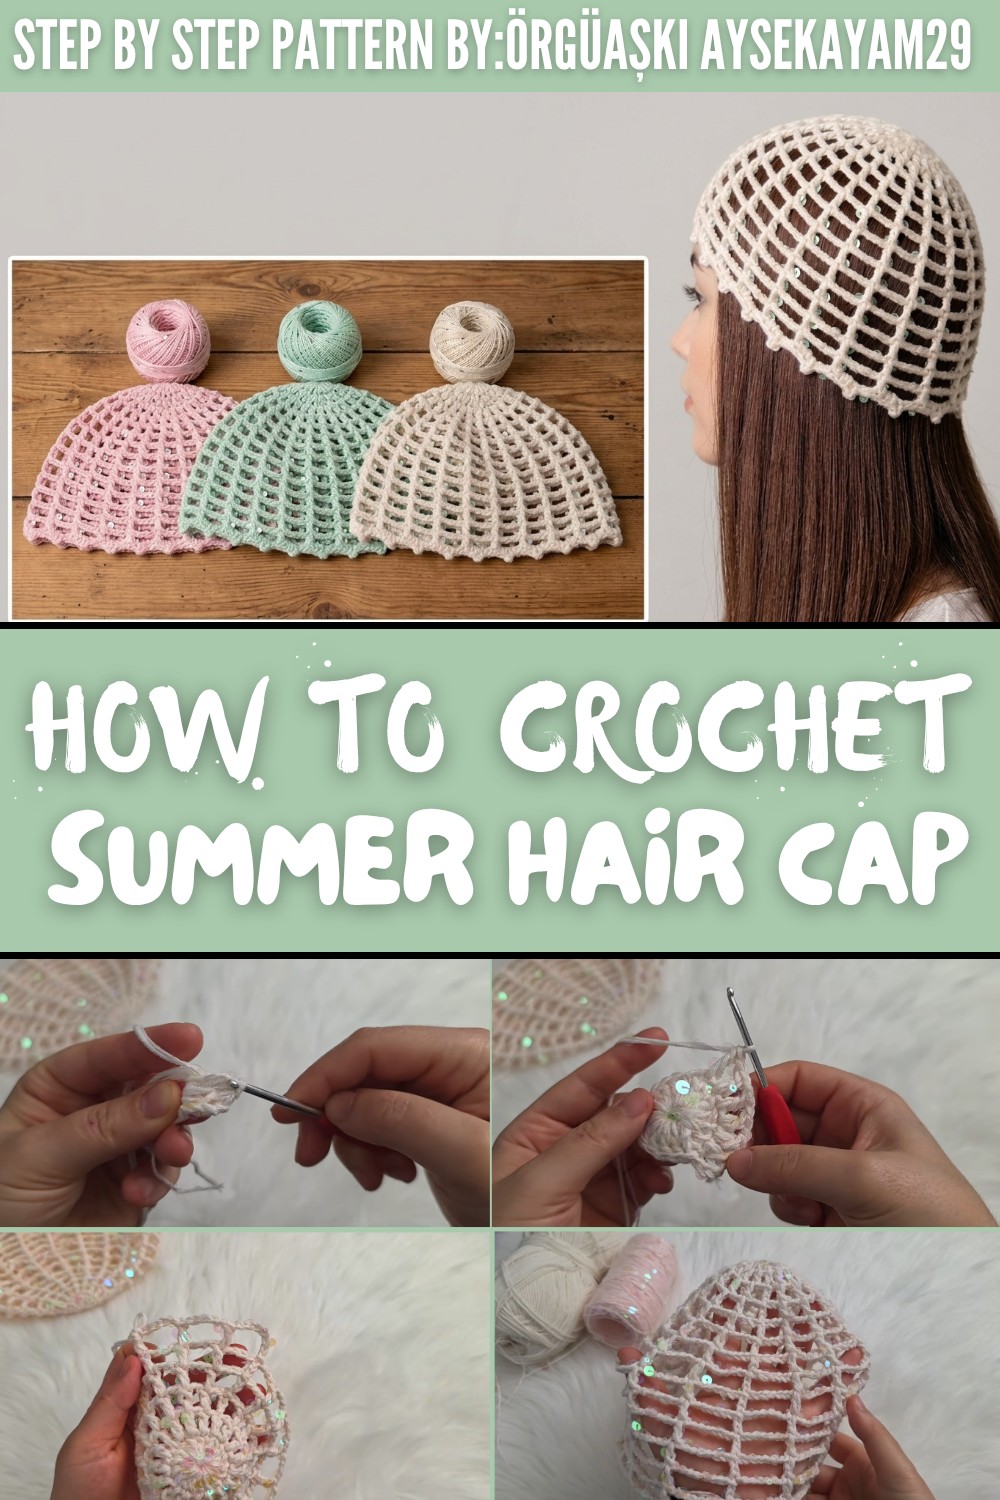
The pattern begins with a magic ring, creating a neat, closed center. Rows are crocheted outward with increases, forming a properly shaped cap. Once the increases are complete, the remaining rows are worked without changes, ensuring the cap fits snugly and stylishly. The finishing touch is a row of single crochet stitches and decorative bobble accents. These details add charm and make the cap look professional and unique.
This summer cap is a perfect accessory for any outfit, offering elegance and sun protection. The project is economical as one ball of yarn can create multiple caps. You can even customize the size, such as making it smaller for children or larger for adults, by adjusting the row counts. Its soft texture, radiant sparkle, and practical design make it a must try for anyone who loves crocheting or wearing handmade accessories.

Crochet Summer Hair Cap Pattern
Materials Needed
- Yarn:
- Sequined Yarn: Thin and lightweight yarn with sparkles (e.g., light pink for a delicate shimmer).
- Cotton Yarn: Soft and durable yarn, blended with the sequined yarn to add body and structure.
- Crochet Hook:
- 3mm hook (recommended for this yarn pairing).
- 3.5mm hook may be used for slightly larger or looser stitches.
- Additional Tools:
- Scissors.
- Yarn needle (for weaving in ends).
- Measuring tape.
Finished Size
- Length: Approximately 17 cm.
- Width: Approximately 25-25.5 cm.
- Adjustable: You can alter the size for children or adults by increasing or decreasing rows or chain spaces.
Pattern Overview
- Structure:
- The cap begins at its center with a magic ring and is worked outward in the round.
- Rows include gradual increases to shape the cap's body.
- Decorative details such as bobble stitches are added to the edges for an elegant finish.
Step by Step Instructions
Step 1: Preparing the Yarn
- Align the ends of both the sequined yarn and the cotton yarn.
- Crochet the two strands together as one.
- This creates a blended color effect with a subtle sparkle and adds strength to the cap.
Step 2: Starting with the Magic Ring
- Create a magic ring using the blended yarn:
- Wrap the yarn around your fingers to form a loop.
- Pull the yarn tail through the loop using your hook and secure it with a chain stitch.
- Row 1 (Foundation Row):
- Chain 3 (counts as the first double crochet).
- Work 17 double crochet (DC) stitches into the magic ring.
- Tighten the ring by pulling the yarn tail to close the center hole.
- Join the last DC stitch to the top of the starting chain with a slip stitch.
- Total: 18 DC stitches (including the starting chain).


Step 3: Building the Cap with Increases
Row 2 (First Increase Row):
- Chain 4 (counts as a double crochet + one chain space).
- [DC into the top of the next double crochet, chain 1], repeat across the row.
- Join with a slip stitch to the third chain of your starting chain.
- Creates 1 chain space between each DC stitch.


Row 3:
- Chain 5 (counts as a double crochet + two chain spaces).
- [DC into the top of the next double crochet, chain 2], repeat across the row.
- Join with a slip stitch.
- 2 chain spaces now separate each DC stitch.

Row 4:
- Chain 6 (counts as a double crochet + three chain spaces).
- [DC into the top of the next double crochet, chain 3], repeat across the row.
- Join with a slip stitch.
- 3 chain spaces are added between each DC stitch in this row.

Row 5:
- Chain 7 (counts as a double crochet + four chain spaces).
- [DC into the next DC stitch, chain 4], repeat across the row.
- Join with a slip stitch.
- 4 chain spaces separate each stitch.
Row 6:
- Chain 8 (counts as a double crochet + five chain spaces).
- [DC into the next DC stitch, chain 5], repeat across the row.
- Join with a slip stitch.
- 5 chain spaces separate each DC stitch.

Row 7 (Final Increase Row):
- Chain 9 (counts as a double crochet + six chain spaces).
- [DC into the next DC stitch, chain 6], repeat across the row.
- Join with a slip stitch.
Important Notes:
- This is the final increase row if you are making an adult sized cap.
- For larger sizes, you may add more rows using 7 chain spaces between each DC. Adjust based on head circumference or preference.
Step 4: Rows Without Increases
- From Row 8 onward, work the following:
- DC stitches with 6 chain spaces between each stitch in the round.
- Repeat row construction for 7 additional rows (or until a total of 15 rows for adult size).
- Adjust row count for smaller or shorter caps.

Step 5: Decorative Edge with Single Crochet and Bobble Stitches
Single Crochet Row:
- Join yarn to the outer edge.
- Work 3 single crochet (SC) stitches into the first chain space.
- Chain 3, and create a bobble stitch:
- Use a slip stitch to close the chain into the last SC.
- Move to the next chain space, repeating: 3 SC stitches, chain 3, bobble stitch.
- Continue around the edge to complete the row.
- For the final stitch:
- Slip stitch into the starting SC stitch.
- Chain 1, cut yarn, and pull through to secure.
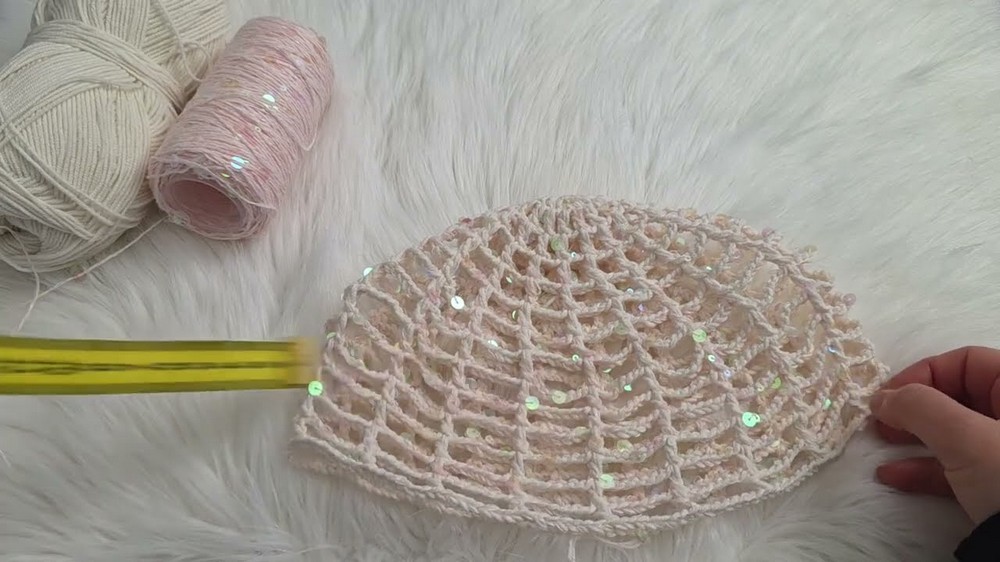
Finishing the Pattern
- Clean Up Edges:
- Use your yarn needle to weave in all loose ends.
- Optional Ironing:
- To shape the cap and enhance its texture, lightly steam or iron it.
- If using sequined yarn, avoid direct heat to prevent damage.

Special Techniques Used
- Magic Ring:
- A neat way to start circular crochet projects.
- Bobble Stitch:
- Adds dimension and style to the edges of the cap.
- Increasing in the Round:
- Simple but elegant technique for shaping circular projects.
Additional Suggestions
- Sizing Adjustments:
- For children: Start with smaller chain spaces between DC stitches.
- For extra-large sizes: Extend the number of rows with increases before working flat rows.
- Yarn Substitutions:
- Pair cotton yarn with metallic or sparkled yarn for variety.
- Customizations:
- Alternate colors or add detailed embroidery to the cap edges for personalization.

Final Words
This Crochet Summer Hair Cap is a lightweight and elegant accessory perfect for sunny days. Its airy design keeps you cool while adding style to any outfit. The sparkled sequined yarn combines beautifully with soft cotton yarn, resulting in an accessory that feels luxurious and looks radiant. Whether you choose to keep it simple or add decorative details, this project gives plenty of room for creativity.
Take your time, enjoy the process, and let this pattern inspire your crochet journey. Once complete, wear it with pride or gift it to loved ones.