Quick & Simple Free Crochet Flower Hair Clip Pattern
Achieve a beautiful look with this Free Crochet Flower Hair Clip that's a simple pattern, it's ideal for accessorizing or gifting with love.
Soft and delicate, this accessory brings a charming pop of color and texture to any hairstyle. Its layered petals and handcrafted feel make it both unique and eye-catching, perfect for anything from casual looks to special occasions. Lightweight and easy to wear, it's designed to complement various outfits while making a subtle yet stylish statement. With endless color options, it can be personalized to match your favorite outfits or even seasonal themes.
Free Crochet Flower Hair Clip Pattern - Easy & Beginner-Friendly
This pattern is approachable enough for beginners, focusing on simple techniques to create a flower you'll be proud of. You won't need a lot of materials, making it a great option for using up leftover yarn from other projects. The step-by-step process is straightforward, helping you follow along even if you're new to crochet.
Once completed, this small project is as functional as it is beautiful-you can turn your creation into a hair clip, brooch, or even an embellishment for bags or hats. Thoughtful and customizable, it's also perfect as a handmade gift for friends or loved ones. With time and a little bit of patience, you'll create something that's both practical and a joy to make.

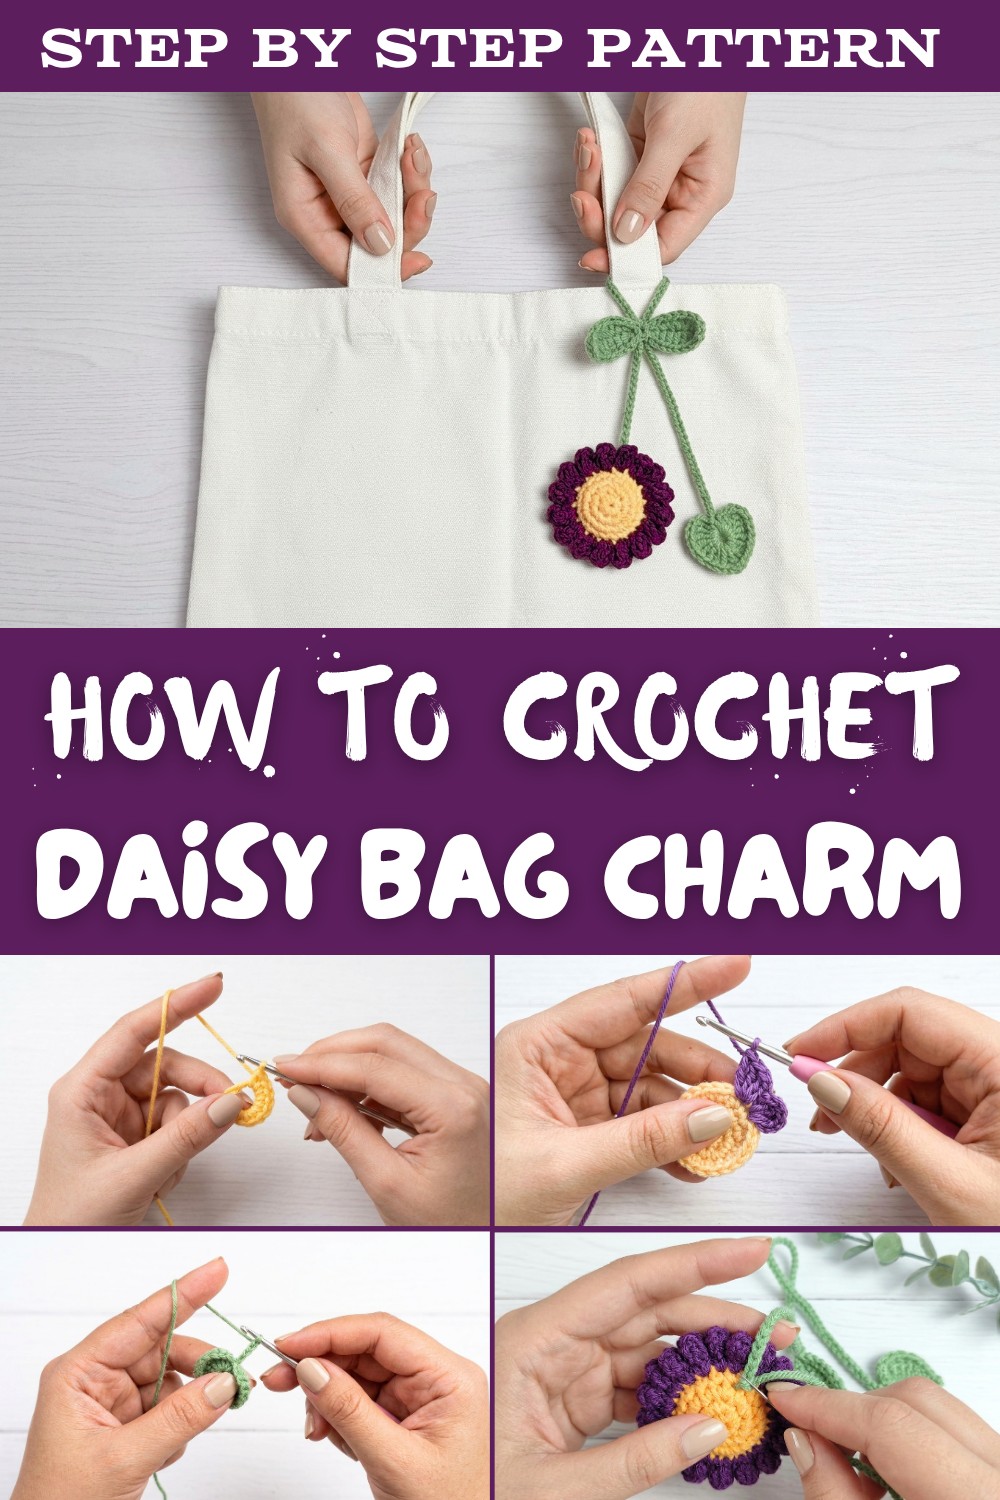
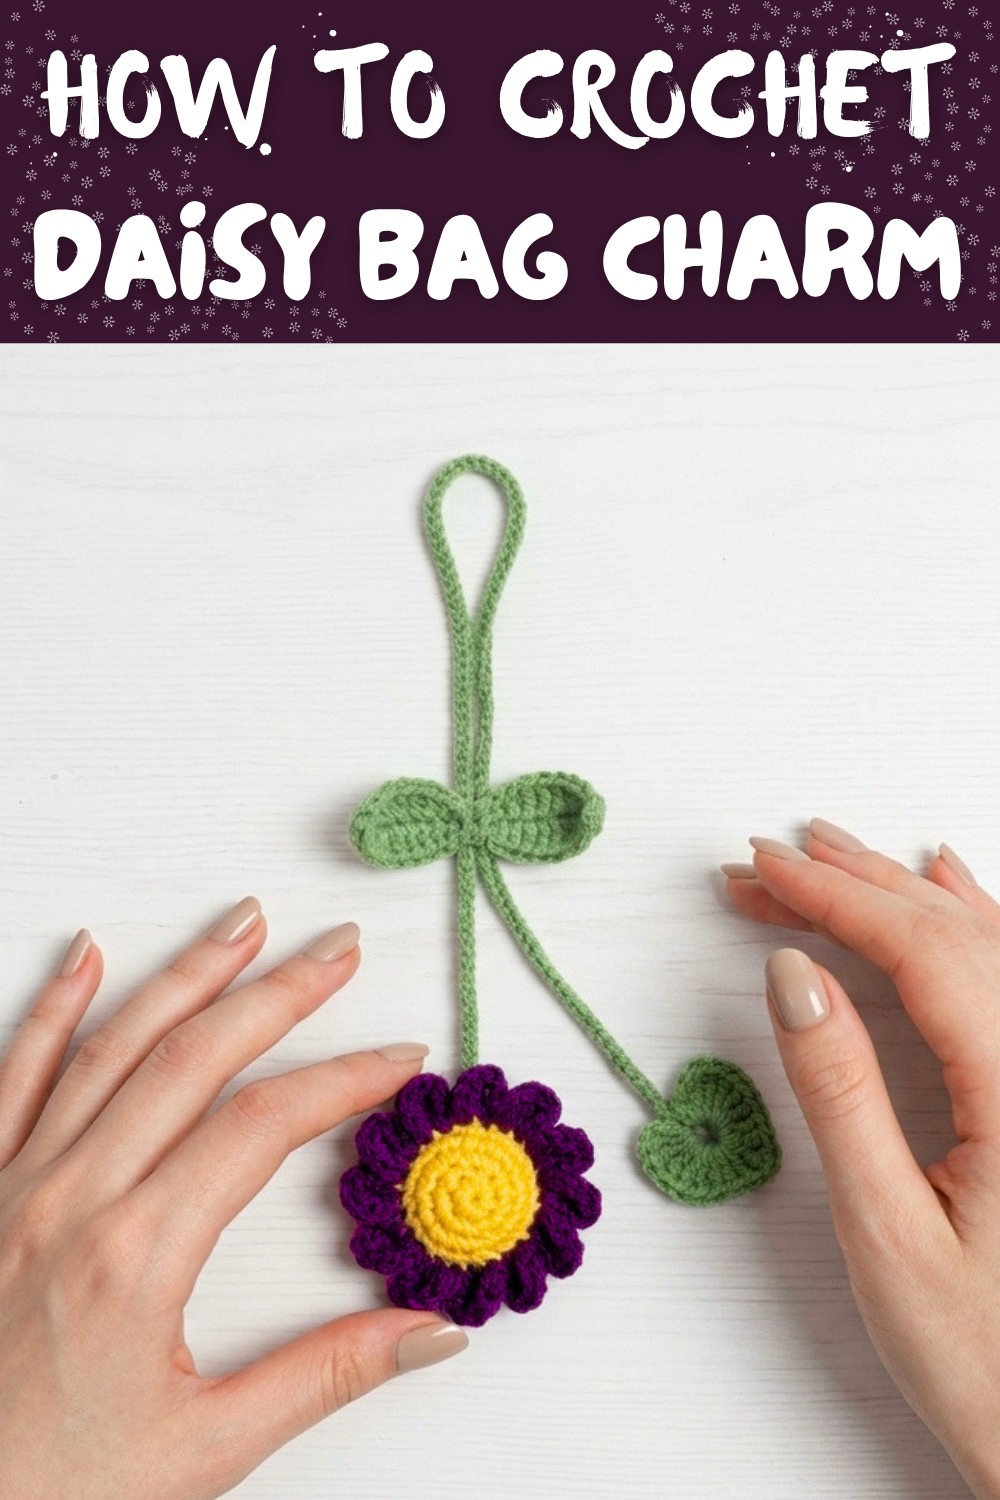
Daisy-Shaped Bag Charm Crochet Pattern
Finished Size
- Approximately 7-9 cm across, excluding the string and leaves (final size varies according to yarn and tension).
Materials Needed
- Yarn: Milk cotton yarn (or similar lightweight/DK yarn) in yellow (center), Purple (petals), green (leaves and string).
- Crochet hook: Size 4 (3.5-4 mm recommended for milk cotton).
- Stuffing: Polyester fiber fill or dacron.
- Tapestry needle: For sewing and finishing.
- Scissors.
Special Techniques Used
- Magic ring (magic loop)
- Single crochet (sc)
- Double crochet (dc)
- Treble (tr) crochet
- Half double crochet (hdc)
- Increase (2 sc in same stitch)
- Crocheting in the round
- Slip stitch (sl st)
Step-by-Step Instructions
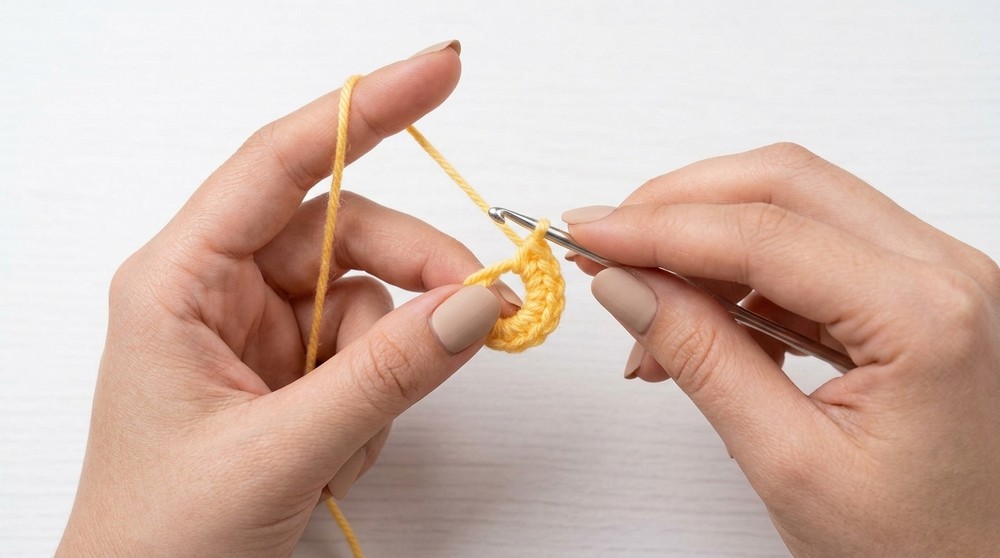
1. Flower Center (Make 2)
With yellow yarn:
- Start with a magic ring.
- Round 1: Work 7 sc into the ring. Pull tail to close the ring. (7 sts)
- Round 2: Work 2 sc (increase) in each stitch around. (14 sts)
- Tip: Crochet over the ring tail if possible for added security.
- Round 3: [1 sc in next st, 2 sc in next st] repeat 7 times. (21 sts)
- Round 4: 1 sc in every stitch around. (21 sts)
- Fasten off and weave in ends.
Repeat Steps 1-6 to create a second, identical circle.
2. Joining the Flower Centers & Forming Daisy Petals
Switch to white yarn for petals:
- Place your two yellow circles together, wrong sides facing each other.
- With white yarn, slip knot on hook.
- Attach petals:
- Insert hook through matching stitches on both circles.
- Slip stitch to join.
- Petal sequence (in the same stitch on both circles):
- Ch 3.
- Dc in the same stitch.
- Tr in the same stitch.
- Dc in the same stitch.
- Ch 3.
- Slip stitch back into the same stitch.
- Slip stitch into the next pair of stitches and repeat the petal sequence above.
- Continue this sequence around for a total of 7 petals, but before closing up entirely:
- Lightly stuff the flower with dacron/fiberfill to give a puffy effect.
- Complete final petal and join with a slip stitch.
- Fasten off and weave in any loose ends.

Tip: Ensure petals are equally spaced and front-facing for the best appearance.
3. Making the Leaf Motif
With green yarn:
Leaf 1 (wider, rounded leaf)
- Start with a magic ring.
- Ch 3 (counts as first dc).
- Work 5 tr into ring.
- Work 3 dc into ring.
- Ch 1.
- Work 1 tr into ring.
- Ch 1.
- Work 3 dc into ring.
- Work 5 tr into ring.
- Ch 3.
- Slip stitch back into ring to close the leaf shape.
- Fasten off, leaving a tail.

Leaf 2 (narrower, string-attached leaf)
- Make a slip knot, then chain 19.
- Starting in the 2nd ch from hook:
- Sc in next ch,
- Hdc in next ch,
- Dc in next 5 ch,
- Hdc in next ch,
- Sc in next ch,
- Repeat: [Sc, hdc, 5 dc, hdc, sc] working along the other side of the chain.
- Slip stitch to the first stitch of the round to finish the leaf.
- Fasten off, leave a long tail for sewing.
4. Making the Hanging String
Still with green yarn:
- Chain 120 (or desired length for your bag charm loop).
- Fasten off, leaving a tail.
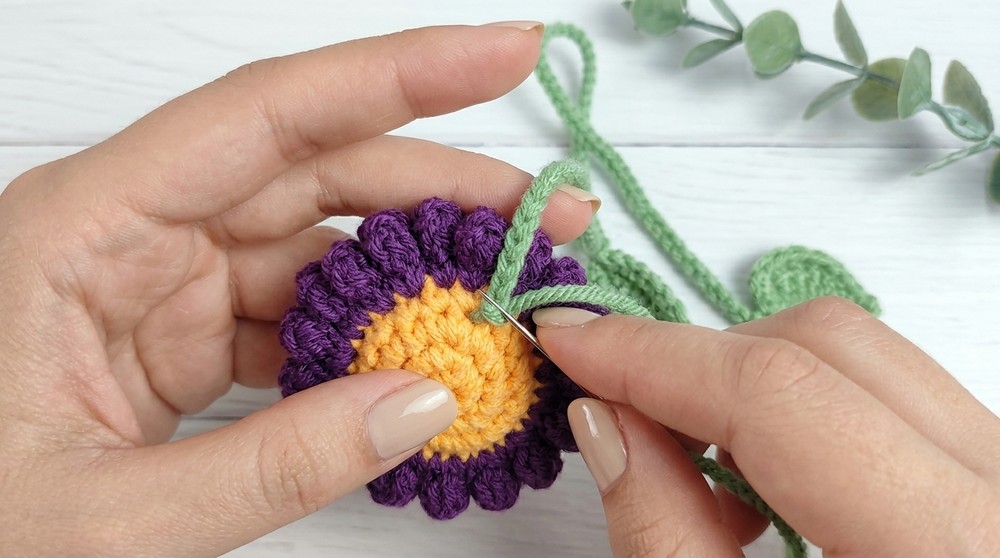
5. Finishing and Assembly
- Use the tapestry needle to tidy up all ends on the flower and leaves.
- Thread the green chain (string) behind a petal or between sc stitches at top of the flower. Use the needle to weave in and out neatly for both stability and beauty.
- Attach the leaves:
- Sew one leaf on each end of the hanging string, or
- Attach the wider leaf directly to the bottom/side of the daisy for balance.
- If desired, reinforce the string's attachment by stitching it directly through the flower center or through a petal base.
- Double-check all parts are firmly attached and tidy.
- Your daisy bag charm is ready to use!
Pattern Suggestions & Tips
- Color Variations: Customize your charm with different center/petal colors, or make several for a bouquet look.
- Petal Crispness: Block the petals if they curl, or lightly starch for firm petals.
- Firmness: Stuff only lightly so the flower remains puffy but not overstuffed.
- Personalization: Add a bead or fancy button to the flower center, or embroider a smiley face for extra cuteness.
- Hanging Options: Adjust the chain length for keychain, bag charm, or even a rear-view mirror decoration.
- Yarn Type: Cotton or acrylic both work; cotton will provide crisper stitch definition.
Final Words
You have now completed a lovely daisy-shaped bag charm that adds a whimsical, cheerful touch to any bag or key set. This beginner-friendly project is an excellent way to practice rounds, increases, joining, and decorative leaves. Play with colors, make a whole floral set, or give as gifts.