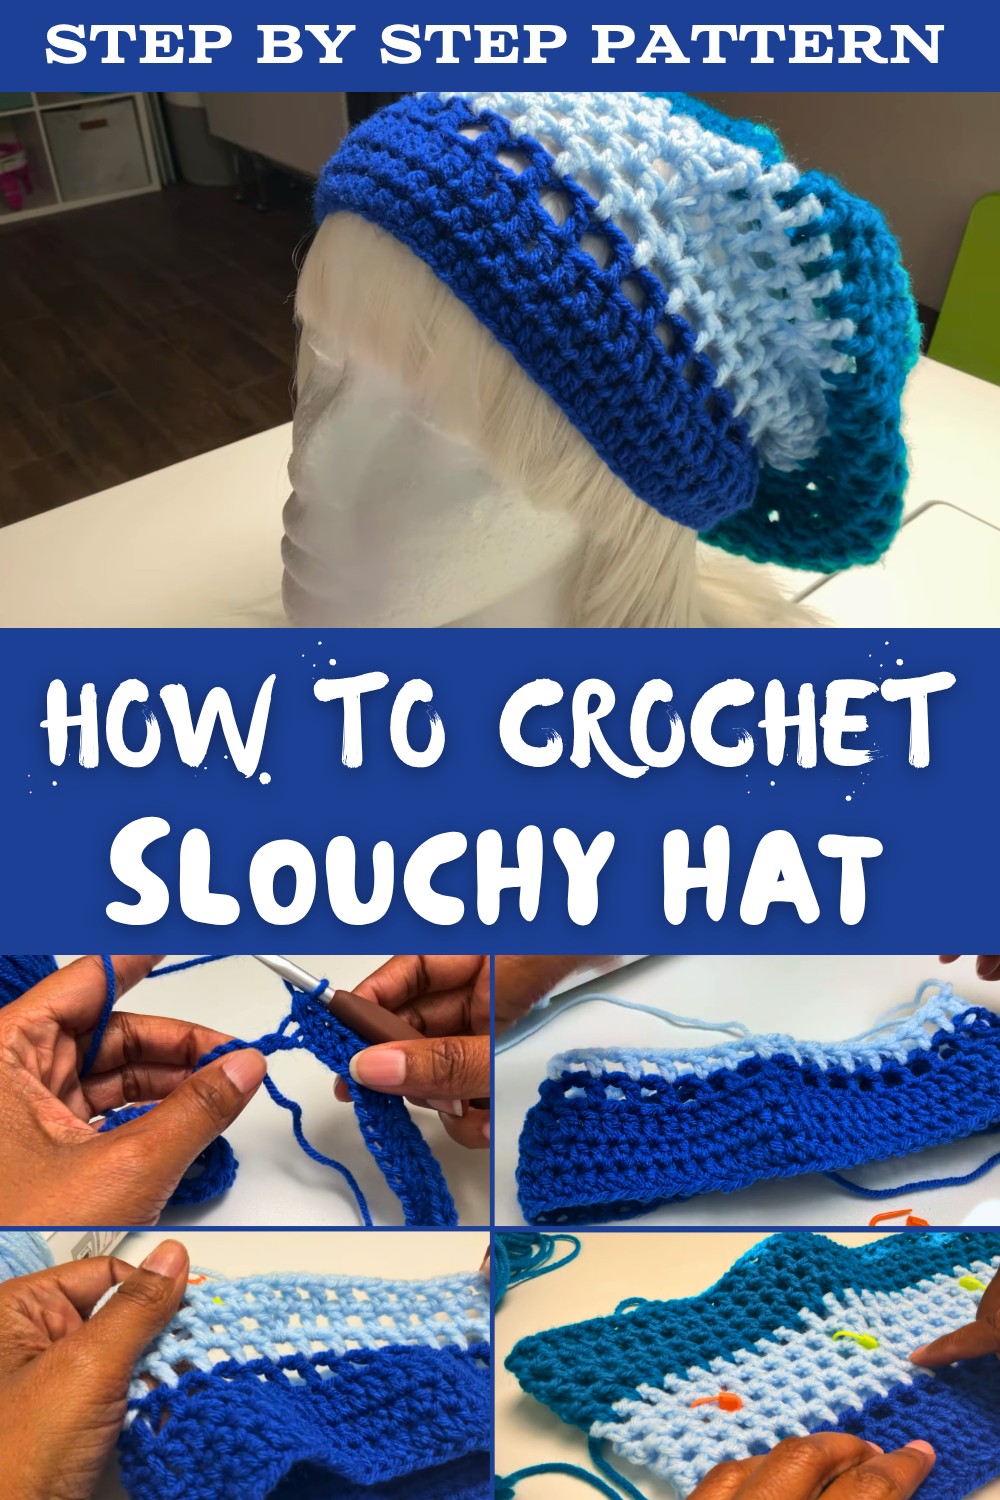
Beginner-Friendly Free Crochet Slouchy Hat Pattern to Try
Have fun creating a cozy and stylish accessory with this Free Crochet Slouchy Hat Pattern that's easy to follow and perfect for beginners.
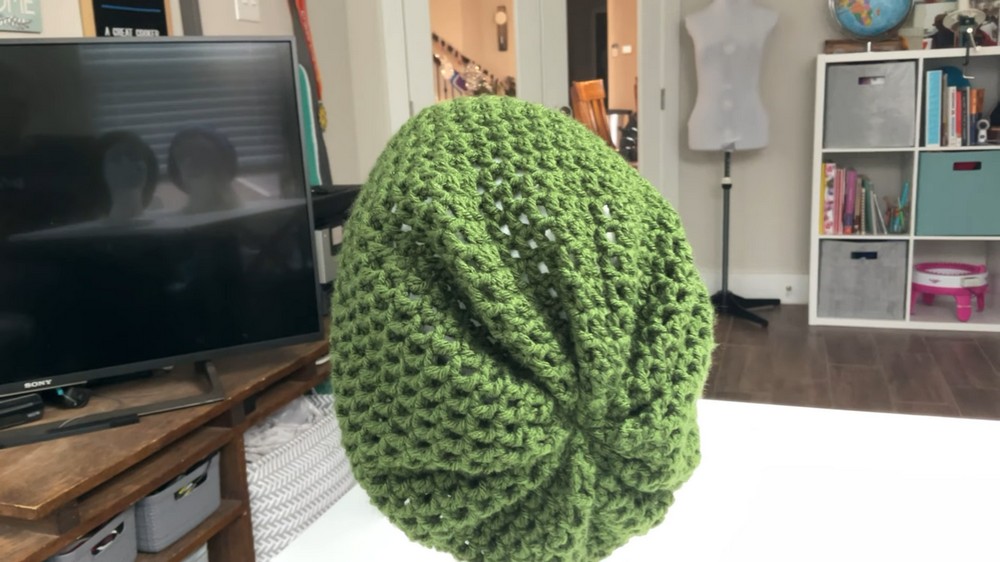
A warm and cozy accessory that adds both style and comfort to your daily look. This type of hat is loose at the back, creating a relaxed and modern feel that's perfect for any season. With soft yarn and easy-to-follow steps, it's simple to make, even if you're new to crocheting. The design is versatile and can be customized with fun colors, gentle textures, or bold details to match your personality.
Cute Free Crochet Slouchy Hat Pattern for All Seasons
Its lightweight yet warm feel makes it ideal for chilly days, outdoor adventures, or just relaxing at home. The unique folds and soft lines give it an elegant appearance while offering a practical way to cover up messy hair or add a playful touch to any outfit. Whether you're going for a casual everyday look or trying something creative, this hat pattern lets you crochet a piece that feels personal and special every time you wear it.
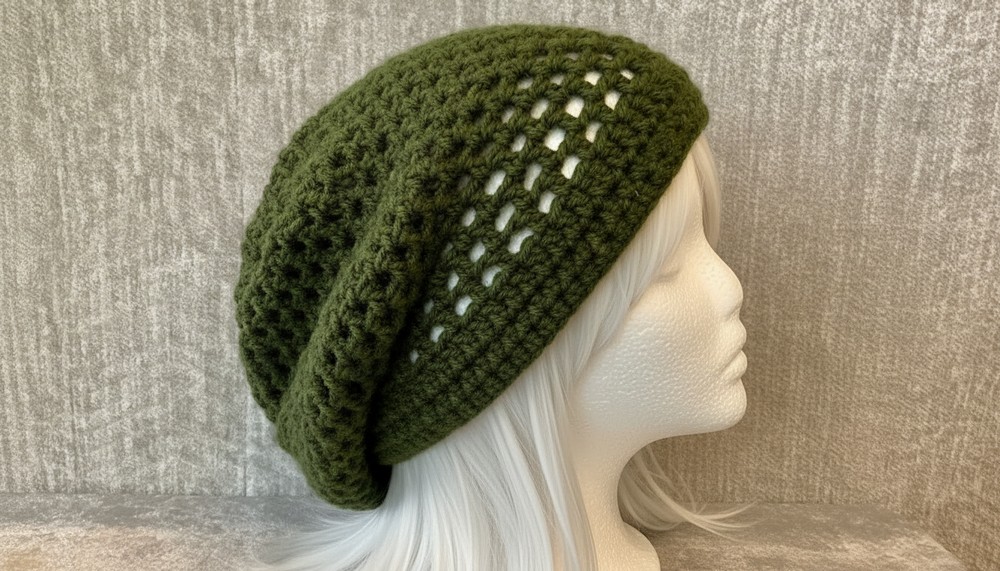
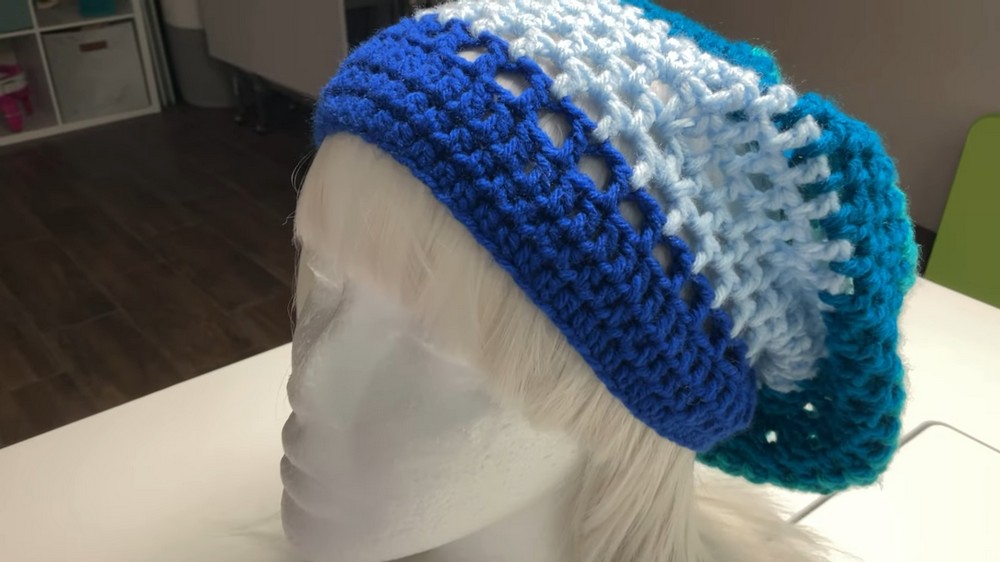
Slouchy Mesh Stitch Beanie Crochet Pattern
Materials Needed
Yarn:
- Medium (Size 4) worsted weight yarn:
- For single color: Approx. 150 yards of 100% acrylic yarn.
- For stripes: Select multiple colors (as shown in the tutorial).
- Examples: Brands like Red Heart Super Saver or Caron Simply Soft.
Crochet Hook:
- Size J/6.0mm crochet hook (adjust based on your tension/gauge).
Additional Supplies:
- Yarn needle: Large blunt needle (bent ends preferred).
- Scissors: For cutting yarn ends.
- 6 stitch markers: Plastic markers or safety pins for marking increase sections.
Gauge:
- 4 inches = 12 stitches (DC row)
- Adjust hook accordingly to match gauge for a consistent finished size.
Finished Size:
- Brim circumference: Approx. 11 inches (unstretched).
- Height: Approx. 10 inches.
- Designed for standard adult head sizes (women's medium).
Skill Level:
Beginner: Familiarity with chain stitch, half double crochet (HDC), double crochet (DC), and working in the round required.
Pattern Instructions
Step 1: Create the Brim
- Starting Chain:
- Begin with a slip knot, leaving at least a 6-inch yarn tail.
- Chain 66 stitches (adjust to an even number if making a different size).
- Join to Create a Loop:
- Ensure the chain is not twisted, then insert your hook into the first chain.
- Yarn over, pull through both loops and close with a slip stitch.
- First Row - Half Double Crochet (HDC):
- Ch 1 (does not count as a stitch).
- Work HDC into each chain around.
- At the end of the row, sl st into the first HDC to join.
- Ensure the row has 66 stitches.
- Second Row - HDC:
- Ch 1 (does not count as a stitch).
- Work HDC into each stitch from the previous row.
- Join into the first HDC with a sl st.
- Row total: 66 stitches.
- Third Row - Double Crochet (DC):
- Ch 3 (counts as the first DC).
- Work DC into each stitch around.
- At the end of the row, sl st into the top of the initial Ch 3.
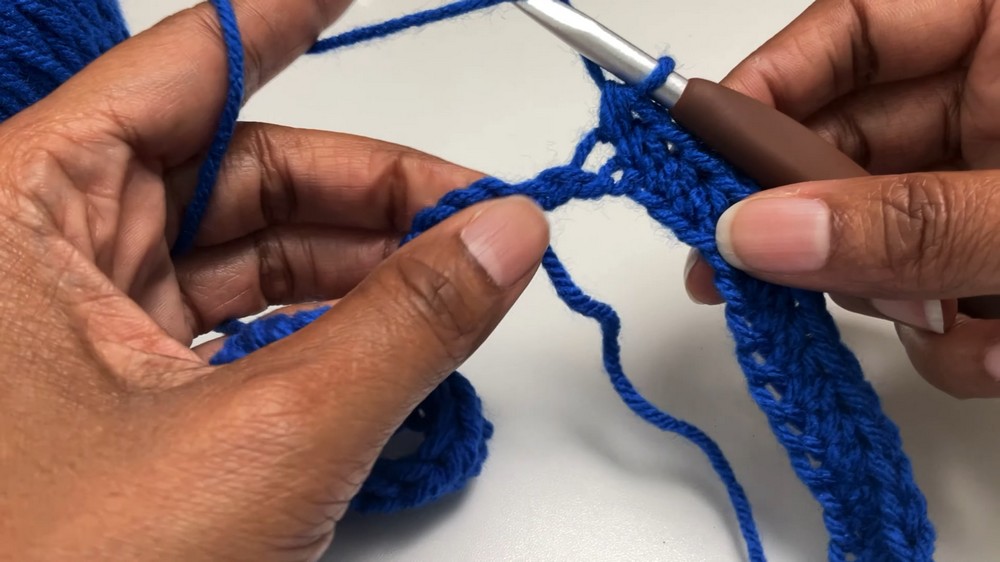
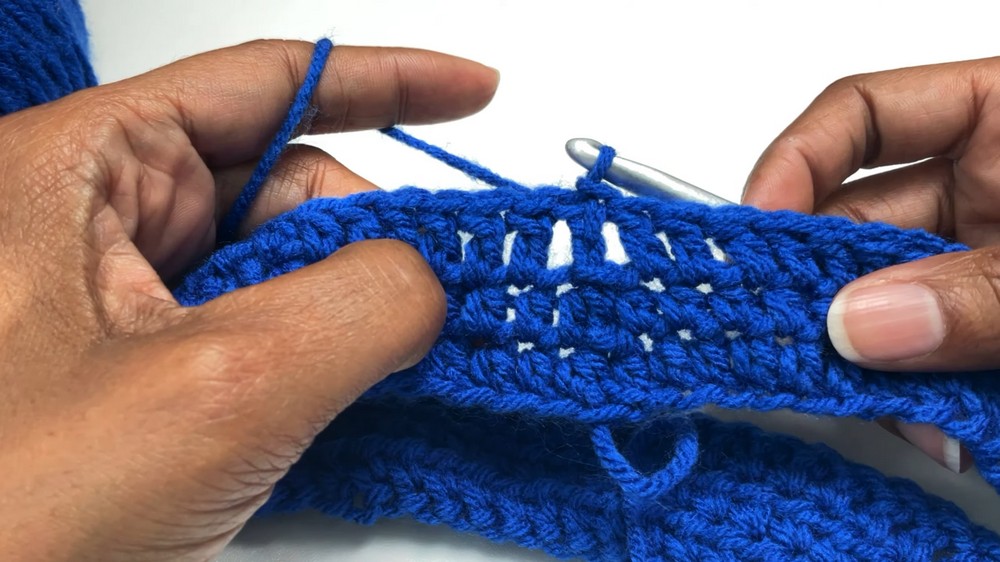
Step 2: Begin Mesh Rows (Row 4 and Row 5)
- Row 4:
- Ch 4 (counts as 1 DC + Ch 1).
- Skip next DC, work DC into the following DC.
- Ch 1, skip next DC, DC into the next.
- Repeat this pattern (DC, Ch 1, skip) around.
- At the end, Ch 1 and sl st into the top of Ch 3.
- Row 5:
- Repeat row 4 mesh stitch pattern.
- At the end, sl st into the top of Ch 3.
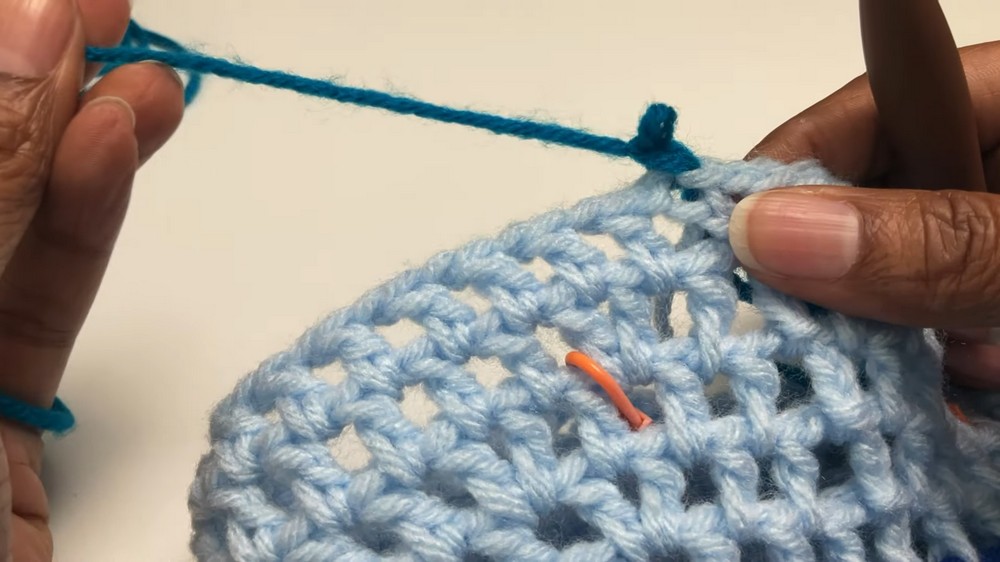
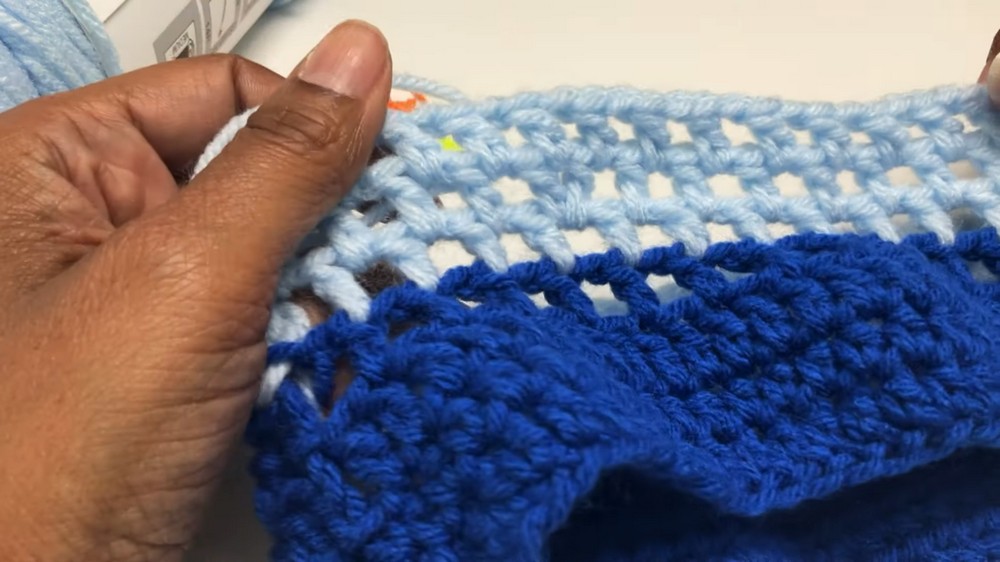
Step 3: Increase Rows
To create the slouchy effect, begin increase rows as follows:
Using Stitch Markers:
- Divide your work into 4 equal sections (based on stitch count, around every 16-17 stitches), marking approximate locations with stitch markers.
- Position the markers where increases (V-stitches) will occur.
Row 6 - Begin Increases:
- Sl st into Ch-1 space, Ch 4 (DC + Ch 1).
- Work regular mesh stitches (DC + Ch 1) until you reach a stitch marker.
- Increase: Work a V-stitch (1 DC, Ch 1, 1 DC) into the marked space.
- Repeat meshes and V-stitches until all marked spaces are completed.
- Join: Ch 1, sl st into top of Ch 3.
Row 7: Repeat Increase Pattern
Repeat row 6 exactly, adding 8 additional stitches.
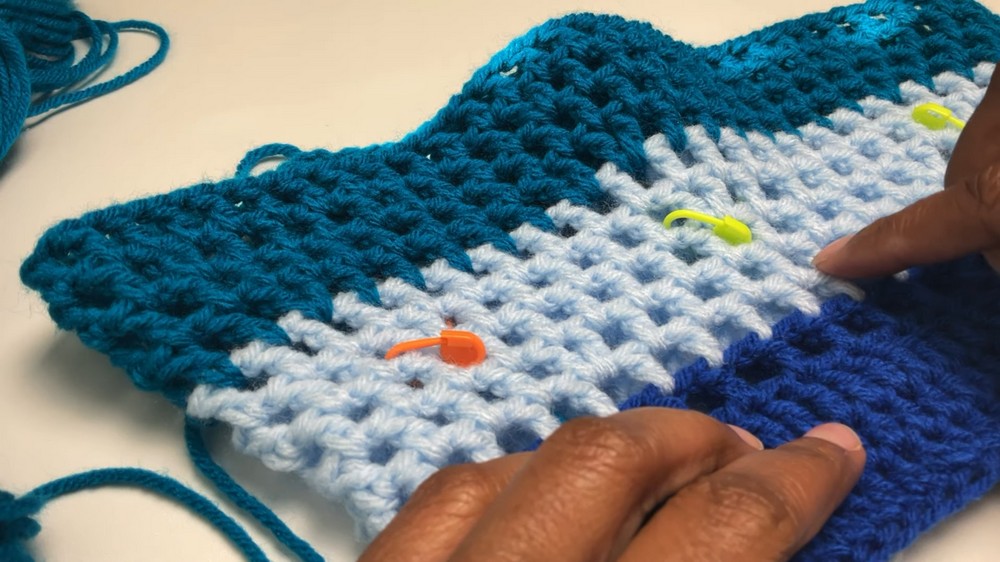
Row 8: Add More Markers
- Divide the hat into 6 sections using stitch markers.
- Repeat increase rows (as per row 6) to work V-stitches in each marked space.
Step 4: Non-Increase Rows
Row 9:
- Work mesh stitches (DC, Ch 1) into every stitch, ignoring marked spaces.
- No increases; stitch count remains constant.
Alternating Increase and Non-Increase Rows:
Repeat between increase rows and non-increase rows until the hat width reaches approx. 14 inches.
- Ensure final row is a non-increase row for symmetry.
Step 5: Add Height
- Continue with regular mesh rows (no increases) until the height reaches approx. 10 inches.
- Measure frequently; stop where slouch effect looks natural.
Step 6: Finish Off and Close
- After the final row, cut the yarn, leaving a long tail (approx. 24 inches).
- Thread your yarn needle and weave the tail through the DC and Ch-1 spaces around the last row.
- Pull tight to cinch the top of the hat closed.
- Secure Closure:
- Work additional stitches (in/out of upper spaces) to close any remaining gaps firmly.
- Weave in the tail securely and trim excess.

Important Remarks
- Final Look: Ensure the brim naturally curls without excessive stretching. The slouch adds style and comfort.
- Customization:
- Add stripes by changing colors after completing mesh rows.
- Optional pompom can be added for a playful look.
Tips
- Marker Placement: While exact placement is not essential, evenly distribute stitch markers for uniform increases.
- Color Changes: Tie new yarn securely and hide ends while stitching to maintain neatness.
- Blocked Appearance: Steam-block the finished hat lightly for a smoother fabric and professional look.
Conclusion
Congratulations! You've created a versatile and stylish slouchy beanie. Perfect for gifting or personal use, this timeless pattern is easy to adapt and fun to personalize.