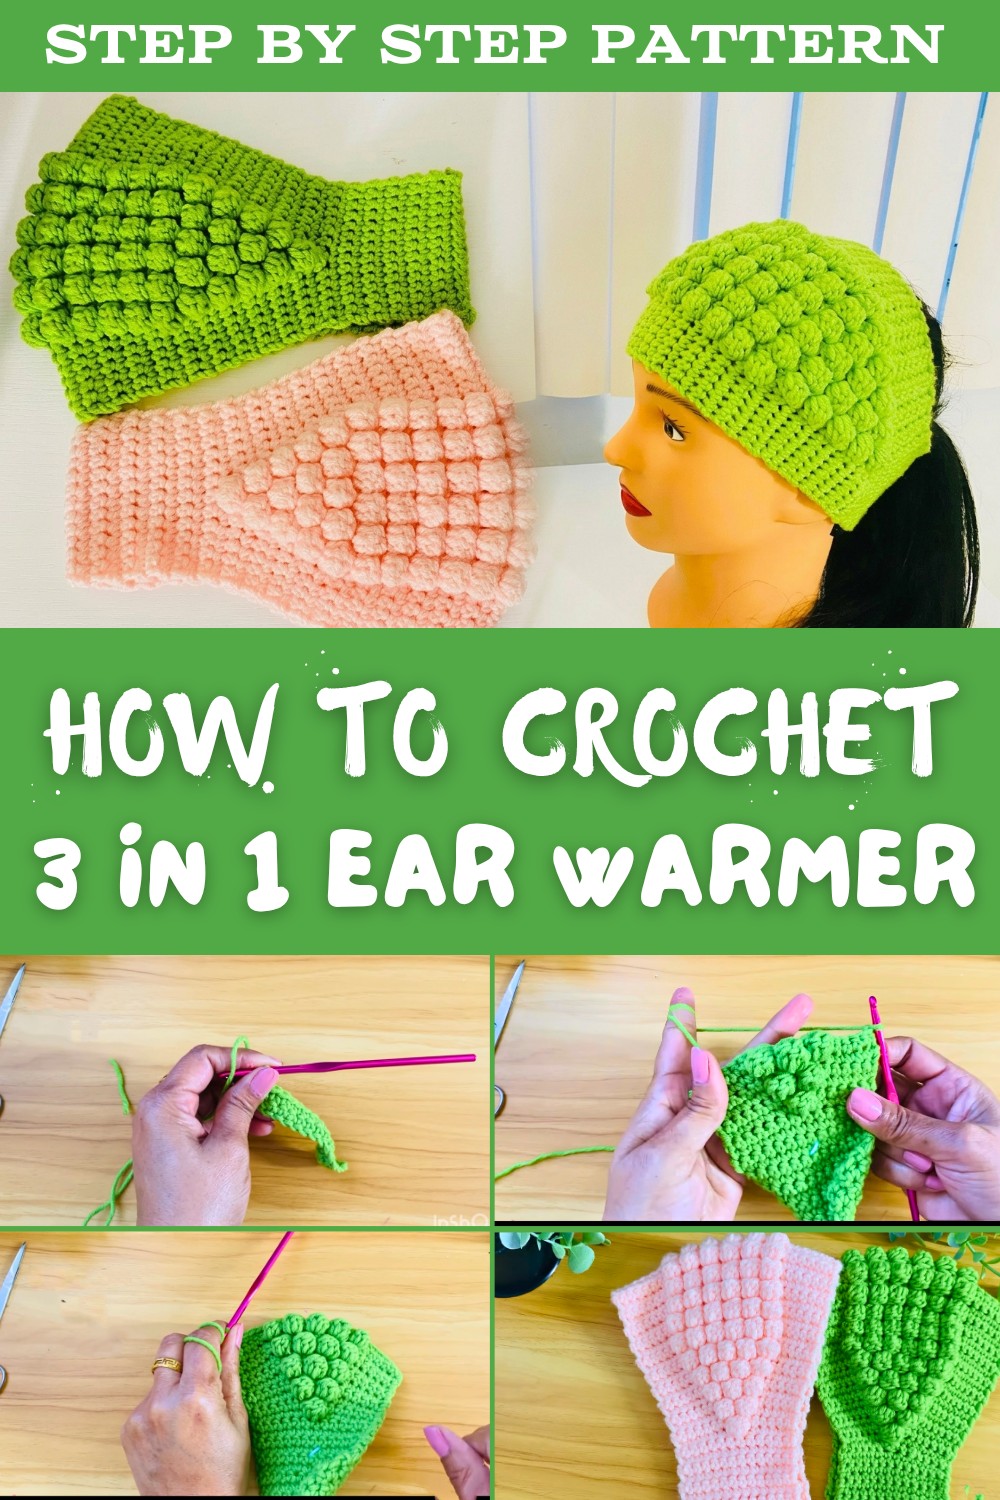
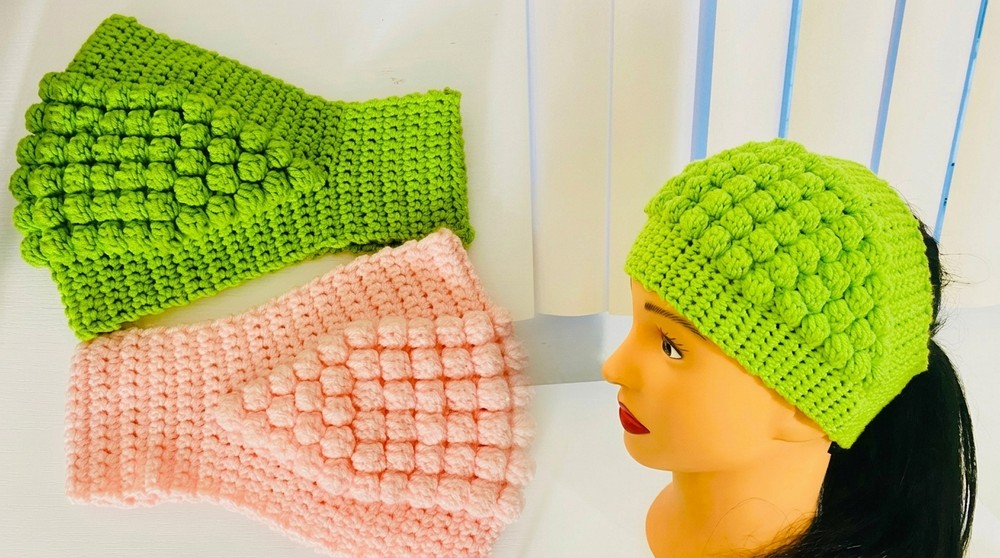
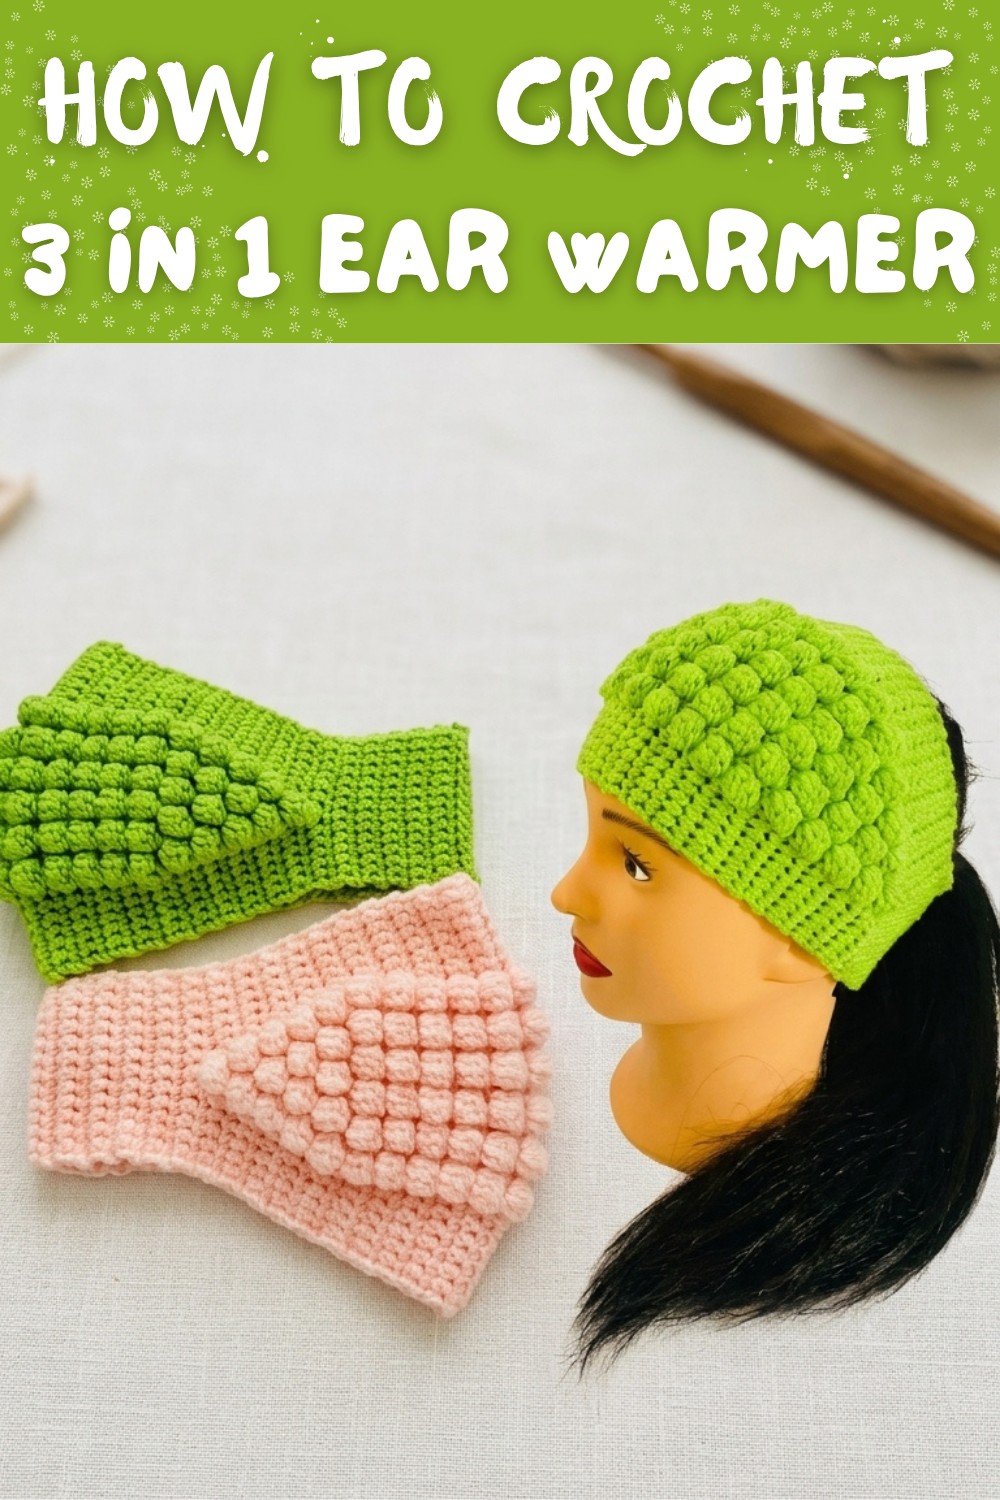
Crochet 3 In 1 Ear Warmer Free Pattern – Just Fold and Seam
Enjoy the Free Crochet 3 In 1 Ear Warmer Pattern, a versatile design perfect for staying warm and stylish as an ear warmer, headband, or cozy neck wrap.
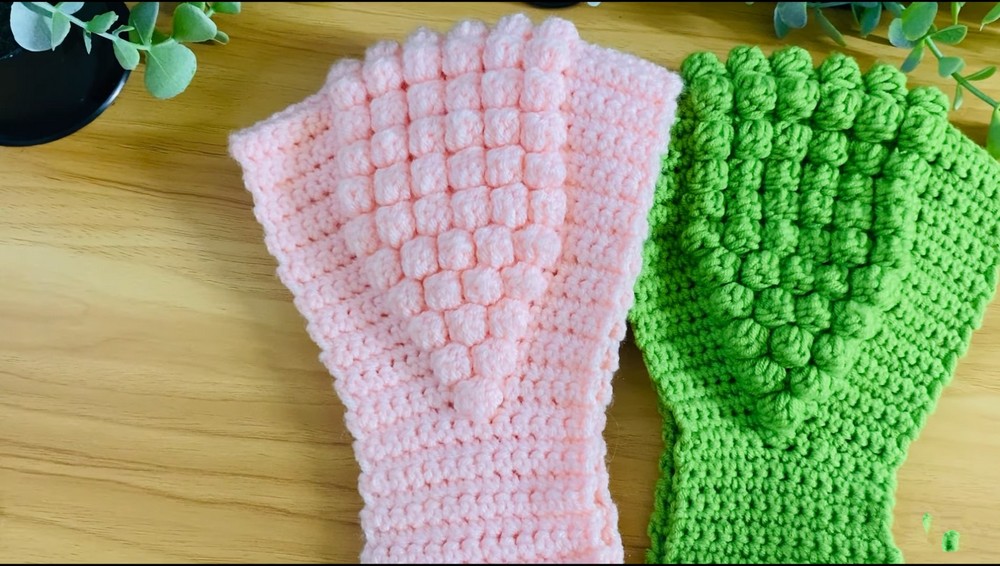
It is always exciting to create something that is both beautiful and practical, and this project is no exception. The Free Crochet 3 In 1 Ear Warmer Pattern adds charm and versatility to any wardrobe, making it a must-have accessory for the chilly seasons. This stunning ear warmer not only keeps your ears snug and comfortable but also doubles as a stylish headband or even a neck warmer, providing three unique ways to wear it! With its cozy texture and intricate design, it becomes the perfect blend of elegance and functionality.
Free Crochet 3 In 1 Ear Warmer Pattern - Multiple Styling Options
This pattern focuses on bold stitch details and lovely textures that make it stand out, while still being beginner-friendly and enjoyable for intermediate crocheters. You'll love how quickly it works up, making it ideal for personal use or as a thoughtful handmade gift.
Whether you're enjoying a brisk morning walk, heading into town, or gifting it to a loved one, this ear warmer is designed to look flattering and feel great.
The pattern's appeal lies in its practicality, gorgeous appearance, and ease of crochet, making it an excellent choice for anyone interested in creating a timeless addition to their accessory collection. Start today and crochet something truly unique that everyone will adore.
Step-by-Step Crochet Headband Pattern with Popcorn Stitches
Required Materials
- Yarn: Four-ply 100% acrylic yarn is recommended for durability and stretch.
- Approx. 50g.
- Choose a color based on personal preference.
- Hook Size: 4.5 mm crochet hook.
- Other Supplies:
- Stitch markers
- Scissors
- Tapestry needle for weaving ends
Gauge
- Gauge: 13 single crochet (sc) stitches and 13 rows = 4 inches by 4 inches.
- Adjust your hook size accordingly to ensure correct fit and size.
Finished Size
- Length: Approx. 20 inches (with unstretched material).
- Width: Starts at 2 inches and expands to 3 inches at the widest point.
Key Special Techniques Used
- Popcorn Stitch:
- Work 4 half-completed double crochets (dc) into the same stitch.
- Yarn over, pull through all loops on your hook, and close the stitch with a chain.
- Decreasing:
- Single crochet two stitches together (sc2tog): Insert your hook into the first stitch, yarn over and pull up a loop; insert into the second stitch, yarn over and pull up a loop; yarn over again and pull through all loops.
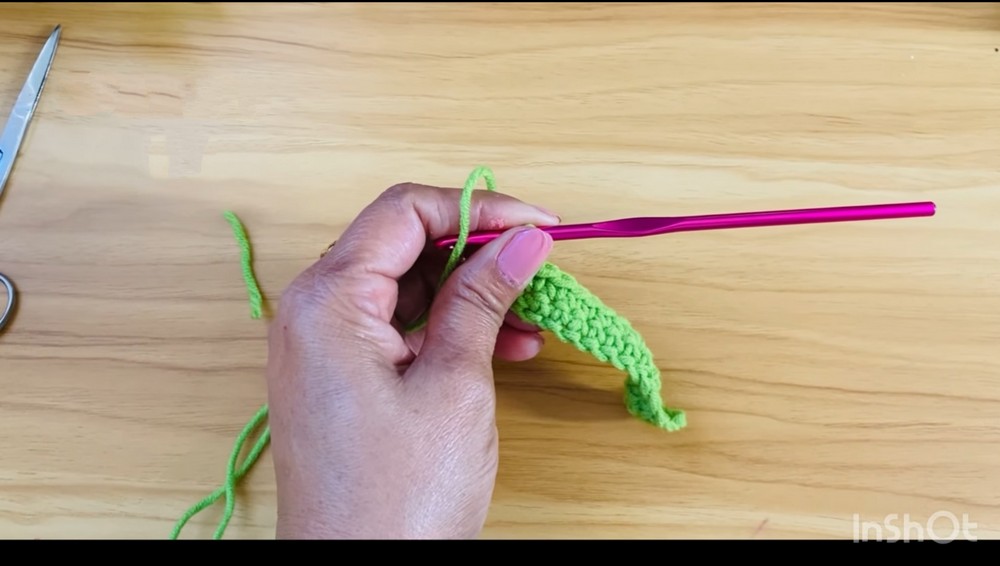
Step-by-Step Pattern
Foundation Chain
- Chain 14.
- Start working into the second chain from the hook.
Row 1: Establishing the Base
- Work 13 sc across the foundation chain.
- Carry the yarn end along as you crochet to securely tuck it in.
- This helps tidy up the loose end while reinforcing the foundation row.
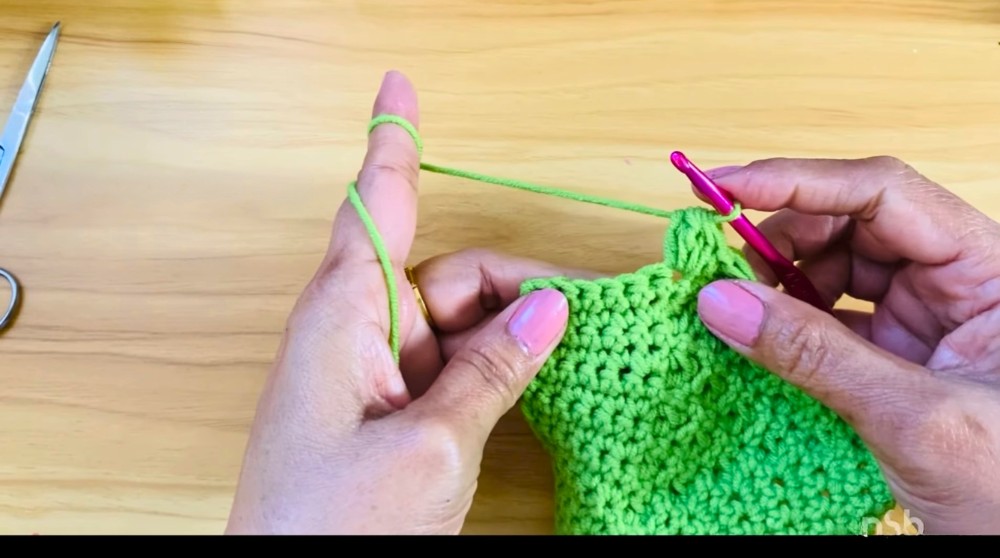
- Chain 1, turn.
Rows 2-13: Straight Rows
- Work 13 single crochet stitches (sc) across each row.
- At the end of every row, chain 1, turn to start the next row.
- Continue until you complete 13 rows of sc stitches.
Row 14: Begin Increasing
- Chain 1 at the start of the row. Place a marker to indicate the side where the stitches will begin to increase.
- Work 5 sc stitches.
- Increase: Add 1 more sc to the next stitch.
- Work 5 more sc stitches.
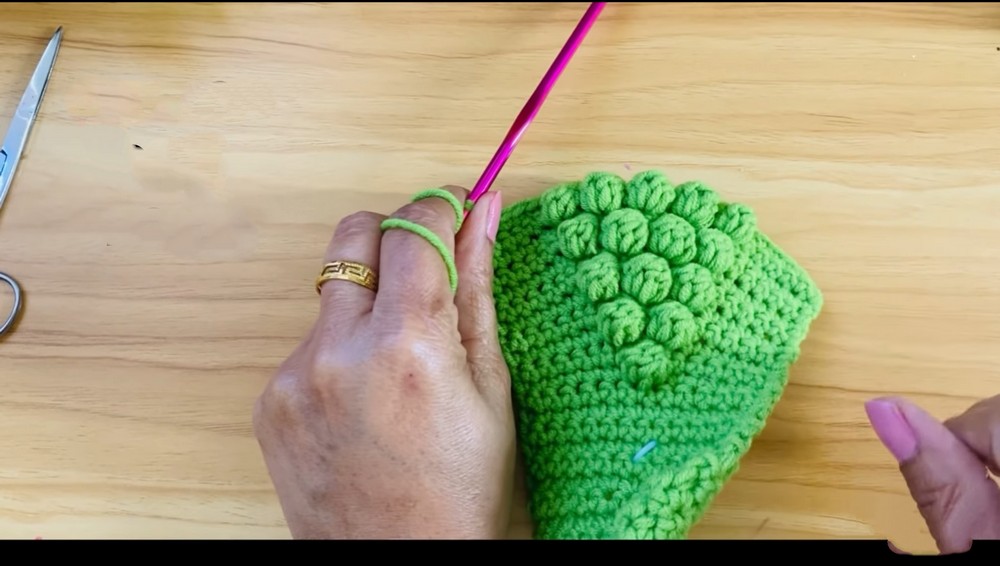
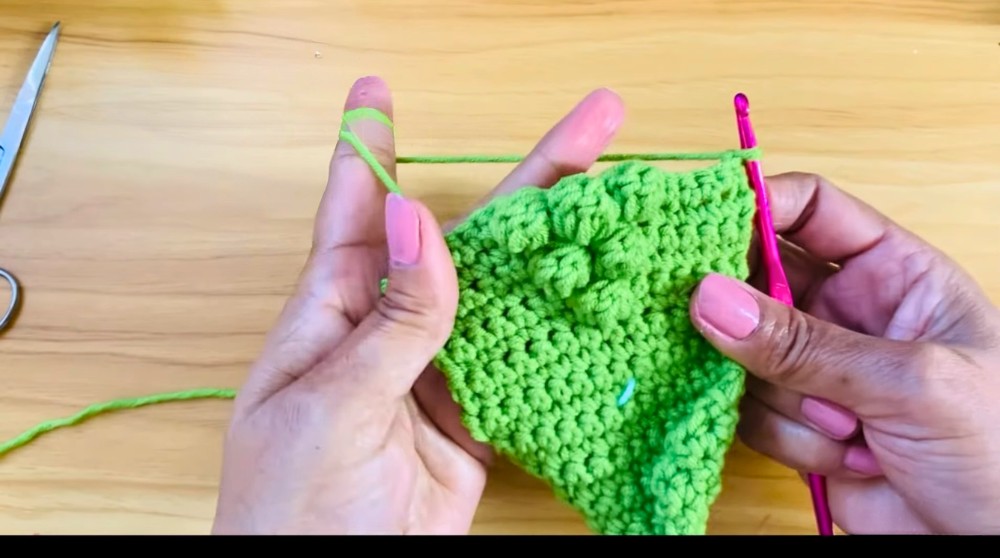
- Create 1 popcorn stitch:
- Work 4 half-completed dc into the same stitch.
- Yarn over, pull through all loops, chain 1 to finish the popcorn.
- Increase: Add 1 sc after the popcorn, then continue 5 sc stitches.
- Chain 1, turn to the next row.
Row 15: Gradual Expansion
- Work 15 sc stitches across the row.
- Count stitches as you go to ensure accuracy.
- Chain 1, turn.
Row 16: Adding More Popcorn
- Work 5 sc stitches.
- Increase: Add 1 more sc stitch.
- Work 2 popcorn stitches, adding 1 sc on each side of both popcorns. Increase by two sc stitches total.
- Work 5 sc stitches after the last popcorn.
Rows 17-25: Gradual Widening
- Continue increasing evenly by adding 1 sc before and after each popcorn stitch, working additional popcorn stitches in every row.
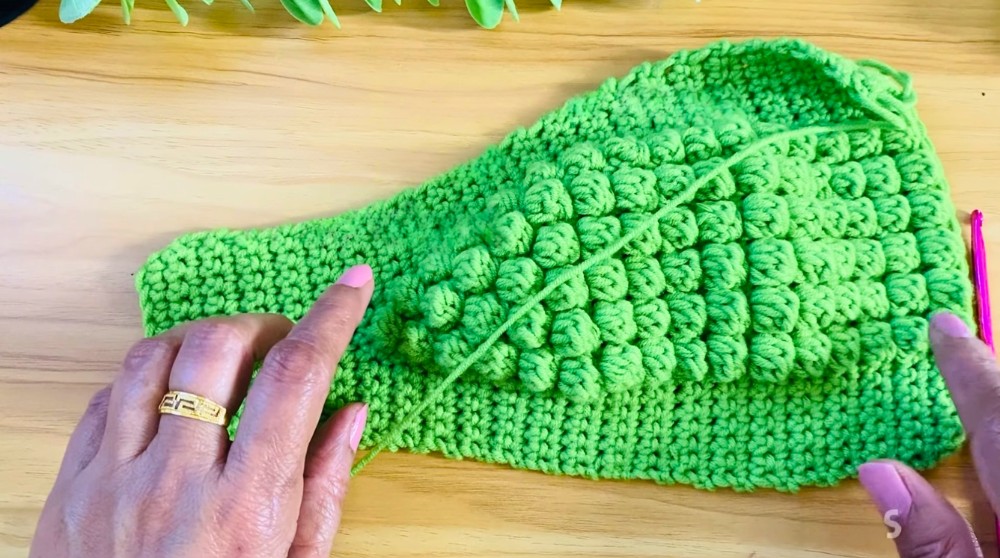
- By Row 25, you should have 6 popcorn stitches in the row.
- Work straight rows with no increases after reaching max width (6 popcorn stitches) until the headband measures 13 inches long.
Straight Rows to Establish Length
- Once the headband reaches its widest width (6 popcorn stitches), work straight rows to increase the length up to 13 inches total.
- Example repeat rows include:
- 13 sc stitches and 6 popcorn stitches.
- Example repeat rows include:
- This forms the straight-line section of the headband.
Rows 26+: Begin Decreasing
- To start narrowing down the headband, decrease 1 sc stitch immediately before and after each popcorn stitch.
- Reduce the number of popcorn stitches in each row until only 1 popcorn stitch remains.
- Example decrements:
- Row 26: 5 popcorns.
- Row 27: 4 popcorns.
- Row 28: 3 popcorns.
- Example decrements:
- Decrease sc stitches evenly until reaching the original 2-inch width.
Final Rows
- When you reach 14 stitches again, work straight sc rows without popcorn stitches.
- Crochet evenly until the headband measures 20 inches.
Finishing
- Edges: For a cleaner finish, work a round of single crochet around the edges of the headband.
- Secure Ends: Use a tapestry needle to weave in loose ends at each edge securely.
- Lightly block your headband to smooth stitches and prevent curling.
Customization Ideas
- Color Variations: Use two or more yarn colors for a striped effect.
- Width Adjustment: Add or subtract chains in the foundation to adjust width.
- Decorative Edging: Add picot stitches or crab stitches (reverse single crochet) along the edges for a unique finish.
- Embellishments: Add beads, buttons, or appliqués for added flair.
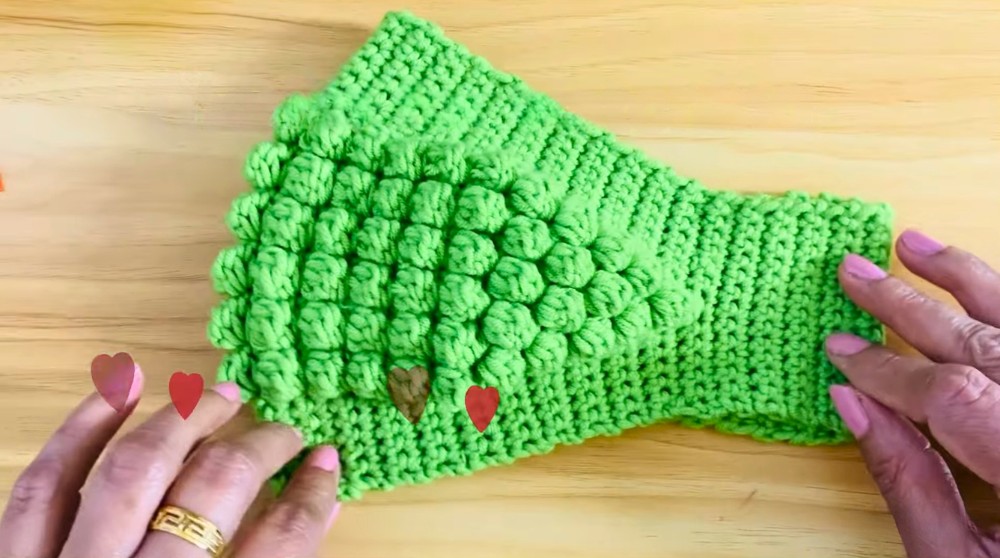
Conclusion
You've now completed a stylish crochet headband with popcorn stitch embellishments! This adaptable pattern is perfect for personalization and creates a comfortable and unique accessory for any season.
Pattern Corrections
- Ensure the popcorn placement is symmetrical throughout.
- If the headband curls excessively, adjust your tension or block thoroughly.
Important Tips
- Count Stitches: To prevent errors, count your stitches regularly during increases and decreases.
- Avoid Tight Popcorn Stitches: Keep your popcorn stitches loose to maintain a smooth texture.
- Gauge Consistency: Watch your tension for consistency between rows to avoid uneven width.