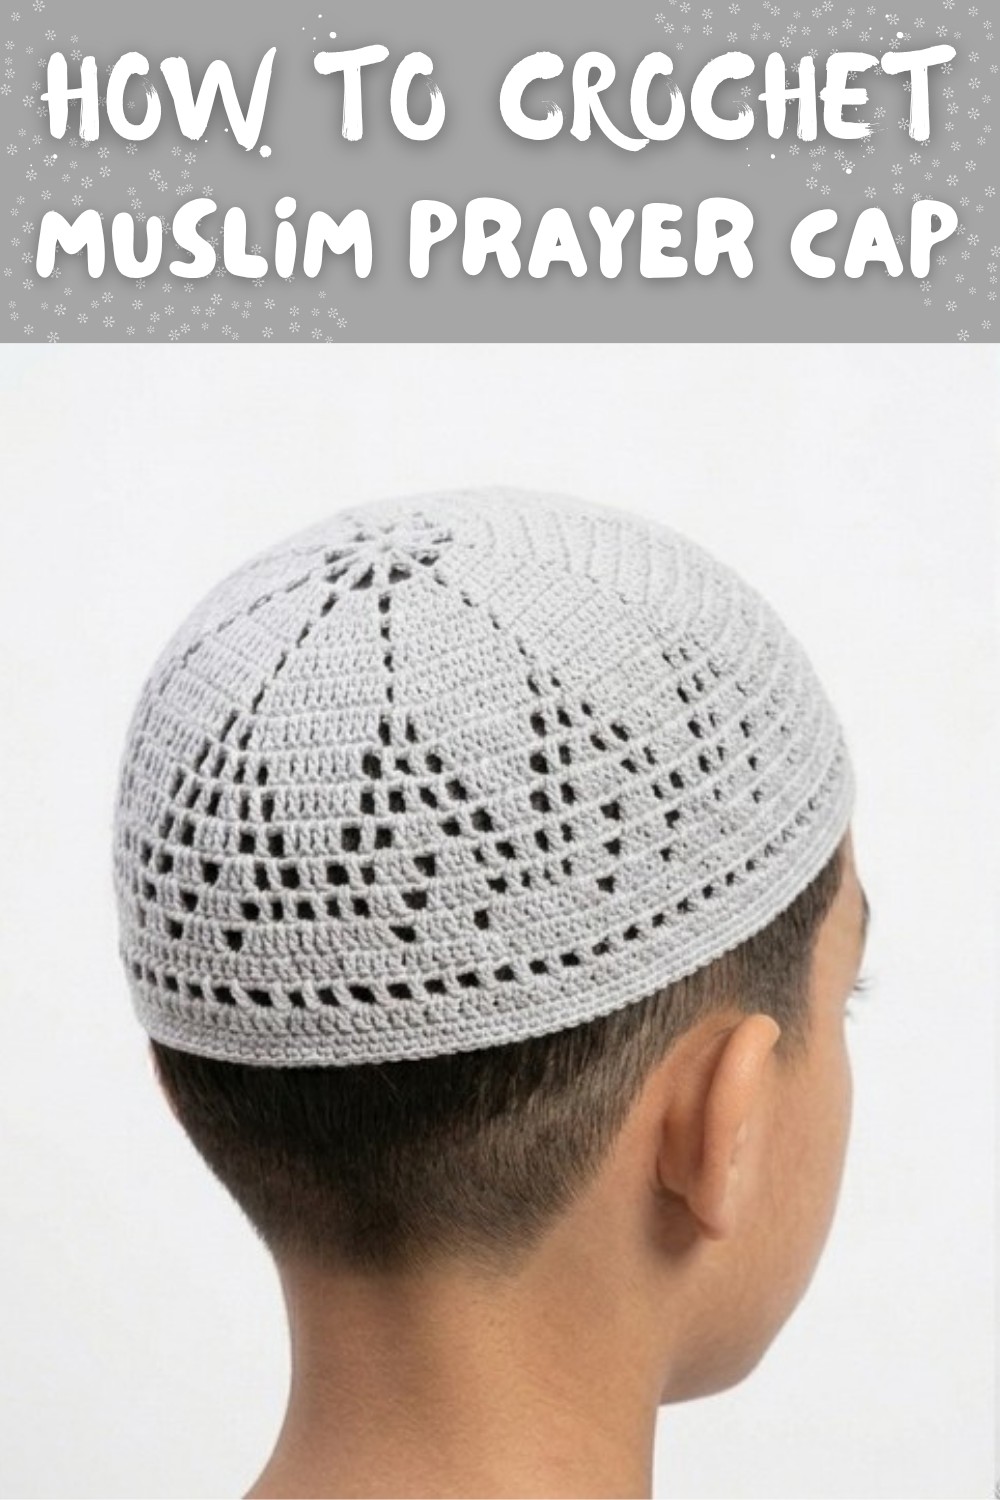
Free Crochet Muslim Prayer Cap Pattern for a Beautiful Handmade Gift
Practice your best creative skills with this free crochet muslim prayer cap pattern to hook a professional and soft hat that feels very cozy to wear.
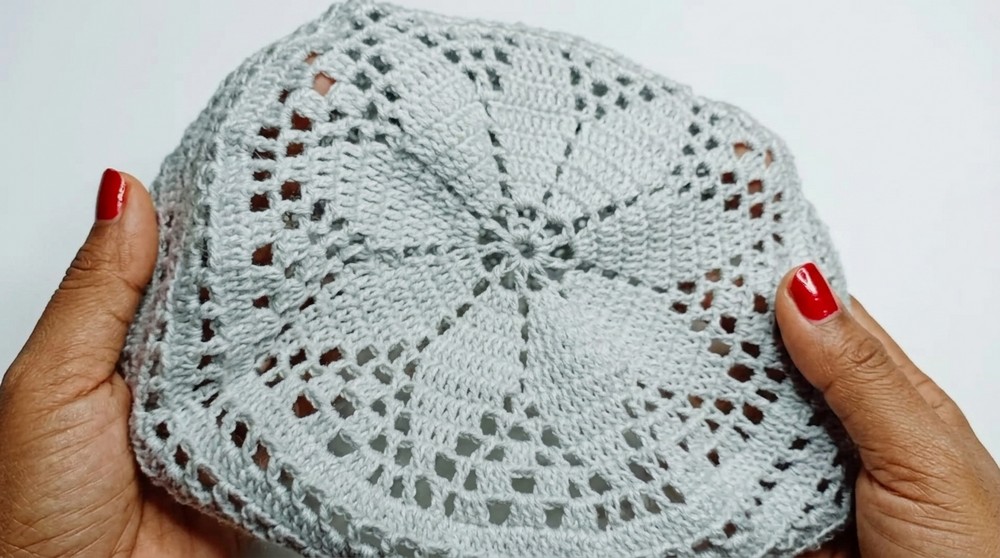
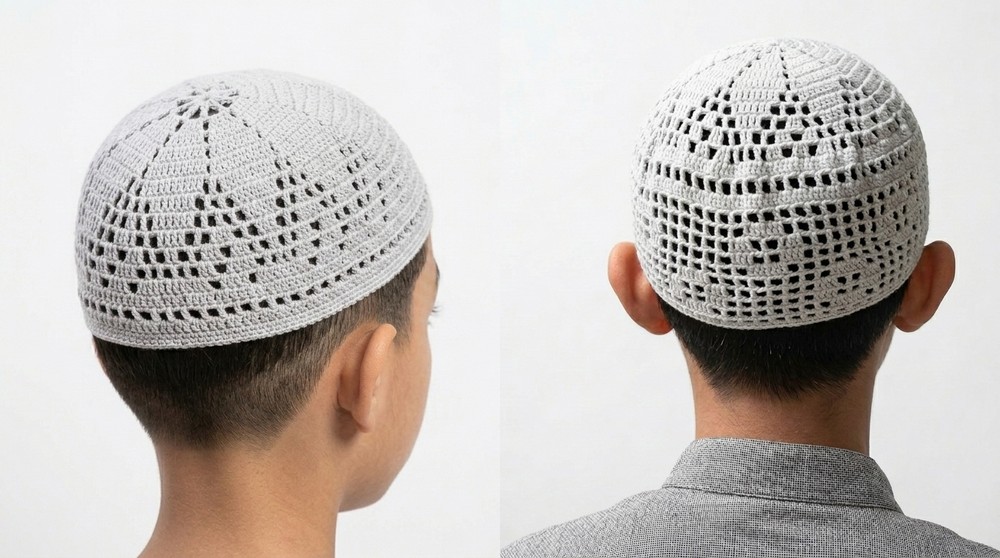
Looking for a beautiful and meaningful project to crochet? The Free Crochet Muslim Prayer Cap Pattern is perfect for expressing your creativity while crocheting something truly special. This pattern makes it easy to create a stylish, lightweight, and comfortable prayer cap that's ideal for daily worship or as a thoughtful handmade gift. The design is both elegant and practical, featuring soft cotton yarn and intricate details that make the cap stand out.
Free Crochet Muslim Prayer Cap Pattern That's So Unique
The cap features neat rows, subtle motifs, and a lovely textured border, making it not only functional but visually stunning. Its adjustable size ensures a secure and comfortable fit for every head. Plus, you can customize the cap to match your style or preferred color.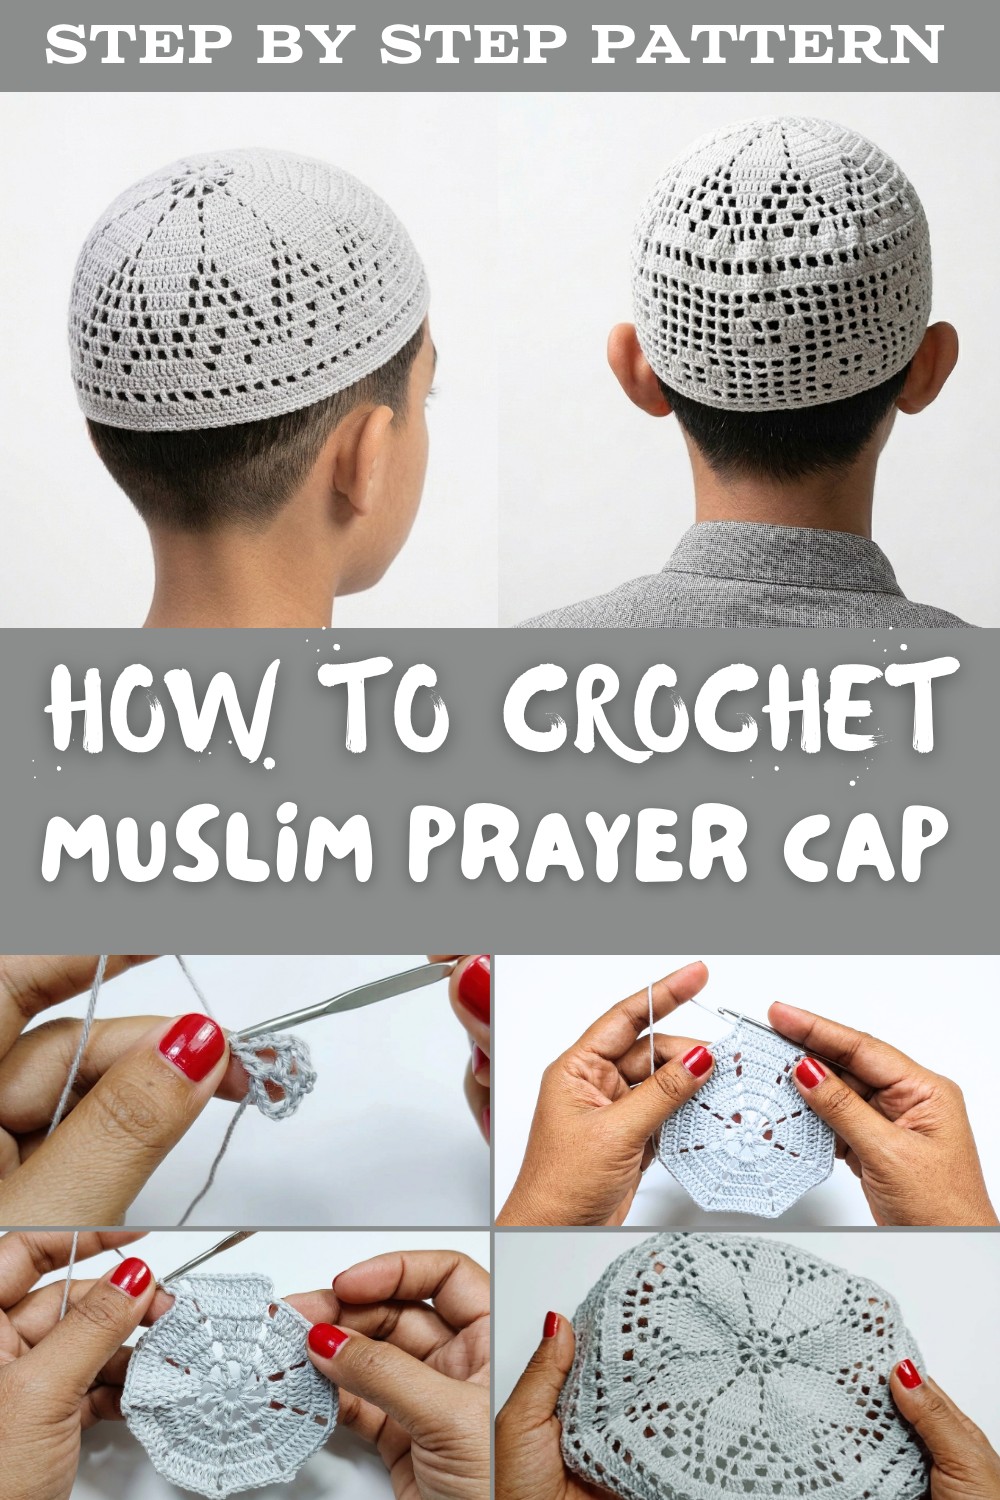
What's even more exciting is that crocheting this prayer cap is a relaxing experience, allowing you to enjoy the process and connect with your crochet. Whether for personal use or gifting, this pattern is perfect for creating something meaningful and beautiful. Start your crochet journey today and experience the joy of crafting your very own prayer cap.
Detailed Crochet Prayer Cap Pattern
Materials
- Yarn: Cotton yarn with size 9D.
- Hook: Tulip hook, size 1.
- Scissors: For cutting the yarn.
- Measuring tape: To measure the diameter (optional).
- Tapestry needle: To weave in loose ends.
Special Techniques
- Slip Knot:
- Create a loop, insert the hook, yarn over, and pull through.
- Slip Stitch (slst):
- Insert hook into the stitch, yarn over, and pull through both loops on the hook.
- Chain (ch):
- Yarn over, pull through the loop on the hook.
- Double Crochet (dc):
- Yarn over, insert hook into the stitch, yarn over again, pull through (three loops on the hook), yarn over, pull through two loops, yarn over again, and pull through the remaining two loops.
- Picot:
- Chain 3, insert the hook into the two loops of the base, yarn over, and pull through to create a small pointed edge.
Step by Step Pattern
Round 1
- Make a slip knot and create a foundation chain of 8 ch.
- Insert the hook into the first chain to form a ring.
- Secure with slst, creating a loop.
- Chain 6 ch, then 1 dc into the ring.
- Chain 3 ch and repeat 1 dc into the ring.
- Repeat this pattern for a total of 8 segments (1 dc + 3 ch for each).
- Close the round with a slst into the third chain of your initial starting chain.

Round 2
- Start with 3 ch (counts as the first dc).
- In the ring of chains, create 3 dc.
- Chain 2 ch, then make 4 dc in the next chain space.
- Continue this pattern of 4 dc + 2 ch around the ring for 8 segments.
- Finish the round with a slst to join.
Round 3
- Begin with 3 ch, then 1 dc in the first loop.
- Work 1 dc into each of the next 2 loops.
- In the last loop of the segment, make an increase by adding 2 dc.
- Repeat this pattern (increase in the last loop, 1 dc in others) for all 8 segments.
- Close with a slst to join.
Round 4
- Start with 3 ch, then make 1 dc in the same loop.
- Work 1 dc in each of the next 4 loops.
- In the last loop, make an increase of 2 dc.
- Chain 2 ch and repeat this sequence for all 8 segments.
- Secure with a slst.
Rounds 5 to 11
- Continue increasing the number of double crochets in the middle loops of each segment.
- For each round, maintain a consistent pattern of 2 dc in the last loop and increasing the total number of dc in the straight section.
- Round 5: 6 dc in straight section.
- Round 6: 7 dc in straight section.
- Round 7: 8 dc in straight section.
- Continue this progression for all rounds up to 11.
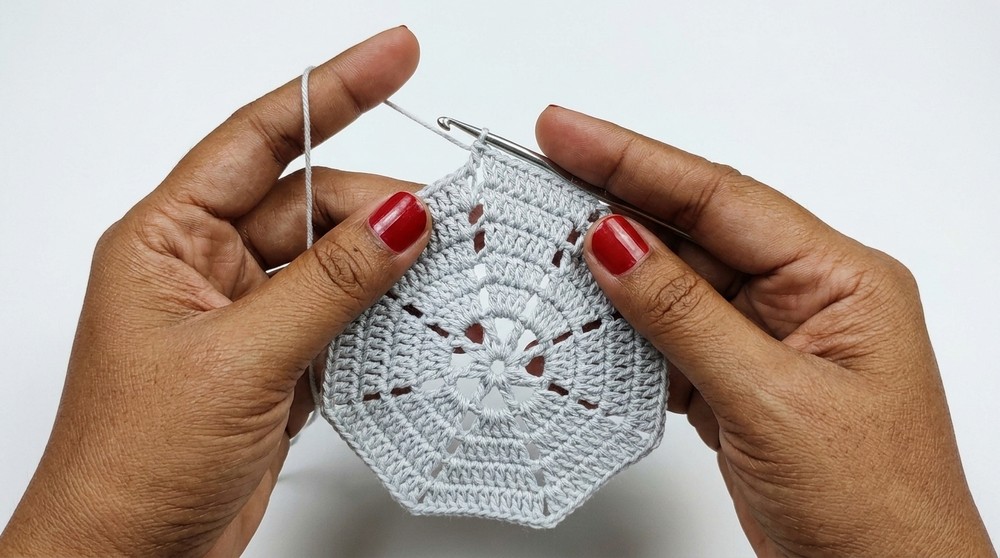
Round 12
- Begin with 5 ch, then skip 2 loops and insert your hook into the 3rd loop.
- Make 1 dc, chain 2 ch, and insert the hook in the next loop.
- Repeat this pattern around to form a "box like" grid between the existing stitches. Close with a slst.

Round 15
- Create additional texture by making boxes in groups of 8 boxes.
- In between, add a motif by working 2 dc in a chain space, 1 dc in the next loop, and repeating this sequence.
Round 17
- Repeat the grid pattern with adjusted positioning for the motif.
- Make 5 ch, then work boxes for 6 sections, followed by the motif placement.
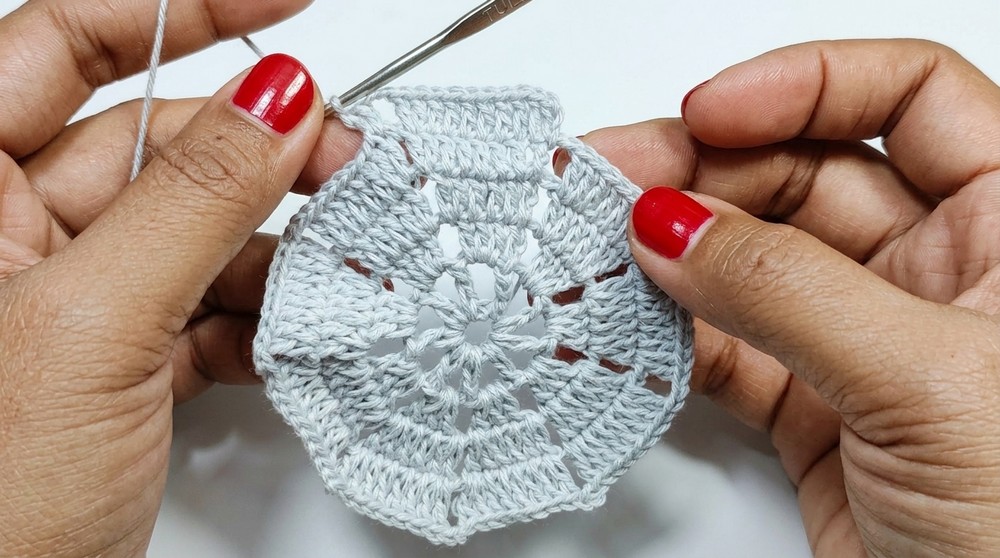
Final Rounds and Edging (Round 24 onwards)
- For edging, fill chain spaces with sc stitches. Make two sc, then 3 ch, and work a picot.
- Add 4 sc after the picot, repeat the picot, and continue around.
Finishing the Pattern
- Once you complete the edging, securely fasten the yarn.
- Use a tapestry needle to weave in all loose ends on the inside of the prayer cap.
- Gently shape and block the cap to ensure it has a smooth and even design.
Final Words and Tips
- Measuring the Diameter: To ensure the right size for the prayer cap, measure from one ear to the other over the top of the head, divide the measurement by 2, and crochet until the diameter matches this length.
- Blocking for Shape: If the cap curls or doesn't lie flat, lightly steam or block it for a clean finish.
- Maintain the Pattern: Handwash your prayer cap to preserve its shape, avoiding harsh detergents.
This step by step guide provides a detailed approach to making a beautiful prayer cap that is both practical and decorative.