Summer Flower Crop Top: Free Crochet Pattern
Try this free crochet flower crop top tutorial for a soft, lightweight, and beautiful piece that's perfect for sunny days and casual wear.
A soft and lightweight crop top covered in delicate floral details offers charm and simplicity for any occasion. This handmade piece draws attention with its detailed flower shapes and airy look, making it perfect for sunny days or casual outings. The floral details carry a natural and gentle beauty, making it different from ordinary clothing.
Free Flower Crop Top Crochet Pattern for Fresh Styles

It has a relaxed fit that feels comfortable and pairs well with jeans, skirts, and shorts. Offering both style and ease, it's suitable for warm weather or fun events. With flexible color choices, it's easy to customize this top to suit your personal style.
This crop top stands out as a creative way to include an artistic touch in your outfit. Lightweight and stylish, it keeps things fresh while showing off an eye-catching design that truly elevates everyday wear.

Crochet Floral Crop Top - Step-by-Step Pattern
Materials List
- Yarn:
- 100% Cotton or Acrylic Yarn - Lightweight (Category 3).
- At least 2 complementary colors for the flower centers and petals (e.g., Fuchsia and White).
- Black or a darker color for the straps and buttonhole edging for contrast (optional).
- Hook Size:
- Recommended: 3.5 mm crochet hook.
- Optional Materials:
- Tapestry Needle: For sewing flowers together and weaving in ends.
- Measuring Tape
- Scissors
Skill Level
Intermediate to Advanced: Requires knowledge of creating individual motifs (flowers), joining motifs, and adding finishing details like buttonholes and straps.
Key Abbreviations
- ch: Chain
- sl st: Slip Stitch
- sc: Single Crochet
- dc: Double Crochet
- tr: Treble (Triple) Crochet
- yo: Yarn Over
Special Notes
- Gauge: Each completed flower motif measures approximately 5 cm in diameter. Adjust hook size if your flowers measure significantly larger or smaller.
- Sizing: The top can be customized for different bust sizes by varying the number of flowers.
- For example:
- Bust circumference of 70 cm requires 10 flowers in a row.
- Measurements are calculated for a size Small (S); adjust length and width as needed for larger sizes.
- For example:
- Make sure to weave in ends as you go to save time on finishing work.
- Join flowers with a tapestry needle for a sturdy seam.
Step-by-Step Pattern
Part 1: Flower Motif
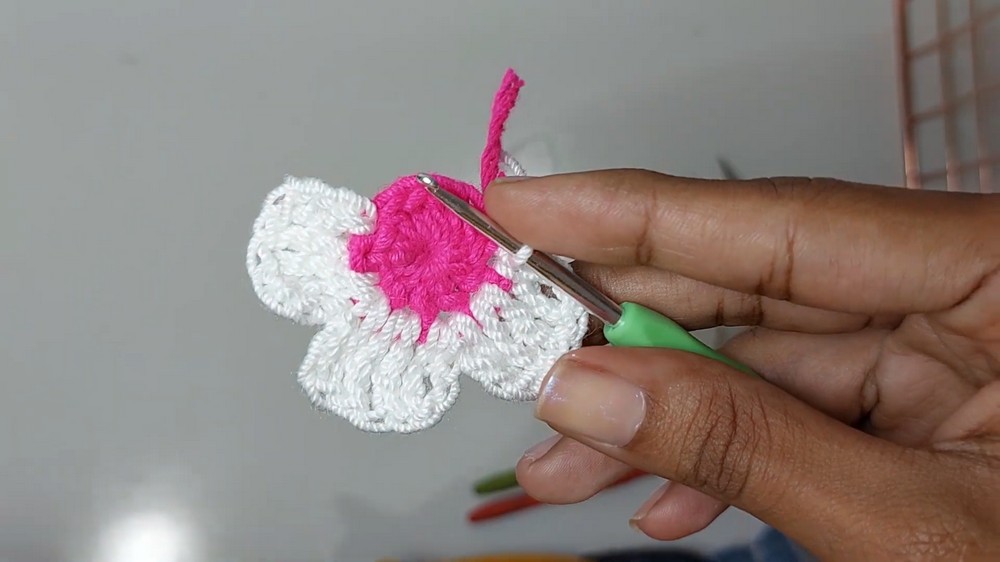
Round 1: Flower Center
- Begin with a magic ring.
- Ch 2 (counts as the first dc).
- Work 11 dc into the magic ring (12 dc total including the initial ch 2).
- Pull the yarn tail tightly to close the ring.
- Sl st to the top of the starting ch to close the round.
- Fasten off and leave a long tail for sewing/weaving in later.


Round 2: Petals
- Attach the second-colored yarn (e.g., white) into any dc from Round 1.
- Ch 3, then work a tr into the same stitch. In the same space, make:
- 2 more tr.
- Ch 3, then sl st into the same space to form the first petal.
- Move to the next stitch. Repeat the following for a total of 5 petals:
- Ch 3, work 4 tr into the stitch (close the double treble points together to form a cluster), Ch 3, and sl st in the same stitch.
- After completing the final petal, sl st to the base of the first petal to close the round.
- Fasten off and leave a long tail for weaving.
- If you need to hide threads immediately, secure them by weaving into the back side of the flower.

Part 2: Calculate the Required Number of Motifs
- Measure the bust circumference for your desired top size. For example:
- 70 cm circumference for a size Small.
- Divide the circumference by the width of one flower (in this case, 5 cm) to determine the number of flowers needed for one row (e.g., 70 ÷ 5 = 14 flowers).
- Plan the number of flower rows to achieve the desired crop length:
- For a crop top that measures 20 cm in height, arrange 4 rows of flowers vertically.

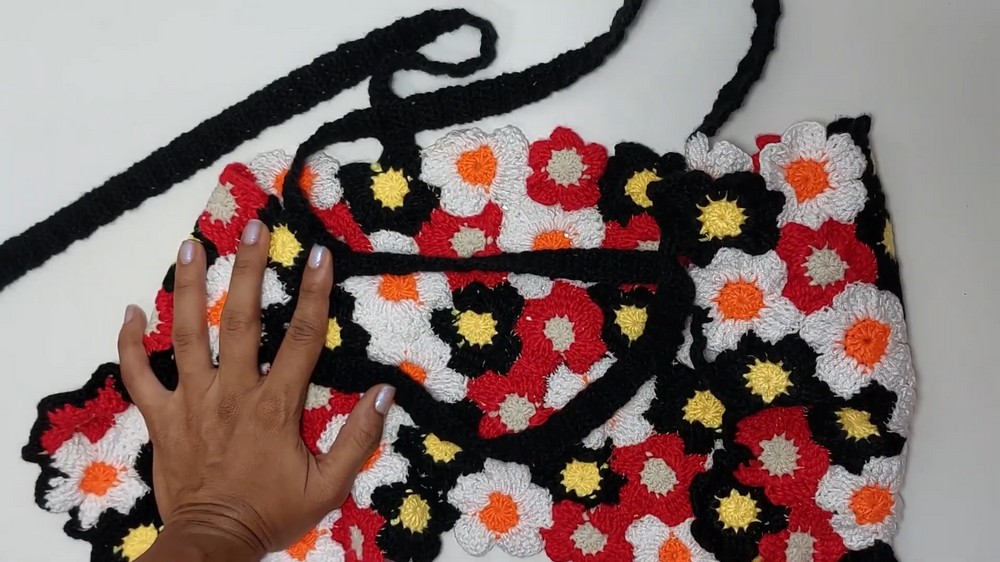
Part 3: Assemble the Flowers
- Arrange the flowers into the desired pattern on a flat surface.
- You can mix and match colors for a creative effect or use uniform colors for a classic look.
- Using a tapestry needle and matching thread:
- Begin sewing flowers together, one by one.
- Align edges of petals when sewing for a seamless transition between flowers.
- Take your time in stitching each flower to avoid gaps.
- Make strips of flowers first. For example:
- For a size Small: Create 4 strips of 10 flowers each.
- Then stitch the strips together to form the body of the crop top.

Part 4: Back Buttonholes
Once the flower motifs are joined and the crop top structure is ready:
Round 1: Base for Buttonholes
- Attach a darker contrasting yarn (e.g., black) to any flower petal edge on the back panel of the top.
- Work sc stitches evenly along the edge of the flowers.
- When transitioning from one flower to another, add 5 ch to create the buttonhole space (this allows straps to weave through).
Round 2: Reinforce Buttonholes
- After completing the first round with buttonholes, add another round of sc to reinforce the buttonhole loops.
- For each 5 ch buttonhole, work 5 sc inside the hole.
- Fasten off and weave in ends.

Part 5: Straps
Steps for Straps
- On the front panel, mark the points for two straps (approximately 16 cm apart).
- Attach yarn at the marked point and chain until the strap is approximately 108 cm long.
- Work rows of dc (5 stitches wide) to create a thick, durable strap.
- Continue until the strap measures desired width (e.g., 1 cm).
- Attach the strap to the back panel after crossing it through all buttonhole loops.
- Repeat for the second strap.
Finishing the Pattern
- Weaving in Ends: Using your tapestry needle, securely weave in all remaining yarn ends on the back of the blouse to ensure a clean finish.
- Blocking: Lightly block the entire crop top to shape the flowers and even out the seams.

Conclusion
Congratulations on completing your Crochet Floral Crop Top! This garment is a true labor of love-crafted from individual motifs hand-sewn together. The final piece should have a beautifully textured floral design, with adjustable buttonholes and straps to fit your unique shape. Wear your crop top proudly-it's a showstopper sure to impress!
Pattern Correction
- If any flower seems smaller, it may be due to inconsistent tension. Redo it with careful tension or block the flower to adjust the size.
- Ensure all corners align perfectly when joining flowers to maintain a polished look.
Final Tips
- Balance Your Yarn Tension: Slight variations may affect the size of flowers. Take breaks while working on this detailed piece.
- Use a Smaller Hook if your flowers tend to be too loose.
- Mix Colors Creatively: Choose a set of cohesive or contrasting colors that reflect your style.