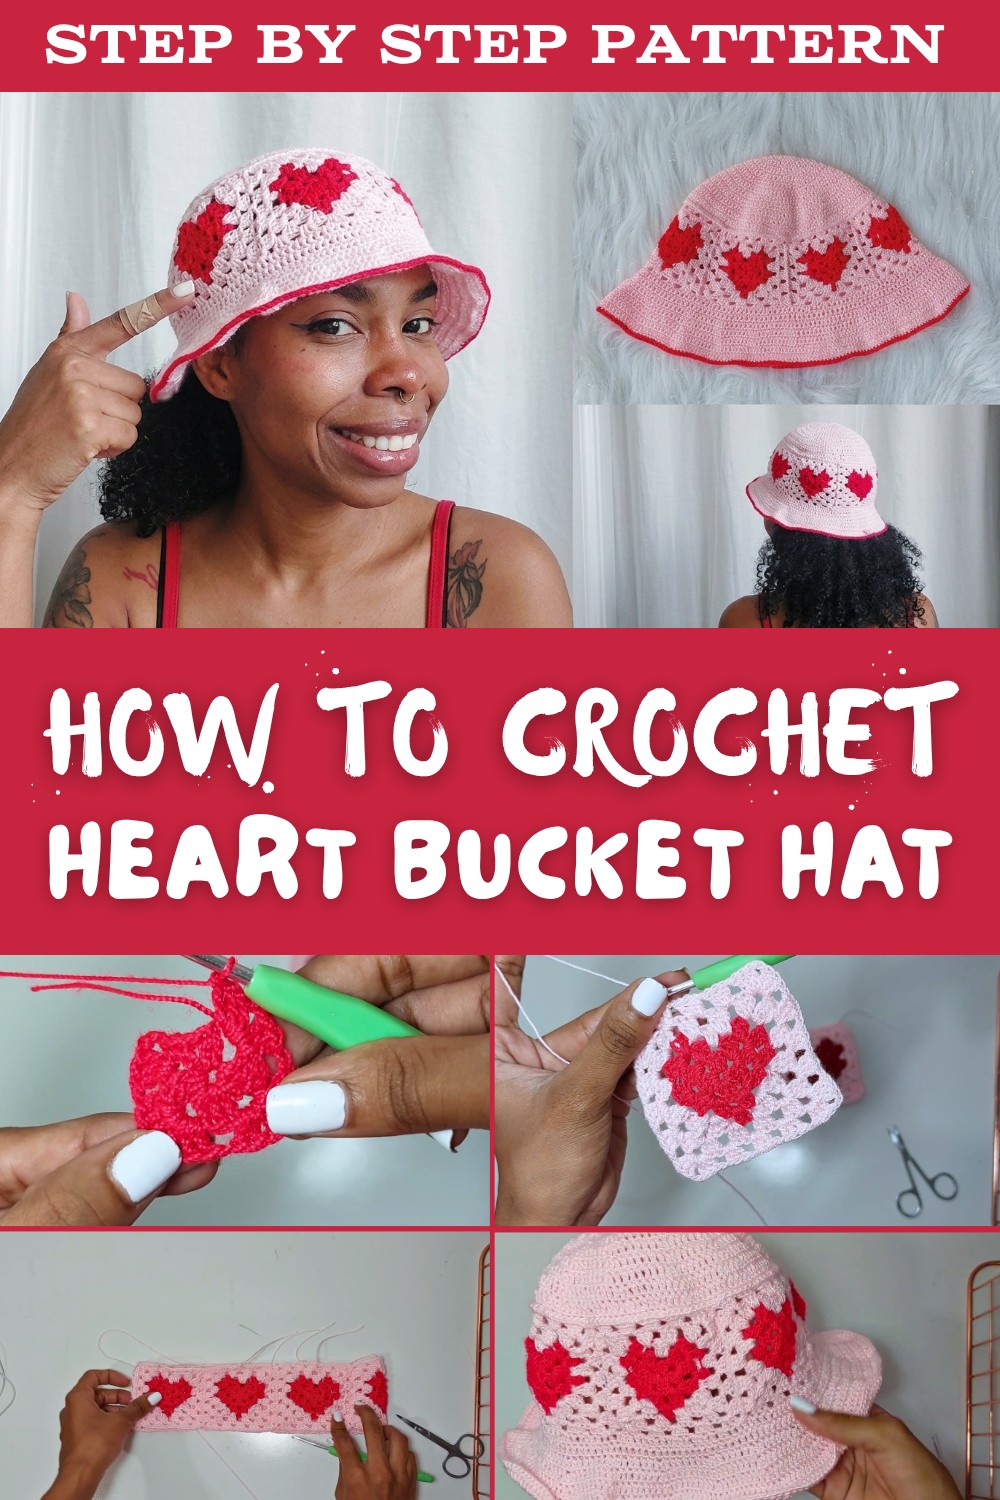
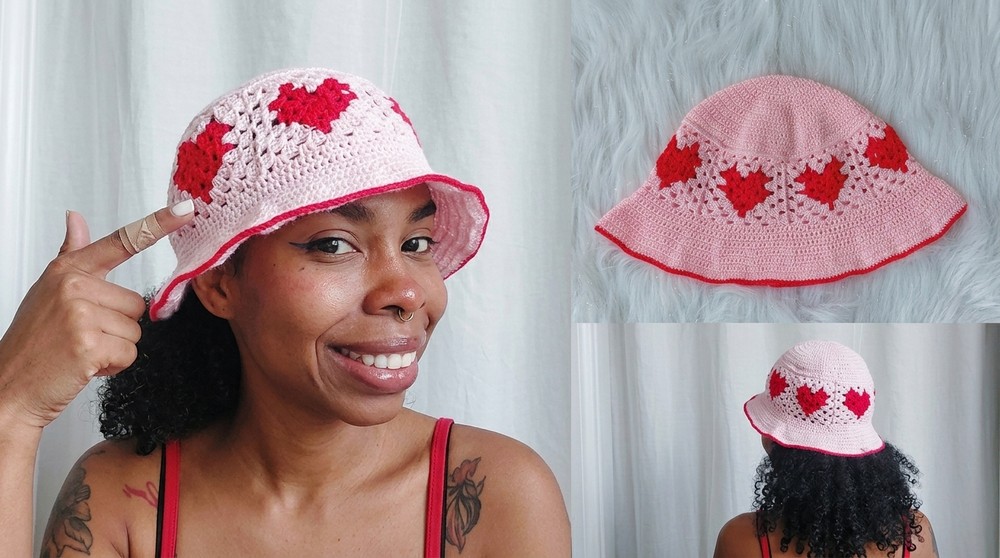
Heart Bucket Hat Crochet Free Pattern for Summer Fun
Follow this free crochet heart bucket hat pattern for a cute and comfy accessory that adds charm and style to your everyday wardrobe effortlessly.
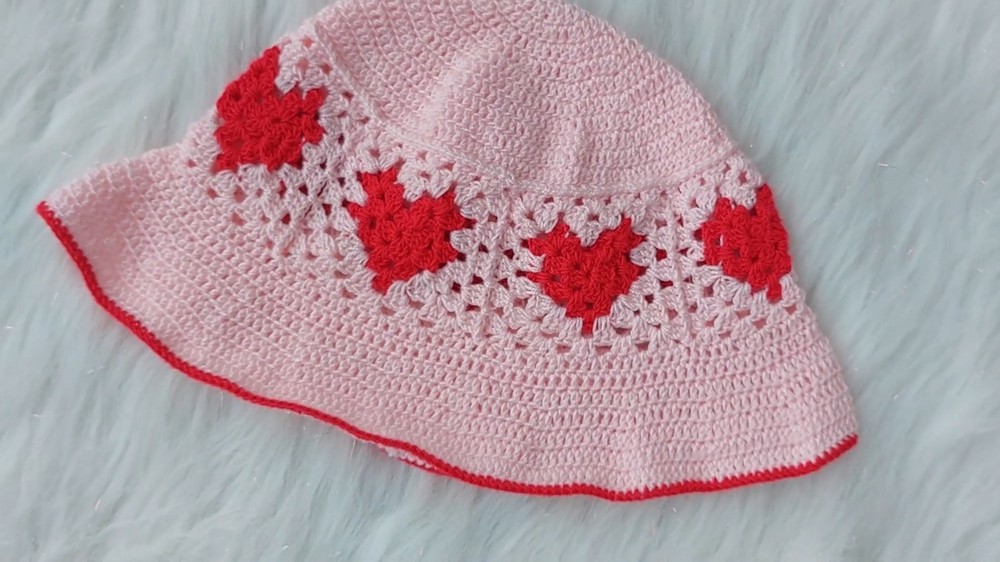
A sweet and charming addition to any outfit, this heart bucket hat is both stylish and practical. With its adorable heart shapes, it stands out as a fun accessory for people of all ages. The design is simple yet eye-catching, offering a playful look that works for casual outings, sunny days, or gifting to someone special.
Free Crochet Heart Bucket Hat Pattern for a Fun Project
Perfect for keeping the sun away while adding a cute touch to your style, the hat combines creativity and usefulness in a unique way. It's easy to match with different outfits, making it a versatile choice for everyday wear. The soft texture adds comfort, while the heart details bring warmth and joy to its appearance.
This pattern offers a beautiful way to create something fun and personal. Whether it's for yourself, a friend, or a loved one, this bucket hat makes every look lighthearted and cheerful, all while being practical and fashionable.
Crochet Heart Beanie (Step-by-Step Pattern)
Materials Needed
- Yarn:
- Main Color: Red (heart center and decorative contrast).
- Secondary Color: Light Pink (for heart background and main body).
- Optional Third Color (for a border or extra detail contrast).
- Yarn Type: 100% acrylic, mercerized yarn, commonly known as crochet thread or coral yarn (lightweight, approximately #2 or #3 weight).
- Hook Size:
- Recommended: 3.0 mm or 3.5 mm crochet hook, suited for lightweight yarn.
- Optional Materials:
- Tapestry Needle: For weaving in ends and sewing.
- Measuring Tape: For ensuring accurate sizing.
- Scissors
Gauge
Gauge for Granny Hearts: Each completed Granny Heart measures 7 cm across using lightweight yarn and a 3.5 mm hook.
If the size differs significantly, adjust your hook size or yarn appropriately to achieve similar measurements.
Finished Size
- Adult-sized beanie: Head circumference of approximately 50-53 cm.
- Customizable to fit larger or smaller sizes by altering the number of hearts or rounds.
Skill Level
Intermediate to Advanced: This pattern involves Granny Square techniques, color changes, and assembly.
Abbreviations (US Terminology)
- ch: Chain
- sl st: Slip Stitch
- sc: Single Crochet
- dc: Double Crochet
- yo: Yarn Over
Special Notes
- Customization: Add more hearts, or adjust the arrangement as needed for a larger or smaller size.
- Tight Stitches for Defined Edges: Crochet tightly, especially in the Granny Heart sections, to maintain a clean shape.
Step-by-Step Pattern
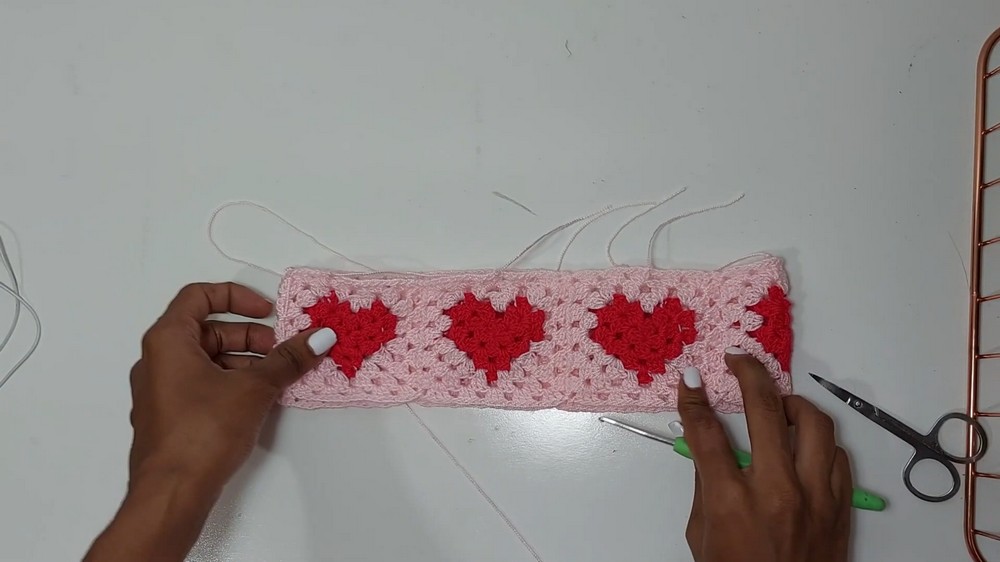
Part 1: Heart Granny Square
Each Granny Square heart forms the design element of the beanie, and they will be joined together to form the crown.
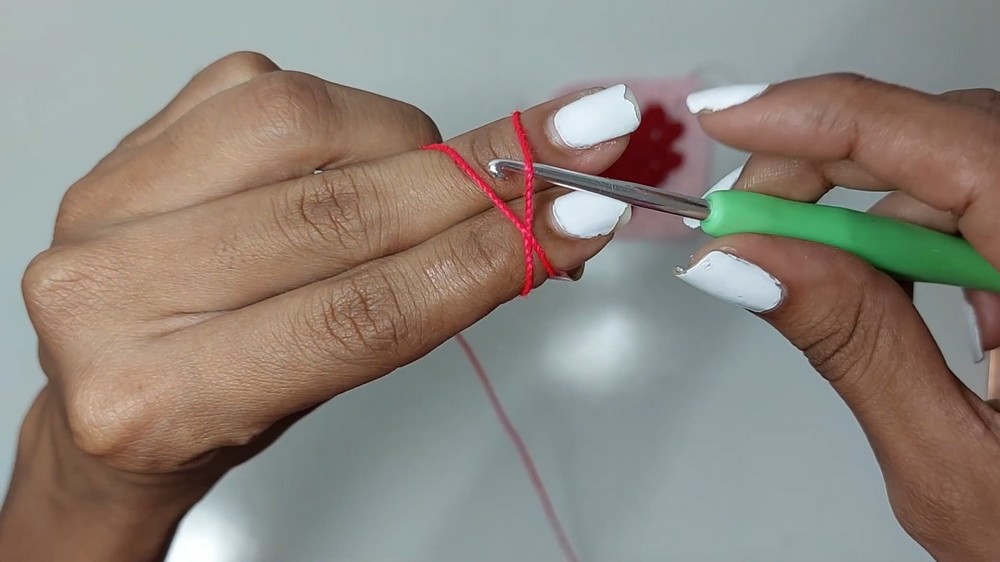
Round 1: Heart Center (Red)
- Create a magic ring.
- Wrap the yarn around two fingers to form a loop and insert your hook under the loop to pull the working thread through.
- Ch 5 (counts as one dc and two separation chains).
- In the magic ring, work:
- (3 dc, ch 2) Repeat this sequence 3 more times for 4 total groups of 3 dc, all separated by ch 2.
- To complete the heart shape, add 2 dc in the ring (half of the fifth group).
- Pull the yarn tail tightly to close the magic ring, creating a rounded center.
- Tie a knot to secure the center, ensuring it doesn't unravel.
- Sl st into the 3rd chain from the starting ch-5 to form a small "square" shape.
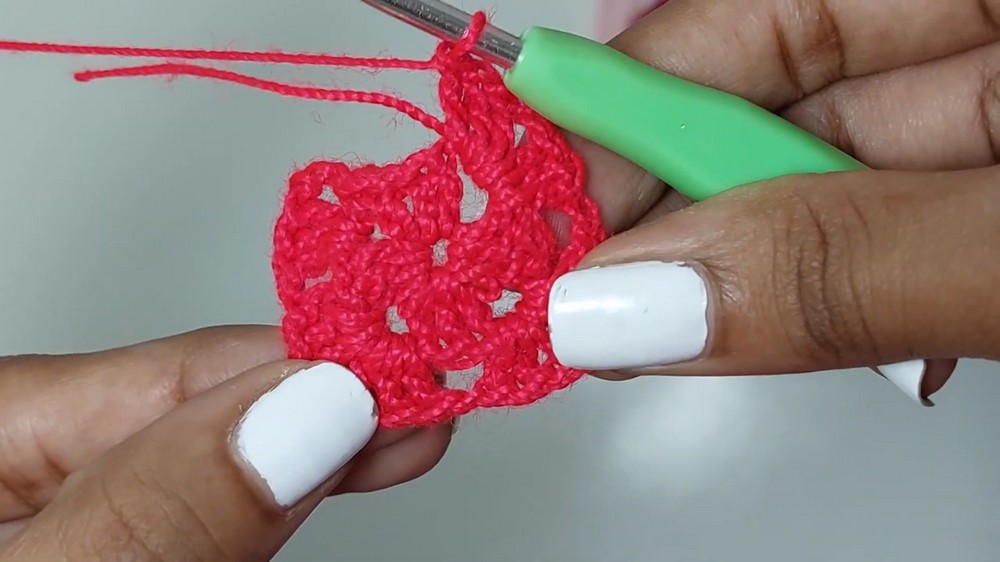
Round 2: First Petal Layer (Red)
- Ch 3, and in the same corner, work (2 dc, ch 1).
- This forms the first group in one corner of your Granny Square.
- In the next corner (ch-2 space), make (3 dc, ch 2, 3 dc).
- Continue this sequence of (ch-1, 3 dc) in every ch space around the square.
- Stop just before the final corner on the top of the heart shape.
- Make 2 dc in the current corner and fasten off the red yarn.
Round 3: Heart Shaping (Light Pink)
- Change to pink yarn. Attach it to the chain from the previous round.
- Work evenly across the groups of dc by crocheting 1 dc into each dc from the previous row, forming the top outline of the heart.
- At all four corners, including the heart's two rounded lobes, work:
- 3 dc, ch 2, 3 dc.
Round 4: Heart Edge (Light Pink)
- Work one more round of 3 dc per segment, ensuring every corner has a (3 dc, ch 2, 3 dc) sequence.
- Continue until the heart-shaped Granny Square measures approximately 7 cm.

Repeat this process to create 7 identical Granny Squares (adjust the number based on the circumference size you're making).
Part 2: Assemble the Granny Hearts
Once you have all 7 Granny Hearts ready, it's time to join them to form the crown of the beanie.
- Arrange the Hearts: Place them edge-to-edge in a circle to form the crown of the beanie.
- Join the Hearts: Use a tapestry needle and the same light pink yarn to sew the hearts together at their edges. For a seamless look, use whip stitches.
- Sew all 7 Granny Squares together to form a circular panel.
Part 3: Create the Beanie Top
- Magic Ring for Top: Using pink yarn, make a magic ring at the center top of the crown.
- Foundation Round (12 dc): Work 12 dc into the ring, fasten off lightly.
- Increase Rounds: Add rounds of dc to form the top panel of the beanie. Use the following increase sequences:
- Round 2: (1 dc, inc) = 24 dc
- Round 3: (1 dc, inc every second stitch) = 36 dc
- Round 4: Continue in this pattern until the panel reaches 16 cm in diameter (or the head circumference size).
Part 4: Beanie Base
- Attach the bottom of the Granny Heart panel to the circular dc panel with whip stitches or slip stitches to form the base of the hat.
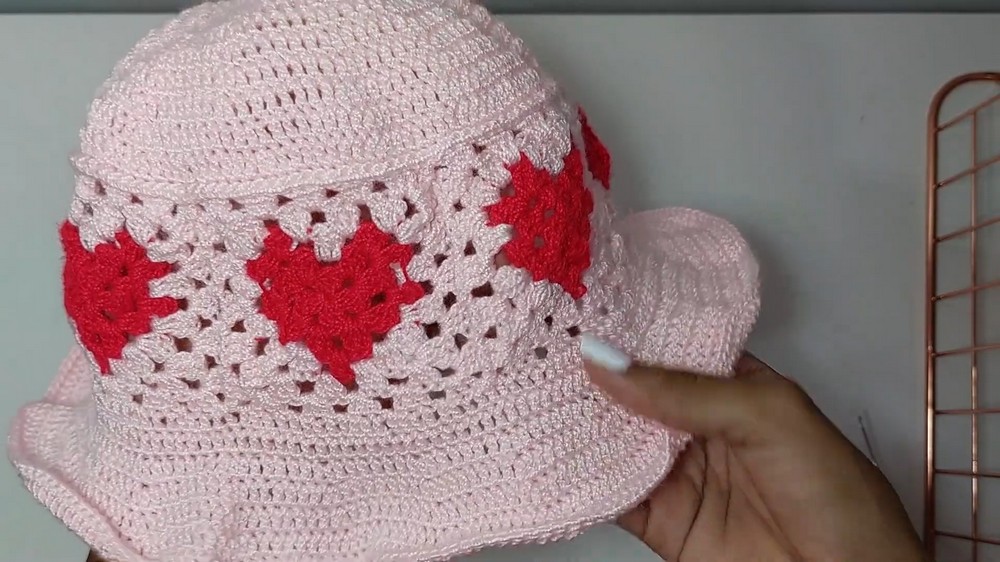
Part 5: Decorative Border
- Attach red yarn to the bottom edge of the hat and work a round of sc for a polished edge.
- Optionally, add a second round of sc or use the crab stitch (reverse single crochet) for texture.
Finishing Details
- Weave in Ends: Trim and secure all loose ends using a tapestry needle. Weave them into the stitches to prevent unraveling.
- Blocking: Lightly steam block the Granny Hearts for a flat, polished look.
Tips and Customization Ideas
- Play with Colors: Swap out the heart and background colors for a unique, vibrant design.
- Add a Pom-Pom: Sew on a pom-pom to the top of the beanie for an extra touch of fun.
- Adjust Sizing: Add or remove Granny Heart Squares based on circumference measurements, or decrease/increase top panel diameter.
Conclusion
Congratulations on completing your Heart Granny Beanie! This project combines classic Granny Square motifs with innovative beanie construction techniques. The hearts give the hat a whimsical yet classy design, making it the perfect gift or personal accessory.