
Easy Free Crochet Bow Hairclip Pattern in Just a Few Steps
Learn how to make a simple and cute crochet bow hairclip that's perfect for adding fun to your hairstyle or making a sweet and thoughtful gift for someone special.
A small and delightful accessory created to add charm to any hairstyle can instantly brighten your look. With its soft yarn, vibrant colors, and adorable shape, it gives a playful and stylish touch to everyday outfits or even enhances special occasions. Crocheted with simple crochet techniques, it is lightweight, sturdy, and gentle, ensuring comfortable wear throughout the day.
Free Crochet Bow Hairclip Pattern for Fun Hair Accessories

Its neat stitching and adjustable size make it a wonderful choice for kids, teens, or anyone who loves unique, handmade pieces. The design can be personalized with a variety of colors, letting you match it perfectly with your favorite outfits. Not only does it keep hair tidy, but it also adds a cheerful, handcrocheted touch that is sure to grab attention. Compact and versatile, this accessory works beautifully for school, parties, family gatherings, or casual outings. Whether for yourself or as a heartfelt gift, it's both practical and full of charm.
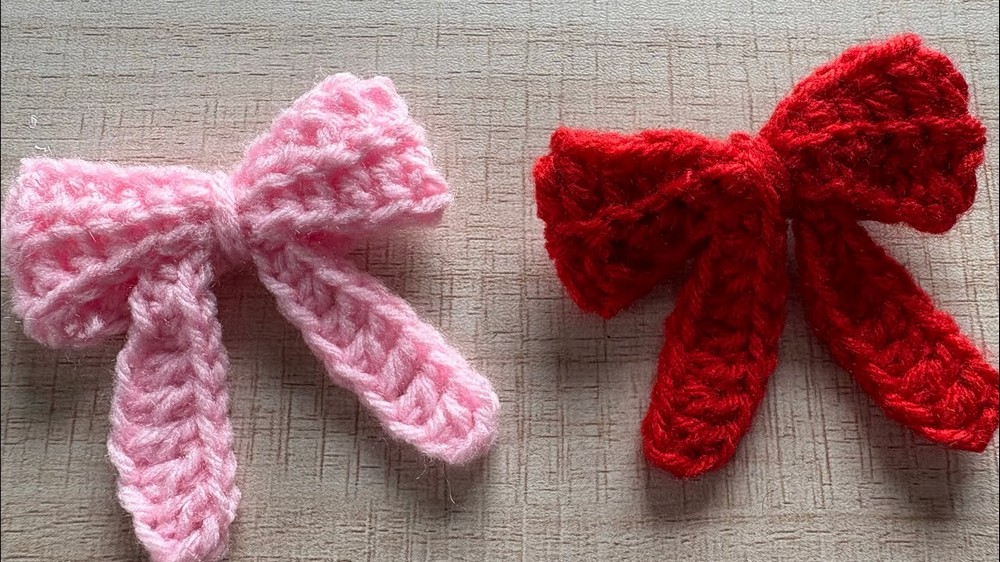
Crochet Bow Tie Pattern
Materials Needed
- Yarn: Medium-weight acrylic or cotton yarn (sample shown in pink)
- Crochet Hook: 2 mm hook size
- Scissors
- Yarn Needle (for weaving ends and sewing)
- Slip Knot Helper (optional, for beginners)
- Hair Clip, Safety Pin, or Bag Clip (optional, for finishing)
Finished Size
- Approximate Size: 3.5" x 2" (9 cm x 5 cm)
Note: Size may slightly vary depending on yarn and tension.

Gauge
- Gauge:
25 chains = approx. 4.5" (11 cm).
Gauge is not critical for accessories, but keep your tension consistent for best results.
Step-by-Step Pattern
1. Foundation
a. Make a slip knot.
b. Chain 25.
- This forms the base of your bow tie.
- Tip: Use the video link in the description if you're new to chaining.
2. Row 1: Shaping the Bow
Work into the back loop of each chain (for texture):
- First 4 chains: Single Crochet (SC)
- Next 2 chains: Half Double Crochet (HDC)
- Next 4 chains: Double Crochet (DC)
- Next 2 chains: Half Double Crochet (HDC)
- Last 4 chains: Single Crochet (SC)
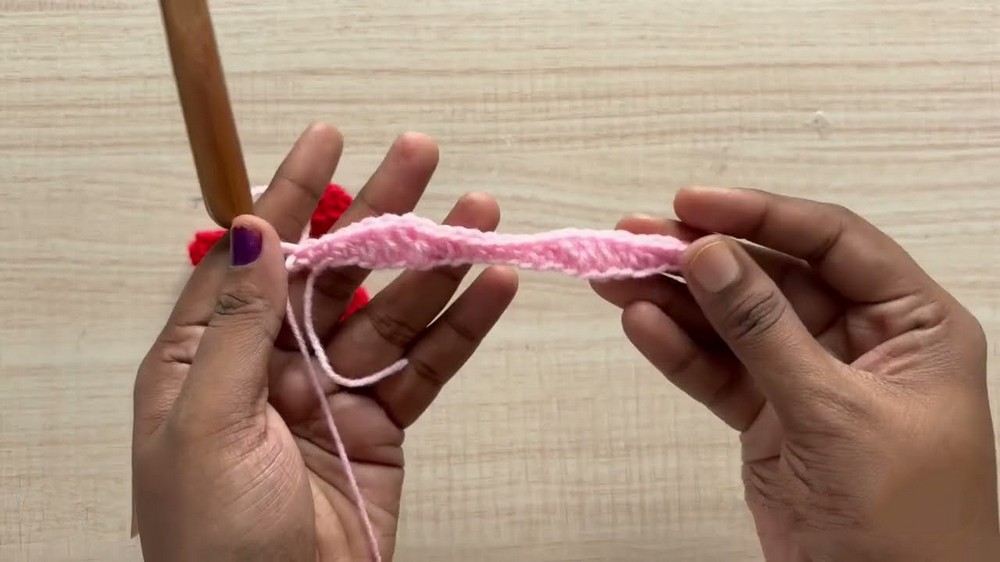
Detailed Instructions:
- Insert hook into the back loop of first chain, make a SC. Repeat for next three chains (total 4 SC).
- Next 2 chains: HDC in each.
- Next 4 chains: DC in each.
- Next 2 chains: HDC in each.
- Last 4 chains: SC in each.

Check your stitch count: You should have 4 (SC) + 2 (HDC) + 4 (DC) + 2 (HDC) + 4 (SC) = 16 stitches. If you follow the video closely, adjust to 25 as mentioned, but the central shaping stays in this sequence.
3. Row 2: Second Side
Turn work. Work only into the back loop for texture.
- Repeat Row 1: 4 SC, 2 HDC, 4 DC, 2 HDC, 4 SC.
- Continue to the end.
4. Fasten Off & Weave Ends
- Cut yarn, leaving a long tail (approx. 8"/20 cm).
- Use yarn needle to sew and secure ends.
5. Bow Center (Band)
- Make a slip knot.
- Chain 11.
- Turn.
- Skip first chain, work into second chain from hook:
- Next 5 chains: DC in each.
- Next 2 chains: HDC in each.
- Next 2 chains: SC in each.
- Last chain: Slip Stitch (SL ST).
- Fasten off, leave a tail for sewing.

6. Assembly
- Fold the main bow piece so edges touch in a classic bow shape.
- Use the band to wrap around the bow's center.
- Sew or tightly tie to secure shape.
- Attach to desired accessory (hair clip, bag, etc) by sewing or gluing.

Tips & Customization
- Color: Use contrasting colors for the bow and center.
- Size: Adjust the number of chains for a larger or smaller bow.
- Accessories: Sew a button, bead, or charm in the center for extra flair.
- Edges: Add a decorative border by slip stitching around post assembly.
- Stiffness: Steam press the bow or use fabric stiffener for crispness.
Special Techniques
- Back Loop Only Crochet: For added texture and shape distinction.
- Shaping: Alternating single, half double, and double crochets create a convex/concave bow profile.
Finished Look
Your bow is now ready! It's a delicate piece perfect for hair clips, bags, gifts, or decorative purposes. The center band cinches the bow, giving it a classic definition. The structured rows and textured stitches bring out the characteristic bow shape.
Conclusion & Important Remarks
- Skill Level: Beginner-friendly, with a touch of texture.
- Versatility: This pattern can be customized for color, size, and attachment.
- Care: Hand wash if using acrylic or cotton. Air dry recommended.
- Presentation: Perfect as a return gift, a doll's accessory, or even a fashionable pin.