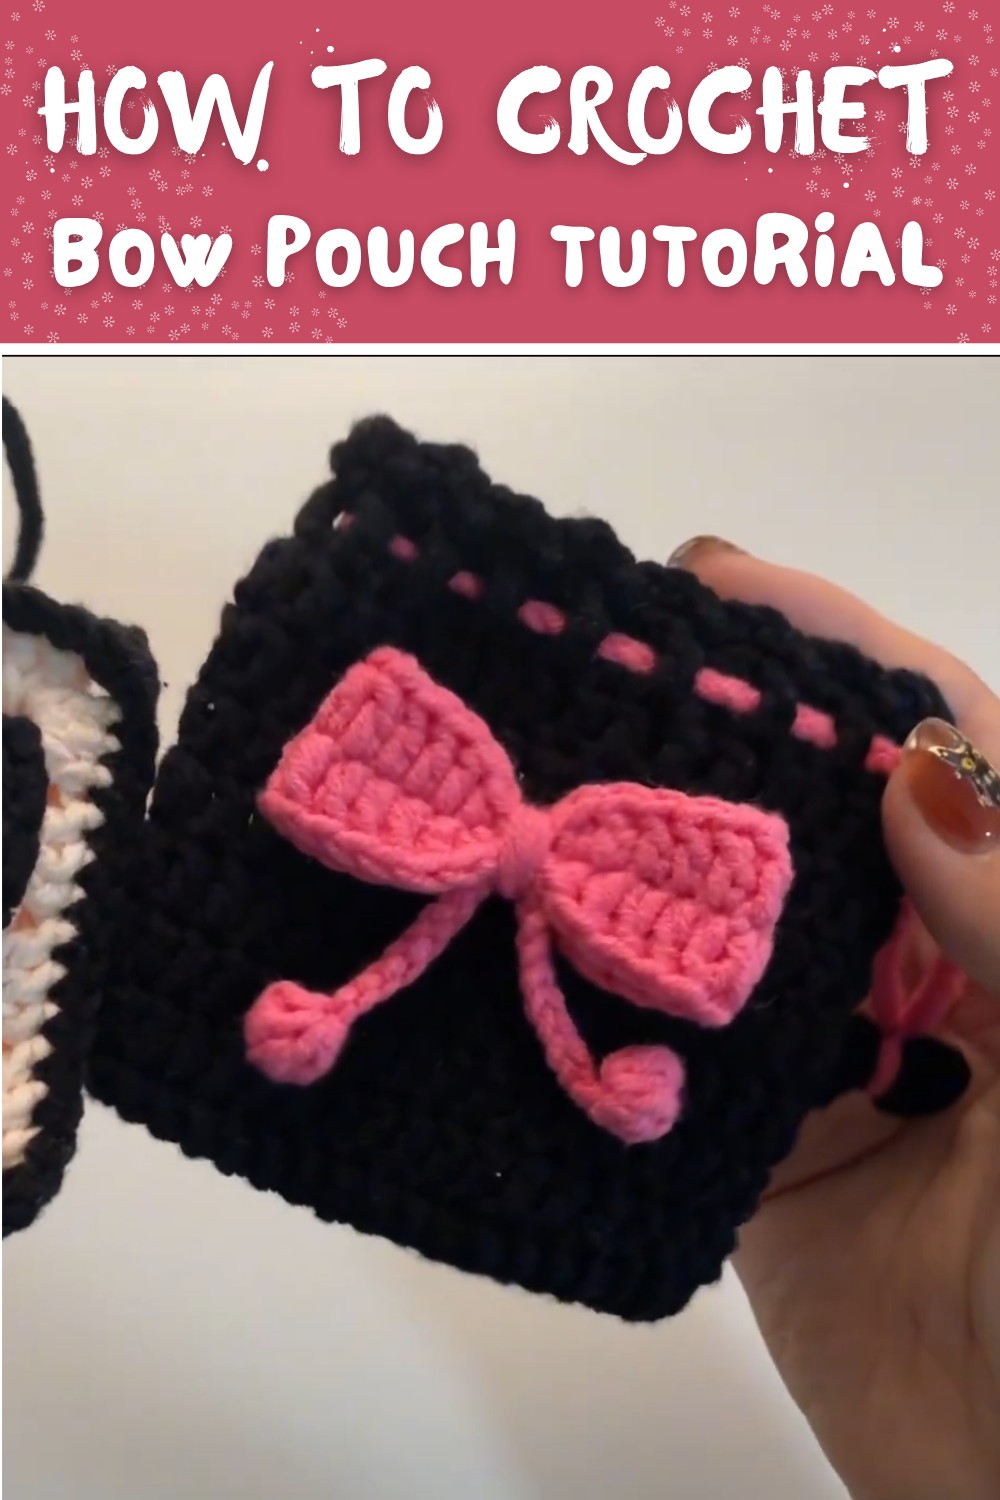
Free Crochet Bow Pouch Pattern for Organizing Small Items
Grab the chance to crochet a fun and cute bow pouch that's perfect for holding your tiny treasures while adding a splash of charm to your everyday life.
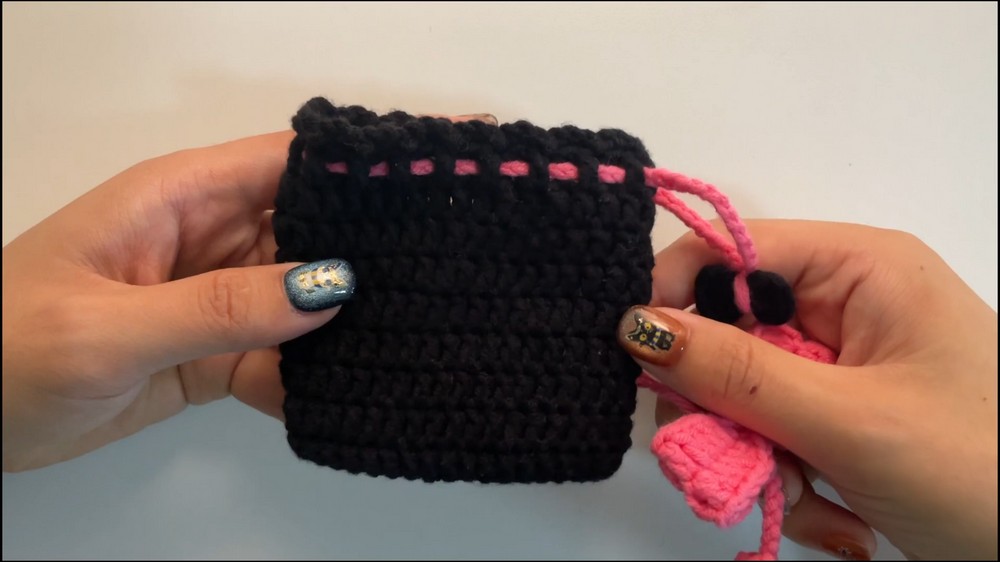
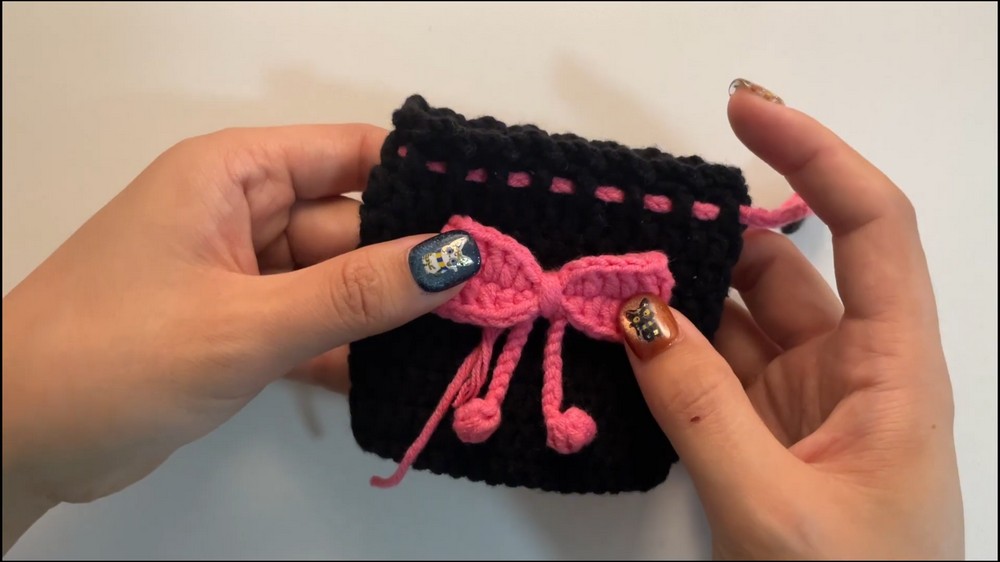
A small and charming pouch with an adorable bow that is both stylish and practical. This little creation is perfect for carrying small items like coins, keys, lip balm, or any tiny treasures you want to keep safe. Its soft and textured design gives it a cozy feel, making it a lovely accessory to add to your collection or gift to someone special.
Easy Free Crochet Bow Pouch Pattern for Your Essentials
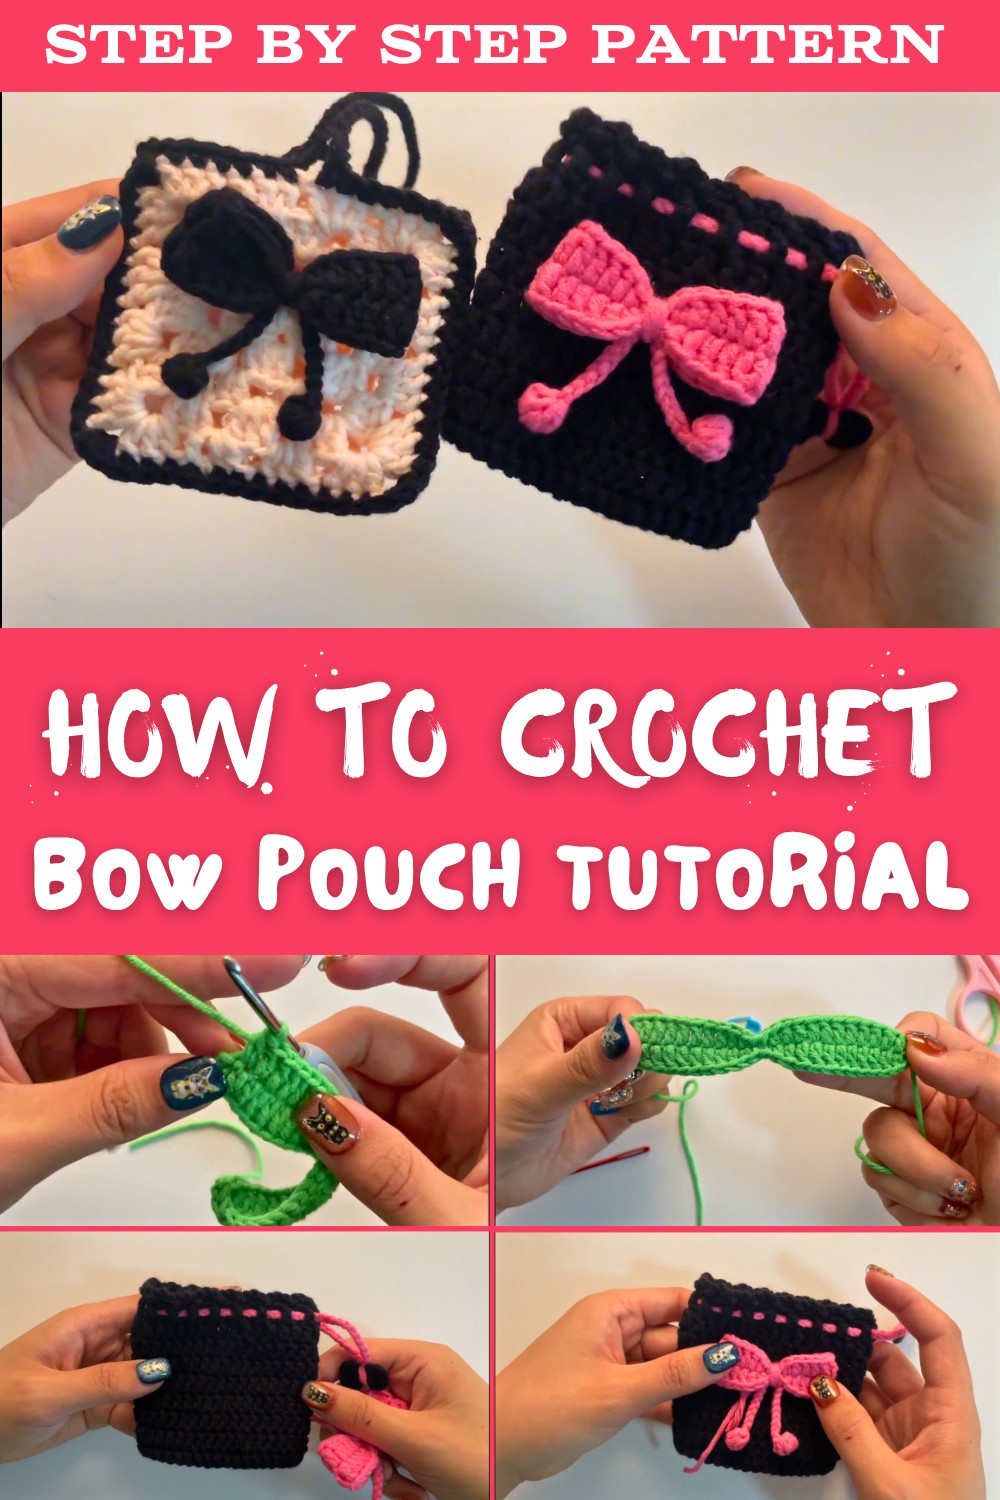
The unique bow detail at the front adds a touch of elegance, making it stand out from ordinary pouches. It is lightweight, easy to carry, and fits perfectly into your bag or pocket. Its versatility makes it useful for keeping things organized at home or while on the go. You can even use it as a decorative item to add a pop of charm to your space. With its simple and attractive design, it's great for anyone who loves practical and beautiful handmade items.
Crochet Bow Pouch (Bow Appliqué) Pattern
Skill Level
Easy - Suitable for confident beginners to intermediate crocheters. (Includes bobble stitches and shaping.)
Materials
- Yarn: 5-ply cotton yarn (approx. 10-15g for the bow and tie), in color of your choice
- Hook: 3mm crochet hook
- Notions:
- Scissors
- Darning needle
- Stitch marker (optional)
Key Abbreviations (US Terms)
| Abbreviation | Meaning |
|---|---|
| ch | chain |
| st(s) | stitch(es) |
| sc | single crochet |
| hdc | half double crochet |
| dc | double crochet |
| sl st | slip stitch |
| yo | yarn over |
| bobble | 4-dc bobble (see Special Notes) |
Special Notes
- Bobble stitch explained in pattern-no additional abbreviations used for this pattern.
- You may adjust yarn weight and hook size. Adjust stitch/row counts for larger or smaller bows.
- This pattern creates a bow that can be sewn to pouches, hairbands, or other projects.
- Gauge is not critical.
Pattern
A. Main Bow Piece
- Leave a long tail (for assembly), make a slipknot.
- Ch 27.
Row 1
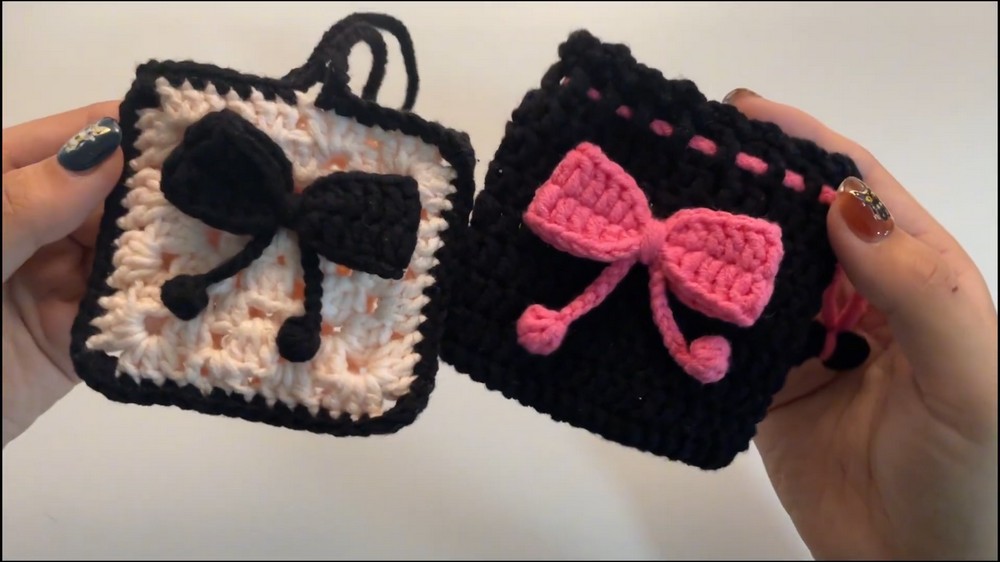
- Sc in 2nd ch from hook (place stitch marker here if desired).
- Hdc in next ch.
- Dc in each of the next 9 ch.
- Hdc in next ch.
- Sl st in each of next 2 ch.
- Hdc in next ch.
- Dc in next 9 ch.
- Hdc in next ch.
- Sl st in last ch.
- Ch 1, sl st into the last gap worked (to round the corner).
- You are now ready to work around the opposite side of the foundation chain.
Row 2 (Other side of starting chain)
Work into the unworked loops of the starting chain, mirroring the stitches:
- Hdc in first ch.
- Dc in next 9 ch.
- Hdc in next ch.
- Sl st in next 2 ch.
- Hdc in next ch.
- Dc in next 9 ch.
- Hdc in next ch.
- Sl st in final st where you placed the marker (first sc).
- Sl st once more to join neatly.
- Fasten off leaving a tail for sewing.
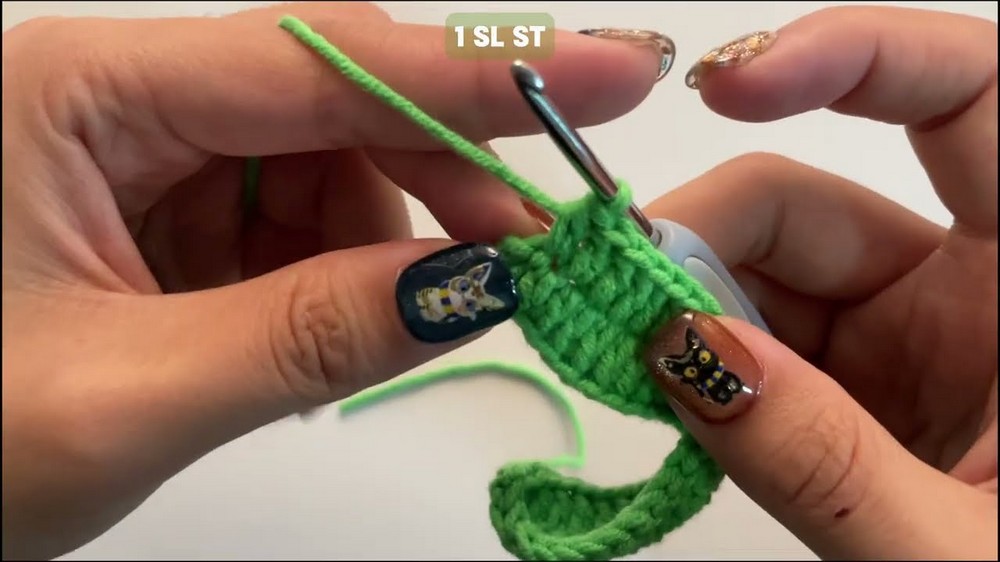
Piece should now resemble a flat, symmetrical "sprout" shape.
B. Center Tie with Bobbles
Leave a long tail to start for assembly.
- Make a slipknot.
- Ch 3.
First Bobble Ball
- In 2nd chain from hook, make a bobble as follows:
- Yo, insert hook in ch, yo, pull up a loop, yo, pull through 2 loops (leaving 2 loops on hook).
- Repeat 3 more times in same ch. (You will have 5 loops on hook.)
- Yo and pull through all 5 loops on hook.
- Ch 20 (for tie between bobble ends).
- In 2nd ch from hook, repeat bobble stitch.
- Fasten off with long tail.
C. Bobble Shaping & Assembly
- Using darning needle, thread starting/ending tails through bobble stitches.
- Cinch tightly into a ball, knot securely.
- Thread tail ends into center, trim any excess.
- Repeat for both bobble ends.
D. Bow Assembly
- Place main "sprout-shaped" bow front side up.
- Fold at the center, right side facing out.
- Take the center tie (bobble piece).
- Knot tie tails together twice at the center back.
- Wrap one tail around center in one direction, the other tail in the opposite.
- Pull snug, but not overly tight (maintain bow fullness).
- Knot both tails at the back to secure.
- Weave in ends or leave long tails to sew the bow to a pouch or desired surface.
- Arrange tie/bobbles as desired.
- Use remaining tail(s) and a darning needle to sew securely in place on your project.
Conclusion
This dapper and delightful crochet bow, with its plush center bobbles and crisp "petal" edges, makes the perfect accent for pouches, headbands, gifts, and more. You've practiced a range of easy stitches and simple finishing.
Pattern Correction & Tips
- Pattern Correction: Ensure you mirror the stitches when working the second row along the foundation chain for perfect symmetry.
- Tip: For extra structure, block your finished bow lightly.
- Tip: Use a contrasting yarn or larger hook for a chunkier, oversized bow.
- Tip: Make the "tie" (center piece) longer or shorter to suit your style or application.
Final Look
Your completed crochet bow should be:
- Even and symmetrical, with plush round bobble ends.
- Firmly cinched at the center for a classic bow shape.
- Ready to be attached to your favorite pouch or accessory.