Crochet Granny Square Hat with This Easy Free Pattern
Jump into the world of fun and colors by making a cozy granny square hat with this free crochet pattern, perfect for adding charm and warmth to your day.
A colorful and cozy granny square hat is an exciting crochet project that is both stylish and fun to make. This hat is made of multiple small squares stitched together, creating a beautiful patchwork design full of eye-catching patterns and bright colors. Its unique appearance makes it perfect for adding personality to your outfit while keeping you warm during chilly days.
Free Crochet Granny Square Hat Pattern for Beginners and Experts

The hat is soft and comfortable, easy to wear, and can be made in different sizes for children and adults. You can use it as a casual fashion accessory or make one as a thoughtful handmade gift that everyone will love. Making this hat is simple and enjoyable. It starts by crocheting individual squares, using basic stitches, and then joining them together.

Because granny squares are quick to create, you'll love experimenting with different color combinations to make each hat truly unique. With just some yarn, a hook, and a little patience, you'll create a beautiful hat that stands out and brings joy to your crochet projects.
Granny Square Hat - Step-by-Step Crochet Pattern
Skill Level
Intermediate - Advanced (Must be comfortable with joining motifs, working in the round, and basic increases.)
Materials List
- Yarn: Fingering or fine weight yarn (approx. 2 mm thick); sample uses wool in fuchsia (30g), light gray (10g), and dark gray (20-25g). Adjust yardage according to head size and yarn thickness. Heavier yarn will result in a larger hat.
- Hook: 3 mm crochet hook (or size appropriate for your yarn)
- Notions:
- Yarn needle (for sewing motifs, weaving ends)
- Scissors
- Stitch markers (optional)
- Measuring tape or ruler (to check motif size)

Key Abbreviations (US Terms)
- st(s): stitch(es)
- sl st: slip stitch
- ch: chain
- sc: single crochet
- dc: double crochet
- sp: space
- beg: beginning
Special Notes
- Adjust motif/round/hat size as needed to fit your head. Measure your granny squares and the joined pieces before final assembly.
- Maintain a consistent tension for neat joins and even sizing.
- You may substitute other granny square motifs of matching size.
Pattern Instructions
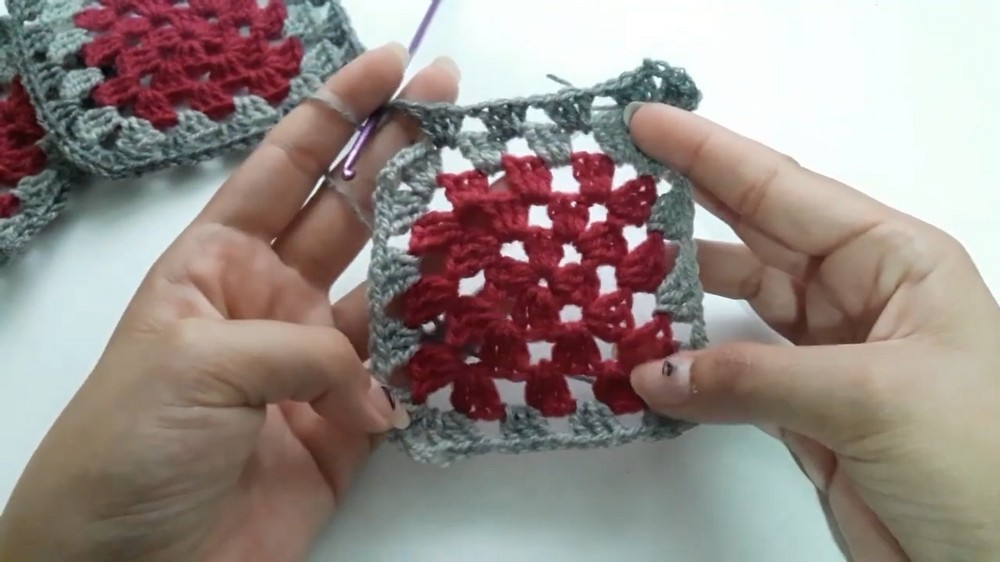
1. Make the Granny Squares for the Sides (Make 6)
Basic Granny Square
Round 1:
- With chosen color, ch 3 (counts as 1 dc),
- In ring: 2 dc, ch 2,
- (3 dc, ch 2) three more times in ring,
- Join with sl st to beg ch-3. (4 sides)
Round 2:
- Sl st to next ch-2 sp, (ch 3, 2 dc, ch 2, 3 dc) in same sp (first corner made),
- Ch 1,
- (3 dc, ch 2, 3 dc) in next ch-2 sp, ch 1 3 times,
- Join with sl st to top of beg ch-3.

Round 3:
- Sl st to next ch-2 sp, (ch 3, 2 dc, ch 2, 3 dc) in same sp, ch 1,
- 3 dc in next ch-1 sp, ch 1,
- (3 dc, ch 2, 3 dc) in next corner, ch 1, 3 dc in next sp, ch 1 repeat around,
- Join with sl st to beg ch-3.

Round 4 (and Round 5 if desired):
- Continue pattern: In each corner (ch-2 sp), (3 dc, ch 2, 3 dc), ch 1,
- In each side sp, 3 dc, ch 1.
- Repeat for 5 rounds or until squares measure approx. 10 cm (4 in). Fasten off.
Tip: Use a "false double crochet" (ch-2 plus a sc) instead of ch-3 for an invisible turning chain if desired.
2. Join the Squares
- Arrange the 6 squares in a loop, right sides facing inward.
- Sew or use sl st through matching stitches at the edges to join into a ring (the 'crown band').
- Seam the final edge so the 6th square joins the 1st.
3. Make and Attach the Crown (Top Circle)
Crown Shape
Using chosen color:
Round 1:
- Make a magic ring, ch 3 (counts as dc),
- 11 dc into ring (12 dc total). Join with sl st to beg ch-3.
Round 2:
- Ch 3, dc in same st,
- 2 dc in each dc around (24 dc), join with sl st.
Round 3:
- Ch 3, dc in same st,
- (dc in next st, 2 dc in next st) repeat around (36 dc), join.

Round 4:
- Ch 3, dc in same st,
- (dc in next 2 sts, 2 dc in next st) repeat around (48 dc), join.
Continue increasing:
- Next round: (dc in next 3 sts, 2 dc in next st),
- Next: (dc in next 4 sts, 2 dc in next st),
- …and so on, until your circle has a diameter of ~16 cm (6.25 in) or matches the granny square band circumference.
- Stop increasing when the crown is as wide as the granny band.
- Optional: Work one or two rounds of dc with NO increases for some depth if needed.
Fasten off.
4. Join Crown to Granny Square Band
- With wrong sides together, align top edge of granny band to the outer edge of the crown.
- With yarn needle or sl st, sew or crochet through evenly spaced stitches (or corner to side as fits) to join. Take care to avoid puckering.

5. Hat Brim
Brim Setup:
- Join yarn to any ch-1 space at lower edge of granny band.
- Work 3 dc in each space, ch 1 between groups for one round, including across all sides and corners, placing groups in each space and at square joins as needed.
Next Round: (foundation for brim)
- Change color if desired.
- In any ch-1 space, 3 dc, ch 1, continue around, working into all spaces and square joins.
- Join with sl st to beg dc.

Increase Round (if looser brim is desired):
- In every 4th or 5th group, (3 dc, ch 1, 3 dc) in same space (increase group) to widen brim.
- Continue as established for 1 round, then:
6. Brim Body
- For 2-3 more rounds: Work 3 dc in each space, ch 1 between, without further increases.
- (Total brim height in sample: ~6 cm / 2.25 in, adjust as needed.)
7. Finishing Edge
- Work 1 round of sc: Work sc in each dc and in each ch-1 space around for a neat edge.
- Join with sl st to beg sc. Fasten off.
8. Finishing
- Weave in all threads on the inside with yarn needle.
- Block the hat lightly if necessary, especially if using natural fiber yarns.
- Try on your new hat and enjoy!

Conclusion
This structured granny square hat is a beautiful project for intermediate to advanced crocheters with experience in motif joining and shaping. The main body is modular and highly adaptable; mix and match granny square patterns for a personal look. The fitted crown and brim give a contemporary style adaptable for any season by varying yarn type.
Pattern Correction and Tips
- Check motif gauge before assembly; squares must match each other in size for neat seaming.
- If there is puckering at joins, block pieces before seaming.
- For larger or smaller hats, add or subtract granny squares or rounds in the crown.
- The final brim can be easily widened with more rounds.
- Blocking the finished piece will greatly enhance drape and help shape the hat.
- Alternative constructions: Try triangles for pointy crowns, or rectangular motifs for bucket-styled brims.