
Free Crochet Bee Pattern to Decorate Office Desks
Convert just a bit of yarn into a cute crochet bee pattern with quick steps, suitable for decorations, charms, or sweet handmade presents.
Crocheting a small bee is both fun and rewarding. This project will guide you through making a delightful bee using basic stitches like single crochet and increases, perfect for beginners or anyone looking for a simple project. The final result is a tiny amigurumi bee, just the right size for a keychain, a bag charm, or even as a cheerful addition to a flower bouquet or gift. Through this pattern, you'll practice working in rounds, learn how to make seamless color changes for the bee's striped body, and add small details like wings and a smiling face. The skills you'll pick up from this project include working with tight stitches, making symmetrical shapes, and assembling the pieces into a finished design.
Free Crochet Bee Pattern with Farmhouse Shelf Style

This isn't just limited to making bees, These techniques can help you make small animals, cute keychains, or other stuffed shapes like balls, fruits, and even ornaments. With the same process, you can expand your crochet ideas and create more fun items to share or keep.
Some challenges might pop up, like ensuring your tension stays consistent or attaching the wings evenly. A simple solution is to use a stitch marker to track each round and take a moment to adjust pieces carefully before sewing. Every step becomes easier with a bit of patience and practice. By the end, you'll have a cheerful little bee that's soft, lightweight, and full of charm. It's a perfect small project to enjoy and share as a thoughtful handmade gift.

Step by Step Crochet Pattern: Amigurumi Bee
Quick Overview of Pattern
- The bee consists of 4 main parts: Body, Wings, Cheeks, and Mouth.
- The body involves simple rounds with color changes to achieve the striped pattern.
- Wings and details are added later, including embroidered cheeks and a small stitched mouth.
Notes
- The bee is crocheted in continuous spirals unless otherwise stated. Use a stitch marker to help track the beginning of each round.
- Make sure to keep your stitches tight to prevent visible gaps after stuffing.
- Be mindful when changing colors to achieve clean transitions.
- Follow each step carefully to align color changes and maintain symmetry in the design.
Skill Level
Beginner to Intermediate (knowledge of basic crochet stitches and techniques is required).
Materials
- Yarn:
- Yellow and Black for the body.
- White for the wings.
- Pink for cheeks (optional).
- Black embroidery thread for the mouth.
- Crochet Hook: 2.5 mm.
- Stuffing material.
- 6 mm safety eyes (or a larger size if preferred).
- Scissors.
- Yarn needle for weaving in ends and sewing.
- Stitch marker.
- Lighter (optional-for securing safety eye locks).
Measurements / Sizing
- Width: 5 cm
- Length: 4 cm
Gauge
Gauge is not critical for this pattern. Use a hook size suitable for your yarn to achieve tight stitches.
Stitch Abbreviations
- ch: chain
- sc: single crochet
- inc: increase (2 sc in the same stitch)
- dec: decrease (single crochet two stitches together)
- sl st: slip stitch
Special Stitches
- Invisible Decrease (inv dec): Insert hook into the front loop of the next two stitches, yarn over, pull through both loops, yarn over again, and pull through remaining two loops on the hook. This creates a clean and less noticeable decrease.
The Crochet Pattern
Body
- Round 1: Start with a magic ring and make 6 sc inside it. Pull the ring tight to close.
- Stitch count: 6.
- Round 2: Make 1 inc in each stitch around.
- Stitch count: 12.
- Round 3: 1 sc, 1 inc repeat 6 times.
- Stitch count: 18.
- Round 4: 2 sc, 1 inc repeat 6 times.
- Stitch count: 24.
- Round 5: 1 sc in each stitch around.
- Stitch count: 24.
- Change to Black Yarn: On the last pull through while completing the final sc, switch to black yarn. Leave a tail of yellow yarn for tying off and securing later. Don't cut the yellow yarn; you'll use it again later.
- Round 6:
- Take the back loop only of each stitch, and work 1 sc around.
- Switch between yellow and black yarn to close the stitches cleanly.
- Stitch count: 24.
- Round 7: Using black yarn, work 1 sc into each stitch around.
- Stitch count: 24.
- Secure the yellow yarn on the inside.
- Round 8: Continue with black yarn, making 1 sc in each stitch around. Change back to yellow yarn for the final sc.
- Stitch count: 24.
- Round 9: Work in the back loop only to achieve the bee's neat color stripes. Switch colors as described in Round 6. Continue working 1 sc in each stitch until the end of the round.
- By the end of Round 9, return to yellow yarn and secure the black thread.
- Round 10: Work 1 sc in each stitch using yellow yarn.
- Stitch count: 24.
- Round 11: Work 1 sc in each of the stitches for the entire round. On the last sc, change to black yarn again.
- Round 12: Work 2 sc, 1 dec. Repeat 6 times around.
- Stitch count: 18.
- Round 13: 1 sc, 1 dec. Repeat 6 times around. Add stuffing to the body.
- Stitch count: 12.
- Round 14: Work 6 dec around the row. Finish the last 6 stitches and pull the thread to close tightly.
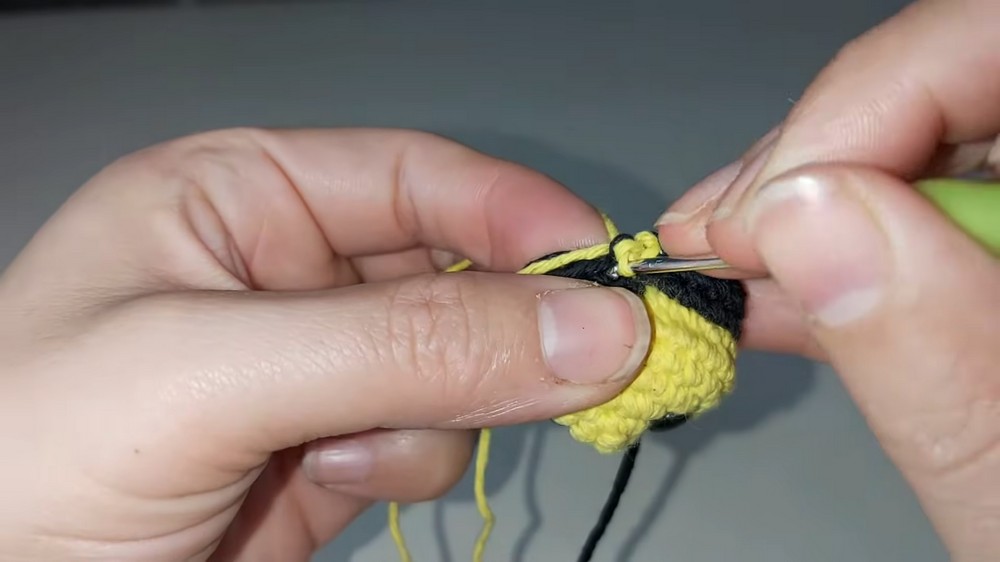
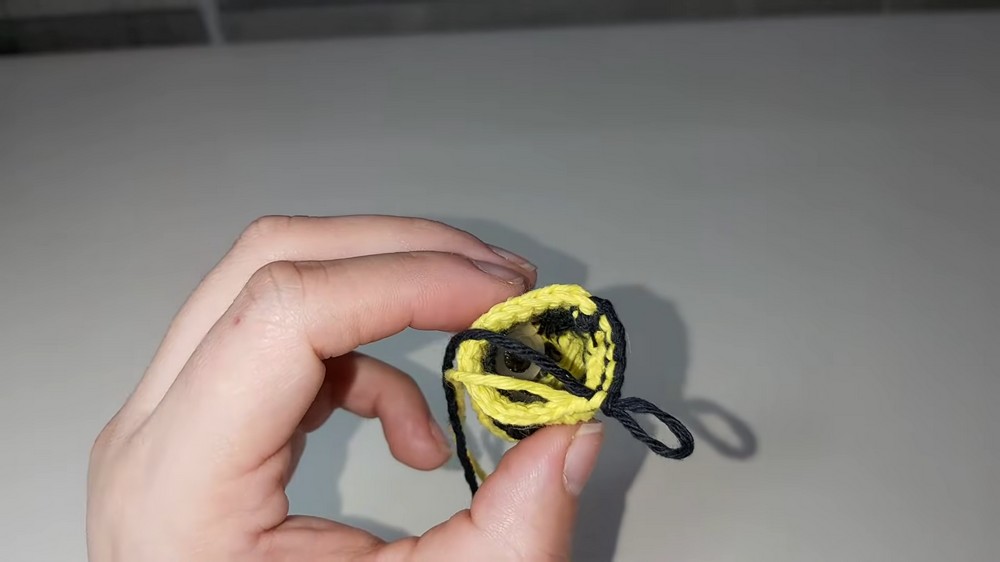

The body is now complete. Secure all threads inside using a yarn needle.
Wings
- Round 1: Create a magic ring and work 5 sc into it. Pull to close.
- Round 2: Increase each stitch (1 inc in every stitch).
- Stitch count: 10.
- Round 3: 1 sc, 1 inc repeat 5 times around.
- Stitch count: 15.
- Round 4: 2 sc, 1 inc repeat 5 times around.
- Stitch count: 20.
- After completing the round, slip stitch into the next stitch, cut the thread, and leave a long tail for sewing.
- Assembly:
- Identify the front and back sides of the wings based on the neatness of the stitches.
- Align the back sides of the two wings together, ensuring symmetry. Stitch the edges together using a yarn needle.

Assembly & Details
1. Step 1: Attach the Wings
- Place the wings symmetrically on the top back of the bee body.
- Use a yarn needle to sew the wings onto the body, securing them with tight, inconspicuous stitches.
2.Step 2: Add Safety Eyes
- Place the eyes on the bee's face about three rows down from the top of the body on the yellow stripe.
- Using a lighter, carefully heat the ends of the safety eye backs to mold them securely in place.
3.Step 3: Add Cheeks
- Use pink yarn or embroidery thread for the cheeks. Create small circular shapes on each side of the bee's face.
- Secure the pink thread by knotting it inside the body.
4.Step 4: Embroider the Mouth
- Use black thread to create a simple curved smile just below the eyes.
- Thread the black yarn with a needle, knot at one end, and carefully stitch the smile shape.

Finished Size
The finished amigurumi bee measures:
- Width: 5 cm.
- Length: 4 cm.

Conclusion and Ending Words
Congratulations, You've successfully created an adorable amigurumi bee. This cute little project is perfect as a gift or a decorative piece, and it can be customized with various colors or additional features. Add a keychain ring or attach it to a backpack, bouquet, or even a gift box for a personal touch.