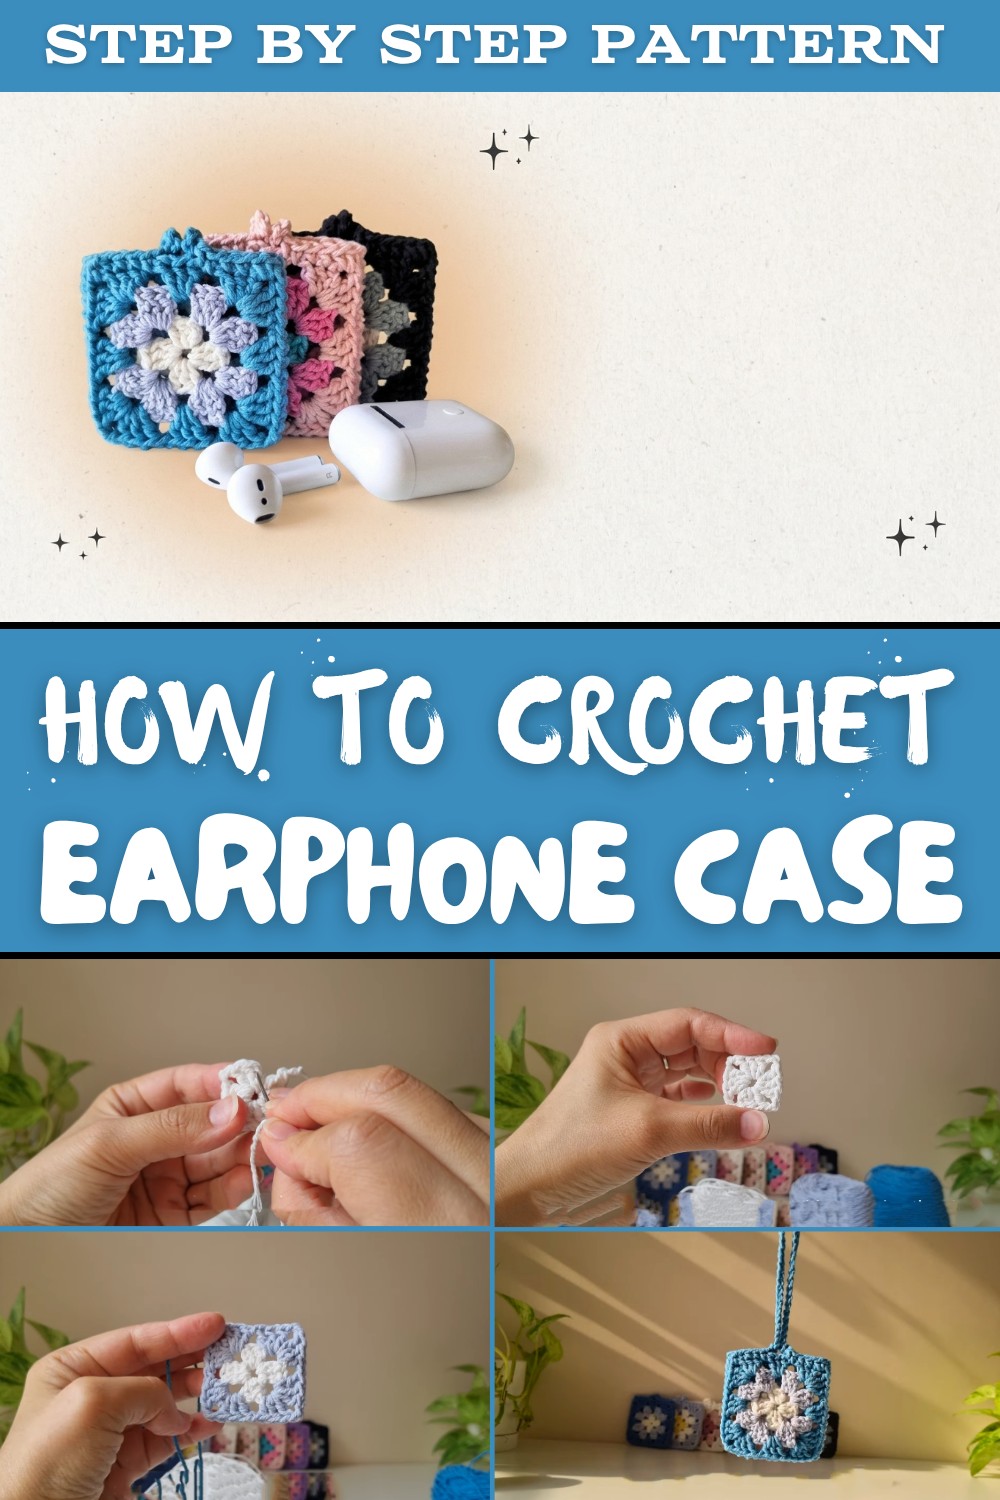
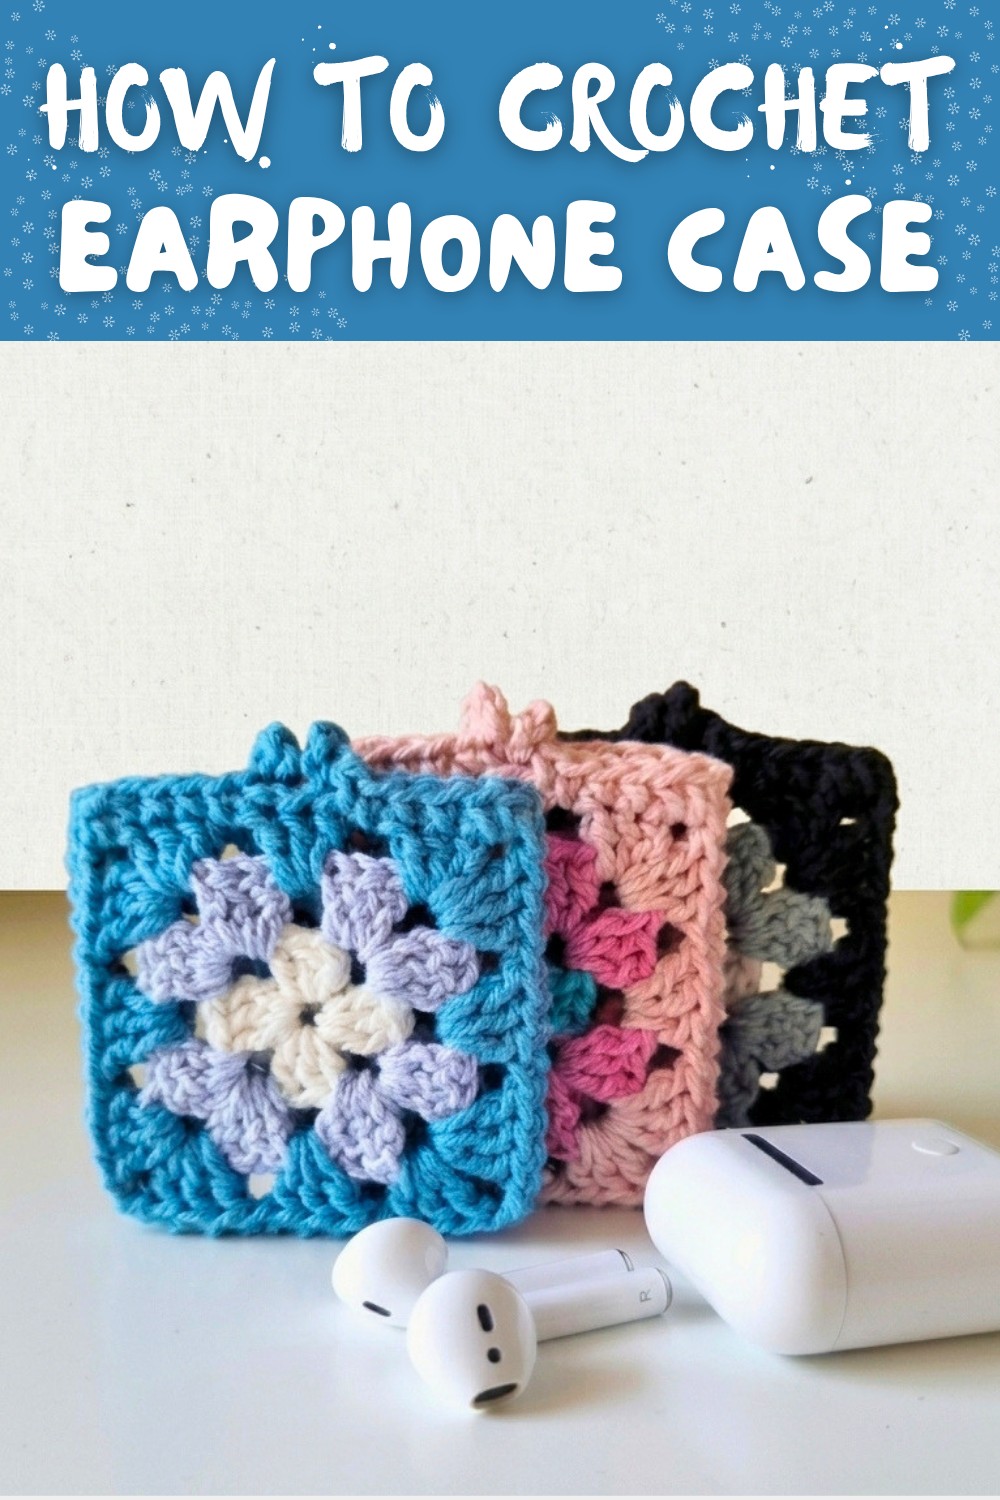
Stylish Crochet Earphone Case Pattern for Accessory Protection
Organize and protect your earbuds with this fun and free crochet earphone case pattern, perfect for beginners and customizable for any style.
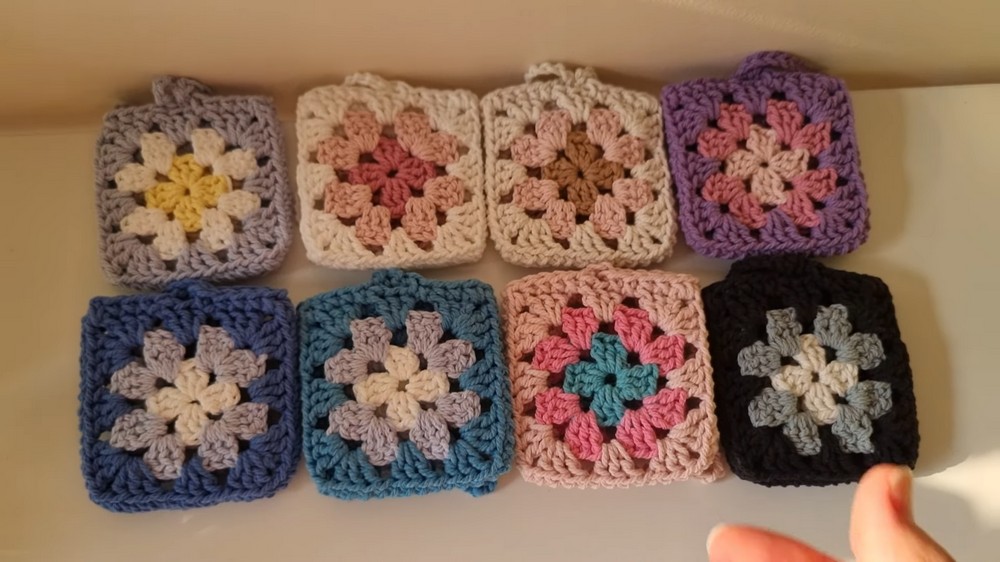
Small yet mighty, this crochet earphone case pattern is the ultimate solution for organizing your everyday essentials with style. Perfect for storing earphones, lip balms, or loose change, its compact pattern makes it a practical accessory you'll reach for daily. Built on classic granny square techniques, this pattern is beginner-friendly while giving advanced crocheters room to experiment with colors and modifications.
Crochet Earphone Case Pattern: Free, and Perfect for Travel
One of its standout features is its versatility; you can easily tweak the size or add rows to create a custom pouch or even a mini tote. It's also a thoughtful gift idea, letting you personalize it with colors to match the recipient's style. Plus, the process of crocheting allows you to enjoy a relaxing break as you build something functional and creative.
Beyond its usefulness, this earphone case pattern is a stylish way to elevate your accessories while keeping your essentials organized. For those who love adding handmade charm to their everyday items, this project is a must-try. Fast, practical, and easy to customize, the crochet earphone case is sure to become your next favorite creation!
Free Crochet Earphone Case Pattern
Special Features
- Uses classic granny squares as the base design.
- Allows for customization with colors and row variations.
- Beginner-friendly with step-by-step instructions.
- A versatile final product: can serve as an earphone case, mini storage pouch, or even a small bag with additional rows.
Difficulty Level
Beginner: Suitable for those new to crochet, as it mainly requires knowledge of basic stitches like slip stitches, single crochets, and double crochets.
What You'll Need
- Yarn in three colors. Recommended: 2 mm cotton yarn.
- Example colors: White (center), Light Blue (second row), Dark Blue (third row).
- Crochet hook: Use a size that suits your yarn; the tutorial uses a 3.5 mm hook.
- Yarn needle.
- Scissors.
Step-by-Step Pattern
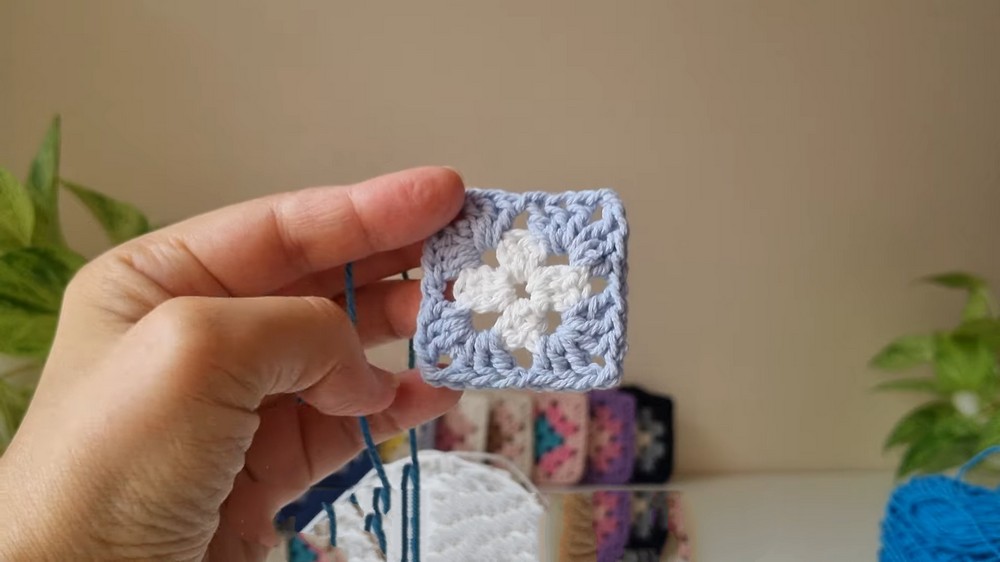
Chapter 1: How to Crochet a Granny Square
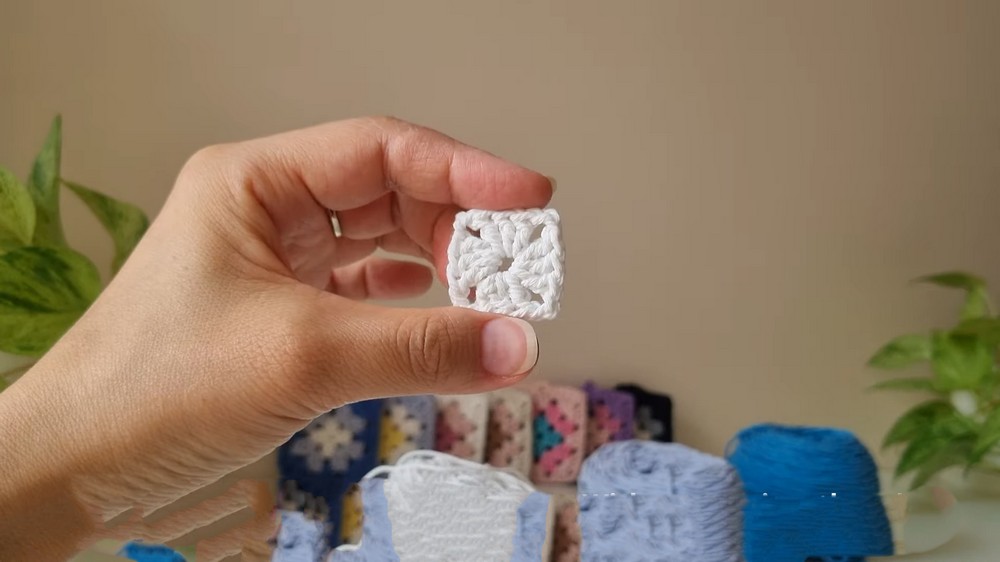
Each earphone case starts with making two small granny squares using the instructions below.
Round 1:
- Start with a magic ring.
- Chain 1, twist, and chain 1 again to create a base similar to a double crochet.
- Next, work 2 double crochets into the magic ring, then chain 2.
- Repeat this pattern three more times: Work 3 double crochets and then chain 2 into the magic ring.
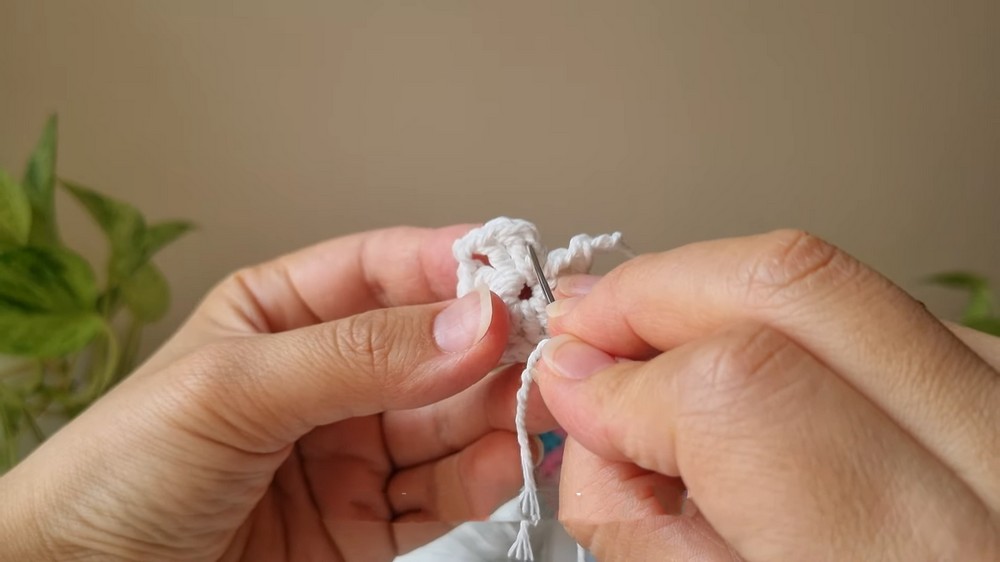
- Cut the yarn and secure it by closing the round with a needle.
- Weave in the yarn ends.
Chapter 2: Round 2
- Turn your work (optional). Changing direction after each row helps prevent twisting, but for this small square, it's unnecessary.
- Change to your second yarn color-the tutorial uses light blue.
- Chain 1, twist, and chain 1 again (initial stitch).
- Make 2 double crochets into the same space, and then chain 1.
- In the next corner space, work 3 double crochets, chain 2, and 3 more double crochets into the same space.
- Repeat Step 5 for each corner, ensuring you chain 1 between corner clusters.
- After completing the round, chain 2, cut the yarn, and finish off by weaving in the ends.
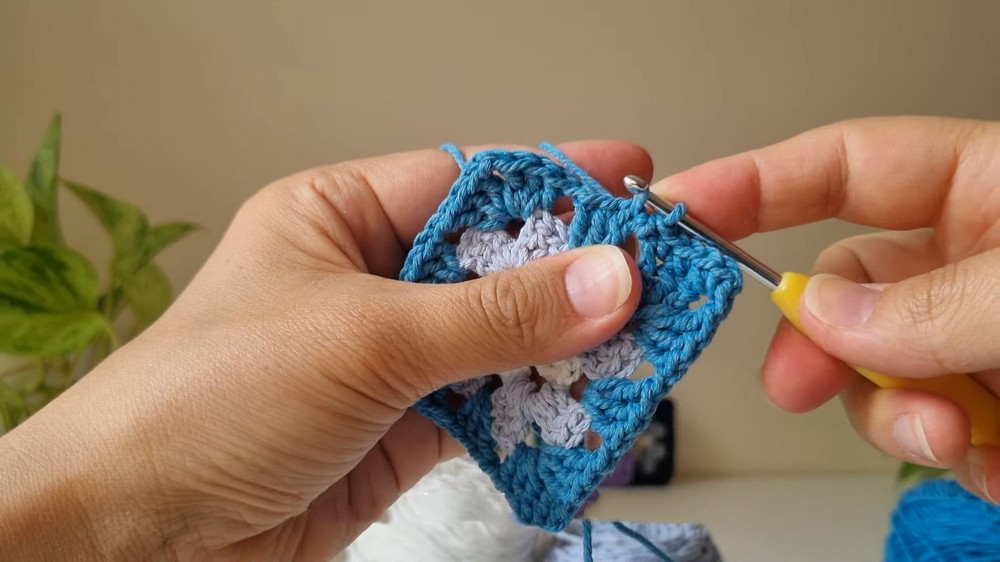
Chapter 3: Round 3
- Turn your work and change to your third yarn color-the tutorial uses dark blue.
- Start in the corner space. Chain 1, twist, and chain 1 again (initial stitch).
- Work 2 double crochets into the same space, chain 1, then make 3 double crochets into the next space (these are the spaces between double crochet clusters from the previous round).
- Proceed to the next corner:
- Work 3 double crochets, chain 2, and 3 double crochets into the same corner space.
- Chain 1 and move to the next space.
- Repeat this pattern around the square.
- To finish, substitute the final chain-2 with a half-double crochet instead of slip stitching to maintain the square shape.
Chapter 4: Making the Upper Side of the Case
- Take one of the granny squares.
- To form the upper edge:
- Row 1: Chain 1 and make 2 single crochets into the same space, followed by 4 single crochets.
- Chain 4, skip 1 stitch, and then make 6 single crochets.
- Cut the yarn and secure. Make a stitch at the bottom and hide the yarn end.
- Create the second granny square, but instead of chaining 4, chain 40 for the loop.
- Repeat the same process from Row 1.
Chapter 5: Assembling the Case
- Place the two squares side by side, with the wrong sides facing outward.
- Before cutting the yarn, leave a length of yarn about 3 times the case's visible length to make stitching easier.
- Align the edges and use a yarn needle to stitch the squares together.
- Pick up only the back loops for a seamless and neat join.
- Begin with the first stitches on the bottom edge and work around.
- Once assembled, secure and weave in the yarn ends.
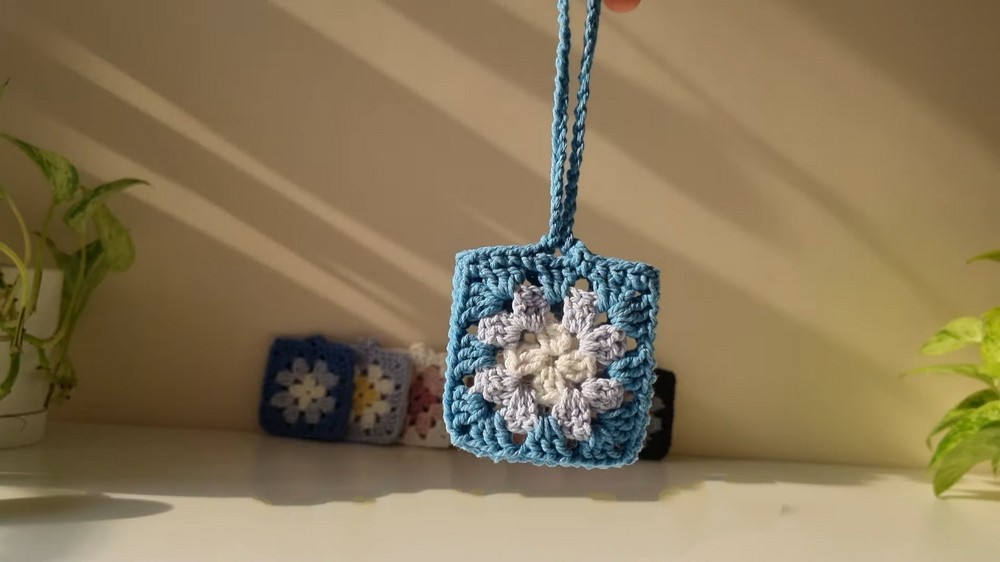
Conclusion: Finished Product
Your cute crochet earphone case pattern is now ready! It's compact yet versatile; perfect for organizing earphones, lip balm, small creams, or even loose coins. Better yet, you can adapt this pattern to make small bags or shopping totes just by adding more rows.
Tutor's Suggestions
- Use vibrant or pastel colors depending on your style preferences.
- Experiment with adding embellishments like buttons or tassels for added charm.
- A thicker yarn will make the case sturdier, while a lighter yarn will make it softer.
Pro Tip
When stitching the squares together, use the yarn needle's eye to pinch the yarn tightly before threading-it makes the process quicker and saves time.
Final Remarks
This project is a delightful mix of creativity and utility and is perfect for beginners looking to expand their crochet portfolio. The granny square pattern is timeless and versatile. Pair your completed case with matching accessories for a stylish touch.