Soft and Cuddly Free Crochet Bear Amigurumi Pattern to Try
Find instant inspiration with this Free Crochet Bear Amigurumi Pattern, ideal for beginners and great for heartfelt handmade gifts.
Crocheting something by hand that's both adorable and functional feels incredibly rewarding! This one-of-a-kind bear amigurumi pattern offers a fantastic way to design an irresistibly charming plush toy. Perfect as a thoughtful gift for baby showers, birthdays, or even as cozy nursery decor, this handmade pattern is more than just a stuffed animal-it's a symbol of care and creativity.
The Ultimate Free Crochet Bear Amigurumi Pattern for Fun Projects

The pattern shines with its seamless head and body structure, making assembly easier and ensuring durability for endless hugs and cuddles. Plus, its customization options let you tweak colors, sizes, or even facial expressions to match your style. Whether you're looking to add a cute flair to a child's toy collection or searching for a relaxing stress-relief project, this crochet bear pattern makes the ideal companion.

Packed with joy and charm, the finished pattern is lightweight, soft, and totally gift-worthy. Not to mention, you'll hone your crochet skills while creating something meaningful. With easy-to-follow instructions, this project ensures an enjoyable and productive creative session. From beginners to experienced crocheters, this pattern has something for everyone. Sit back with your yarn and hook, and let the process turn a simple ball of thread into a heartwarming keepsake.
Level of Difficulty: Beginner-Friendly
This pattern is ideal for beginners as it includes simple stitches and consistent steps with frequent guidance for easy learning.
Finished Bear Dimensions
- Height: Slightly larger than the average hand size.
Materials Needed
- Semi-thick cotton yarn: Color suggestions include brown for the bear body and natural/ivory for the snout.
- Crochet hook (size compatible with chosen yarn).
- Stitch marker.
- Safety eyes (size 8mm, black or brown).
- Polyester filling.
- Black thread or yarn for facial details.
- Scissors.
- Yarn needle for sewing and finishing.
Step-by-Step Pattern Guide
Head and Body
- PART ONE: Head and Body:
- Round 1: Create a magic ring and crochet 6 single crochets (sc) into the ring. Tighten the ring.
- Round 2: Make 6 increases (2 stitches per stitch) for a total of 12 sc.
- Round 3: Alternate 1 sc, 1 increase until completion (18 sc).
- Round 4: Repeat 2 sc, 1 increase across the row (24 sc).
- Round 5: 3 sc, 1 increase, repeat this pattern (30 sc).
- Round 6: Work 4 sc, 1 increase (36 sc).
- Round 7: Repeat 5 sc, 1 increase until finishing row (42 sc).
- PART TWO: Building the Body:
- Rounds 8-17: Work 1 sc in each stitch without increases for 10 rounds (42 sc per round).
- PART THREE: Shaping the Head:
- Round 18: 5 sc, 1 decrease, repeat 6 times (36 sc).
- Round 19: Work 4 sc, 1 decrease across the row (30 sc).
- Insert Safety Eyes: Place between Round 13 and Round 14, secure tightly with safety eye locks.
- Stuff the Head: Use polyester filling to firmly shape the head.
- PART FOUR: Close the Body:
- Rounds 20-22: Continue decreasing: 3 sc, 1 decrease (24 sc in Round 20), repeat for diminishing rounds.
- Finish stuffing the body, ensuring no gaps are visible.
- Sew the top of the body to close, using a yarn needle.


Arms
- Round 1: Begin with a magic ring and make 5 sc into it.
- Round 2: Make 5 increases (10 sc) around the row.
- Round 3: Alternate 1 sc, 1 increase, repeating 5 times (15 sc).
- Rounds 4-5: Work 1 sc in each stitch for 2 rounds (15 sc each round).
- Round 6: Alternate 1 sc, 1 decrease, repeating for the row.
- Rounds 7-14: Crochet 1 sc in each stitch for 8 rows.
- Stuff the arm lightly and leave yarn for assembly. Create two identical arms.
Legs
- Round 1: Create a magic ring of 6 sc. Tighten the ring.
- Round 2: Make 6 increases for 12 sc.
- Round 3: Alternate 1 sc, 1 increase (18 sc).
- Round 4: Work 2 sc, 1 increase for 24 sc.
- Rounds 5-6: Work 1 sc in each stitch for two rounds.
- Round 7: Alternate 2 sc, 1 decrease.
- Round 8: Alternate 1 sc, 1 decrease for the row (12 sc). Finish stuffing firmly.
- Repeat the pattern to create two identical legs.
Ears
- Round 1: Crochet a magic ring with 6 sc stitches.
- Round 2: Make 6 increases (12 sc).
- Round 3: Alternate 1 sc, 1 increase for 18 sc.
- Rounds 4-5: Work 1 sc in each stitch for two rounds (18 sc each round).
- Round 6: Alternate 1 sc, 1 decrease, ending the row with 12 sc.
- Round 7: Work 6 decreases to close the stitch.
- Fasten and cut yarn, leaving extra length for sewing. Repeat to make two ears.
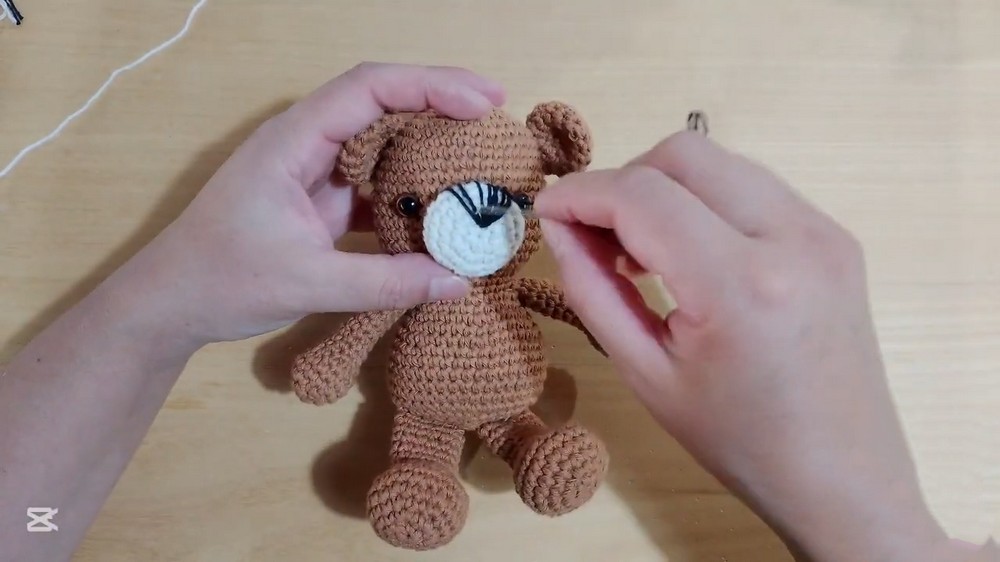
Snout
- Round 1: Crochet a magic ring with 6 sc.
- Round 2: Make 6 increases (12 sc).
- Round 3: Alternate 1 sc, 1 increase.
- Rounds 4-6: Work 1 sc in each stitch for three rounds (18 sc per round).
- Lightly stuff the snout, sew onto the front of the face, connecting both pieces securely.
Tail + Paw Pads
- For the Tail:
- Round 1: Create a magic ring, with 5 sc.
- Round 2: Make 5 increases (10 sc).
- Round 3: Work 1 sc in each stitch (10 sc).
- Round 4: Alternate 1 sc, 1 decrease (6 sc).
- Cut yarn, leaving extra for sewing, and stuff lightly.
- For the Large Paw Pads:
- Round 1: Create a magic ring of 6 sc.
- Round 2: Work 1 sc in each stitch (6 sc).
- Make two of these and attach one to each foot's sole.
- For Small Paw Pads:
- Round 1: Crochet a magic ring of 6 sc.
- Cut yarn and finish the edges smoothly. Create six total small pads, three for each foot.
Assembly and Final Details
- Sew the ears onto the head and position them appropriately.
- Attach the arms, legs, and tail neatly to the body.
- Sew the snout onto the front of the face.
- Use black thread or yarn to embroider the nose and mouth onto the snout. Add personality with a small detail like brows or a smile.
- Attach paw pads with hot glue or carefully stitch them onto the feet.

Conclusion
Congratulations! You've completed your adorable Crochet Bear Amigurumi! This cute bear, with its charming snout, floppy arms, stubby legs, and detailed paws, is sure to bring joy wherever it goes. Whether you're gifting it or making it just for fun, this project adds warmth and creativity to your day.
Tutor's Suggestions
- Use a stitch marker to keep track of the beginning of each round.
- Add extra stuffing as needed to avoid gaps in your amigurumi.
- Experiment with yarn colors for customized designs!
Tip
For a professional look, use invisible stitching when attaching the pieces. This will give your bear a seamless, clean finish.

Complete Remarks
This Crochet Bear Amigurumi Pattern stands out as an easy and enjoyable project with adorable results. From soothing your mood during crochet time to gifting something handmade, it's a purposeful crochet worth trying.