
Simple Free Crochet Cardigan Pattern For 3 to 6 months Baby
Bring babywear to life with this free crochet cardigan pattern, combining comfort, timeless design, and beginner-friendly instructions.
This free crochet cardigan pattern feels like the perfect mix of cozy and stylish, especially if you love making something special for babies. Worked from the neckline down in a simple and easy way, it uses soft acrylic yarn and a 4 mm hook to create a lovely baby cardigan in sizes 0 to 3 months and 3 to 6 months.
The beauty of this pattern is in its texture. You start with neat rows of double crochet, then move into front post stitches and a beautiful star stitch section that adds a delicate, eye catching detail. These same stitches can also be used for matching baby blankets, hats, headbands, and even textured scarves, so you are not just making one project, you are building skills you can reuse.
Easy Free Crochet Cardigan Pattern

The cardigan pattern is practical too. It is warm but lightweight, perfect for layering over little outfits, and the top down crochet makes it easy to adjust the length or width just by changing yarn thickness or adding a few extra rows. The designer keeps everything beginner friendly by explaining each step slowly, including where to place stitch markers for the armholes and how to keep your stitch count on track. Even if you are newer to crochet, the repetition of double crochets and the clear structure of the rows help you feel confident as you go.
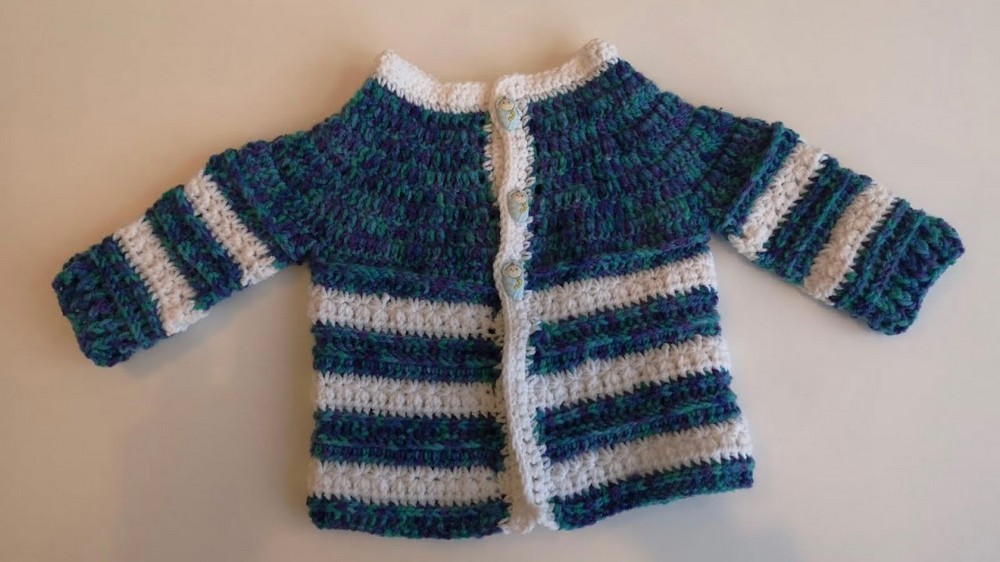
From this pattern you will learn how to crochet a baby cardigan from the top down, how to increase evenly for a yoke, how to separate for armholes, and how to work special stitches like front post double crochet, back post single crochet, half double crochet rows and the star stitch. Once you understand this pattern, you can use the same stitch combination to make baby vests, matching baby blankets, textured cushions, cozy cowls, or even a larger cardigan by adjusting your measurements and yarn. It is a great foundation project that gently takes you beyond basic stitches while still feeling calm and enjoyable to follow.

Crocheted Cardigan Sleeves and Finishing Touches Pattern
Welcome! In this part of our cardigan project, we'll tackle the sleeves, button band, buttonholes, and all finishing touches. You'll learn how to crochet elegant sleeves with stitch variation and finish the cardigan for a beautiful fit.
Quick Overview of Pattern
- Sleeve is worked onto the armhole by joining yarn and creating seamless rounds.
- Sleeve pattern combines standard double crochet, front post double crochet, and textured star stitch.
- Cuff is shaped with alternating front and back post double crochet.
- Button band and buttonholes are crocheted along the front opening.
- Final assembly includes sewing buttons and closing any remaining gaps.
This is quick overview of pattern, for complete Step by Step pattern Scroll down and Enjoy.
Notes
- Keep right side facing you while working the sleeve for a clean join.
- Stitch counts (e.g., 29 sts per round of sleeve) are essential for a neat fit-adjust as needed for your own gauge or sizing.
- The pattern demonstrates color changes for visual interest, but you may use a single color if preferred.
- Buttonband and buttonhole placement can be customized according to your desired closure style.
- Gaps at the underarm are closed with a tapestry needle and yarn for a seamless finish.
Skill Level
Intermediate
You should be comfortable with:
- Working in the round
- Various post stitches (front/back)
- The star stitch (a textured stitch requiring pulling up loops)
- Assembly techniques and basic finishing
Materials
- Same yarn and hook used for body of cardigan (e.g., DK or worsted weight, hook size matching body gauge)
- Contrasting yarn for band (optional)
- Buttons
- Yarn needle/tapestry needle for sewing buttons and closing underarm
- Scissors
- Stitch markers (optional, for buttonhole placement)
Measurements / Sizing (Schematic)
- Sleeves designed to begin with approximately 29 sts at upper arm; fits standard adult sizes.
- Cuff can be lengthened with additional rounds if desired.
- Button band fits cardigan opening; number of buttonholes (example: 3) can be changed according to preferences.
Gauge
- Gauge should match bodice of cardigan. Stitch/row count for sleeves is based on picking up all stitches around armhole and corresponding to 29 stitches.
Stitch Abbreviations
- ch: chain
- sc: single crochet
- hdc: half double crochet
- dc: double crochet
- fpdc: front post double crochet
- bpdc: back post double crochet
- sl st: slip stitch
- st(s): stitch(es)
- star st: star stitch
Special Stitches
- Star Stitch:
Pull up loops from various points to have 6 loops on hook, then yarn over and pull through all at once, ch 1 to close the "eye" of the star. - Front post/back post double crochet:
Work dc around the post of stitch from front (fpdc) or back (bpdc) for texture.
The Crochet Pattern
A. Sleeve (Worked in Rounds)
1. Establish Sleeve Foundation:
- With right side facing, join yarn to last double crochet at armhole separation.
- Ch 3 (counts as first dc). Work 1 dc in same st.
- Work dc in each dc around the armhole, including the other side, ensuring you work into the first and last dc of the rounds before the armhole.
- At the end, you should have 29 dc (or 28 dc + beginning ch-3).
- Join with a sl st to top of ch-3.
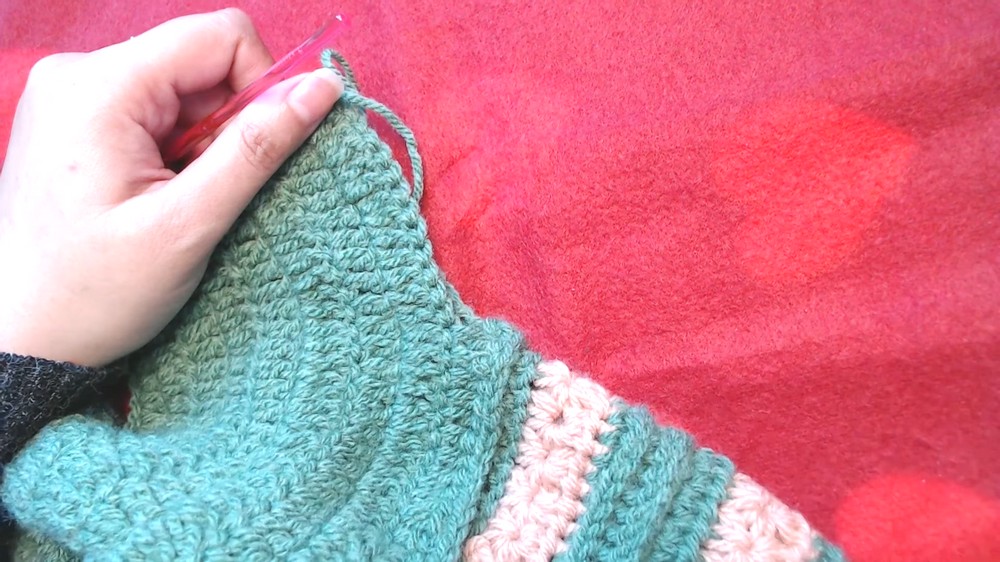
2. Round 2 (Front Post Double Crochet):
- Ch 3, turn.
- Work fpdc around each dc from previous round all the way around.
- Join to top of beginning ch-3 with a sl st.
- Cut yarn for color change if desired.

3. Round 3 (Star Stitch Foundation, New Color):
- Join new color to top of ch-3.
- Ch 3.
- Pull up a loop from 2nd ch from hook, 3rd ch, stitch where yarn was joined, and next 2 sts (6 loops on hook).
- Yarn over, pull through all, ch 1 to close star ("eye").
- Continue across:
- Insert hook into eye of previous star, pull up loop.
- Pull up loops from spike, star base, next 2 sts (6 loops).
- Yarn over, pull through all 6, ch 1.
- Repeat to end (approx. 14 star sts).
- End with a hdc in the same st as beginning ch-3. Join with sl st to ch-3.

4. Round 4 (Star Stitch Second Round):
- Ch 2, turn.
- 2 hdc in each star eye around (each hole at center of previous star).
- Join to top of ch-2 with sl st (total 28-29 sts).
5. Round 5 (Single Crochet):
- With RS facing, join yarn to top of ch-2 (or any st).
- Ch 1, sc in same st and each st around.
- Join to first sc with sl st.
6. Round 6 (Front Post Double Crochet):
- Ch 3, turn.
- fpdc around each st of previous round; do not work into ch-3.
- Join to top of ch-3.
7. Round 7 (Back Post Single Crochet):
- Ch 1, turn.
- Back post single crochet around ch-3 and each st of previous round.
- Join with sl st.

8. Round 8 (Half Double Crochet):
- Ch 2, turn.
- hdc in each st around.
- Join with sl st and fasten off if changing color.
9. Rounds 9-16: Star Stitch Pattern and Texture Section
- Repeat Rounds 3-8 for another sequence through the textured and star stitch sections.
B. Cuff
10. Cuff Pattern (Front/Back Post Double Crochet):
- Ch 3.
- [fpdc in next st, bpdc in next st]; repeat around for a ribbed edge.
- Join to first fpdc (not the ch-3).
- Ch 3; repeat previous round for a second ribbed round (add another for longer cuff if desired).
- Fasten off and weave in ends.
C. Button Band and Buttonholes
1. Join contrasting color at lower right front edge.
- Ch 1, sc in same st.
- Working up the side, make sc evenly:
- 2 sc per dc row-side, 1 sc per sc, 2 sc per ch-3 edge, as fits for smooth band.
- At collar, 3 sc in corner; continue all the way around opening.

2. Buttonhole Marking and Formation:
- On right front, mark desired buttonhole positions with stitch markers (e.g., in every 8th sc).
- Row 2: Work sc to marker, ch 2, skip marked st, sc in next 7, repeat for required buttonholes.
- At neckline/collar: (where you made 3 sc in the corner), sc in each, making 3 sc into the center stitch for a rounded transition.
3. Continue around neckline and left front, mirroring placement and working evenly spaced sc along edge.
4. Final edge (Row 3):
- Work more sc around for a neat finish, making 2 sc into chain spaces at buttonholes, maintaining the neat band look.
D. Assembly & Finishing
- Sew buttons in alignment with buttonholes.
- Close underarm holes:
- Thread needle with matching yarn, sew underarm gap by weaving between edges. Knot securely, weave in ends.
- Weave in all yarn tails for a tidy finish.
- Block cardigan if desired for best shape.

Finished Size
- Sleeve circumference: Approx. 29 sts at upper arm, cuff fitted.
- Total sleeve length: Adjust according to repeats for desired length.
- Finished cardigan closes neatly with band and buttons aligned.
Conclusion and Ending Words
Your cardigan is now beautifully complete with textured sleeves, a neat button band, and a professional finish. You have learned not only practical construction, but also special stitch features that give your cardigan a unique touch. We hope this tutorial was clear and enjoyable.