
Crochet Crown Baby Beanie Free Pattern for Special Baby Moments
Stitch a cute royal style hat for little ones with this Free Crochet Crown Baby Beanie Pattern and enjoy a soft and lovely baby accessory.
Refine your crochet as you create a cozy, soft, and adorable beanie that brings both warmth and charm. Designed especially for babies aged 0 to 3 months, this timeless piece is perfect for everyday wear, baby showers, or even special photoshoots. This Crochet Crown Baby Beanie is highlighted by its unique crown inspired design, giving it a royal touch that makes it truly stand out. The crown edges are carefully shaped to resemble real regal points, making every baby look like a little prince or princess. You can add sparkling beads for a touch of glamour or leave it simple for an elegant, classic finish.
Free Crochet Crown Baby Beanie Pattern for Baby Showers
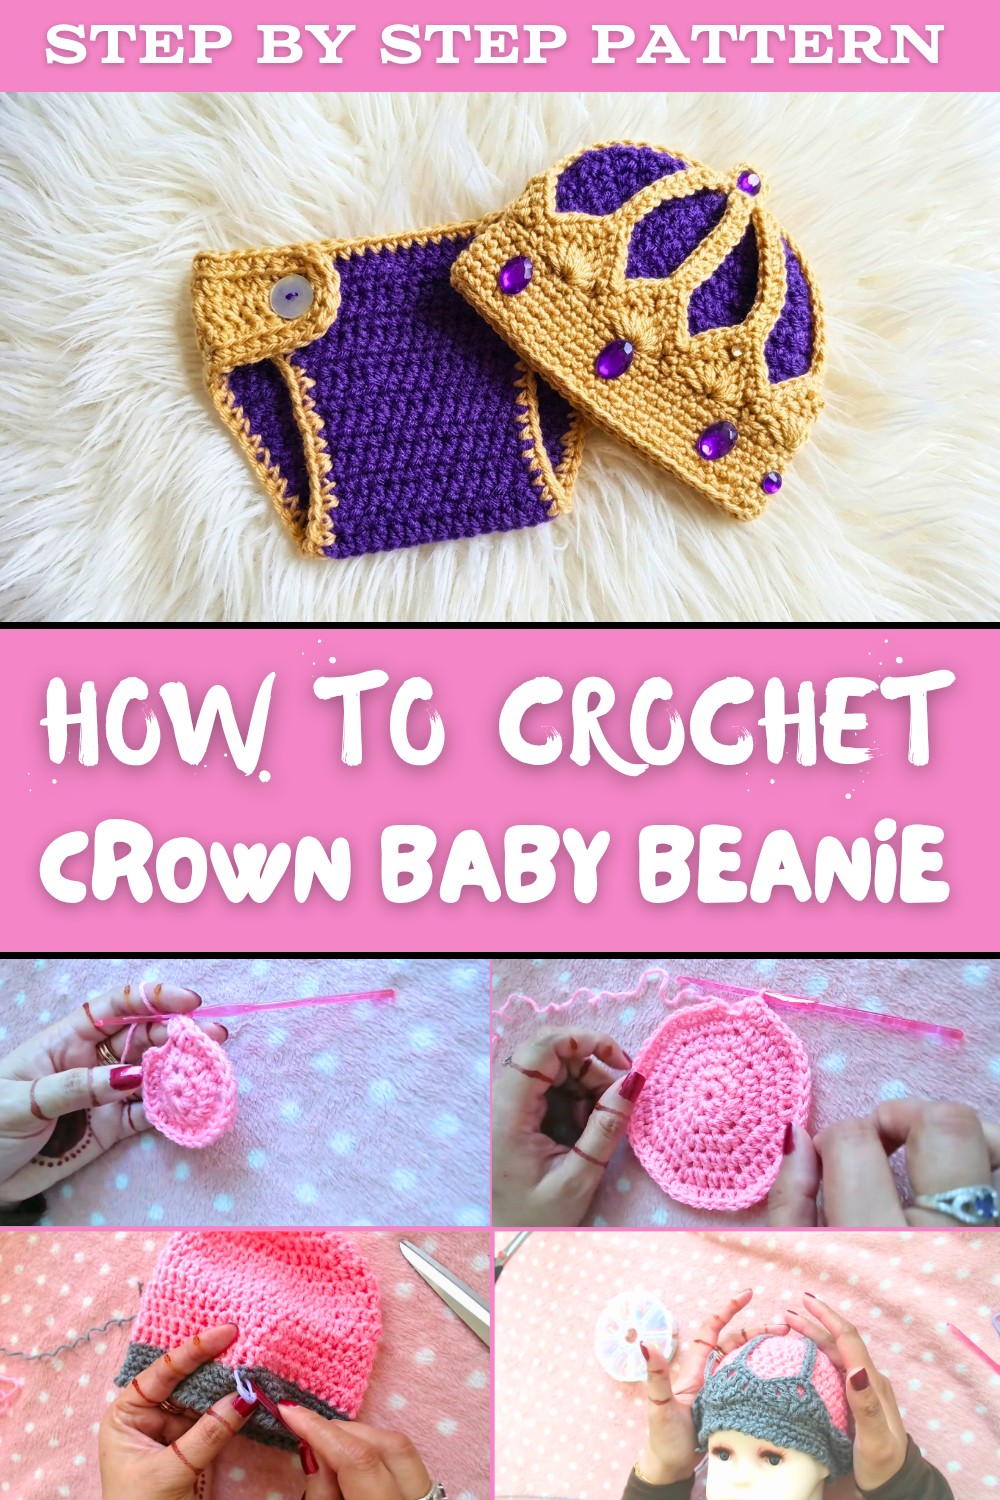
Its blend of soft yarn and lightweight design ensures both comfort and style for delicate baby skin. Measuring 6.5 inches wide and 5.5 inches tall, it offers the perfect fit for little ones while remaining gentle and cozy.
Built with easy to learn stitches like half double and single crochets, this pattern is ideal for beginners and experienced crocheters alike. You can play with different colors to make each piece truly unique and suited to your style.
This crochet crown baby beanie is more than just a baby accessory-it's a heartfelt creation filled with love. Whether for gifting, keepsakes, or everyday wear, it offers the perfect balance of beauty and practicality, making it a must try project for crochet enthusiasts. Start now and create something magical for the little one in your life.
Crown Baby Beanie Crochet Pattern
Necessary Materials
To get started, gather the following materials:
- Yarn:
- Brand: Gonka Yarn by Ice Yarns.
- Weight: Light (100g skein with approximately 300 meters).
- Colors: One or two contrasting colors (one for the body, one for the crown).
- Crochet Hook:
- Size: 4mm (G/6).
- Optional Embellishments:
- Beads (oval shaped, ideally flat back, for decoration).
- Tools Needed:
- Scissors.
- Tapestry needle (for weaving in ends and attaching beads).
- Stitch marker (optional but useful).
Finished Size and Gauge
- Finished Measurements:
- Width: 6.5 inches (16.5 cm).
- Height: 5.5 inches (14 cm).
- Gauge: Approximately 8 half double crochets (HDC) per 2 inches in width.
Special Techniques
- Reverse Single Crochet (Optional): Creates a textured stitch by working in a clockwise direction. This will be used for edging if desired.
- Shaping the Crown Points: Points are achieved through a combination of chains, slip stitches, and double crochets.
Pattern Overview
This baby beanie is worked in the round, starting at the top with a flat circle. After a series of increasing rounds to achieve the desired width, plain half double crochet rounds are worked to build the height. Finally, a decorative crown design adds a regal touch, making it stand out. Optional beads can be added to the crown points for extra flair.
Step by Step Instructions
Step 1: Creating the Foundation of the Beanie
- Ring Formation:
- Create a slipknot, then chain 4.
- Slip stitch into the first chain to form a ring.
- Round 1:
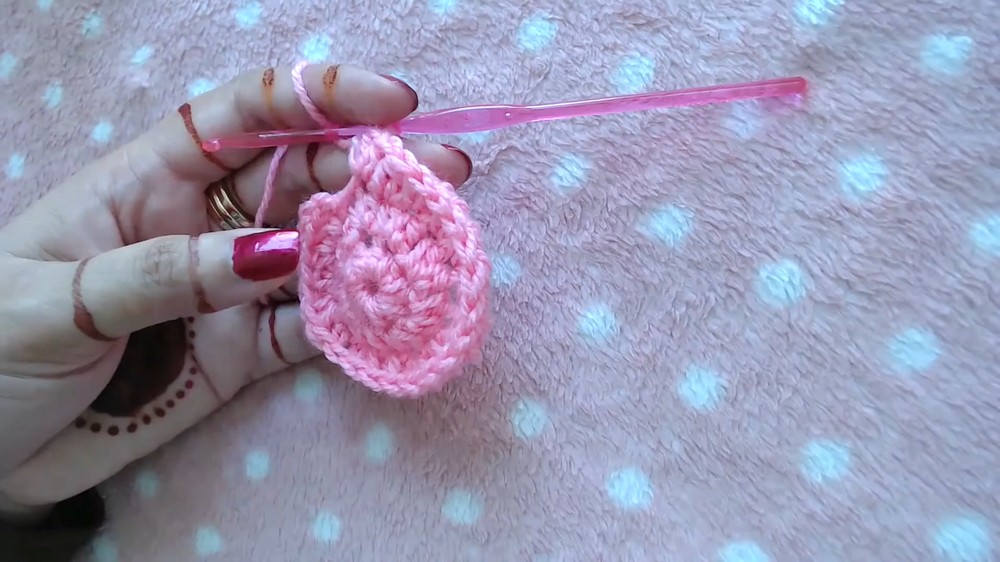
- Work 8 half double crochets (HDC) into the ring.
- Slip stitch to the first HDC to close the round (do not count the initial chain 2).
- Stitch Count: 8 HDC.
- Round 2:
- Chain 2 (does not count as a stitch).
- Work 2 HDC into each stitch from the previous round.
- Slip stitch to the top of the first HDC.
- Stitch Count: 16 HDC.
- Round 3:
- Chain 2 (does not count as a stitch).
- 1 HDC into the next stitch, 2 HDC into the next stitch. Repeat **from * to ** around.
- Slip stitch to the top of the first HDC.
- Stitch Count: 24 HDC.
- Round 4:
- Chain 2.
- 1 HDC into each of the next 2 stitches, 2 HDC into the next stitch. Repeat **from * to ** around.
- Slip stitch to the top of the first HDC.
- Stitch Count: 32 HDC.
- Round 5:
- Chain 2.
- 1 HDC into each of the next 3 stitches, 2 HDC into the next stitch. Repeat **from * to ** around.
- Slip stitch to the top of the first HDC.
- Stitch Count: 40 HDC.
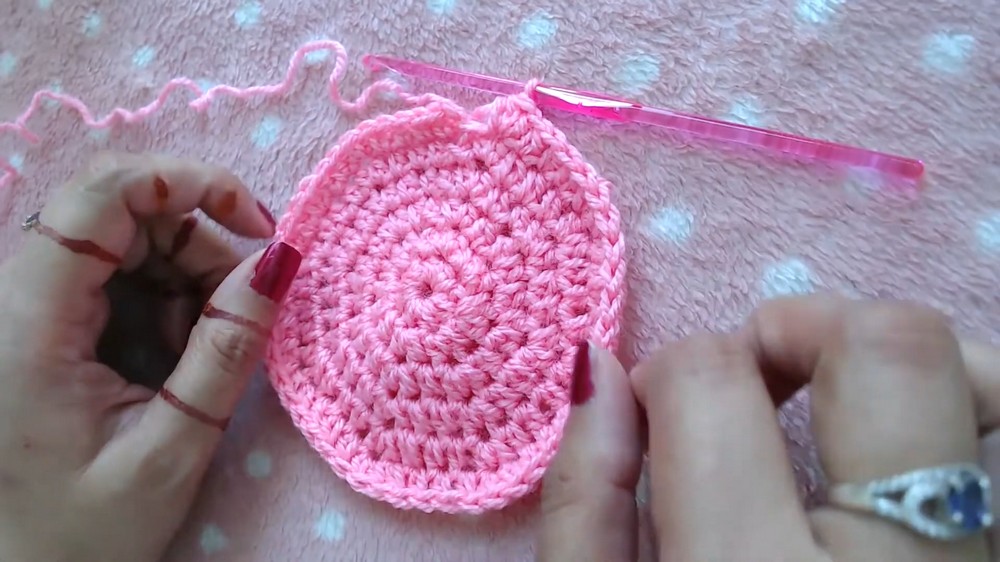
Step 2: Building the Height
- Rounds 6 to 10 (Plain Rounds):
- Chain 2. HDC into each stitch around.
- Slip stitch to the top of the first HDC.
- Continue working plain HDC stitches for several rounds until the beanie measures approximately 4.5 inches (11 to 12 cm) tall.
Step 3: Adding a Border
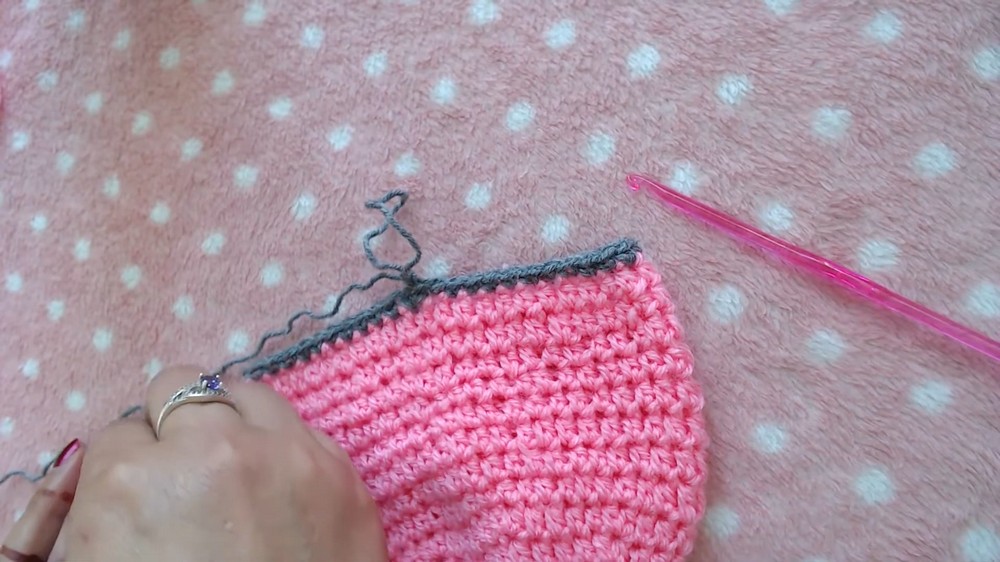
- Round of Single Crochet (SC):
- Switch to a new color for contrast (if desired).
- Chain 1. SC into each stitch around. Slip stitch to the first SC.
- Optional Reverse SC:
- Chain 1. Work SC stitches clockwise (reverse single crochet) for a decorative edging.
Step 4: Forming the Crown Points
Step 4.1: Creating the Foundation for the Crown
- Prepare for Crown Points:
- Locate the previously completed single crochet round.
- Join the yarn into the round with a slip stitch.
Step 4.2: Shaping the Crown Points
- Pattern for Crown Points:
- Skip 2 stitches.
- Work 5 double crochets (DC) into the next stitch.
- Skip 2 stitches. SC into the next stitch.
- Repeat: Skip 2, 5 DC, skip 2, SC.
- Repeat this sequence around to form the crown points.
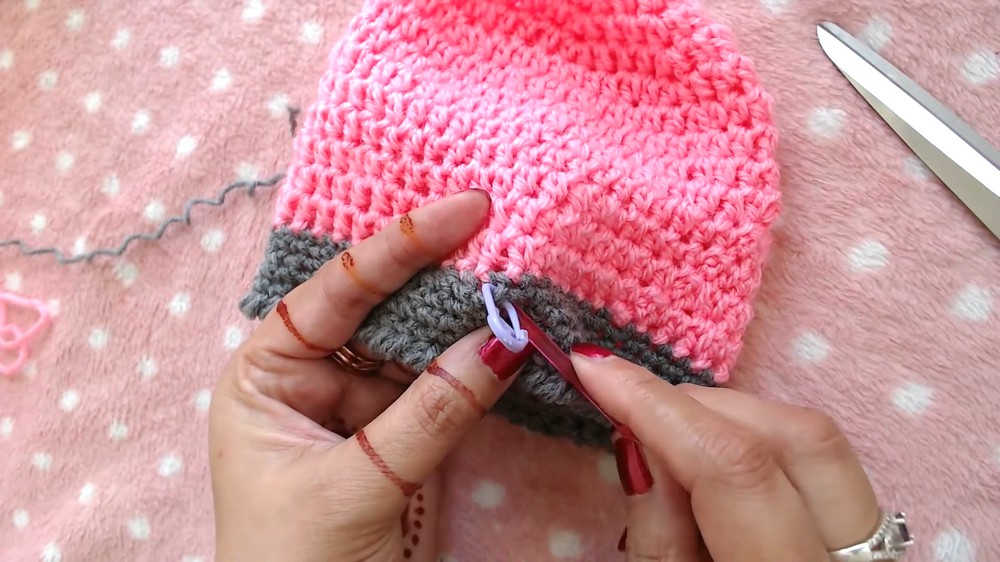
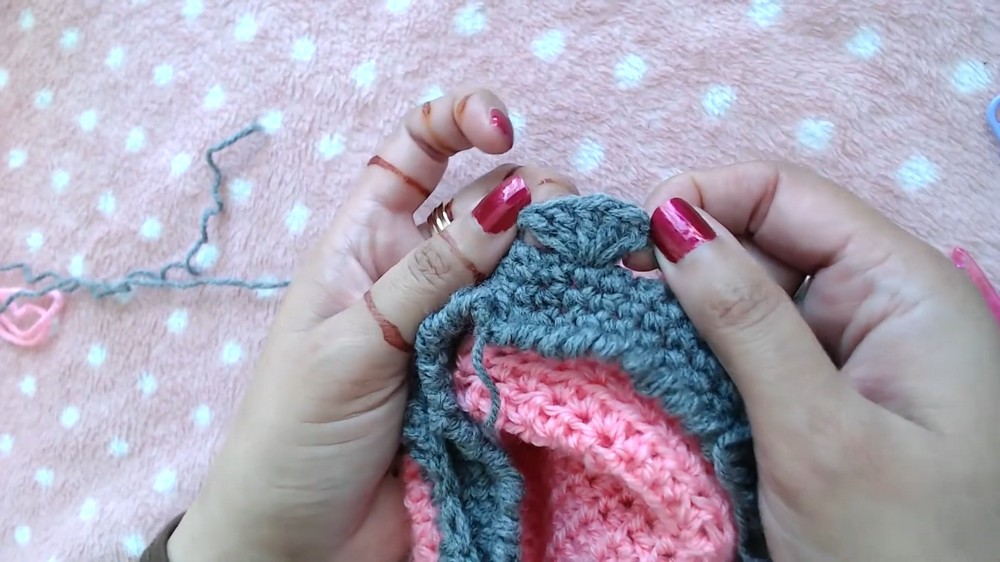
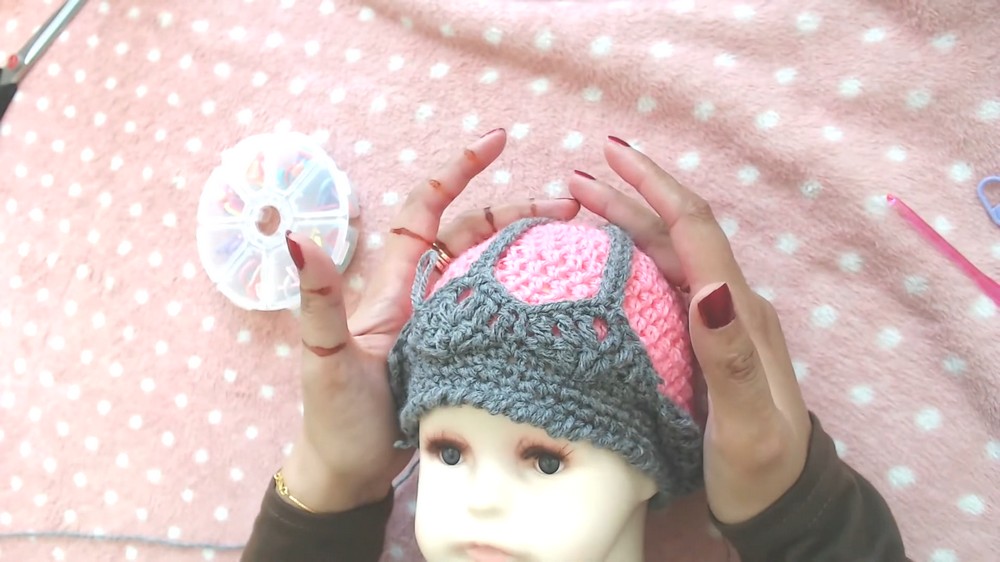
- Final Round for Crown Points:
- Chain 15 after joining at the peak of each crown cluster to create a "cord."
- Slip stitch into the first round of half double crochets to secure it vertically.
- Turn your work clockwise and SC into each chain of the cord (for a total of 15 single crochets).
- SC into the chain 2 space between crown clusters. Repeat for each crown.
Customization Ideas
- Beads:
- Sew small, flat back beads at each crown point for decoration. Oval shapes work well for a regal finish while ensuring the design remains safe and baby friendly.
- Color Combinations:
- Experiment with two or more colors. Give the crown a contrasting shade for increased visibility and effect.
- Texture Options:
- Instead of reverse single crochet edging, try a shell stitch or picot edging for a softer look.


Finishing Steps
- Trim and Secure Yarn:
- Cut the yarn, leaving a short tail. Use a tapestry needle to weave in any loose ends for a polished finish.
- Add Optional Beading:
- If using beads, sew them securely onto the top of each crown cord or along the body of the beanie as desired.
- Inspect for Quality:
- Ensure all slip stitches, joins, and ends are clean and that the crown points are evenly spaced.
Final Look and Remarks
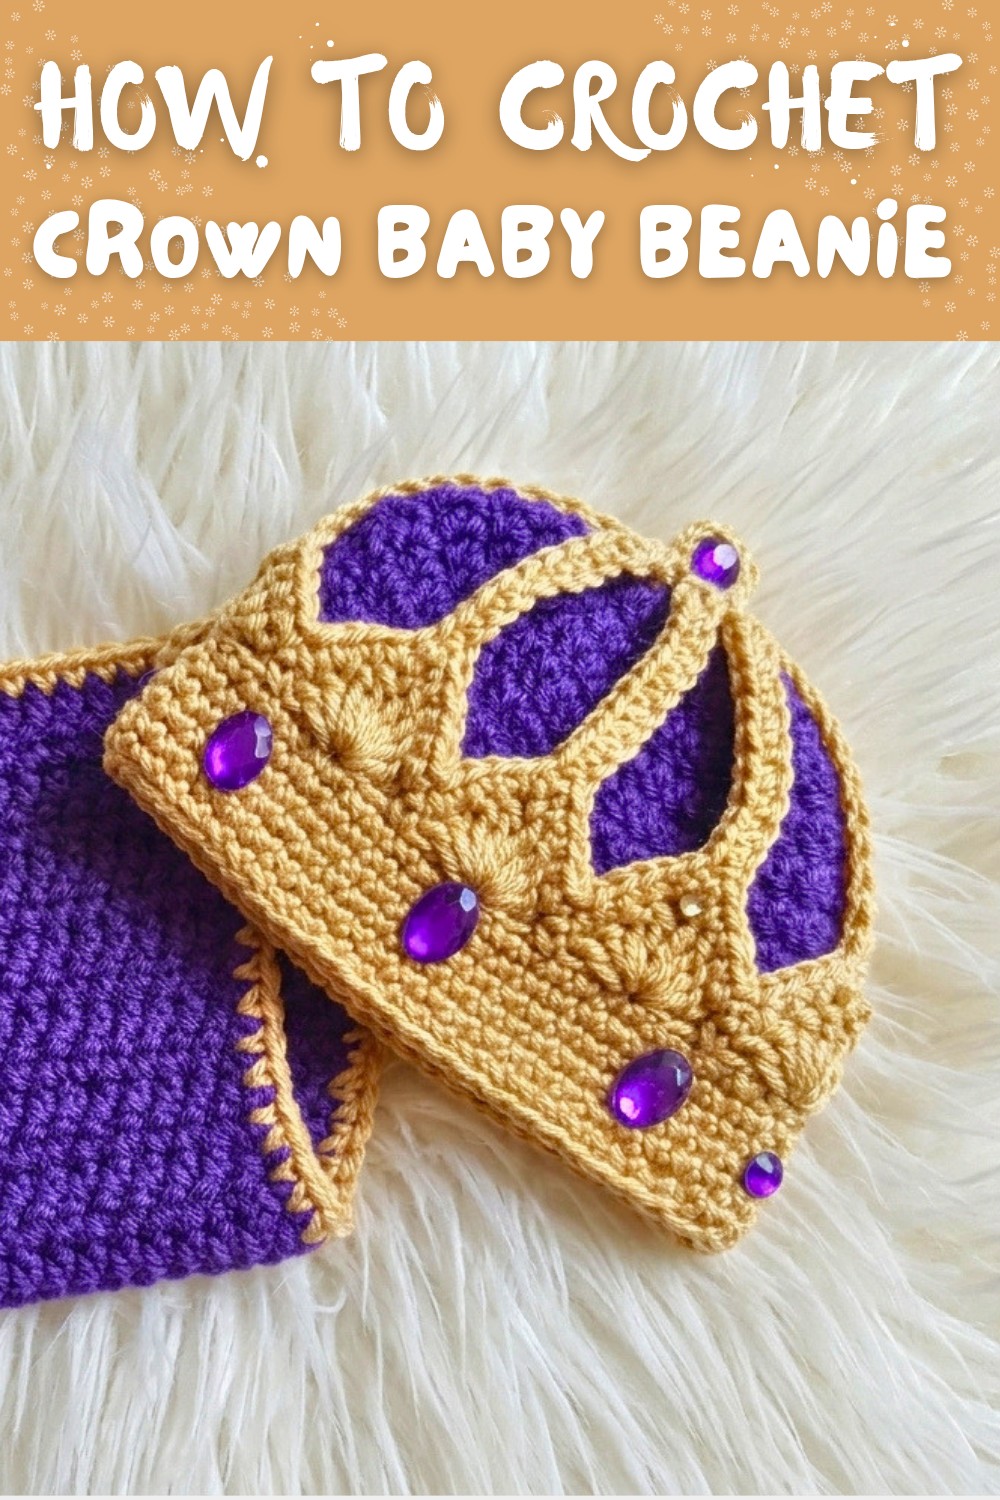
Your Crown Baby Beanie is now complete. This elegant and functional design serves as both a keepsake and a practical accessory. The crown shaped design creates a whimsical and royal theme, suitable for special occasions or everyday wear.
Key Features:
- Sturdy yet soft design perfect for sensitive baby heads.
- Crown points and optional beads add visual interest and uniqueness.
- Customizable in terms of size, color, and embellishments.
Tips for Crocheters
- Gauge Check:
- Check your gauge before starting to ensure the size matches the baby's head. Adjust your hook size as necessary for a correct gauge.
- Avoid Tight Stitches:
- Do not crochet stitches too tightly, especially for the cords in the crown, as they need to remain flexible.
- Use High Quality Yarn:
- Choose soft, machine washable yarns suitable for babies. Avoid yarns with rough textures.
Conclusion
The Crown Baby Beanie is a delightful way to combine creativity with functionality. Each stitch adds a touch of love and care, resulting in a beautiful piece that a baby (and parents) will adore. Impress your loved ones with this intricate yet easy to follow design, and don't forget to experiment with colors and embellishments to make it uniquely yours.