
Free Crochet Heart Keychain Pattern With Colorful Yarn
Brighten your day with a free Crochet Heart Keychain Pattern that brings simple charm and a personal, heartfelt touch to your everyday accessories.
Have you ever wondered how to make a heartfelt gift that's simple, quick, and full of personal charm? The free crochet Heart Keychain pattern might be just what you're looking for. Not only is it beginner-friendly, but it's also a creative way to transform a few basic stitches into something beautiful and practical. The heart shape stands out with its sweet, curvy lines, making it a lovely accent for keys, purses, backpacks, or even as a thoughtful token for someone special. With endless color options, you'll find that every heart you make has its own unique flair and style.
Free Crochet Heart Keychain Pattern to Make for Loved Ones

How Can I Make This?
The process starts with selecting your yarn-opt for worsted weight or cotton yarn for best results. Pair it with a corresponding crochet hook (usually size 3.5mm to 4mm for a neat finish). You'll also need a yarn needle for sewing pieces together, stuffing such as polyester fiberfill for plumpness, scissors, and a keyring to turn your heart into a usable accessory.
Who Is This Pattern For?
Whether you're a beginner eager to practice core crochet skills or an experienced creator looking for a quick gift idea, this pattern suits all levels. Teachers, parents and teens alike will find making these heart keychains a rewarding project-ideal for classroom crafts, Valentine's swaps, friendship gifts or stocking stuffers.
This pattern is especially great for beginners since it mostly uses single crochet-a foundational stitch in crochet that opens the door to so many other projects. You'll practice increasing and decreasing, which are essential skills to help shape your work and are widely used in amigurumi, coasters, bookmarks, flowers, and other crafts. The joy of this pattern is in its simplicity: you'll find yourself picking up the rhythm of each row and seeing your heart take shape right before your eyes, all while keeping the process fun and stress-free.
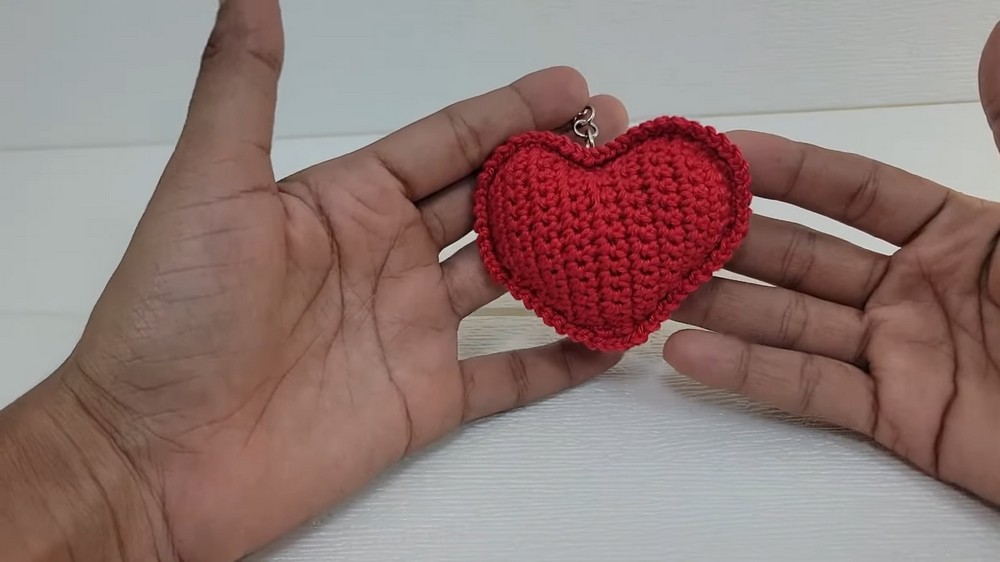
By making this heart keychain, you'll become comfortable with foundational techniques like chaining, single crochet, increasing, decreasing, and joining pieces. Completing the pattern gives you the confidence to take on other shaped projects-perhaps you'll move on to crochet stars, plush toys, or lovely little ornaments.
Upon completion, there's a satisfying joy in seeing your handmade heart ready to adorn a keyring or surprise a loved one, all while leaving you a little prouder of your skills and a lot more inspired for your next crochet adventure.
Important Remarks
Take your time-precision in small projects leads to more polished, lasting results. If you're new, don't be discouraged by mistakes; each attempt helps you grow. Make sure to secure all ends well for durability and safety, especially if gifting to children. Remember, the magic isn't just in the stitches, but in the heartfelt gesture woven into every piece you finish.

Special Techniques & Stitches
While the majority of stitches are single crochet, you'll get to practice increases (two stitches in one) and decreases (crocheting two stitches together) for shaping. Working in the round, stuffing neatly, and joining pieces with a yarn needle all build important skills for future projects.
Enhance Your Experience
Try adding a loop or tassel, stitching initials on your heart, or using hand-dyed yarns for a one-of-a-kind creation. For an extra challenge, practice surface embroidery to embellish your heart with little flowers, words, or even smiley faces.
With just a few basic stitches, you'll discover how easily you can craft meaningful items for gifting, decorating, or adding a personal touch to your everyday life. This small heart keychain is a great reminder that the simplest stitches can create the sweetest treasures in the world of crochet.

Crochet Heart Keychain Pattern
Materials:
- Yarn in your favorite color (DK weight recommended)
- 2.5mm-3mm crochet hook
- Fiberfill stuffing
- Scissors, tapestry needle
- Keychain ring (optional)
Make Two Heart Halves
Heart Half (Make 2)
Step 1: Foundation Chain
- Chain 6.
You start with a chain of 6 to make the heart base.
Row 1:
- Starting in the 2nd chain from hook, work 1 sc.
- Continue: 1 sc in each of next 4 chains.
- (You have 5 sc across.)
- Chain 1, turn.

You worked your sc stitches in each chain, skip the first chain as the video says. Turn and remember to keep your rows even.
2:
- In the first stitch, work 2 sc (increase).
- Sc in next 3 stitches.
- In the last stitch, work 2 sc (increase).
- (You now have 7 sc across.)
- Chain 1, turn.

Both ends of the row get an increase (2 sc in one stitch). This helps shape the "bottom" of the heart.
3:
- In the first stitch, 2 sc (increase).
- Sc in next 5 stitches.
- In the last stitch, 2 sc (increase).
- (You now have 9 sc.)
- Chain 1, turn.
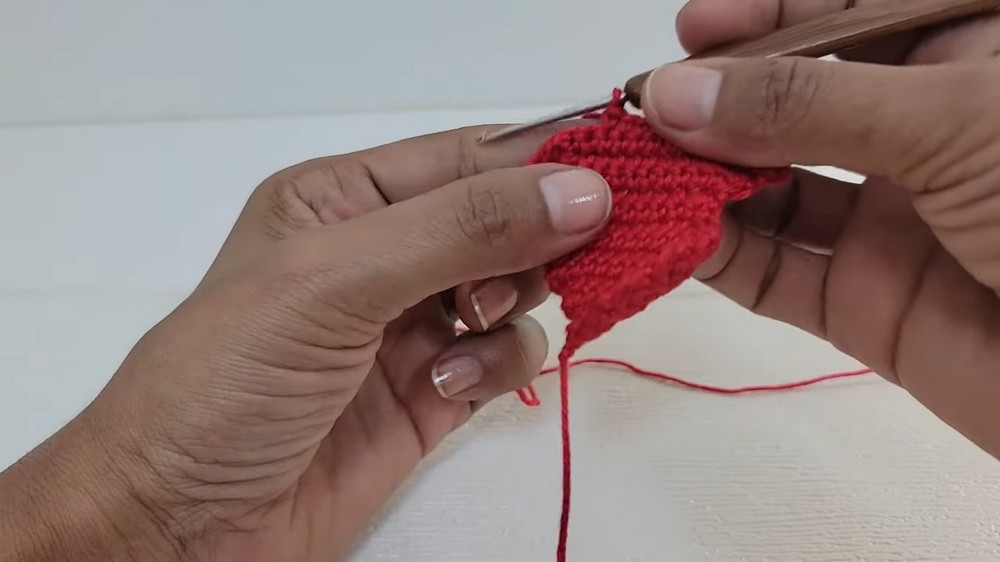
Continue increasing at both ends-your heart starts to widen as you build up rows.
4:
- Increase (2 sc) in the first stitch.
- Sc in next 7 stitches.
- Increase (2 sc) in the last stitch.
- (11 sc)
- Chain 1, turn.
Keep increasing at both edges. Your stitch count can be checked every time.
5:
- Sc in first stitch.
- Sc in each stitch across (total: 11 sc).
- At the end of the row, increase (2 sc) in the last stitch.
- (12 sc)
- Chain 1, turn.

Now the increases will first alternate-watch where the increase happens (beginning or end).
6:
- Increase (2 sc) in the first stitch.
- Sc in each stitch across, ending with sc in the last stitch.
- (13 sc)
- Chain 1, turn.
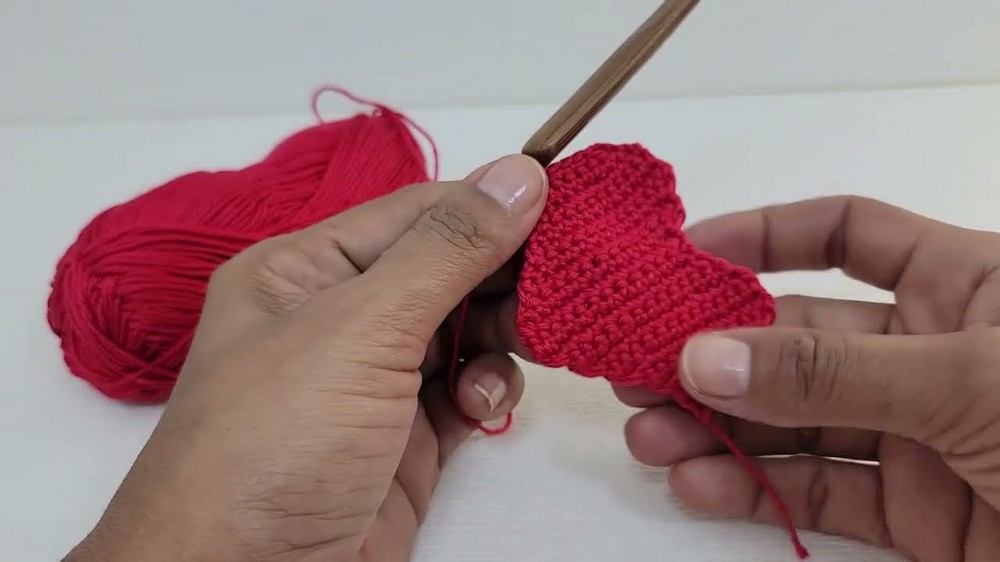
7:
- Decrease over first 2 stitches (sc2tog).
- Sc across next 10 stitches.
- Increase (2 sc) in the last stitch.
- (13 sc)
- Chain 1, turn.
You start decreasing at the beginning, and increasing at the end. This helps narrow the heart to shape the sides.
8:
- Increase (2 sc) in the first stitch.
- Sc across next 10 stitches.
- Decrease over the last 2 stitches (sc2tog).
- (12 sc)
- Chain 1, turn.
9:
- Decrease over first 2 stitches.
- Sc in next 9 stitches.
- Increase (2 sc) in last stitch.
- (12 sc)
- Chain 1, turn.
10:
- Increase in first stitch.
- Sc in next 9 stitches.
- Decrease over last 2 stitches.
- (11 sc)
- Chain 1, turn.

11:
- Increase in first stitch.
- Sc in next 9 stitches.
- Decrease over last two stitches.
- (11 sc)
- Chain 1, turn.
12:
- Decrease over first 2 stitches.
- Sc across next 8 stitches.
- Increase (2 sc) in last stitch.
- (11 sc)
- Chain 1, turn.
13:
- Increase in first stitch.
- Sc in next 8 stitches.
- Decrease over last 2 stitches.
- (11 sc)
- Chain 1, turn.
14:
- Decrease over first 2 stitches.
- Sc in next 8 stitches.
- Increase in last stitch.
- (11 sc)
- Chain 1, turn.
15:
- Sc in each stitch across (11 sc).
- Chain 1, turn.
16:
- Decrease over first 2 stitches.
- Sc in next 7 stitches.
- Decrease over the last 2 stitches.
- (9 sc)
- Chain 1, turn.
17:
- Decrease over first 2 stitches.
- Sc in next 5 stitches.
- Decrease over last 2 stitches.
- (7 sc)
- Chain 1, turn.
18:
- Decrease over first 2 stitches.
- Sc in next 3 stitches.
- Decrease over last 2 stitches.
- (5 sc)
- Chain 1, fasten off.
The rows with decreases shape the upper curves of the heart. Fasten off one piece completely.
Make a Second Piece
- Make another piece exactly the same, but do not fasten off at the end-leave the yarn attached for joining.
Joining the Heart Pieces and Stuffing
- Place both heart halves together, right sides facing out.
- Use the yarn still attached to one piece.
- Insert hook through both pieces, work single crochet around the edges to join.
- Stuff lightly as you go (leave a gap to add stuffing, don't overstuff).
- Close the gap with single crochets.
- Slip stitch in the last stitch and fasten off.
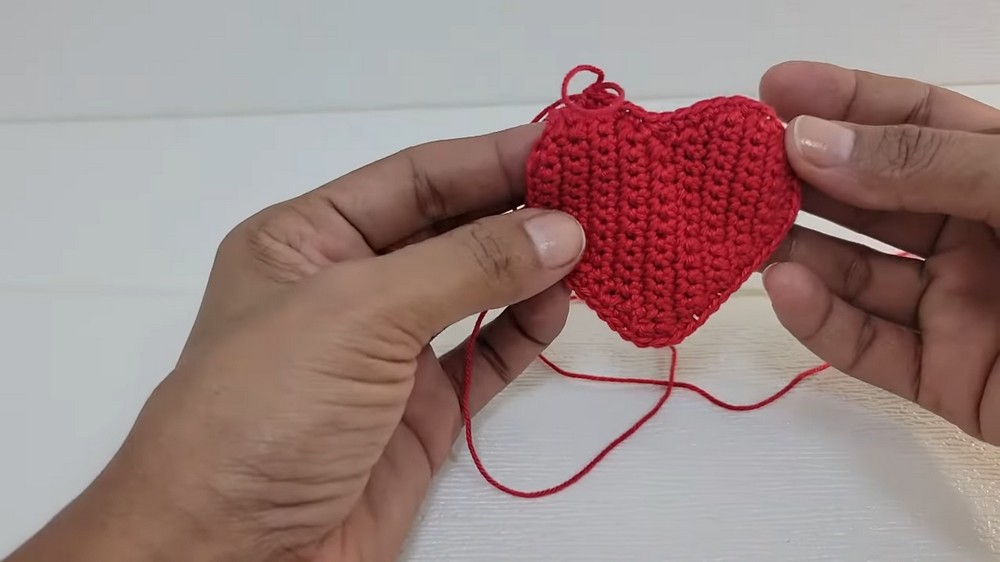
Joining both parts with single crochet creates a neat edge. Don't forget to add stuffing before closing completely!
Edging and Loop
- Make a finishing round:
- Chain 1, slip stitch in each stitch around (optional for more definition).
- Leave a long tail, use the tapestry needle to weave in ends.
- Add a keychain ring at the top with the yarn tail, secure with a knot.
Slip stitch round makes the edge a little firmer and clean. Attach your keychain at the top center.
Beginner Note Per Section:
- Chain, sc, increases and decreases will shape your heart as you go.
- After each round, your heart will grow and then curve at the top as you decrease.
- Join two hearts together and stuff-it's just like making a simple pillow!