Quick and Easy Crochet Mesh Tote Bag Pattern (Free!)
Starting a crochet mesh tote bag is a great choice for anyone who loves simple projects and wants something both practical and stylish. Even if you're new to crochet, this project is approachable and satisfying. A mesh tote is perfect for carrying books, groceries, or beach essentials. It also makes a thoughtful handmade gift for friends and family. Getting into crochet routines like this bag can be a fun way to relax, learn new skills, and make something truly useful from just a ball of yarn.

Important Steps You Can't Forget
- Start with a solid foundation chain and check your count
- Use even tension for each row to avoid a lopsided bag
- Reinforce the handles for strength
- Finish every end neatly to prevent unraveling

Features, Colors, and Versatility
This mesh tote bag stands out because of its lightweight and airy design. You'll mainly use chain stitches and double crochet stitches, which are some of the easiest patterns to learn. The mesh weave makes the bag stretchy but sturdy, ideal for a variety of uses.
- Features you'll love:
- Open, breathable pattern to keep items fresh
- Handles are attached securely and comfortably
- Customizable to any length or color
- Color ideas:
- Use bright summer shades for a beach-ready tote
- Try earth tones for an everyday shopping bag
- Even variegated (multi-color) yarn will make a unique look
- With small changes, you can use this same pattern to make other items like:
- Produce bags for groceries
- Laundry or toy storage sacks
- Stylish lightweight purses

Common Issues and How to Fix Them
Some problems may pop up, especially for beginners:
- Uneven Rows:
- Keep your stitches the same size and count at each turn
- Loose Stitches Making the Bag Floppy:
- Try a smaller hook size or tighter stitches
- Handles Stretch Too Much:
- Reinforce with a few extra rows or use tighter stitches
If you make a mistake, don't worry! Gently undo the last few stitches and redo them, making sure your pattern stays consistent.

Size Guide and Getting a Great Result
To reach the right size for your needs:
- Most tote bags are about 12-15 inches wide and 14-16 inches deep, with 20-inch handles
- Adjust the starting chain or number of rows to make the bag bigger or smaller
- Always check your work as you go to keep the shape even
Following these tips and steps, your Free Crochet Mesh Tote Bag will turn out strong, attractive, and ready to use or gift! With a little patience, anyone can complete this project and enjoy the results.
Step-by-Step Pattern
Materials Needed
- Nautical Polypropylene Cord (5mm), or sturdy yarn
- 5mm crochet hook
- Small scissors
- Lighter (for sealing ends on synthetic cord)
- 4 beads (any style)
- Tapestry needle
- Stitch markers
- Cardboard or lid for tassel
Bag Base
Step 1: Foundation Chain
- Chain 36 (make them slightly loose).

You're starting your bag base by making a simple row of chains. Make sure not to make them too tight; these chains will decide the width of your bag.
Step 2: Single Crochet Foundation Row
- Turn your work so the back bumps of the chain are facing up.
- Skip the first chain from the hook.
- Insert hook into the back bump of the second chain. Yarn over, pull through, yarn over, pull through both loops on hook (single crochet).
- Repeat single crochet in each back bump along the chain (35 stitches total).

This step creates a sturdy and even edge for your base. Always work into the back bump for a neater look.
Step 3: Work 9 Rows of Single Crochet
- At the end of each row, chain 1, turn.
- Single crochet in each stitch across (35 stitches each row).
- Continue for a total of 9 rows.
Nine rows using single crochet will give you a flat, firm rectangle for the bottom of your bag.
Step 4: Border the Base
- Single crochet around the 3 sides of the base (not the top row you just finished).
- 2 single crochet stitches in each corner for a rounded corner.
- Place single crochet evenly along the sides, using the horizontal lines as a guide.
- Finish with an invisible join for a smooth look.

You're creating a border so you can work up the sides evenly. Put two single crochet stitches in corners so they don't curl up.
Bag Body
Step 5: Work into Back Loops for Texture
- With the right side facing, attach yarn (if needed) at the midpoint of a short side.
- Single crochet all the way around, but only grab the back loop and the small bump behind it of each stitch.

This gives the bag flexibility and a nice, subtle ridge for texture.
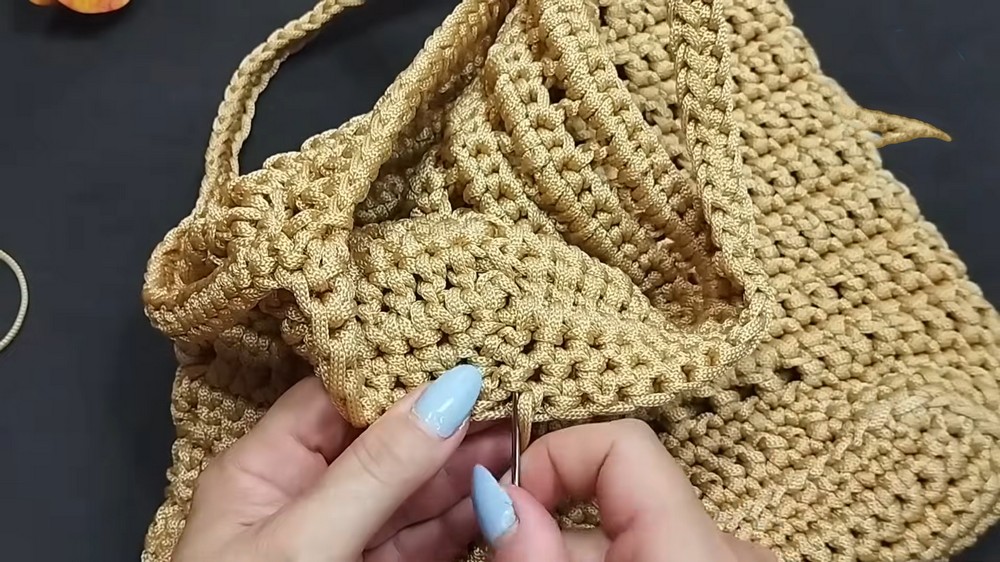
Step 6: Body Pattern Rounds (Mesh and Solid Rows)
Repeat this 2-round sequence NINE times for the bag's height.
Round A: Mesh Row
- Place stitch markers: Mark 16 stitches at each end for the solid side panels. The 27 stitches on the front and back between markers are the mesh panels.
- In the solid sides: Double crochet in each stitch for 16 stitches.
- For the open mesh section:
- Chain 1, skip 1 stitch, double crochet in the next stitch; repeat across the mesh area.
- Resume double crochet in each stitch in the side panel.
- Repeat around.

You'll have two solid panels at the sides and open mesh at the front and back. Markers help keep your pattern lined up.
Round B: Solid Row
- For solid (double crochet) areas: Centered single crochet into each double crochet (insert hook into the center of the "V" at the top of the double crochet, out back).
- In mesh areas: Single crochet into each chain-1 space; for the double crochets, do a centered single crochet.
- Work all the way around.
This row fills the spaces and gives strength to the mesh part of the bag. Centered single crochet makes the fabric sturdy and neat.
Step 6 is repeated for nine mesh and solid (single crochet) round pairs, going as high as you'd like your bag.
Bag Top and Handles
Step 7: Mark and Make Handles
- Fold the bag and find the middle at the top edge.
- On each side: count 11 stitches from the corner and add a marker. Do this on front and back for both handles. There are 22 stitches per handle, with 21 stitches between.
This helps ensure both handles start and end in the same places on each side of the tote for a balanced look.
Step 8: Single Crochet Top Row and Start Handles
- Single crochet across the top edge until you reach a marker.
- At the marker: chain 50 (about 40 cm or your preferred strap length).
- Attach the chain to the next marker with a single crochet.
- Continue single crochet around the top, making the other handle the same way.
You are making the handle chains right on the top edge for a smooth, sturdy join.
Step 9: Reinforce and Finish Handles
- Work a final round of single crochet around the bag and up and along both handles.
- When working the handles, insert the hook into the back bumps of the foundation chain to make the straps extra strong.
Crocheting single crochet over the handle chain makes them thicker, flatter, and much more comfortable to hold.
Finishing
Step 10: Secure and Weave in Ends
- Cut yarn, use a tapestry needle to weave in all ends neatly.
- Make a small knot and seal with a lighter if using synthetic cord.

Neat ends help your bag look professional and last longer.
Double Tassel and Beads (Optional)
Step 11: Make Tassel Chain
- Measure 1.5 meters of cord, fold in half, and begin chaining.
- Make a chain about 55 cm long. Thread chosen beads onto both ends and tie knots to secure.
A decorative chain with beads gives your bag a fun, boho beach vibe.
Step 12: Make and Attach Tassels
- Wrap yarn around cardboard or your lid 16 times (or adjust if you want smaller/larger tassels).
- Tie one end to secure, slide off, and tie another piece around the top 2cm down for the "head".
- Cut the bottom open and trim the ends evenly.
- Attach to each end of your tassel chain, just under the beads.
The tassel gives a perfect handmade look and adds movement and color.
Final Steps
- Make sure all ends are sealed and woven in.
- Admire your new roomy, trendy tote!
You'll have a sturdy, stylish, oversized mesh tote-perfect for the beach, market, or everyday use-with beautiful handles and decorative tassels for extra flair!