
Adorable Free Crochet 3D Rose Pattern for stunning Projects
Turn simple yarn into lifelike 3D rose using this free guide, featuring clear instructions to help beginners bring timeless floral charm to their projects.
Who said you need a green thumb to grow roses? With just a hook and yarn, you can create rose that'll never wilt or need watering. Crochet 3D rose is like crocheting a little garden in your hands, vibrant, timeless, and absolutely stunning. Its layered petals and lifelike texture make them a gorgeous addition to just about anything, from cozy blankets and hats to pretty gift wraps and home décor.
Step-by-Step Free Crochet 3D Rose Pattern You'll Love
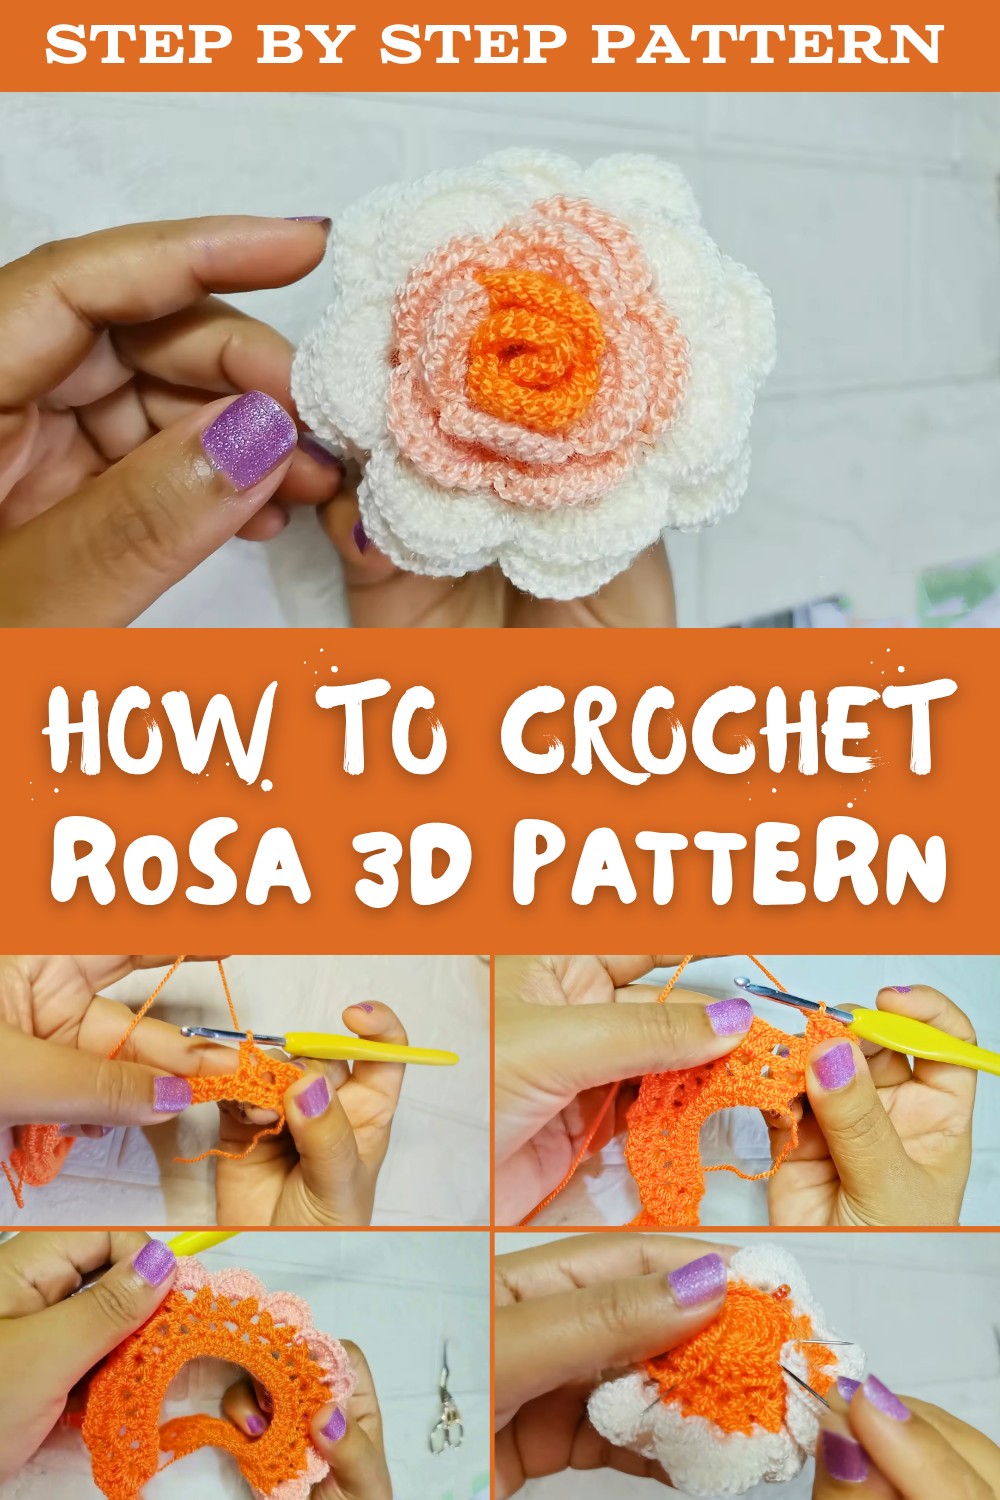
But here's the best part: these roses are way easier to crochet than they look. Even beginners can quickly master it with a bit of practice! Using simple stitches, like chains and double crochets, you'll watch your yarn magically transform into a bloom that's as soft as it is beautiful. You can bring out your creativity by mixing colors, making two-tone roses, or sticking with the classic red for that romantic vibe.
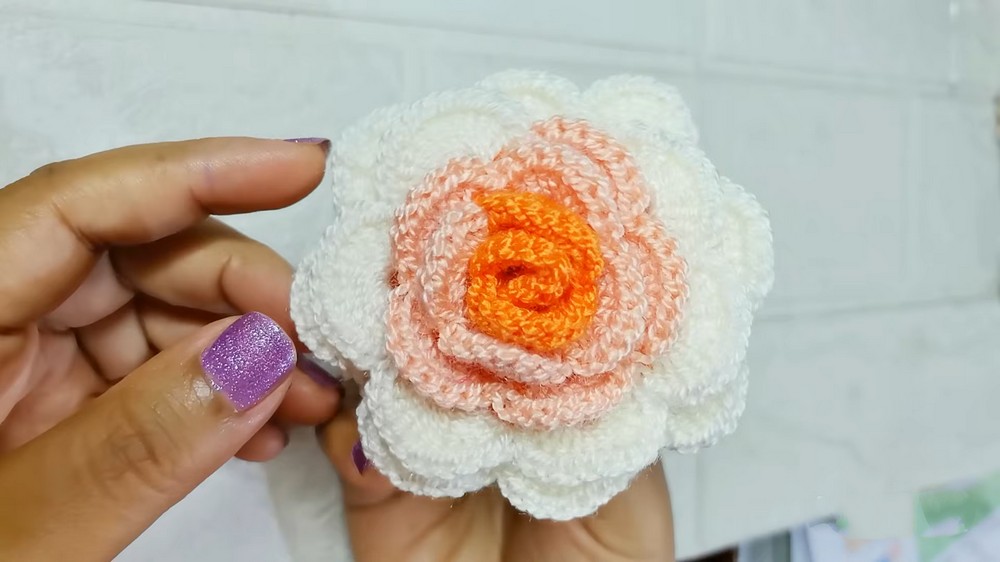
Detailed Crochet Rose Pattern
Materials Required
- Yarn:
- Three colors of light worsted or DK (category 3) yarn (Color A, B, and C: orange, pink, and white)
- Hook:
- 3.5 mm (E/4) crochet hook, or hook appropriate for yarn
- Tapestry needle:
- For sewing the rose together and weaving in ends
- Scissors
- Stitch marker (optional)
Gauge
Gauge is not crucial for this decorative item.
With listed materials, your rose should fit in the palm of your hand and measure approximately 2.5-3.5" (6-9 cm) in finished diameter. For a larger or smaller rose, use heavier or lighter yarn and a corresponding hook.
Finished Size
Approximately 3-3.5" (8-9 cm) in diameter, after spiraling and sewing.

Abbreviations (US Terminology)
- ch: chain
- sc: single crochet
- hdc: half double crochet
- dc: double crochet
- sl st: slip stitch
- st(s): stitch(es)
Special Techniques
- Magic ring (for alternative foundation, though not used here)
- Color change with seamless transition: Drop the old yarn, pick up the new color, pull through to complete a stitch.
- Spiral sewing: Rolling the strip flat, then stitching through the base to secure shape.
- Crocheting in foundation chain and row gaps
Pattern Instructions
Step 1: Foundation & First Row
- Start with Color A (e.g., orange).
- Make a slip knot, put it on your hook, and ch 75.
- Mark the last chain with your finger or a stitch marker.
- Ch 2 more (acts as turning chains).
- Work 1 hdc in 3rd chain from hook (where your nail/stitch marker was).
- Work 1 hdc in each ch across - you will have 75 hdc in total.
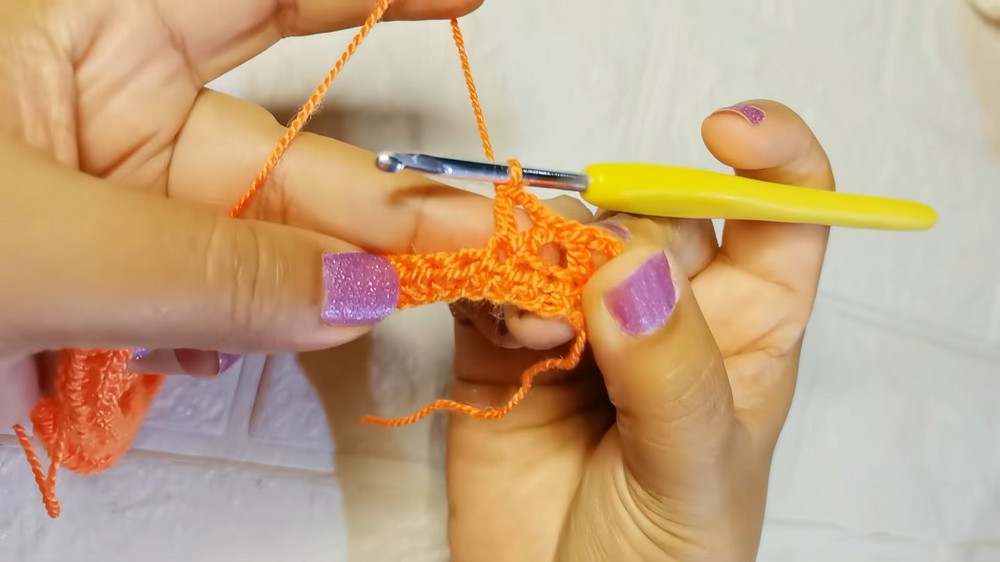
Step 2: Second Row - "Triangle" Bases
- Ch 5 (serves as turning chains and setup).
- Turn your work.
- Dc in first st.
- Skip next 2 sts, dc in third st.
- Ch 2, dc in same st as previous dc - forms a triangle!
- Continue pattern across row:
- [Skip 2 sts, dc in next st, ch 2, dc in same st]
- Repeat until the end of the row.
- You will have a series of upside-down triangles.

Step 3: Third Row - Expanding Petal Bases
- Ch 3 and turn.
- In the first ch-2 sp:
- Dc, ch 2, 2 dc (first "expanded triangle").
- In each ch-2 sp across:
- [2 dc, ch 2, 2 dc]
- These are the bases for your flower petals.
- Do not work in "square" gaps from previous row. Only the triangle (ch-2) spaces.
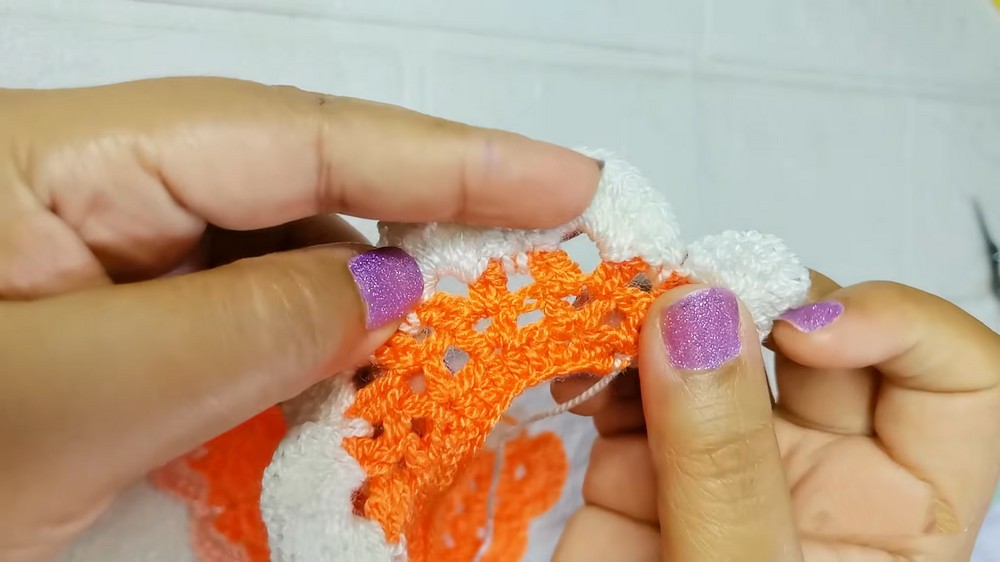
Step 4: Fourth Row - Petals
You will be making petals as groups of double crochets (dc) in each ch-2 sp.
- Optional: Slip stitch to the center of the first ch-2 space to start.
- Ch 3 (counts as one dc).
- Work 7 more dc into same ch-2 space (total 8 dc, not counting the starting ch-3).
- In next space:
- Work 1 sc to anchor the petal.
- Repeat:
- In each ch-2 space:
- [8 dc, 1 sc in next space]
- Continue across all ch-2 spaces of row.
- In each ch-2 space:
Step 5: Color Change (First Petal Color to Second)
On the last sc before a new "petal section":
- Insert the hook into the next space, yarn over with the new color (Color B, e.g., melon), and finish the sc with Color B.
- Cut off Color A, leaving sufficient tail to weave in.
Begin working the next set of petals (still in 8-dc clusters) using Color B.
- Crochet over tails as you go to hide them.
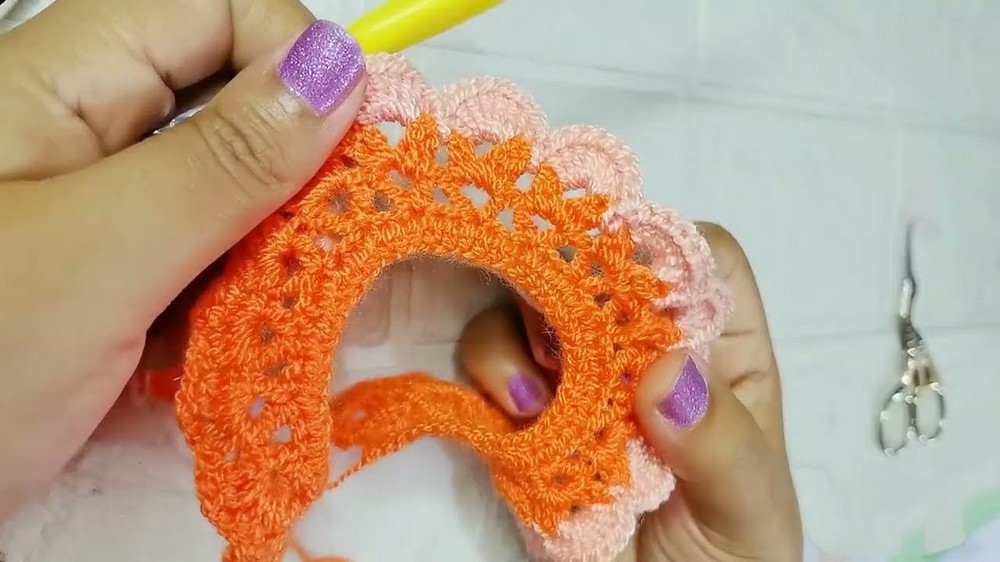
Continue making petals (8 dc for each petal, sc in following space to anchor) for as many petals as desired in this color. The video made 9 melon-colored petals.
Step 6: Color Change to Third Shade (e.g., White) and Larger Petals
When reaching the next petal set, introduce Color C (white) on the last sc of Color B as before.
For White Petals:
- In the ch-2 space, work 12 dc for each petal (for larger outer petals).
- Anchor with 1 sc in the next space.
- Repeat for all remaining ch-2 spaces.
Step 7: Finishing Petal Edge & Strip
- At the end, after the last petal: In the same ch-2 space, work
- 1 additional dc (13th), then
- 1 hdc, then
- 3 sc in the last remaining gaps for a tapered edge.
- Finish with a sl st in the last space and ch 1 to secure.
- Cut yarn and fasten off.

Step 8: Shaping and Assembly
- Identify the "right" and "wrong" sides - the right side shows the beginnings of each chain row.
- Begin rolling up the crocheted strip from the end where you started (Color A section), with the wrong side outwards, keeping the rose base as flat as possible.
- As you roll, adjust each round so that it lays snug without bulging upward into a "cone".
- Use pins to hold layers if needed.
Step 9: Sewing the Rose
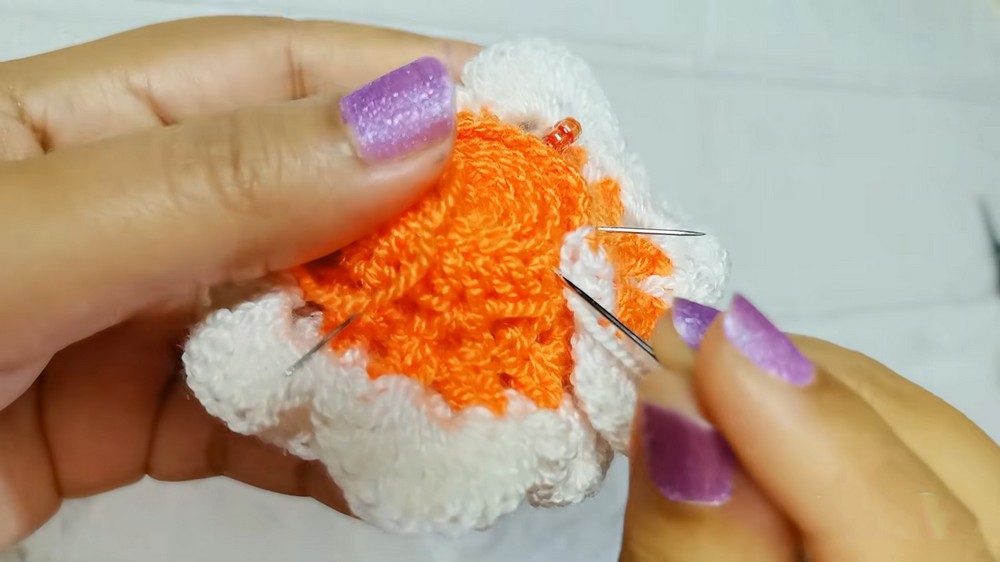
- With a long tapestry needle and a matching yarn tail, stitch through the base of the rose, catching several "midpoint" stitches from each round as you spiral.
- Use a whipstitch or running stitch back and forth across the base, from the center outwards, to secure all layers.
- In the last round, sew the last petal in place with small, subtle stitches, catching the corresponding color section of petals or base.
- Tie off securely and weave in all ends.
Tips and Customization Ideas
- Experiment with color changes for a two-tone, ombre, or single-color rose.
- For a larger or fuller rose: Increase the initial chain (by multiples of three), and add more rows of increasingly larger petals.
- Attach a leaf or two using green yarn and sew at the base for a natural look.
- Secure a pin backing, hair clip, or brooch to the reverse for a wearable accessory.
- Spray lightly with water and shape the petals for extra realism while drying.
Important Remarks on Final Look
Your finished rose will have tightly wound, smaller petals in the center and broader, open petals in the outermost round. The gradient effect adds depth and beauty. When properly sewn and arranged, the base should be flat and the rose should resemble a blooming flower from every angle.
Conclusion
This layered spiral crochet rose showcases beautiful petal transitions and can be adapted for brooches, headbands, hats, or as standalone decorations. Its seamless color transitions and 3D appearance make it an impressive addition to your crochet repertoire. With careful rolling and sewing, your rose will have a professional, lifelike finish.