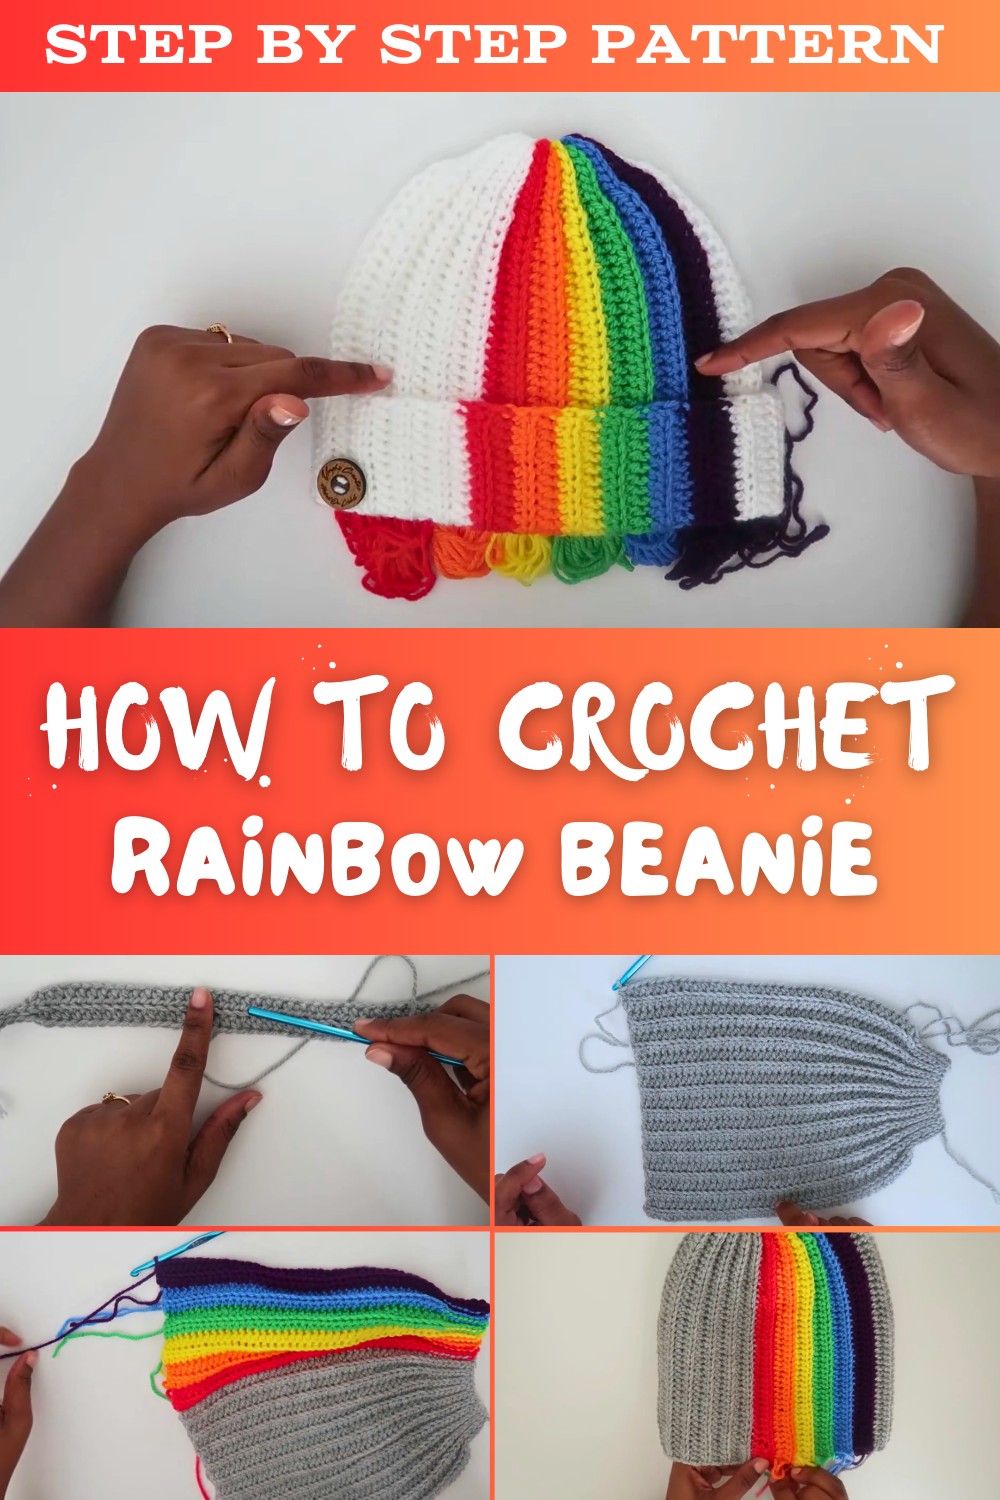
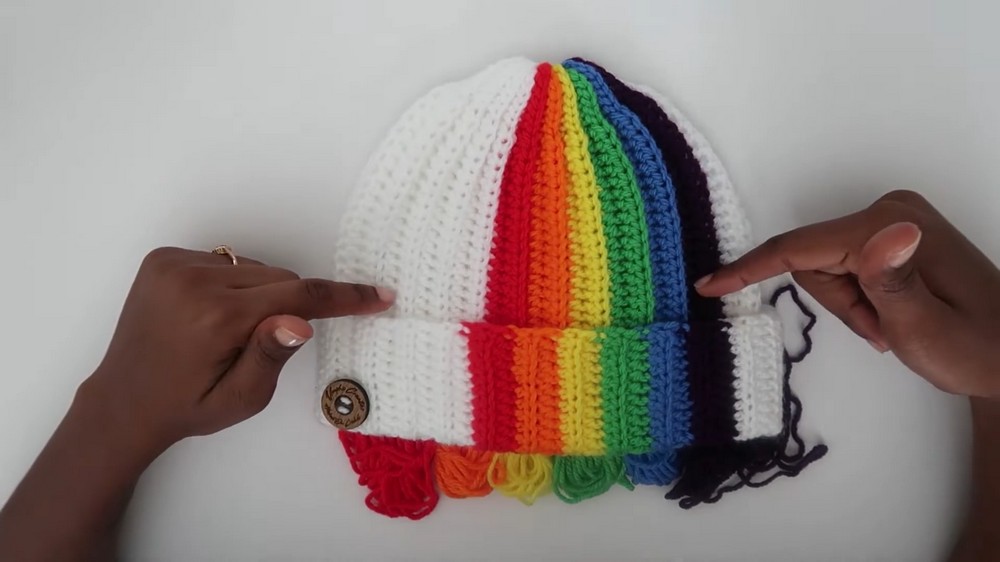
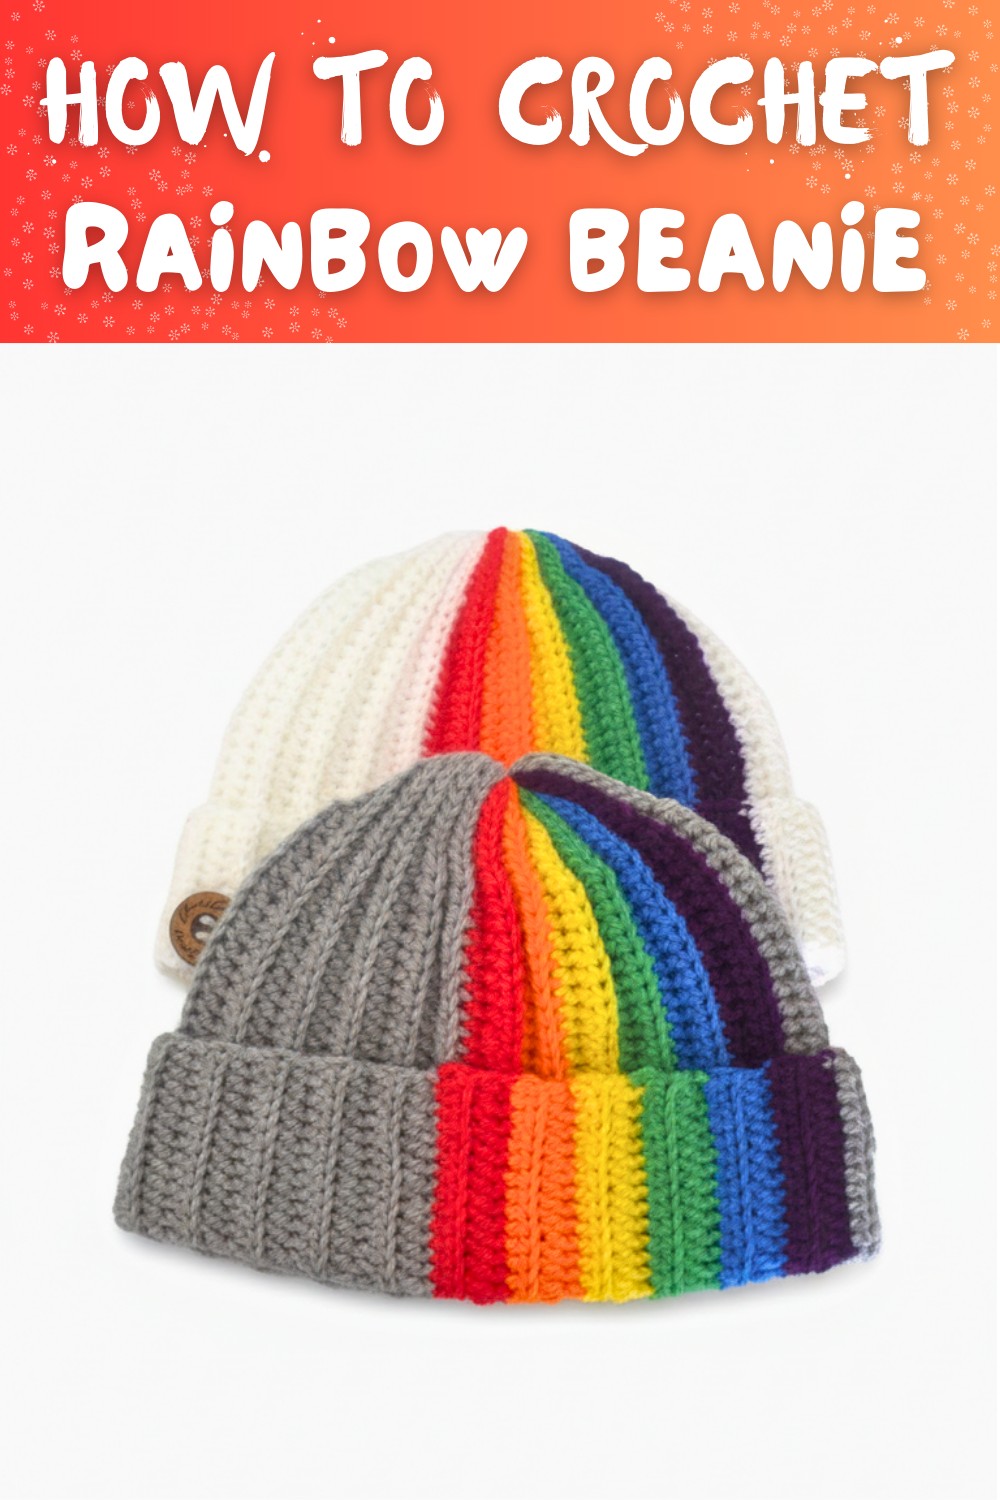
Adorable Free Crochet Rainbow Beanie Pattern To Keep Warm in Style
Grab your hook and create a cozy, colorful look with this FREE Crochet Rainbow Beanie Pattern that's for gifting or adding cheerful style to any outfit.
Ever wondered how a simple accessory can completely brighten your day? The Free Crochet Rainbow Beanie pattern does exactly that-bringing a burst of color and warmth to your wardrobe. Perfect for crisp morning walks, cozy coffee runs, or playful outdoor adventures, this beanie adds personality to any outfit. You can pair it with denim jackets, oversized sweaters, or layered scarves to make the rainbow pop.
Free Crochet Rainbow Beanie Pattern for Daily Wear
Beyond style, crocheting this beanie offers relaxation and a sense of accomplishment, making it a satisfying project for beginners and seasoned crocheters alike. Lightweight yet snug, it keeps you warm without feeling bulky. Whether you're making it as a cheerful gift or for your own collection, this crochet beanie combines practicality, creativity, and joy in every stitch.
Crochet Rainbow Beanie Pattern
Skill Level
- Beginner Friendly
Finished Size
- Fits most adults and teenagers with a head circumference of approximately 21-24 inches.
- Crown length: Customize the height and slouch by adding or subtracting rows.
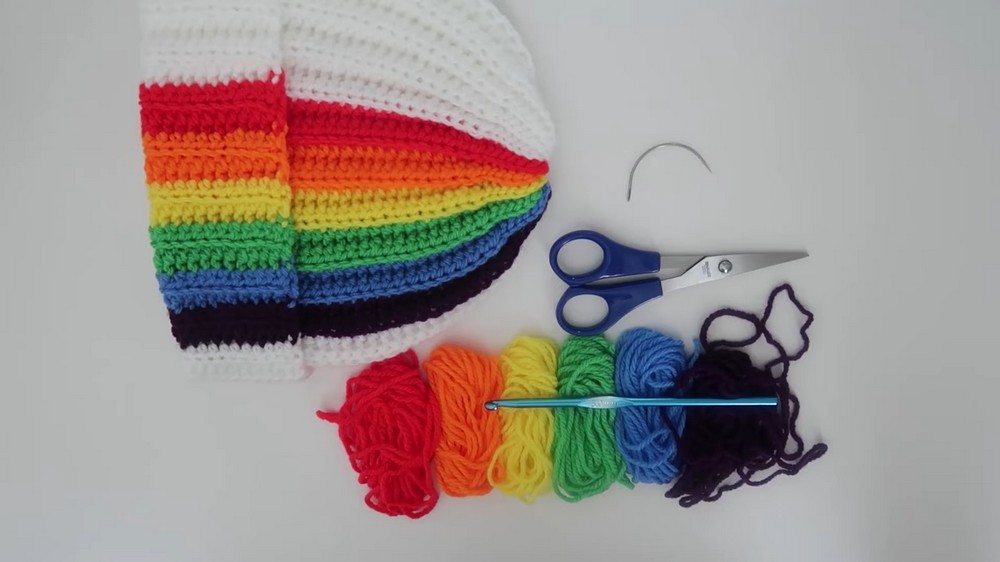
Materials
Yarn:
- Main Color (gray): Double knit yarn (DK weight).
- Rainbow Colors (6 colors): Vibrant DK weight yarn in 6 colors of your choice.
- Example: Red, orange, yellow, green, blue, purple. Use up leftover yarn or small skeins.
Hook Size:
- 5mm crochet hook.
Additional Tools:
- Tapestry needle for sewing and weaving ends.
- Scissors.
- Measuring tape (to check row lengths and overall dimensions).
Gauge
- Half Double Crochet (HDC): 4 stitches x 3 rows = 1 square inch.
- To ensure the correct size, adjust hook size if your gauge does not match.
Key Abbreviations (US Terminology):
- ch: Chain
- st(s): Stitch(es)
- sl st: Slip Stitch
- HDC: Half Double Crochet
- rep: Repeat
- blo: Back Loop Only
Special Notes:
- Working in Back Loop Only (BLO):
- The texture and elasticity of the beanie are created by working HDC and slip stitches in the back loop of each stitch.
- The back loop is the loop farthest away from you in the "V" of a stitch.
- Joining Colors Seamlessly:
- Snugly pull new color into the last stitch of the row before chaining 1 or 2 for the next row.
- Customization:
- Adjust the beanie size by increasing or decreasing the initial chain length or the number of rows.
Rainbow Beanie Pattern
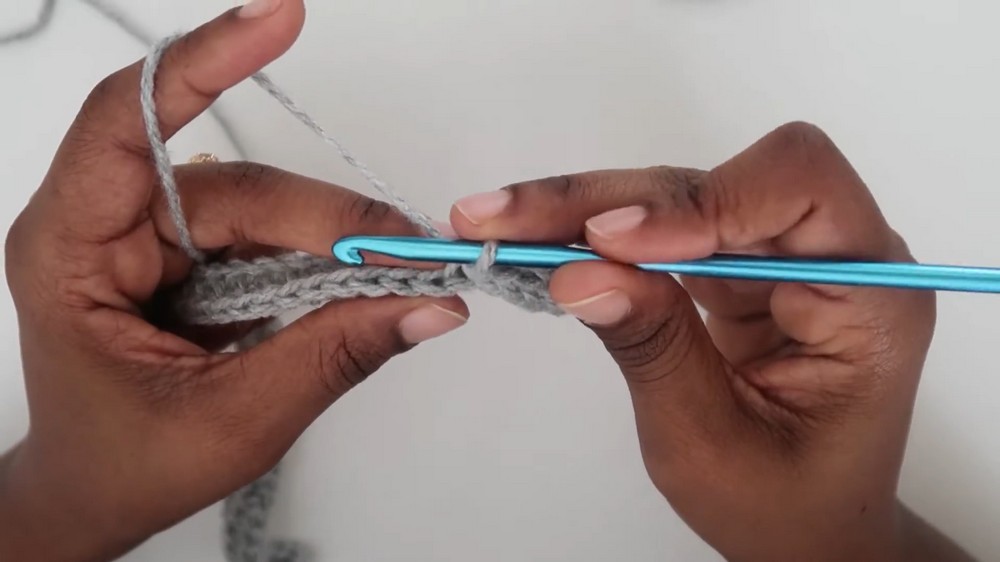
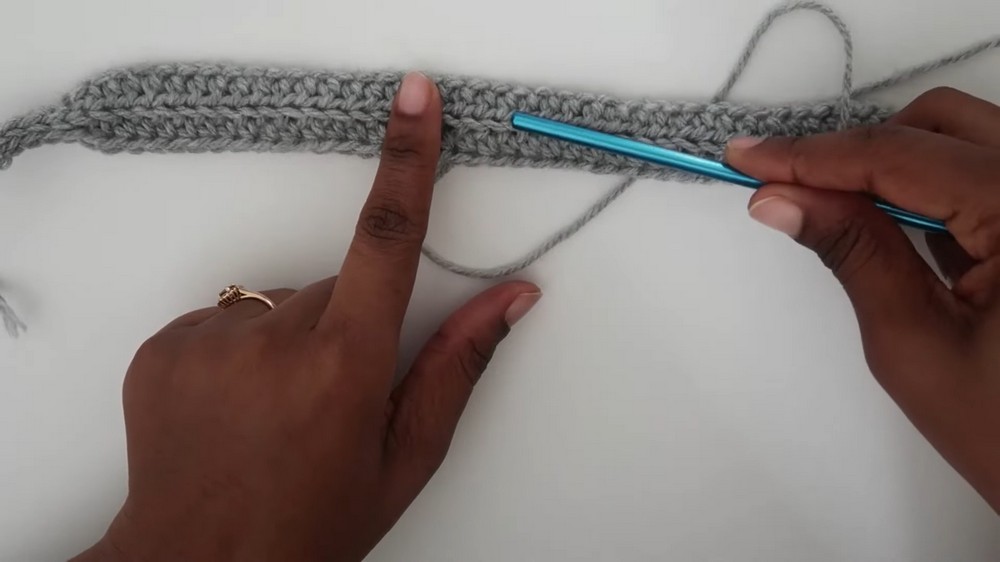
Step 1: Ribbed Body of Beanie (Gray Section)
- Foundation Chain:
- Start with a slip knot and attach it to your 5mm hook.
- Chain 47.
- Chain Setup:
- Block your last chain (47th) with your finger and chain 2 more stitches (these count as your first HDC).
- First Row (HDC):
- Work 1 HDC into the 47th chain (the blocked chain below).
- Continue working HDC in each chain going backward until you are left with 8 chains.
- Last 8 Chains (Slip Stitches):
- Work slip stitches (sl st) in the back loops only of the last 8 chains.
- Keep these slip stitches loose but consistent for easier stitching in the next row.
- Turn Your Work:
- Chain 1 and turn.
- Row 2 (Slip Stitches and HDC):
- Work sl st into the back loops for the first 8 stitches.
- Continue working HDC in the back loops across the remaining stitches, stopping at the final chain.
- Final HDC: Work into both loops of the last stitch to anchor the row.
Step 2: Repeat Ribbed Rows
- Repeat steps for alternating rows of HDCs and slip stitches until you complete 22 rows in the gray color.
- Customization Tip: Lengthen the ribbing section if you want a looser or slouchier beanie.

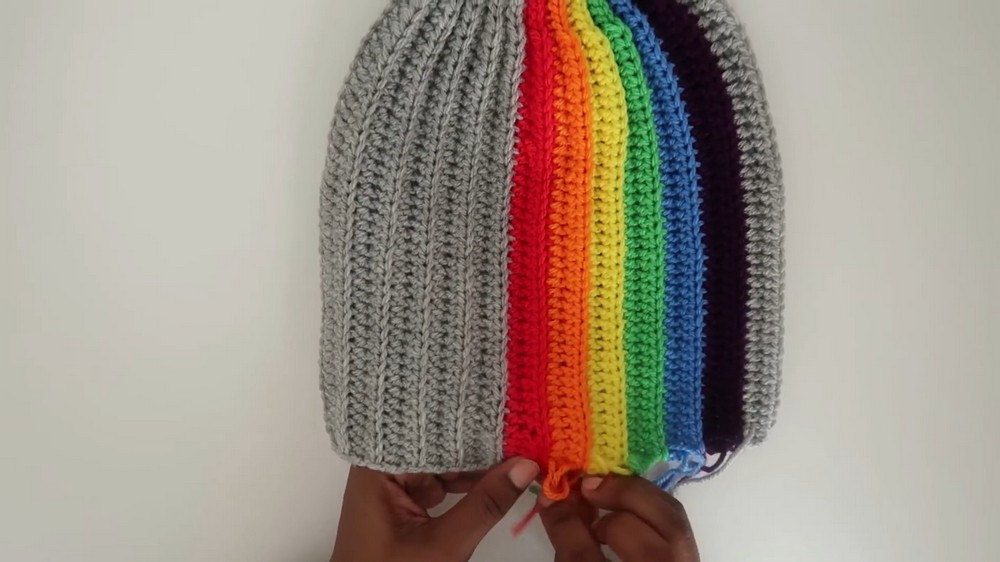
Step 3: Rainbow Stripe Section
Preparation:
- After finishing the 22 gray rows, cut the yarn, leaving a 4-5 inch tail for weaving.
- Join Red Yarn:
- Pull the new yarn through the final loop and fasten snugly.
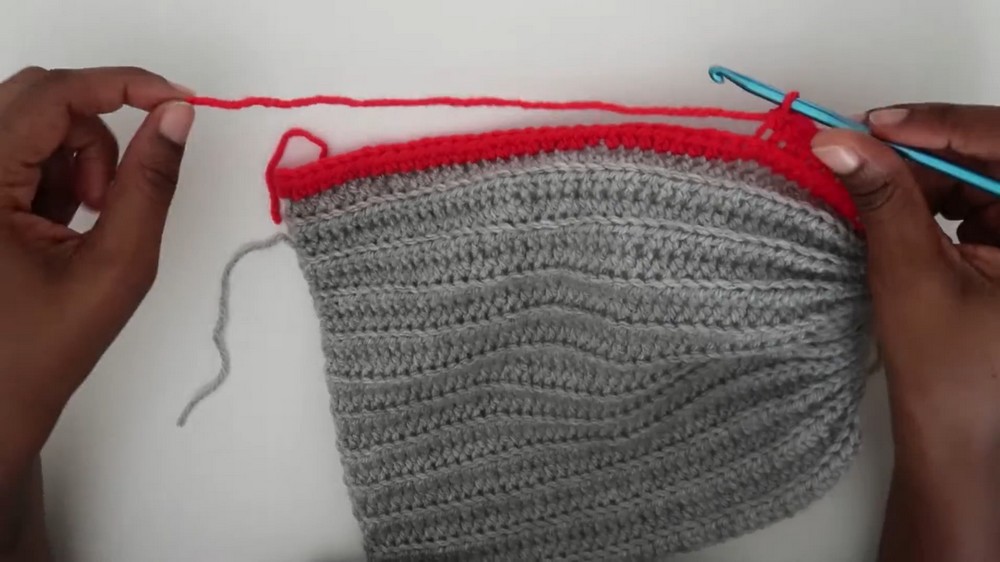
Row Instructions:
- Work in the same way as the gray section:
- HDC in back loops, slip stitch in the last 8 stitches.
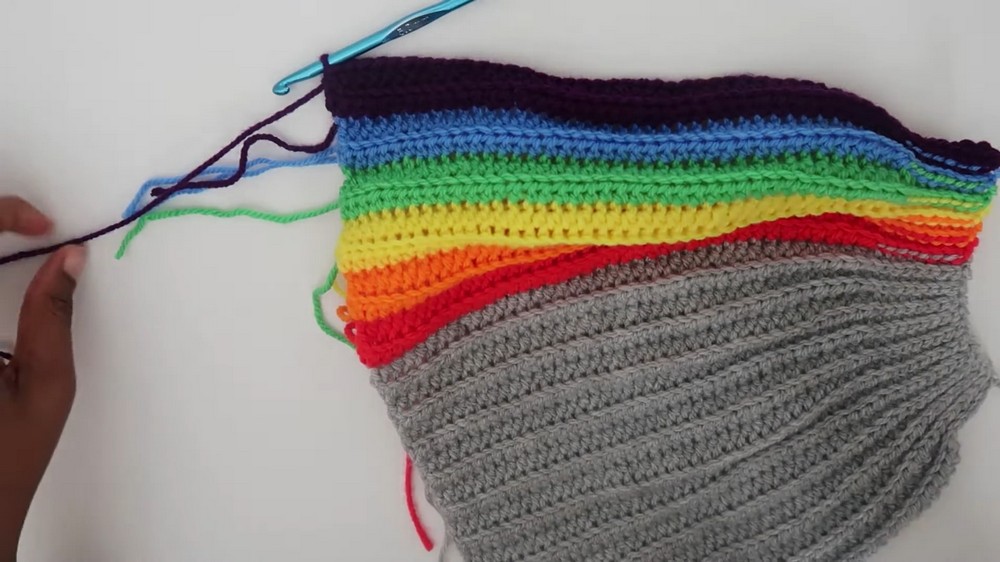
- Create 2 Rows of Each Color in the Following Order:
- Red
- Orange
- Yellow
- Green
- Blue
- Purple
- Finish the rainbow section with a cut and weave in the ends.
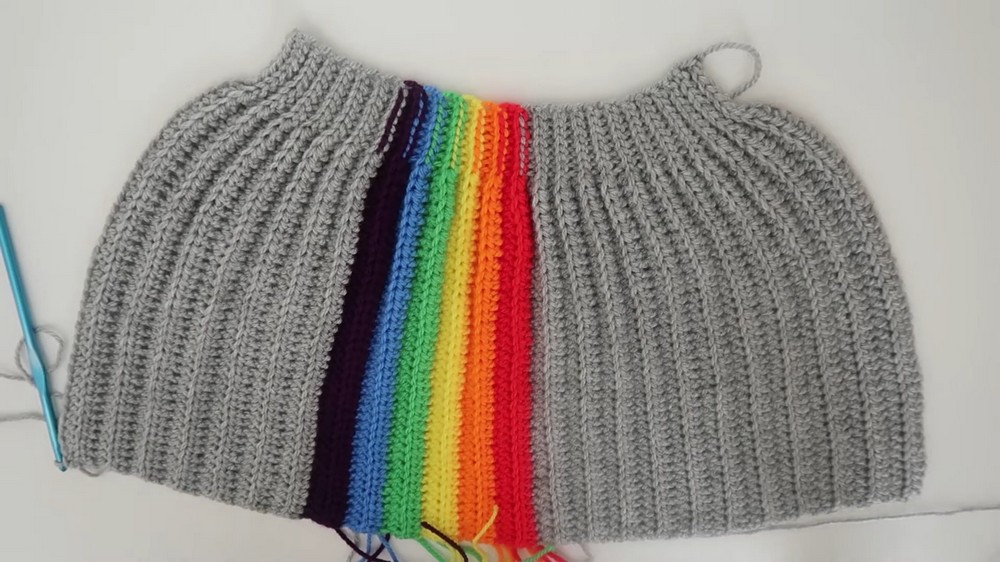
Step 4: Completing the Gray Ribbing
- Reattach Gray Yarn:
- After completing the rainbow section, rejoin the gray yarn and repeat the ribbing pattern (HDC with 8 slip stitches at the end).
- Work for 14 Rows in gray to complete the total height of the beanie.
Step 5: Seaming
Joining the Rectangle:
- Fold the Beanie in Half:
- Align the short edges of the rectangle with the wrong sides facing outward.
- Slip Stitch Seam:
- Work sl st through both layers, securing the rows together.
- After completing the seam, chain 1 and cut off a long tail of yarn (~15-18 inches) to gather the top.
Step 6: Closing the Top
- Close the Top Opening:
- Using the long tail of yarn and a tapestry needle, weave in and out around the top edge of the beanie. - Pull the yarn tightly to close the opening, adjusting the tension as required.
- Secure the yarn by knotting it at the center. Weave in all remaining ends neatly on the inside.

Final Touch:
- Turn the beanie right side out. For a cleaner look, fold the brim over to emphasize the ribbed texture.
Conclusion
Your Rainbow Beanie is complete! This textured, vibrant design is perfect for cool weather and adds a touch of fun and color to your wardrobe. The combination of ribbing texture and colorful rows creates an eye-catching design that's both practical and stylish.
Pattern Adjustments and Tips:
- Size Adjustments:
- For wider hats, increase the number of chains in the initial foundation row.
- For longer hats, add more rows for a slouchy fit.
- Experiment with Colors:
- Use gradients, alternate shades, or even monochromatic schemes for unique styles.
- Keep Slip Stitches Loose:
- Maintain a consistent tension in slip stitches to avoid difficulty in subsequent rows.
- Blocking:
- Lightly block the beanie if needed to even out the stitches and give it a professional finish.