Adorable Free Crochet Scrunchie Pattern to Style Your Hair
Style up instantly with this Free Crochet Scrunchie Pattern that's for making soft, colorful hair accessories that brighten outfits and gifts alike.
There's something special about adding a little personal touch to everyday items, especially when it's soft, stylish, and handmade. A crochet scrunchie is more than just an accessory; it's a combination of beauty and function that makes hair care fun and fashionable. With its gentle texture and unique design, it feels soft and comfortable, perfect for tying up your hair without causing damage or discomfort.
Sweet Free Crochet Scrunchie Pattern for Stylish Hair

The scrunchie's appearance is charming, with its cozy yarn and the ability to play with different colors, making it as bold or simple as you like. Whether it's used to pull your hair back neatly or simply worn on the wrist as a cute decoration, it adds a lovely handmade flair to everyday style. This crochet pattern is a beautiful way to express creativity, bringing both joy and practicality into something so simple yet delightful.
Easy Crochet Scrunchie Tutorial
Materials Required
- Yarn:
- Worsted weight (4) acrylic yarn.
- Choose one color for the base (center of the scrunchie) and another for the optional border.
- Hook: 5mm crochet hook.
- Elastic Hair Tie: A sturdy hair elastic to form the center of the scrunchie.
- Scissors: To trim excess yarn.
- Tapestry Needle (optional): For weaving in yarn tails, though it can also be done with a hook.
Special Techniques & Notes
- Slip Knot: Forms the starting point of your crochet work.
- Color Change: Optional for creating a contrasting edge at the border.
- Single Crochet (sc): Used to attach the yarn base to the elastic and for the border (if applicable).
- Double Crochet (dc): Used for the ruffled body of the scrunchie.
- Slip Stitch (sl st): Joins rounds and finishes the work neatly.
- Crochet Ruffles: Achieved by increasing the number of stitches in a small space.
Tips Before Starting:
- Tension: Keep your tension consistent for even stitches.
- Ruffles: Adjust the number of stitches in each round to customize the amount of ruffles (more stitches = fluffier scrunchie).
- Customization: Use bulkier yarn for a thicker scrunchie or lighter yarn for a more delicate look.
Finished Size
- Approximately 3-4 inches in diameter, depending on yarn choice and tension.

Pattern Instructions
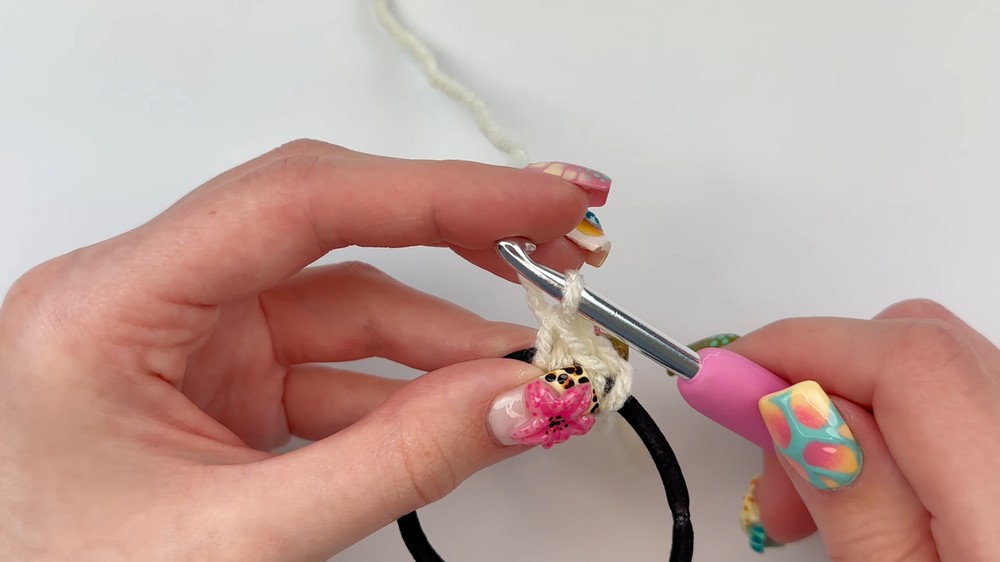
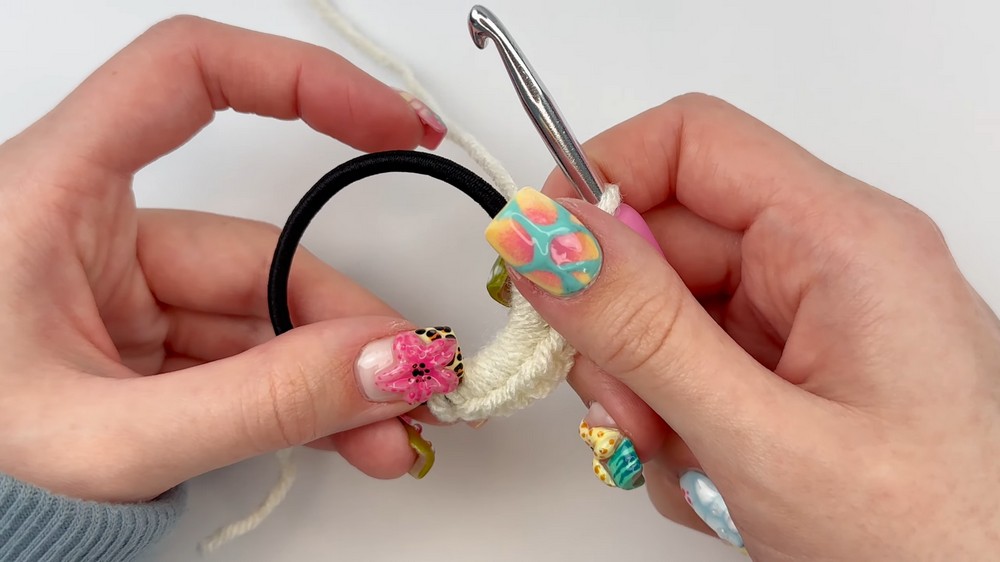
Step 1: Attach Yarn to Elastic Hair Band
- Create a slip knot:
- Wrap the yarn around two fingers to make an "X."
- Put your hook under the first strand, grab the second strand, and pull it up into a loop.
- Pull both ends of the yarn to tighten and secure the knot.
- Slide the slip knot through the hair elastic.
- Insert your hook into the slip knot, tighten it, and pull the working yarn through the loop. This attaches the yarn to the hair band.
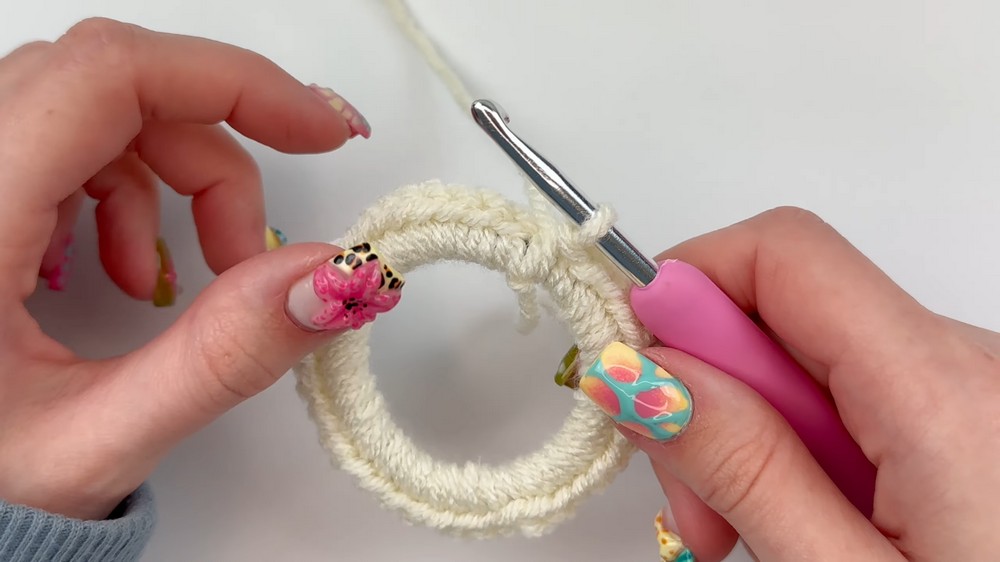
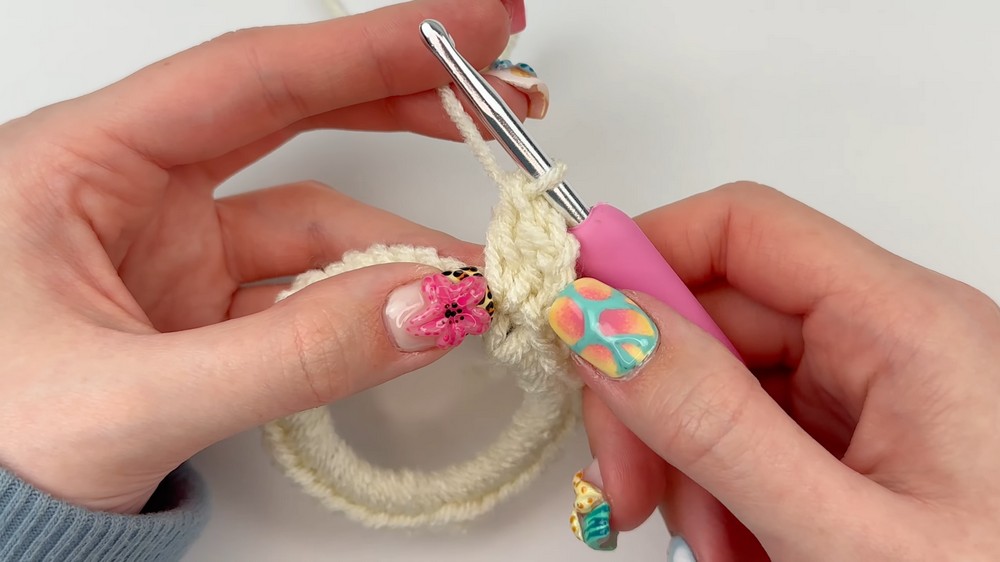
Step 2: Round 1 - Single Crochet Around the Hair Band
- Work single crochets (sc) around the elastic:
- Insert the hook under the hair band.
- Yarn over and pull up a loop (2 loops on hook).
- Yarn over again and pull through both loops.
- Continue making single crochets around the elastic. Push stitches close together as you go to cover up the elastic.Tip: For more ruffles, add more single crochets. For less ruffles, use fewer single crochets.
- Ensure the elastic is completely covered in yarn. Join the last stitch to the first single crochet with a slip stitch to close the round.
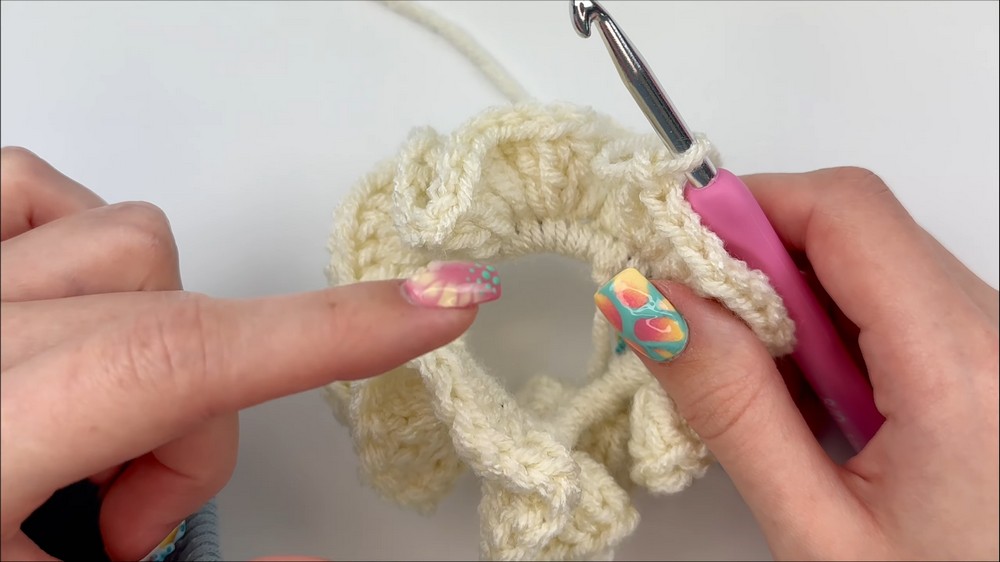
Step 3: Round 2 - Double Crochet Ruffles
- Chain 3 (ch 3). This chain counts as your first double crochet (dc) for this round.
- Into the same stitch as the chain 3, work two double crochets (dc) to make a group of three double crochets.
- Double Crochet (dc): Yarn over, insert your hook into the stitch, yarn over, pull up a loop (3 loops on hook). Yarn over, pull through 2 loops, yarn over again, and pull through the final 2 loops.
- Work three double crochets (dc) into each stitch around the entire row. This increases the fullness, creating the ruffled effect.
- Join the last stitch to the top of the chain 3 with a slip stitch.Tip: If you desire even more ruffles, consider placing 4 or more double crochets per stitch.
Step 4: Round 3 - Optional Color Change and Border
- If you want a different color for the border:
- Cut the current working yarn, leaving a small tail.
- Pull the new yarn through the first stitch of the previous round and secure with a knot.
- Tie both yarn tails firmly to prevent unraveling.
- Chain 1 (ch 1) to start.
- Single Crochet (sc) into each stitch of the previous round:
- Insert your hook into a stitch, yarn over, pull up a loop.
- Yarn over again and pull through both loops.
Note: Work over the yarn tails to weave them in as you go.
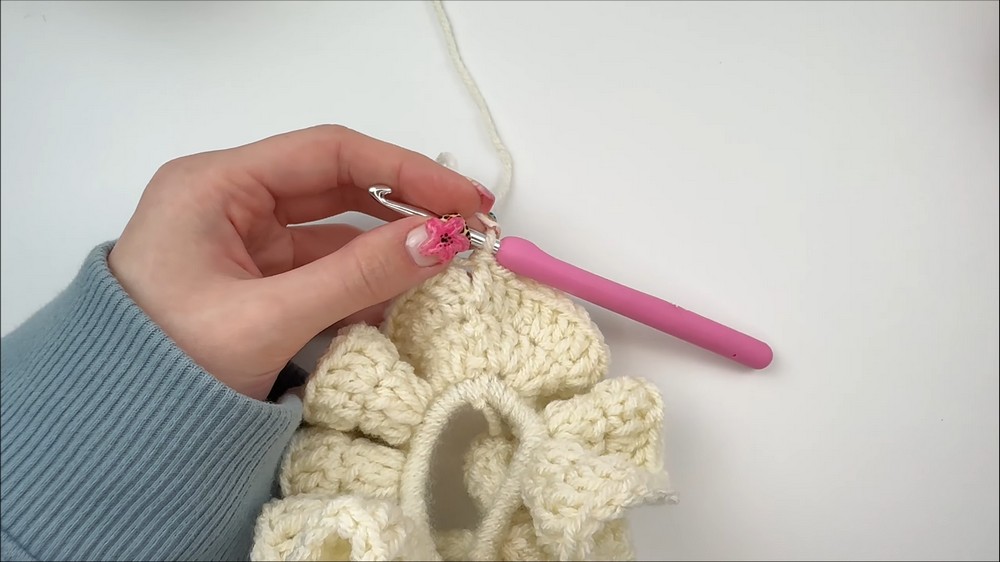
- When you reach the end, join the border to the first single crochet with a slip stitch.
- Tie Off:
- Chain 1, cut the yarn, and pull the tail through the last chain. Pull tightly to secure.

Step 5: Finishing
- Weave in all yarn tails using your hook or a tapestry needle.
- Stretch the scrunchie gently to ensure the yarn is evenly distributed around the hair elastic.
- Trim any remaining yarn tails for a clean look.
Customizations
- Experiment with:
- Yarn Type: Use velvet yarn for a luxurious feel or cotton yarn for durability.
- Colors: Alternate colors for each round or use gradient yarn for an ombre effect.
- Ruffles: Add extra stitches in Round 2 or 3 for exaggerated ruffles.
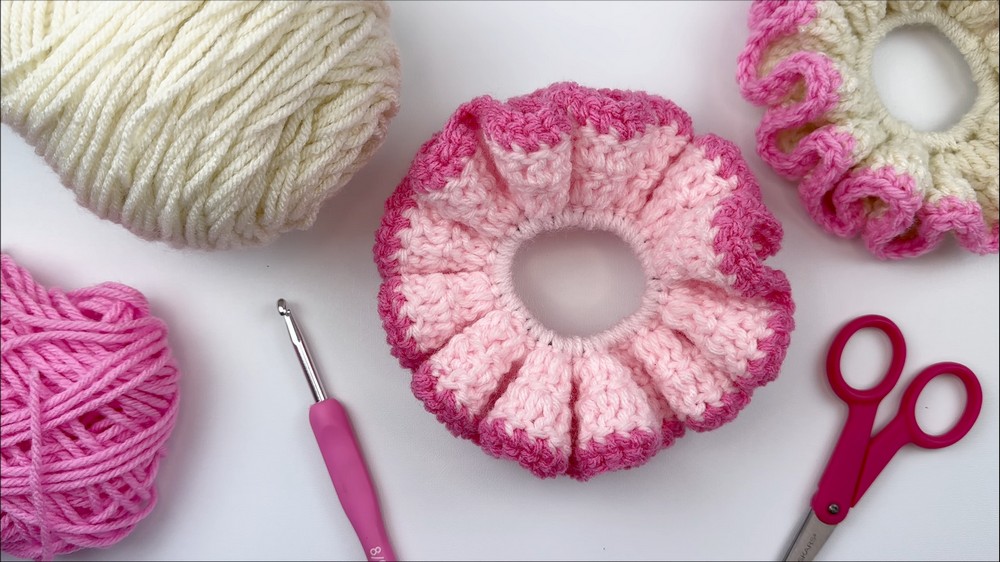
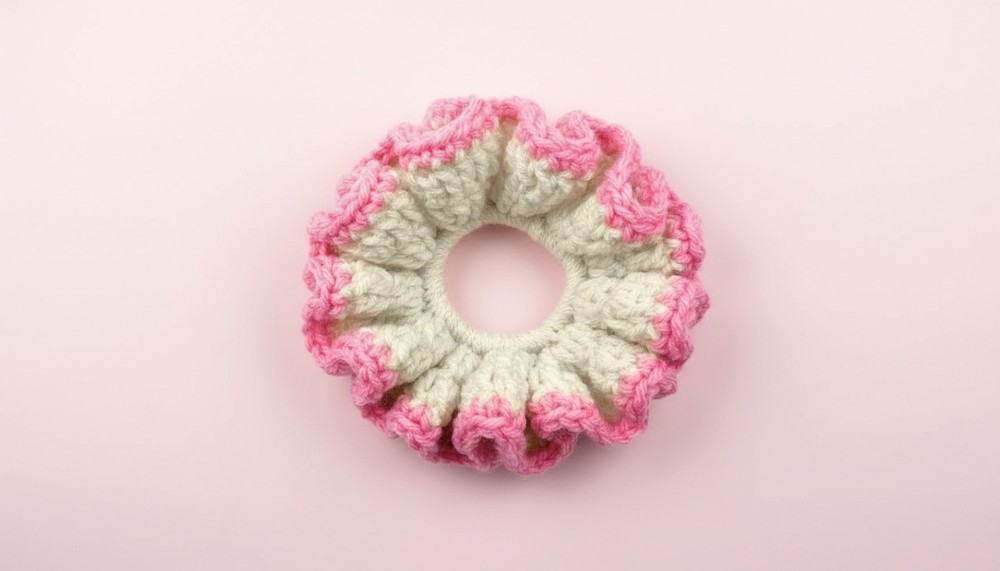
Final Look
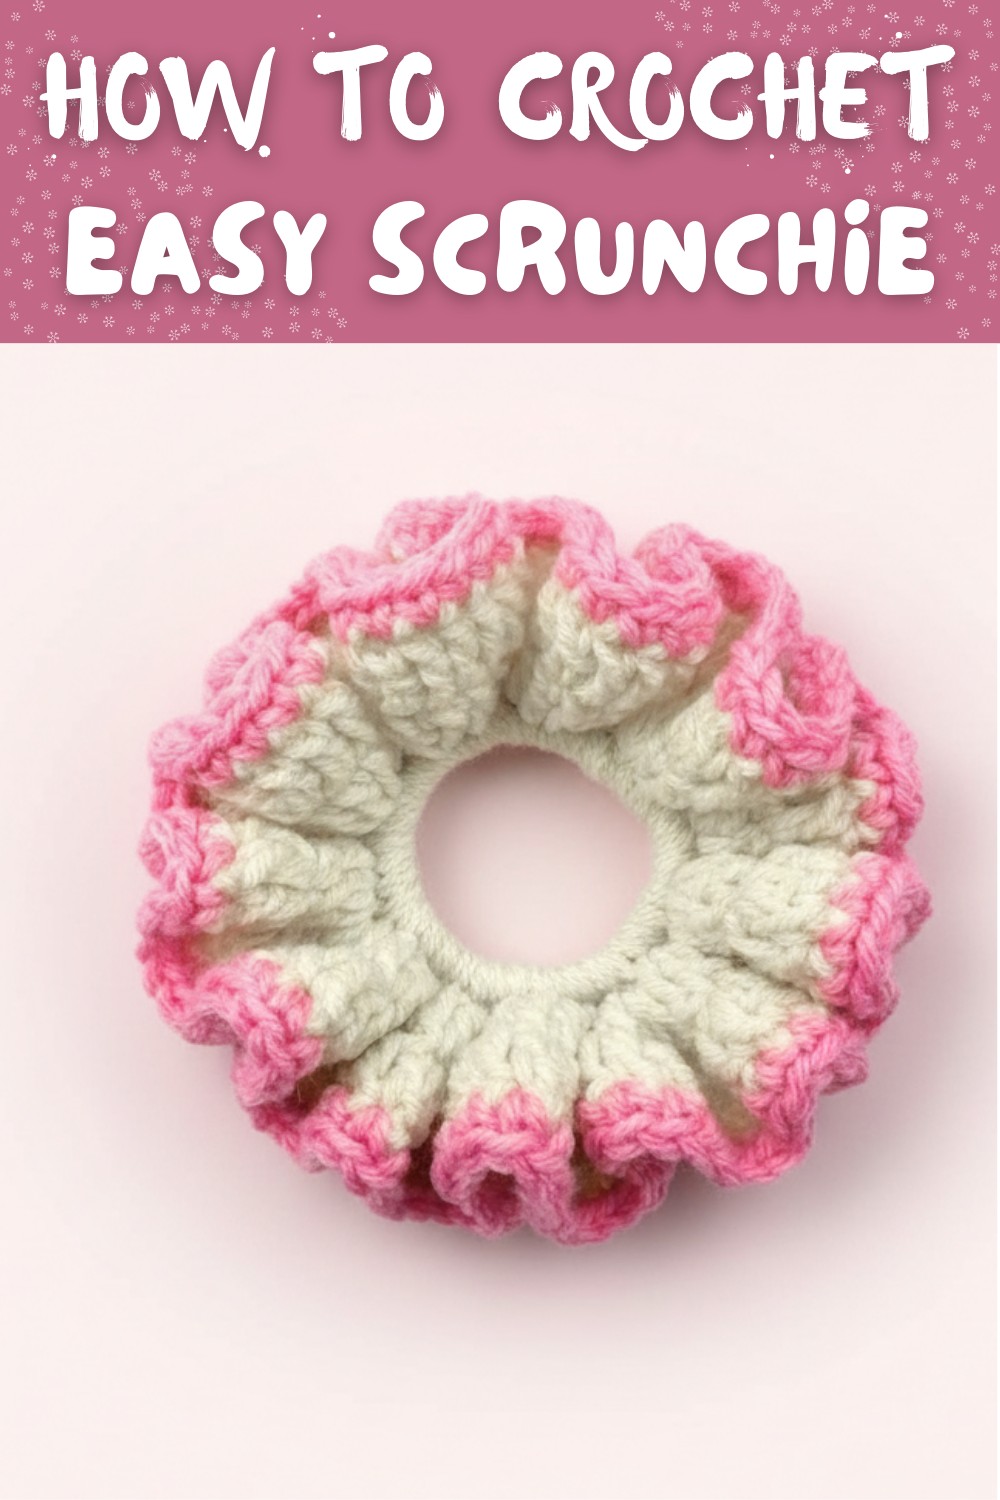
Your finished scrunchie should have a ruffled, textured appearance with the elastic completely concealed by the yarn. It is stretchy, functional, and stylish-the perfect combination!
Final Words
Congratulations on completing your scrunchie! This beginner-friendly project is a fun and rewarding way to add a personal touch to your accessories. Experiment with colors, textures, and stitches to make scrunchies that suit every outfit or occasion.
Tips to Maintain Your Scrunchie
- Wash gently by hand to avoid damaging the loops.
- Store alongside other crochet accessories to retain its shape.