Cute Free Crochet Mini Rose Bouquet Pattern for Endless Cuteness
Learn how to make a simple and cute crochet mini rose bouquet with this free pattern that is fun and easy to follow and perfect for beginners to try.
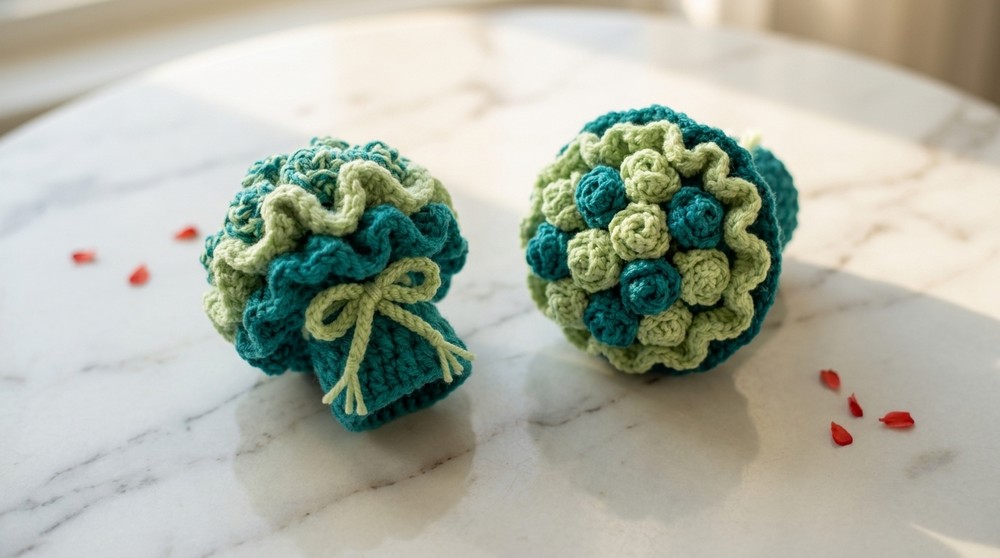
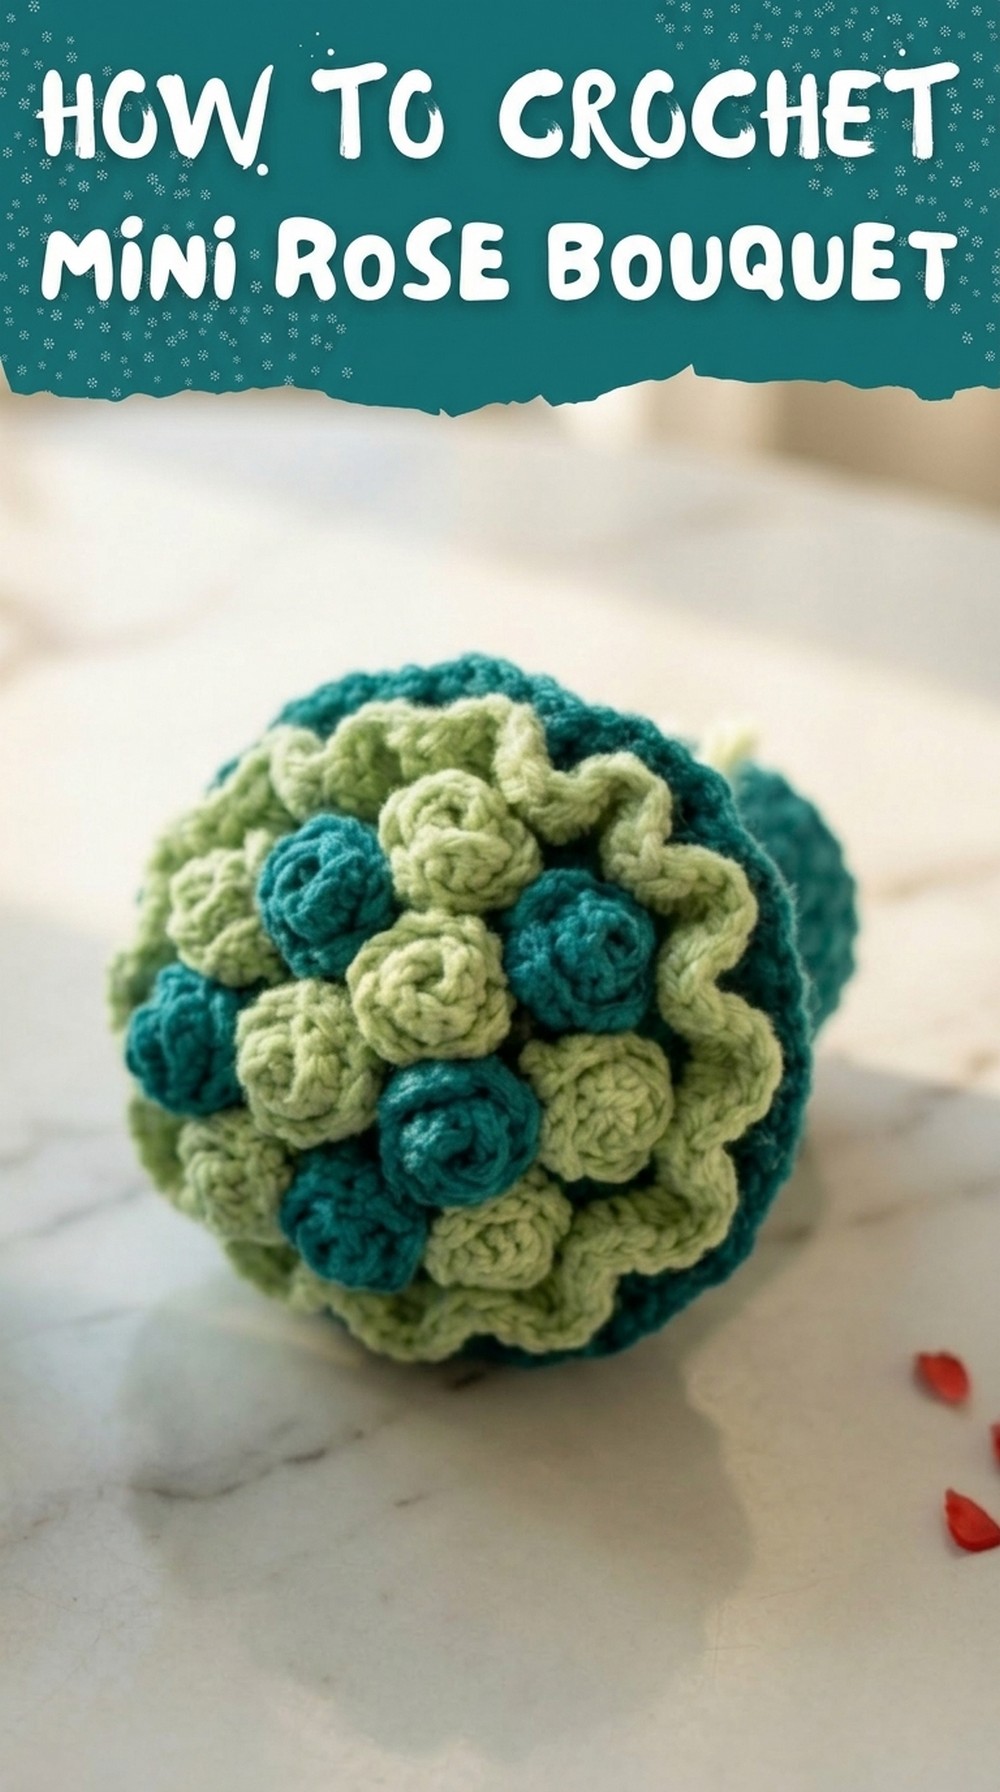
Who doesn't love tiny, beautiful flowers that never fade? A Crochet Rose Bouquet Pattern is a stunning little creation filled with soft, colorful yarn roses tied together with a cute ribbon. These mini-roses look so real and delicate that they instantly bring joy and charm wherever they are placed. Whether you use it as a gift, a keychain, or a decoration for your room, this bouquet adds a touch of beauty and warmth.
Free Crochet Mini Rose Bouquet Pattern That's Pure Happiness
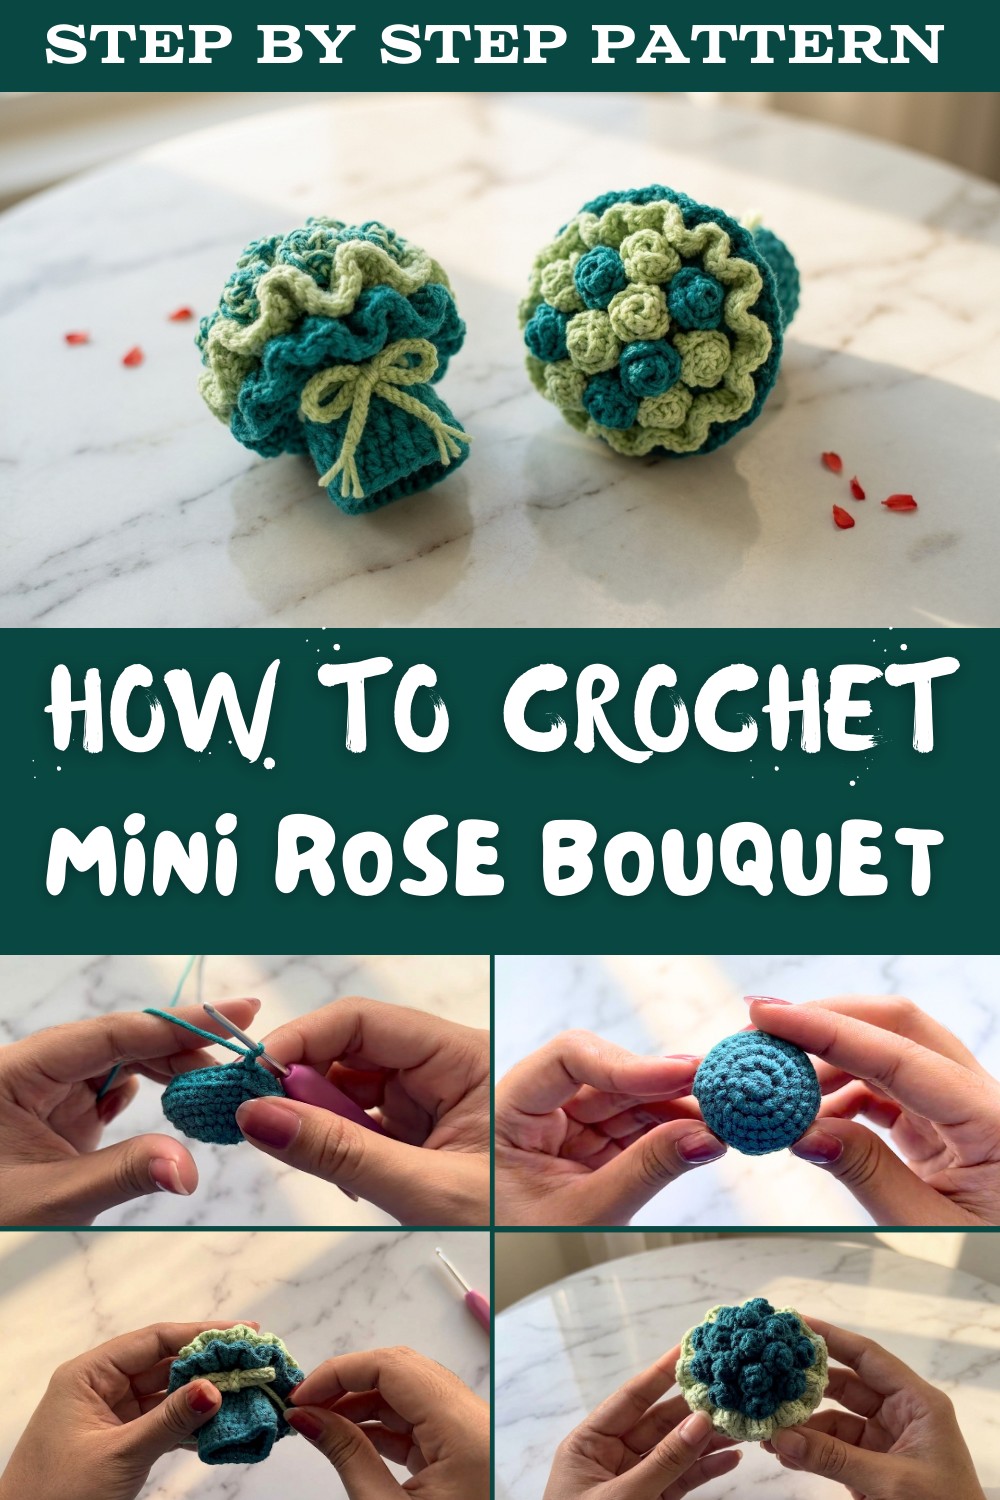
The vibrant colors, soft textures, and elegant design make it stand out. You can choose your favorite colors and make it perfect for special occasions like birthdays or celebrations. This mini rose bouquet is not only a beautiful item but also a lovely way to spread happiness to everyone who sees it.
Crochet Mini Rose Bouquet Pattern
Finished Size
- Bouquet Base: Approximately 3 to4 inches diameter depending on yarn tension.
- Completed Bouquet: Small enough to fit in your palm, perfect for use as keychain décor or gift embellishment.
Materials Needed
- Yarn:
- Milk Cotton Yarn for soft and smooth texture.
- Colors used:
- Teal
- Pistachio
- Crochet Hook: 2.5 mm.
- Stitch Markers: For marking rows and stitches.
- Scissors: To cut yarn tails neatly.
- Hot Glue Gun: For rose assembly.
- Needle: For hiding yarn tails.
Gauge
- Gauge is not critical for this project. However, ensure that stitches are tight and uniform to achieve a compact bouquet structure.
Pattern Instructions
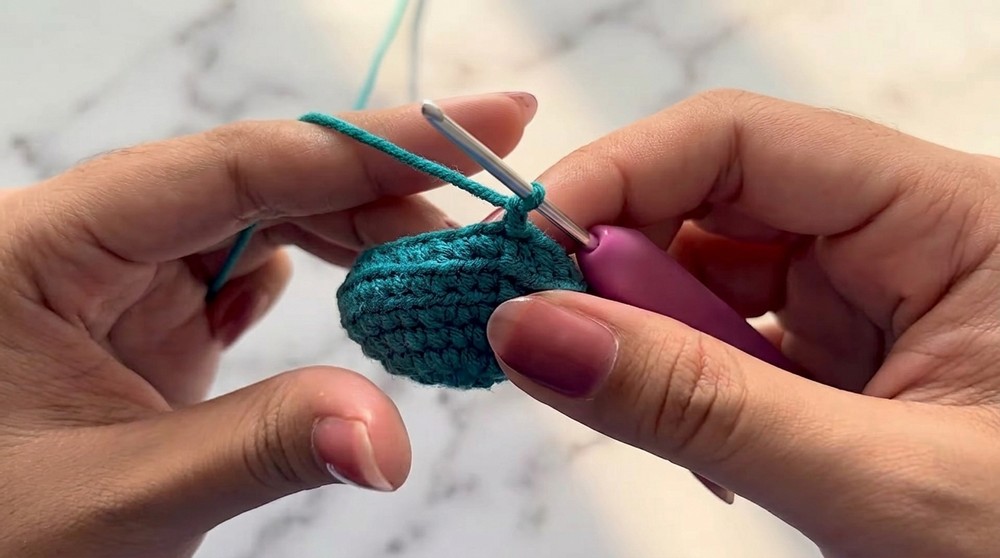
Bouquet Base
- Starting:
- Use Teal yarn and make a magic ring.
- Round 1: Create 8 single crochets (SC) into the magic ring. Use a stitch marker on the first stitch. Pull the yarn tail to close the ring tightly.
- Join the first stitch with a slip stitch and chain one. (Round 1 complete)

-
- Round 2: Make 8 increases (2 SC in each stitch). Use a stitch marker to mark the first stitch. Join with slip stitch and make a chain one.
- Round 3: Alternate 1 SC, then 1 increase. Repeat the sequence for 8 times, marking the first stitch. Slip stitch and chain one to complete.
- Round 4: Create 24 single crochets (1 SC in each stitch around). Mark the first stitch, join with slip stitch, and chain one.
- Round 5: Use the pattern 2 single crochet + 1 increase, repeating 8 times around. Mark, join, and chain one.
- Round 6: Crochet 32 single crochets (SC) in back loops only. Skip slip stitch and chain one. Join, mark, and chain.
- Round 7: Alternate 2 SC + 1 decrease, repeat 8 times. Work in back loops only, mark, join, and chain.
- Round 8: Alternate 1 SC + 1 decrease, repeat 8 times in back loops only. Join, mark, and chain.
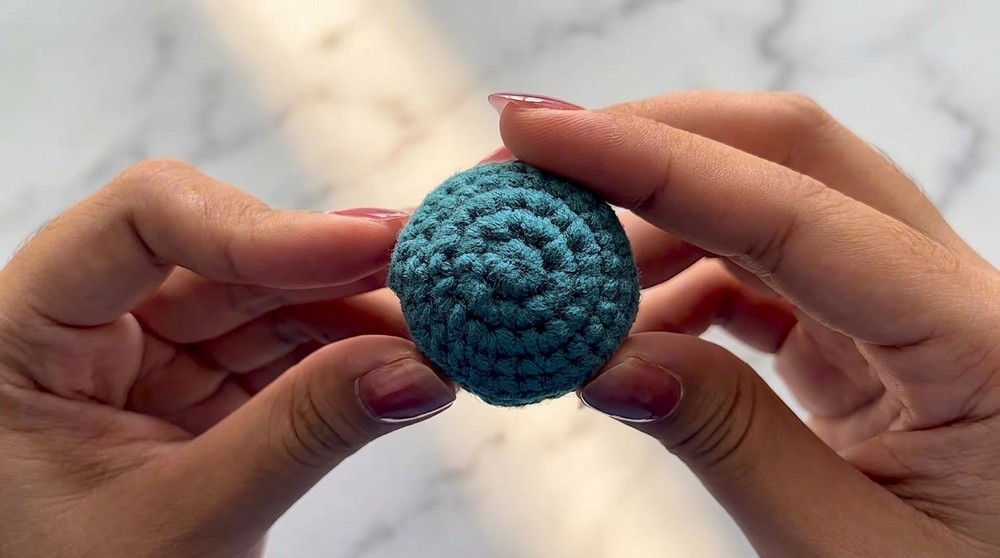
- Round 9: Crochet 16 SC, working into entire loops (not back loops). Slip stitch to join and chain one.
- Round 10 (Final): Complete decreases across the round in back loops only (8 decreases total). Finish with slip stitch, chain one, and cut yarn.
- Shaping the Base:
- Insert needle into the front loops of last round (Round 10) stitches to close the center tightly.
- Hide leftover yarn tails with a needle and adjust for smooth finishing.
- Attach yarn to back loops of Round 10. Begin crocheting in these loops:
- Round 1: At the first loop, make 1 half double crochet (HDC) and repeat HDC around for 16 total stitches. Use stitch marker as needed. Slip stitch to join, chain two.
- Round 2: Work in a sequence of 3 half double crochets + 1 HDC increase. Repeat 4 times around. Slip stitch, chain two.
- Round 3: Crochet 20 HDC, 1 in each stitch of the round. Slip stitch, chain two.
- Round 4: Alternate 4 HDC + 1 HDC increase, repeat 4 times. Finish round with slip stitch and chain two.
- Round 5: Make 24 HDC across. End round with slip stitch, chain two, and cut yarn. Shape the finished layer to form ruffles.
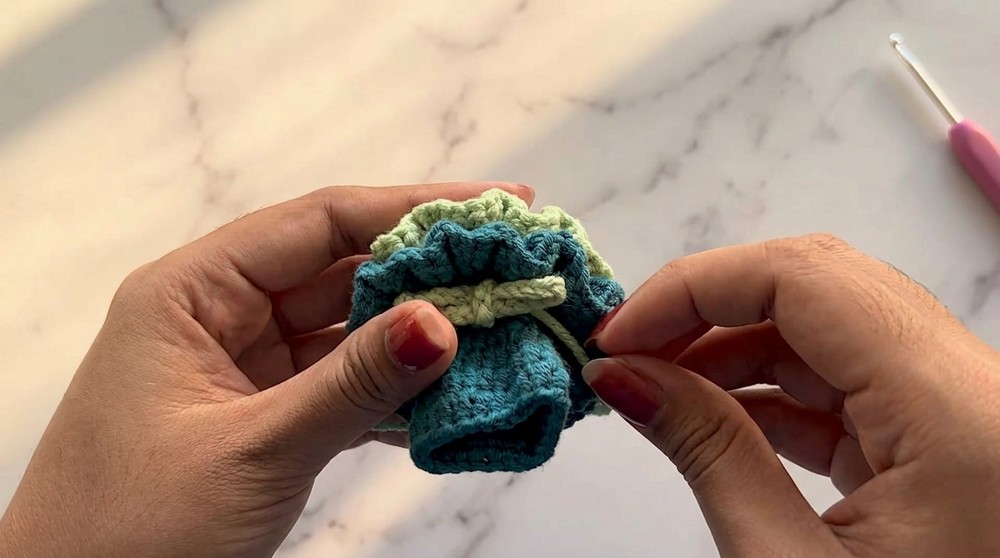
- Attach Pistachio yarn to back loops of Round 8.
- Chain 3, then make 3 triple crochets (TrC) in each loop around, for 24 sets total.
- Finish round with slip stitch to join and hide yarn tails. Shape for added volume.
2nd Upper Layer
- Attach Pistachio yarn to back loops of Round 7.
- Chain 2, then make 3 double crochets (DC) in each loop around, for 32 sets total.
- Slip stitch to finish and hide yarn tails neatly.
Ribbon
- With Pistachio, make a slip knot.
- Chain 55 stitches.
- Cut yarn and tie ribbon between the lower and upper layers securely. Trim excess yarn for a clean look.
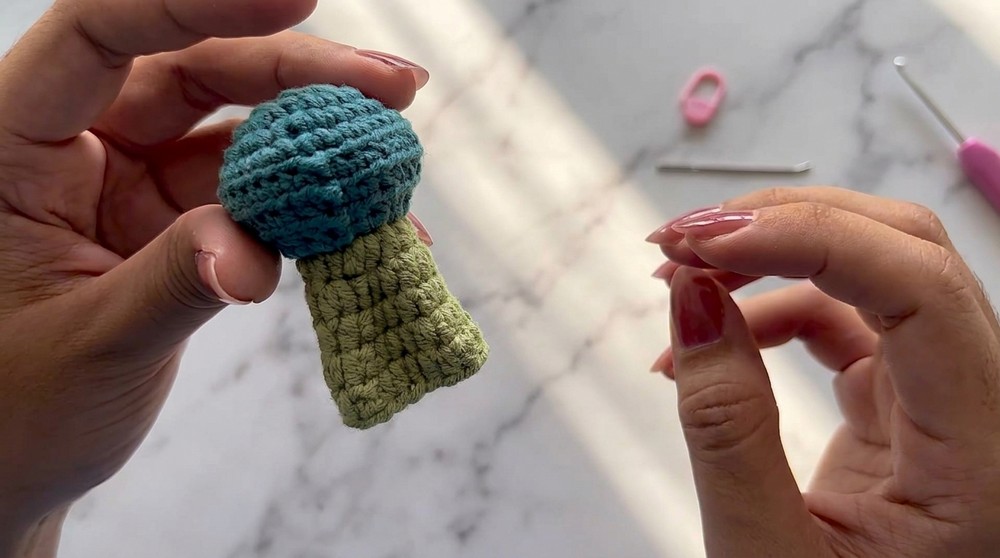
- Use Teal yarn:
- Create 7 chains.
- Work increases (2 SC per chain) across first 4 stitches.
- Make 3 SC in the next chain for a rounded edge. Chain one and fasten off.
- Shape the piece into a rose swirl. Use hot glue to fix the final shape.
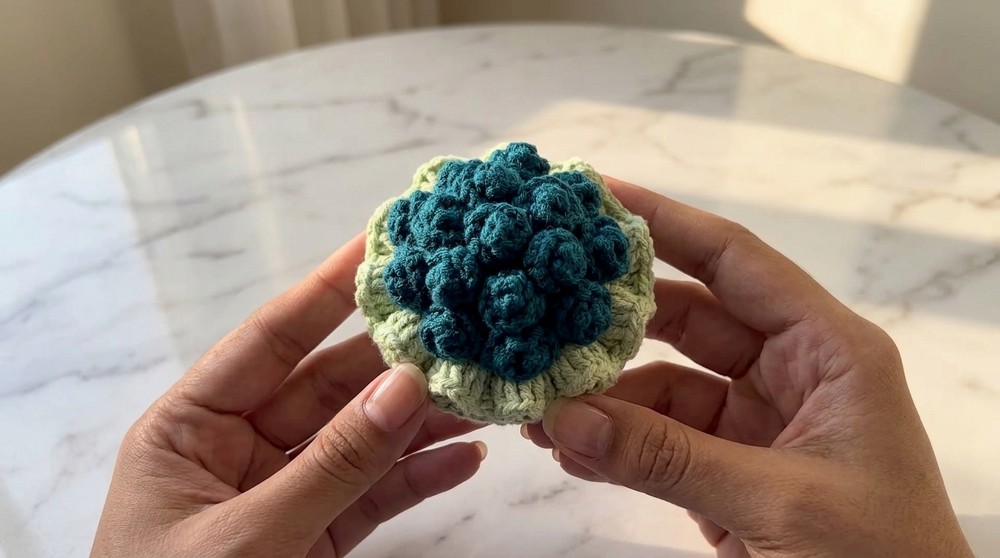
- Create 16 roses in total.
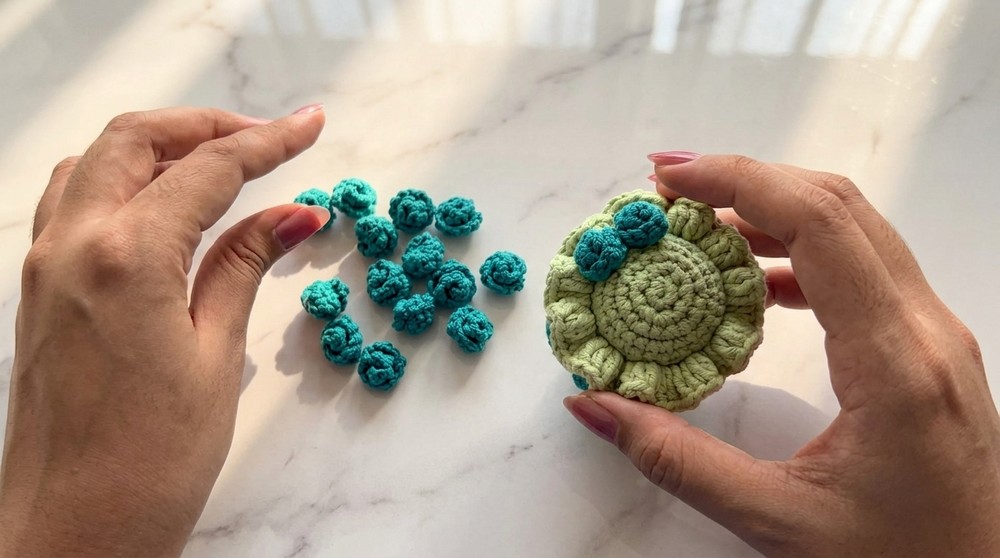
- Attach the roses using hot glue:
- Outer Layer: Attach 9 roses around the bouquet's outer edge.
- Middle Layer: Secure 3 roses evenly spaced.
- Center: Place 1 rose at the very center and use 3 roses to fill remaining gaps.
Tips for Customization
- Color Combos: Experiment with pastel shades or vibrant colors to match occasions like weddings, birthdays, etc.
- Additional Embellishments: Add beads, smaller flowers, or glitter yarn for elegance.
- Size Variation: Use different hook sizes to make smaller or larger bouquets.
Conclusion and Important Remarks
Congratulations on completing your Mini Crochet Flower Bouquet Keychain! Its intricate layers, delicate roses, and soft texture create a stunning handmade piece that is perfect as a thoughtful gift, everyday accessory, or decorative centerpiece.
Remember:
- Crochet tension impacts the final shape-ensure uniform tension.
- Hide yarn tails neatly for a polished look.
- Hot glue ensures durability for the rose attachments.
Your floral masterpiece is now ready to brighten your day or dazzle your recipient-a labor of love and creativity wrapped in yarn.