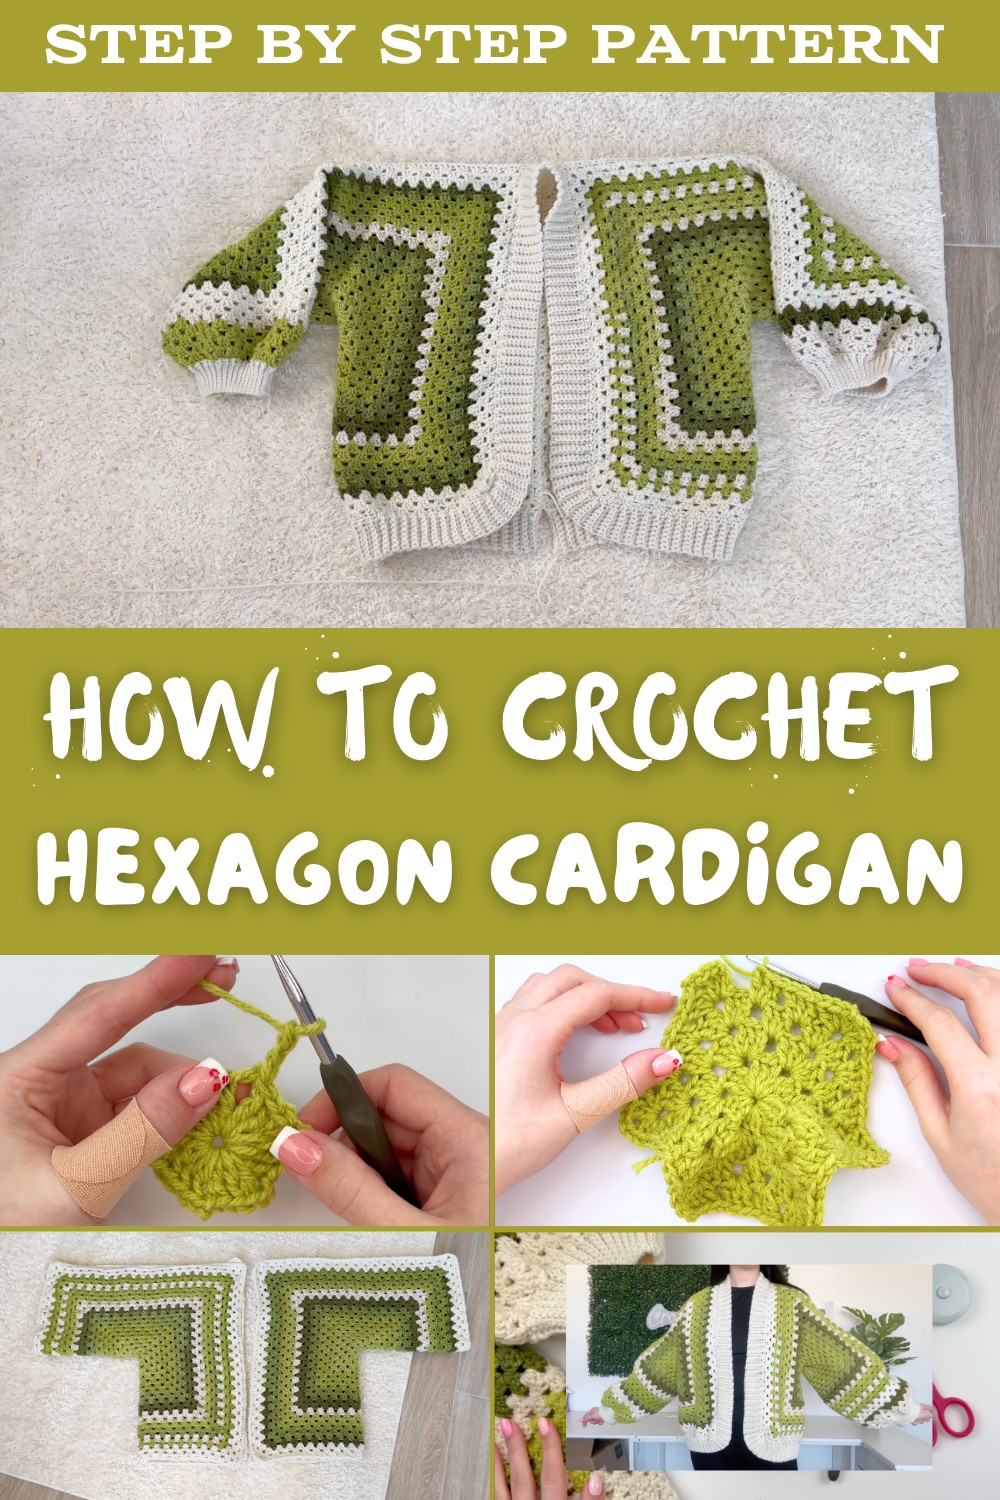
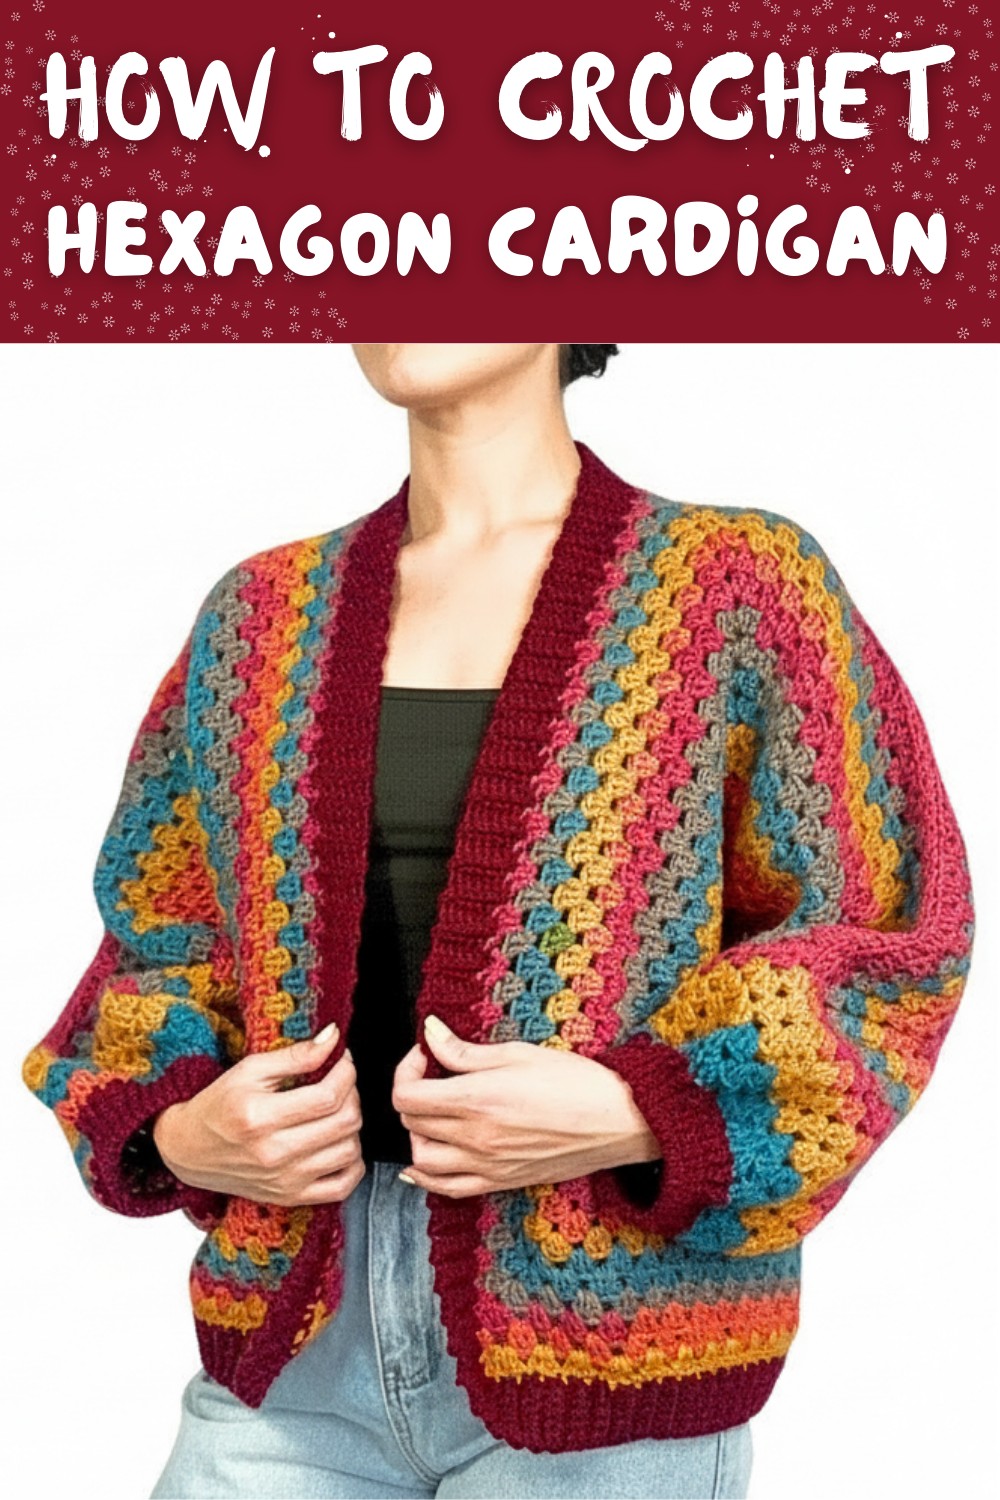
Cozy Free Crochet Hexagon Cardigan Pattern for Handmade Style
Glow up your wardrobe with this FREE Crochet Hexagon Cardigan Pattern that's customizable, and ideal for adding charm to any outfit.
Ever wished your wardrobe could use a little handmade charm? Say hello to the free crochet hexagon cardigan pattern, your chance to turn cozy yarn into a stunning statement piece! This isn't just a cardigan; it's a wearable work of art that's perfect for spicing up daily outfits. Made from clever hexagon shapes, this pattern creates a unique, eye-catching design that's surprisingly easy to crochet.
Free Crochet Hexagon Cardigan Pattern for Any Occasion
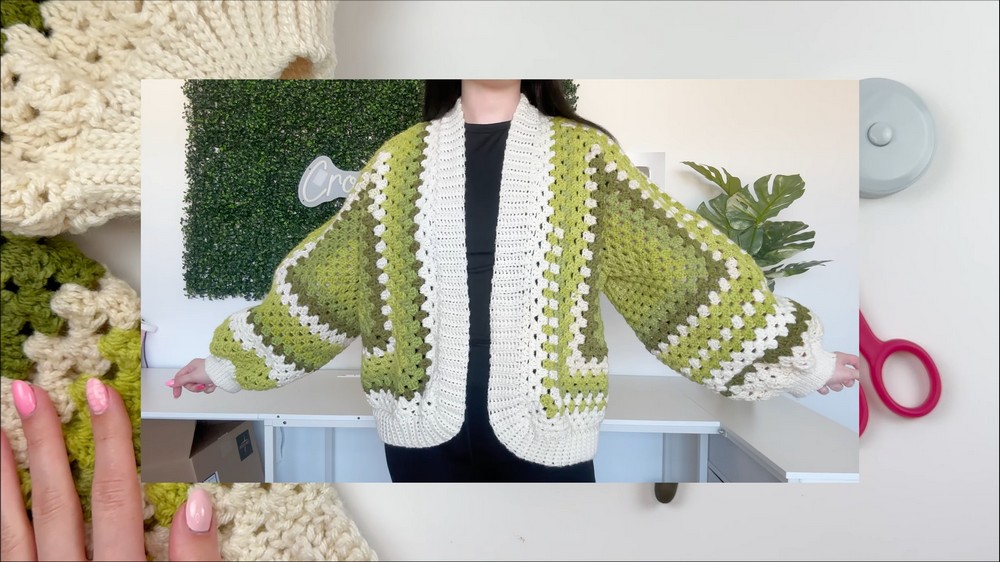
Style it with jeans for running errands or layer it over a sleek dress for a dinner date, it's the perfect balance of comfort and chic. Plus, creating it yourself means you can play with colors and textures to match your vibe. Whether you're diving into crochet as a hobby or gifting your handmade creation, this project is fun, practical, and guaranteed to turn heads.
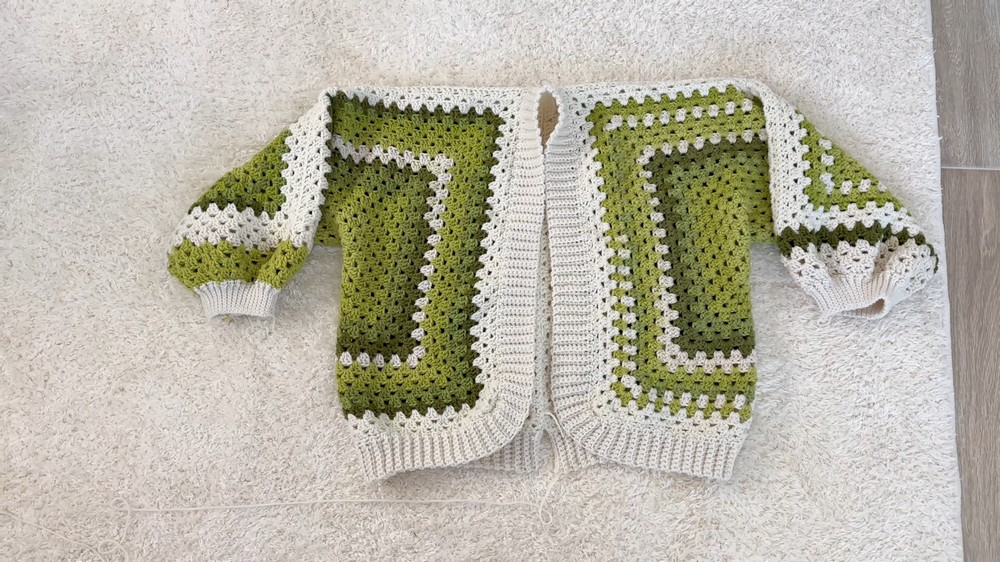
Crochet Granny Hexagon Cardigan Pattern
Materials Needed
- Yarn:
- Worsted weight (Size 4) acrylic yarn.
- Example: 4 skeins of Caron Cakes yarn (approx. 1,000-1,200 yards).
- Color used in tutorial: Pistachio.
- Worsted weight (Size 4) acrylic yarn.
- Hook:
- 5.5 mm crochet hook.
- Additional Tools:
- Scissors.
- Measuring tape (for sizing).
- Tapestry needle (for weaving ends).
Skill Level
- Beginner to Intermediate: Familiarity with basic crochet stitches, working in the round, sewing panels together, and simple construction techniques.
Key Abbreviations (US Crochet Terminology)
- ch: Chain
- dc: Double Crochet
- sl st: Slip Stitch
- yo: Yarn Over
- sc: Single Crochet
- back loop: The loop farthest from you on a stitch when working back and forth rows.
Special Notes
- Measurement-Based Sizing: Before starting, take the measure of your shoulder width from one shoulder to the other. Half this measurement will determine the dimensions for each hexagon panel.
- Yarn Color Changes: To create a multi-colored look, change colors between rows at any chain-2 space.
- Curling: The hexagon may curl slightly as it grows, which is normal and desired for the cardigan's construction.
Pattern Instructions
Step 1: Take Measurements
- Measure your shoulder width from one shoulder edge to the other. Note this number. Half of this measurement will determine the dimension of the hexagon panels' short edge when folded.
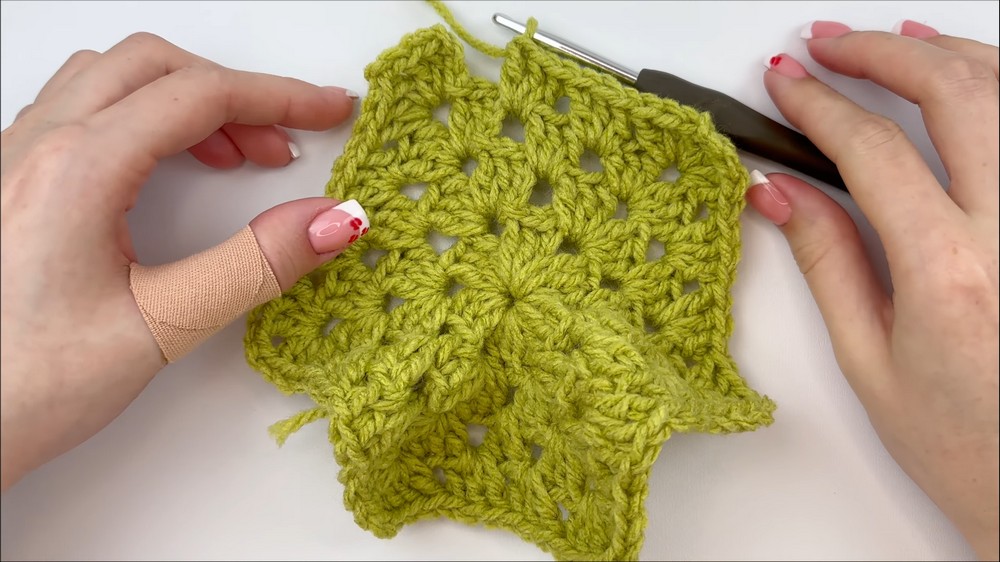
Step 2: Hexagon Panel (Part 1: Round 1)
Start with a Magic Ring:
- Make a slip knot and place it on your hook.
- Chain 4, and join into a circle with a sl st into the first chain.
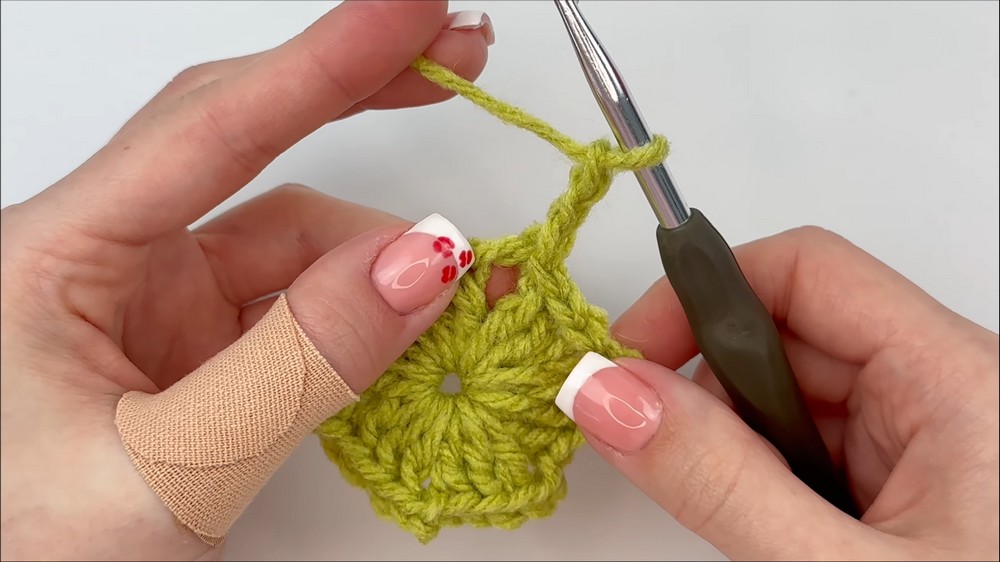
Round 1:
- Ch 3 (counts as a dc).
- Work 2 dc into the circle.
- Ch 2 (to create a corner).
- Work 3 dc into the circle. Repeat this sequence (3 dc, ch 2) 4 more times until you have 6 clusters of 3 dc with ch-2 spaces between each.
- Join with a sl st into the top of the first ch-3 stitch.
- Pull the starting tail tight to close the center ring.
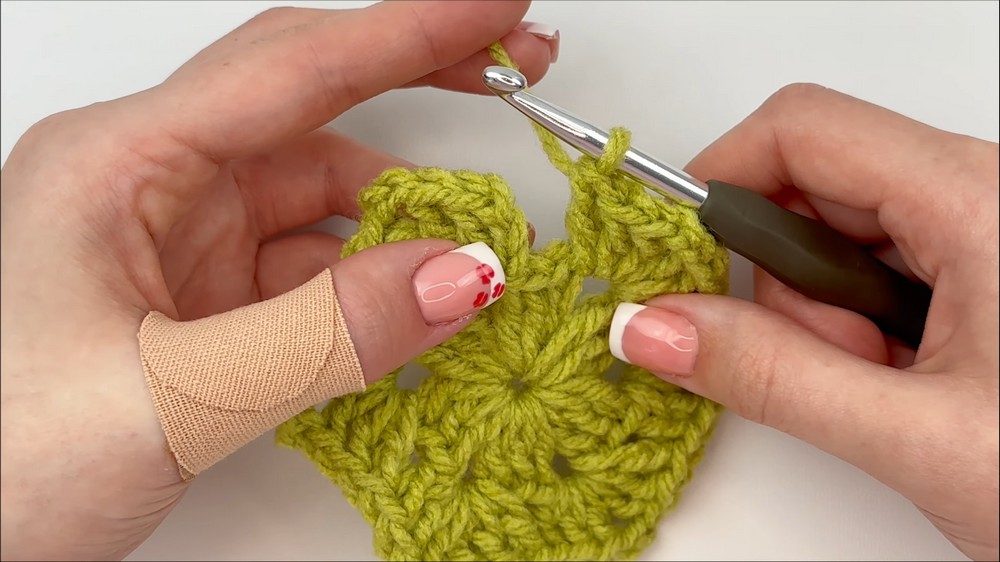
Step 3: Hexagon Panel (Part 2: Round 2 to End)
Round 2:
- Slip Stitch into the next ch-2 space (move across).
- Ch 3 (counts as first dc), then work 2 dc into the same ch-2 space.
- Ch 2, then make 3 dc into the same ch-2 space (this forms a corner).
- Work 3 dc into the next ch-2 space, then move to the following ch-2 space. Repeat the sequence into every ch-2 space around.
- Corner spaces: (3 dc, ch 2, 3 dc).
- Non-corner spaces: (3 dc).
- Join with a sl st to the top of the first ch-3.
Rounds 3-N:
- For every subsequent round, repeat the same pattern:
- Work corners into every ch-2 space: (3 dc, ch 2, 3 dc).
- Work 3 dc into every space between the corners.
- Slip stitch into the next corner to start each new round.
Sizing the Hexagon Panel:
- Lay the hexagon flat. Take two adjacent corner points and fold them into an "L" shape.
- Continue repeating rounds until the folded short edge (bottom of "L") measures half of your shoulder width.
- Pro Tip: As you work each round, count the chain spaces between points to ensure accuracy.
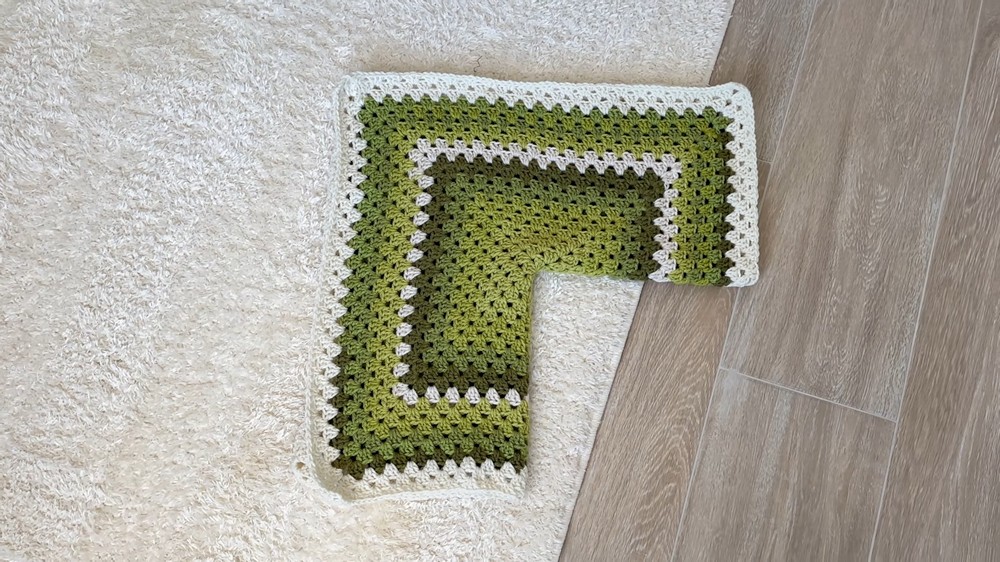
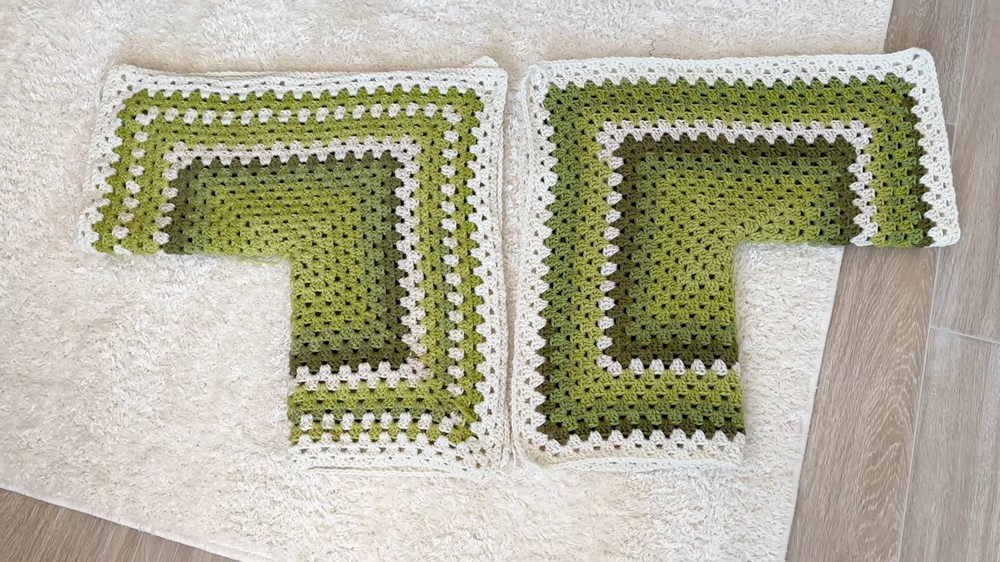
Step 4: Create Two Identical Hexagons
Repeat Steps 2 and 3 to create a second identical hexagon panel. Ensure both panels have the same number of rows before proceeding.
Step 5: Join Hexagon Panels
Back Seam:
- Align the short edges of the folded hexagons, ensuring they form a smooth back seam.
- Use a mattress stitch with the tapestry needle to sew along the back seam, connecting both hexagons.
- Alternatively, use a slip stitch seam with the crochet hook for a quicker result.
Top Seam:
- Flip the hexagons over.
- Sew the top edge seams together, leaving space for the neck opening. Ensure all corners align evenly.
Step 6: Add Length
Optional Body Rows:
- If desired, work rows of dc stitches along the bottom edge of the joined hexagons to extend the cardigan's length.
- Add as many rows as needed for your preferred length.
Step 7: Sleeves
Extend the Sleeves:
- Attach yarn to any space along the sleeve edge.
- Ch 3, work 2 dc into each space, continuing around the sleeve edge.
- Join with a sl st. Repeat rows of dc clusters until sleeve reaches desired length.
- Keep note of the number of rows for uniformity across both sleeves.
Add Cuffs:
- Attach yarn to any stitch along the sleeve edge.
- Ch 10 (or desired cuff width).
- Row 1 (Slip Stitch): Work slip stitches into the back loop only of each chain and attach to sleeve edge with slip stitches.
- Row 2+: Ch 1, work slip stitches into back loops only, attaching cuff to sleeve. Repeat rows until cuff is completed.
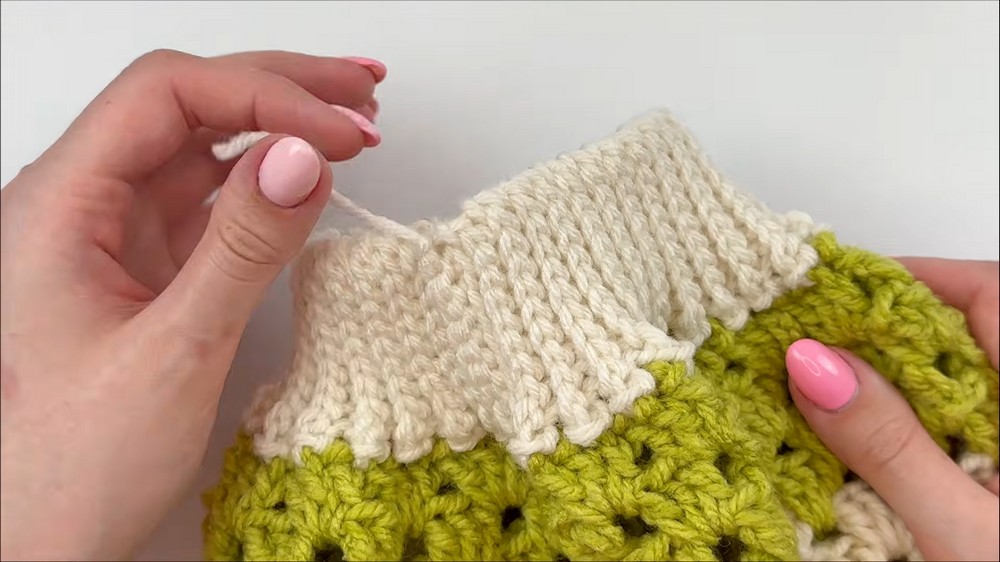
Step 8: Add Ribbing
- Attach yarn to the bottom edge of the cardigan.
- Ch 9 (or desired ribbing width).
- Row 1+: Work single crochets into the back loop only, attaching ribbing to the main fabric edge with slip stitches.
- Continue around the entire cardigan edge until ribbing is complete.
Conclusion
Congratulations! Your granny hexagon cardigan is now complete. The timeless granny stitch makes this customizable cardigan perfect for any wardrobe or occasion. Personalize yours with color changes or added embellishments to make it truly unique.
Pattern Corrections
- Ensure chain counts between corners are consistent throughout rounds.
- Verify uniformity between both hexagon panels to avoid uneven seams.
Tips
- Fit Adjustments: Add more rows or chain spaces for a looser fit, or subtract rows for a snug fit.
- Customization: Consider using variegated yarn for effortless color transitions.
- Blocking: Lightly block panels before joining for better alignment.
- Weaving Ends: Use a tapestry needle to secure loose ends, particularly along the seams.