
Crochet a Blouse with This Super Simple Free Patter
Learn how to crochet a stylish and easy blouse step by step with simple instructions, perfect for beginners to create a beautiful handmade top effortlessly.
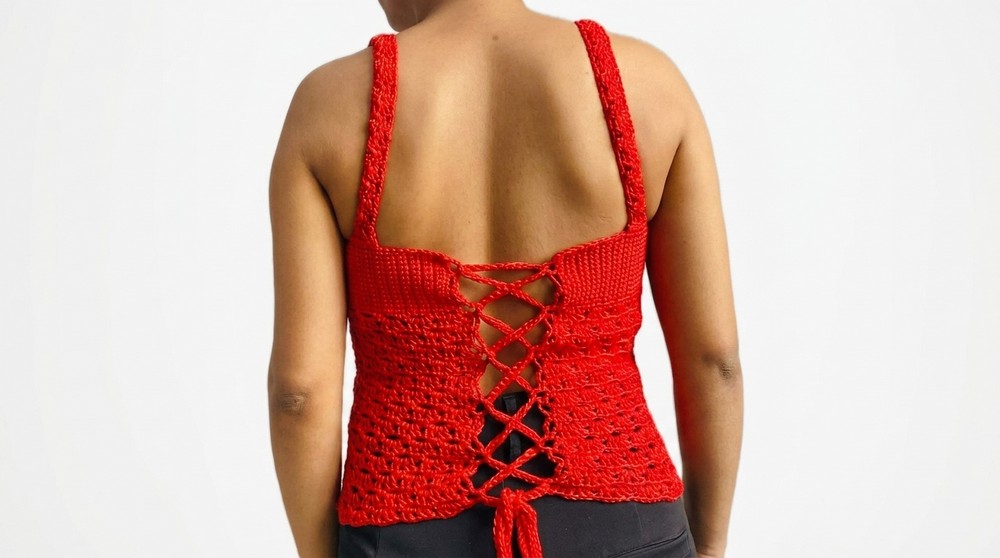
It's the perfect crochet project to create a stylish and lightweight garment that feels effortless to make and wear. This blouse showcases a breezy, openwork design with a flattering shape that gently flows along the body. Featuring adjustable back ties and customizable length and width, this piece is versatile enough to suit multiple styles-whether you opt for a cropped version for sunny days or a longer, more polished silhouette for layering.
Easy Free Crochet Blouse Pattern for Fresh Stylen

The blouse adapts easily to different sizes thanks to its sectional construction, which begins with shaped bust cups that are seamlessly connected to the body. The repeating open stitch pattern not only adds visual appeal but also keeps the project engaging as you progress. Yarn choice plays a key role in bringing out its charm-soft, lightweight options like cotton or bamboo blend beautifully with the intricate stitch details, offering breathability and comfort.
This design brings a balance of practicality and style, making it ideal for casual outings or as a thoughtful handmade gift. The flowy texture and adjustable features make it comfortable to wear while giving it a unique touch of personality. Decorating the edges, experimenting with gradient yarns, or adding accents such as tassels offer limitless ways to make your creation stand out.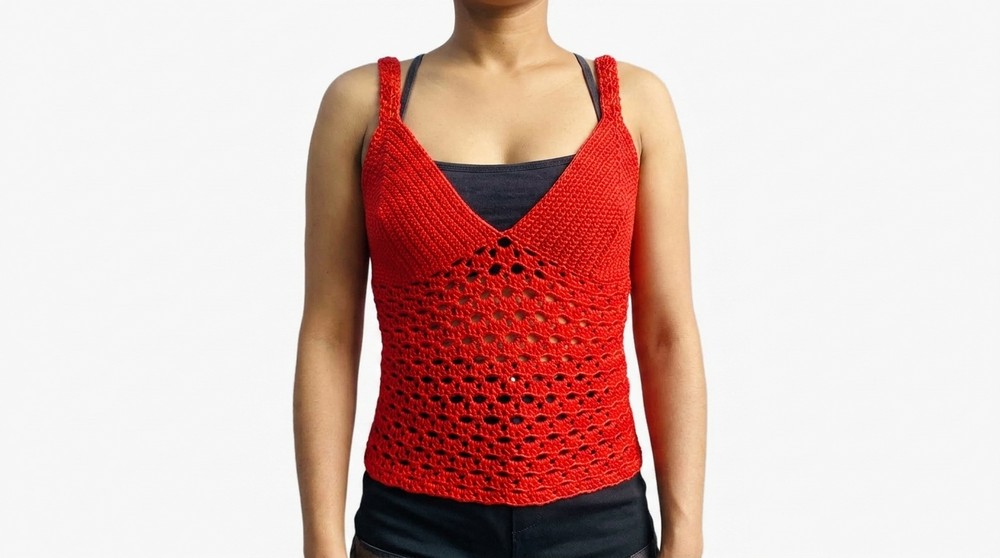
Amazing Crochet Blouse Pattern
Materials Needed
- Yarn: Double strands of light weight yarn or your preferred medium weight yarn. Choose a soft, comfortable yarn to suit your needs.
- Hook: Crochet hook that complements your yarn weight.
- Tapestry Needle: For weaving in loose ends.
- Scissors
- Measuring Tape
- Stitch Markers (optional): For ease of tracking increases.
- Gauge: Crochet a swatch of 10 cm × 10 cm using single crochet stitches to ensure the correct fit. Adjust your hook size if needed.
Finished Size
The finishes sizes provided in this pattern are the following:
- Cup Width: 15.5 cm
- Cup Height: 16 cm
- Total Width of Blouse: Adjustable, based on your gauge
- Blouse Length: Approximately 23 cm, adjustable to your preference
- Back Width: Tailored with adjustable ties
- Shoulder Straps Length: Approximately 30 cm (can be adjusted)
Special Techniques
- Working in Back Loop Only (BLO): Used for neat edge finishes.
- Increases for Shaping: Key in forming the cups and bust area.
Gauge
Gauge is essential if you want your blouse to fit as intended. Adjust your tension accordingly:
- Gauge: Approximately 9 stitches of chains equal 9 centimeters.
Pattern Instructions
The instructions are comprehensive to guide you through each step.
Step 1: Crocheting the Cups
1. Starting Chain:
- Make a reinforced knot and crochet 17 chains.
- Measure to ensure the chain equals 9 cm (adjust based on your desired size).
2. Round 1: Foundation Row & First Increase
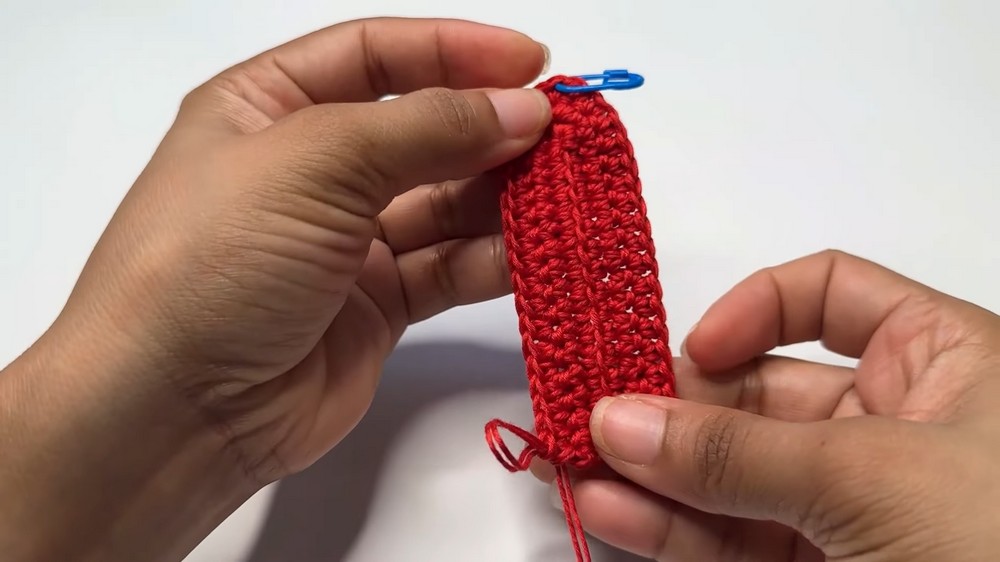
- Begin working in the back loop of the chain across. Make a single crochet (sc) in the 2nd chain from your hook and in each chain to the end.
- Once at the last chain, make an increase of 3 sc in the same chain. Mark the center stitch of these 3 sts with a stitch marker.
3. Round 2: Shaping the Cup (Increase Row)
- Turn and work sc in each stitch until you reach the marked stitch. Remove the marker and work 2 sc, mark the center sc again, and work 2 sc into the same space.
- Continue sc in each stitch until the end.

4. Repeat Rounds:
- Repeat Round 2, always increasing by 2 sc in the center stitch every round, until the cup reaches 15.5 cm across.
- Each increase forms a triangular shape, creating the cup structure.
5. Second Cup:
- Follow the same steps for the second cup, ensuring both cups match in size.
Step 2: Joining the Cups
1. Side Panel:
- Attach yarn to the side of one cup and work 12 rows of single crochet (or your desired width). This creates the side panel.
2. Joining the Cups:
- Place the two cups side by side. Attach yarn to the last row of one cup, and make single crochets across the edge of both cups. This forms the base.
- Ensure the total stitches on this base row are a multiple of 5 + 1. Adjust by adding or skipping one or two stitches at the join if needed.
Step 3: Body Work - Openwork Motif
Round 1: Open Loops
- Starting at the base row, work in the following pattern:
- 1 sc, chain 4, skip 3 stitches.
- Repeat until the end and join with a slip stitch.

Round 2: Shells
- Begin with 3 chains (counts as 1 dc).
- In each chain-4 space:
- Work 2 dc, chain 1, 2 dc (a shell).
- Continue this shell pattern around. End the round with a dc in the last sc.

Round 3: Linking Chain Pattern
- Start with 1 sc on the dc, chain 4, and work 2 sc in the center of each shell.
- Repeat the chain and sc pattern across, ending the round with a sc.
Round 4: Shell Expansion
- In the chain-4 spaces, work a shell (2 dc, 1 chain, 2 dc). Continue until the end of the round.
Continue Body Repeats:
- Repeat Rounds 1 to 4 until the blouse is your desired length. For this pattern, 23 cm was achieved with approximately 6 repetitions of the four rounds.

Step 4: Back Strap Loops
- Attach yarn to the back center and work chain 4, then sc in the next space. Repeat for the entire back row.

Step 5: Shoulder Straps
Creating Straps:
- Locate the center stitch of each cup with markers. Attach yarn.
- Chain 30 cm, work back in single crochet (or double for a thicker strap).
- Attach the straps to the marked points on the back of the blouse using either your hook or tapestry needle.

Tips and Tricks
- Measure Frequently: While crocheting, especially the cups, measure against your body or a reference garment to ensure the fit is correct.
- Use a Stitch Marker: Keep track of where increases are made, particularly at the cup's center.
- Choose a Comfortable Yarn: A stretchy or soft yarn works best, ensuring the blouse fits comfortably and contours well.
- Blocking: Once the blouse is complete, lightly block it to smooth the fabric and set the stitches for a professional finish.

Customization Ideas
- Longer Blouse: Continue working open motif rounds until your desired length is achieved.
- Sleeves: Add flutter sleeves or cap sleeves for a different look. Use the same shell pattern for consistency.
- Lace Back: Replace the chain tied back with ribbon or crochet additional lace detailing.
- Color Blocking: Use contrasting or ombre yarn to make the piece stand out.
Conclusion
With its timeless design, this crochet blouse is a versatile piece that suits various styles and occasions. Whether you wear it casually or dress it up with accessories, it will add a handmade touch to your wardrobe. Customize the fit, length, and colors to match your preferences.
If you follow this pattern step by step, you will create a stunning and functional blouse.
Important Note: Always remember, slight variations in yarn and tension might impact the final measurements. Regularly check as you crochet to achieve the desired size.
Important Remarks
- Always check your tension and measurements to ensure proper fit.
- Be patient-crocheting can be relaxing and enjoyable, but detailed patterns require focus.
- The key to a professional finish lies in weaving in ends discreetly and blocking your work for a polished look.
- With this pattern, you are empowered to create an elegant blouse tailored precisely to your preferences. Enjoy your crocheting journey.
