
Crochet Baby Hexagon Cardigan Free Pattern That Looks Super Cute
Celebrate tiny comfort with this Free Crochet Baby Hexagon Cardigan Pattern and turn yarn into a soft adorable layer for everyday baby style.
The chill in the air brings a perfect opportunity to make something cozy and warm for your little one. A soft and adorable crochet hexagon baby cardigan can be the sweetest addition to your baby's wardrobe. This cardigan is made using just two simple hexagon shapes that fold magically into a snug cardigan without any complicated cutting or shaping.
Crochet a Cute Baby Hexagon Cardigan Free Pattern for Warm Comfort

The textured granny stitch creates a warm yet breathable surface, ensuring your baby stays comfortable while looking stylish. The edges are smoothly finished with single crochet stitches, giving it a polished and neat look that catches everyone's attention. It's lightweight, cozy, and has a gentle drape, making it incredibly easy for your baby to move around without feeling restricted.
The cardigan stands out because of its versatility. You can pick calming pastel shades for an elegant look or bright, cheerful colors for a playful vibe. The possibilities are endless, and the easy stitch work allows for plenty of personalization. Add small buttons, cute ties, or even embroidery along the edges for extra cuteness.

This cardigan isn't just beautiful but also practical. It's perfect for everyday wear, special occasions, or even as a thoughtful handmade gift. The way it's put together allows you to adjust the size easily, making it suitable for growing babies by simply adding more rows to the hexagon.
In just a few hours, you'll have a charming cardigan that's not only functional but brings smiles and warmth to your baby's days. It's a cozy hug in the form of a cardigan, something that every baby deserves.
Crochet Baby Hexagon Cardigan Pattern
Necessary Materials
- Yarn:
- Main Yarn: Acrylic yarn (We Love Yarn used in the video).
- 50g per ball with a yardage of 150 meters per ball.
- Use two contrasting colors (light gray and dark gray) for elegant color changes. A cheerful yellow can be used for borders.
- Amount: Approximately 5 to 6 balls depending on the size.
- Main Yarn: Acrylic yarn (We Love Yarn used in the video).
- Crochet Hook:
- 4 mm hook for the body.
- 3 mm hook for making tighter cuffs.
- Scissors for cutting yarn.
- Tapestry Needle for joining the hexagons and weaving loose ends.
- Stitch Markers for marking critical points during assembly.
Gauge
- 10 cm x 10 cm square (4" x 4") = 7 granny stitches (groups of 3 double crochets each).
- Achieving this gauge ensures uniformity and the correct finished measurements.
Finished Size
- Front Panel width: Approximately 12 inches (30 to 31 cm).
- Back Panel length: Approximately 11 inches (28 cm).
- Sleeves and additional rounds can adjust the cardigan's length and width.
Special Techniques Used
- Granny Stitch: 3 double crochets (DC) worked into the same space.
- Slip Stitch: Used to join rounds seamlessly.
- Chain Stitch: Forms the base and corner spaces.
- Single Crochet (SC): Used for finishing and edge details.
- Turning in Rows: Produces a rectangle for back extension.
Pattern Instructions
1. Hexagon Panels
Step 1: Start the Hexagon
- Make a slip knot and chain 4.
- Slip stitch into the first chain to form a ring.
Step 2: First Round
- Chain 3 (counts as the first double crochet).
- Work 2 DC into the ring to form the first granny stitch.
- Chain 2 for the corner.
- Repeat (3 DC into the ring, Chain 2) 5 more times.
- Slip stitch into the top of the beginning chain 3.
You will now have 6 granny stitches separated by 6 chain 2 corners.
Step 3: Second Round
- Slip stitch into the next 2 DC and into the first chain 2 space.
- Chain 3 (counts as the first DC). Add 1 DC into the same chain 2 space.
- Chain 2 and work 3 more DC into the same chain 2 space.
- Skip the next 3 DC stitches, and work 3 DC, Chain 2, and 3 DC into the next chain 2 space.
- Repeat this around.
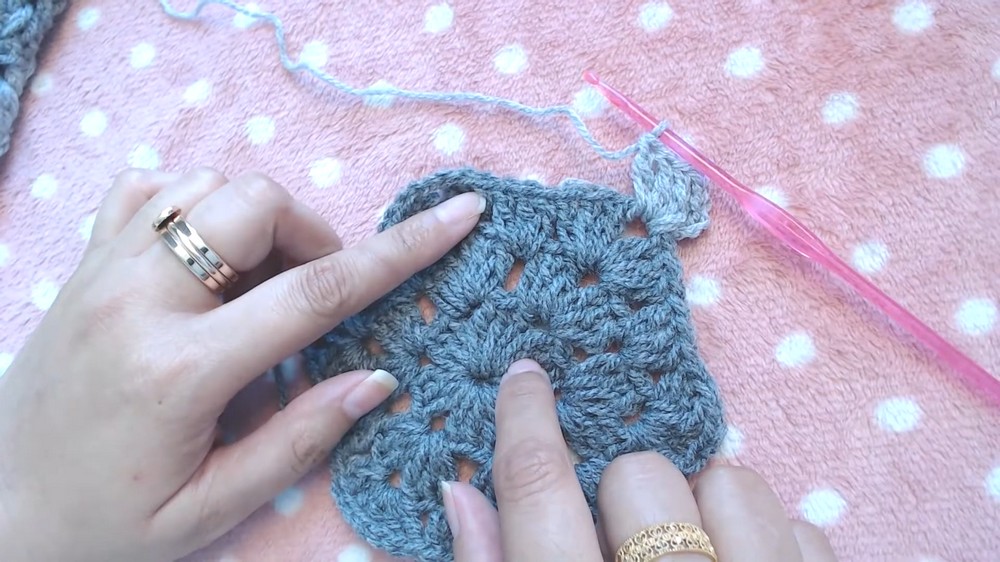
Slip stitch into the 3rd chain of the beginning chain 3 to close the round.
Step 4: Subsequent Rounds
- Continue building the hexagon. In each chain 2 corner space, work 3 DC, Chain 2, and 3 DC.
- Between each corner, work granny stitches (3 DC per space) in the gaps between clusters from the previous round.
- Change the yarn color after every 3 rounds (optional).
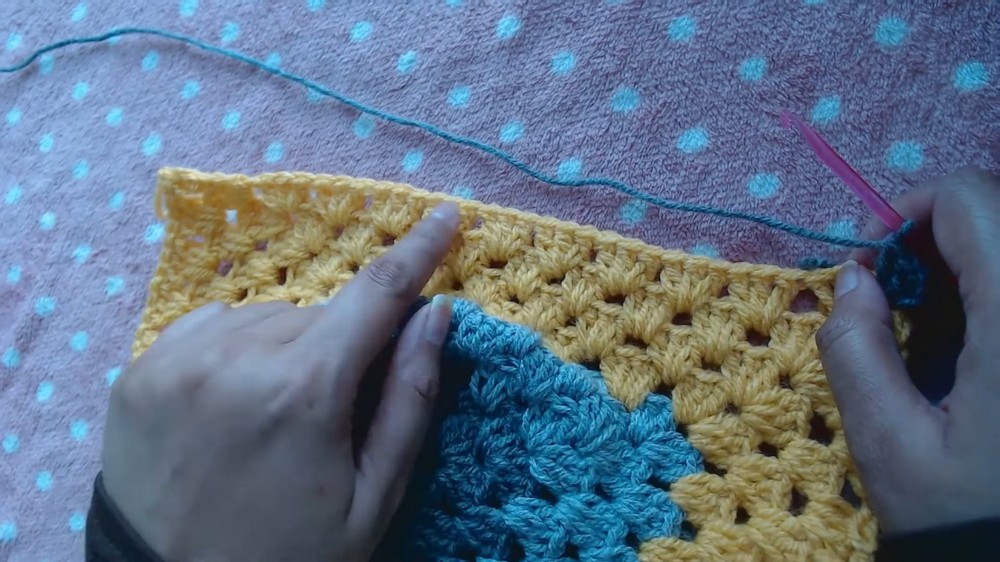

For this cardigan, crochet 10 rounds of the hexagon design, ensuring uniformity on both panels.

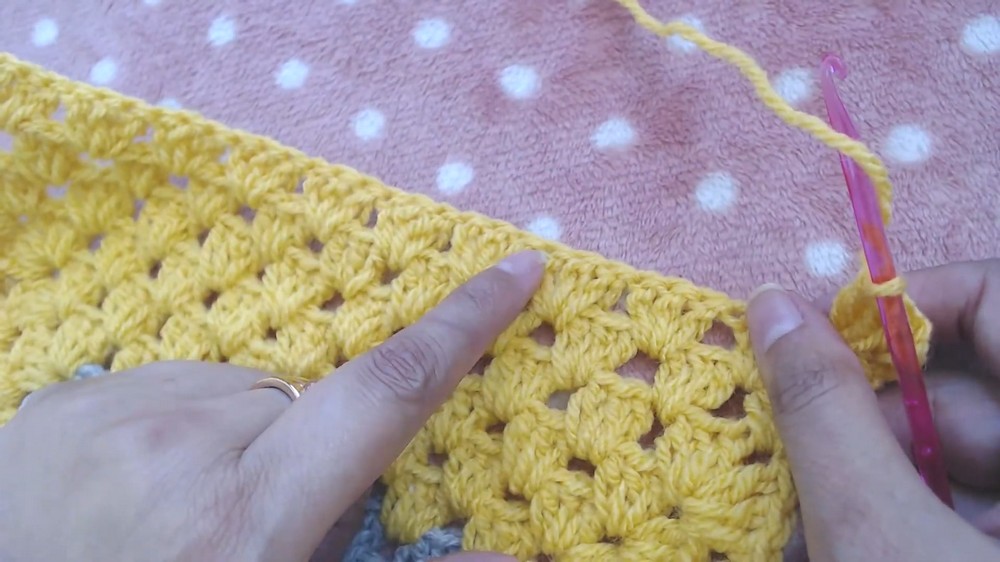
Step 5: Modifying the Back Panel
- On one hexagon panel, after completing 10 rounds, crochet 2 additional rows on the straight edges to extend the back.
- Work in rows instead of rounds: Turn your work at the end of each row and repeat the granny stitch pattern.
- These extra rows allow the panel to wrap comfortably around the back.
2. Sleeves
Step 1: Building Sleeve Length
- Identify the sleeve portion by folding the hexagon.
- Attach yarn at the cuff edge (chain 2 space at the corner).
- Chain 3 (counts as DC), work 2 DC into corner.
- Crochet granny stitches between existing clusters all around.

Step 2: Repeating Rounds
- Repeat rounds of granny stitch until the desired sleeve length is reached (3 to 4 rows recommended).
- Finish with single crochet rounds for a snug cuff. Switch to the 3 mm crochet hook for tighter stitches.

3. Assembly
Step 1: Joining Hexagons
- Place the wrong sides together and line up the hexagons.
- Join the yarn at the upper corner where the panels meet.
- Use single crochet stitches to seam:
- Insert the hook into the front loop of panel one and back loop of panel two.
- Pull through both loops and complete a single crochet.
- Work across the back of the cardigan from one corner to the other.
Step 2: Shoulder Seams
- Locate the sleeves and mark the stitch points for joining.
- Use stitch markers and single crochet to seam the shoulders symmetrically.
4. Adding Length to the Body
For longer cardigan length:
- Attach yarn at the bottom chain 2 corner and chain 3.
- Work granny stitch rounds along the entire hemline, including corners.
- At corners (chain 2 spaces), work 3 DC, Chain 2, 3 DC to keep the pattern square shaped.
- Add 3 to 4 rows or as needed to achieve your desired cardigan length.
5. Collar and Edging
- Attach yarn at the edge of the neckline on the right corner.
- Work single crochet stitches across the neckline, evenly spacing the stitches along rough edges.
- For corners on the neckline edges, work SC, Chain 2, SC.
- Add at least 2 rounds of single crochet for a clean and polished look.
Customization Ideas
- Color Changes:
- Experiment with bold color combinations for a striking appearance.
- Alternate colors after every 2 rounds for a striped effect.
- Button Closure:
- Instead of tie cords, sew buttons along the front panels for a more structured finish.
- Texture Addition:
- Use puff stitches or shells as accents on corners or cuffs.

Conclusion
This Hexagon Cardigan combines simplicity and style, making it perfect for crocheters of all skill levels. Crocheted from just two hexagon panels, sleeves are cleverly formed without extra cutting or shaping. The result is a cozy and customizable cardigan that wraps comfortably while making a bold statement.

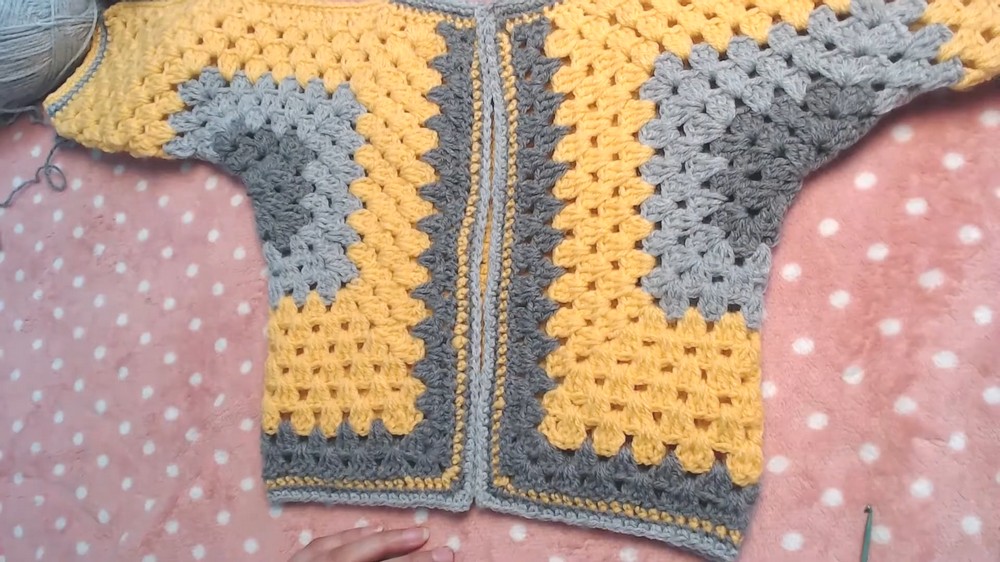
Important Remarks & Final Look
Once completed, your cardigan will have:
- Comfortable sleeves with snug cuffs.
- An extended back panel for relaxed movement.
- A stunning hexagonal design that doubles as both warm wear and stylish outerwear.
This cardigan is truly a reflection of creativity and effort. Whether for personal use or gifting, it is both practical and elegant. Keep experimenting with colors and patterns, and enjoy the joy of designing your wardrobe.