
How to Crochet Cat Aisla Mesh Cardigan Free pattern
Refresh layering style with Free Crochet Aisla Mesh Cardigan Pattern featuring airy relaxed comfort and elegant appeal for every season.
A light layer can elevate your outfit without making you feel too warm or weighed down. Cardigans are perfect for mixing comfort with style on days when the weather is just right or when indoors with cooler air. They offer a cozy solution that doesn't sacrifice fashion and can be easily tossed over your favorite tops or dresses. One particularly lovely option is the Crochet Aisla Mesh Cardigan pattern. This pattern uses openwork stitches to create a breathable, airy fabric. That means it hugs your body gently without feeling tight or stuffy. Because of its mesh design, it's great for layering - helping you stay warm just enough while letting your outfit peek through.

Free Crochet Cat Aisla Mesh Cardigan pattern for boho-inspired style
The cardigan works wonderfully for both casual and dressy looks. Imagine pairing it with jeans and a simple tee for a relaxed day out. Or layering it over a sleek dress when you want to add a touch of softness and texture. The mesh pattern adds a delicate detail that makes the cardigan look elegant but not fussy. Many find it comfortable to wear during spring and fall, or even summer evenings when temperatures drop a little. Also, the pattern can be customized in length or color to suit your style, making it as versatile as it is chic.
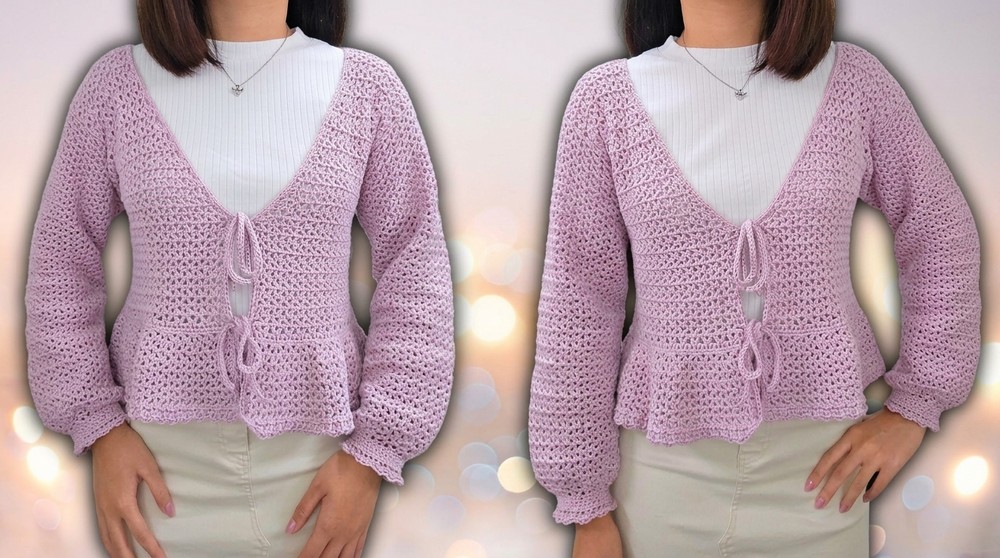
Whether you're heading to work a casual brunch or just lounging at home, this cardigan provides warmth without bulk and beauty without heaviness. For anyone starting out with crochet or looking for a wearable project, the Crochet Aisla Mesh Cardigan pattern combines simplicity with charm, resulting in a practical and pretty piece. It blends softness, lightness, and style into one perfect accessory you'll want to wear often.
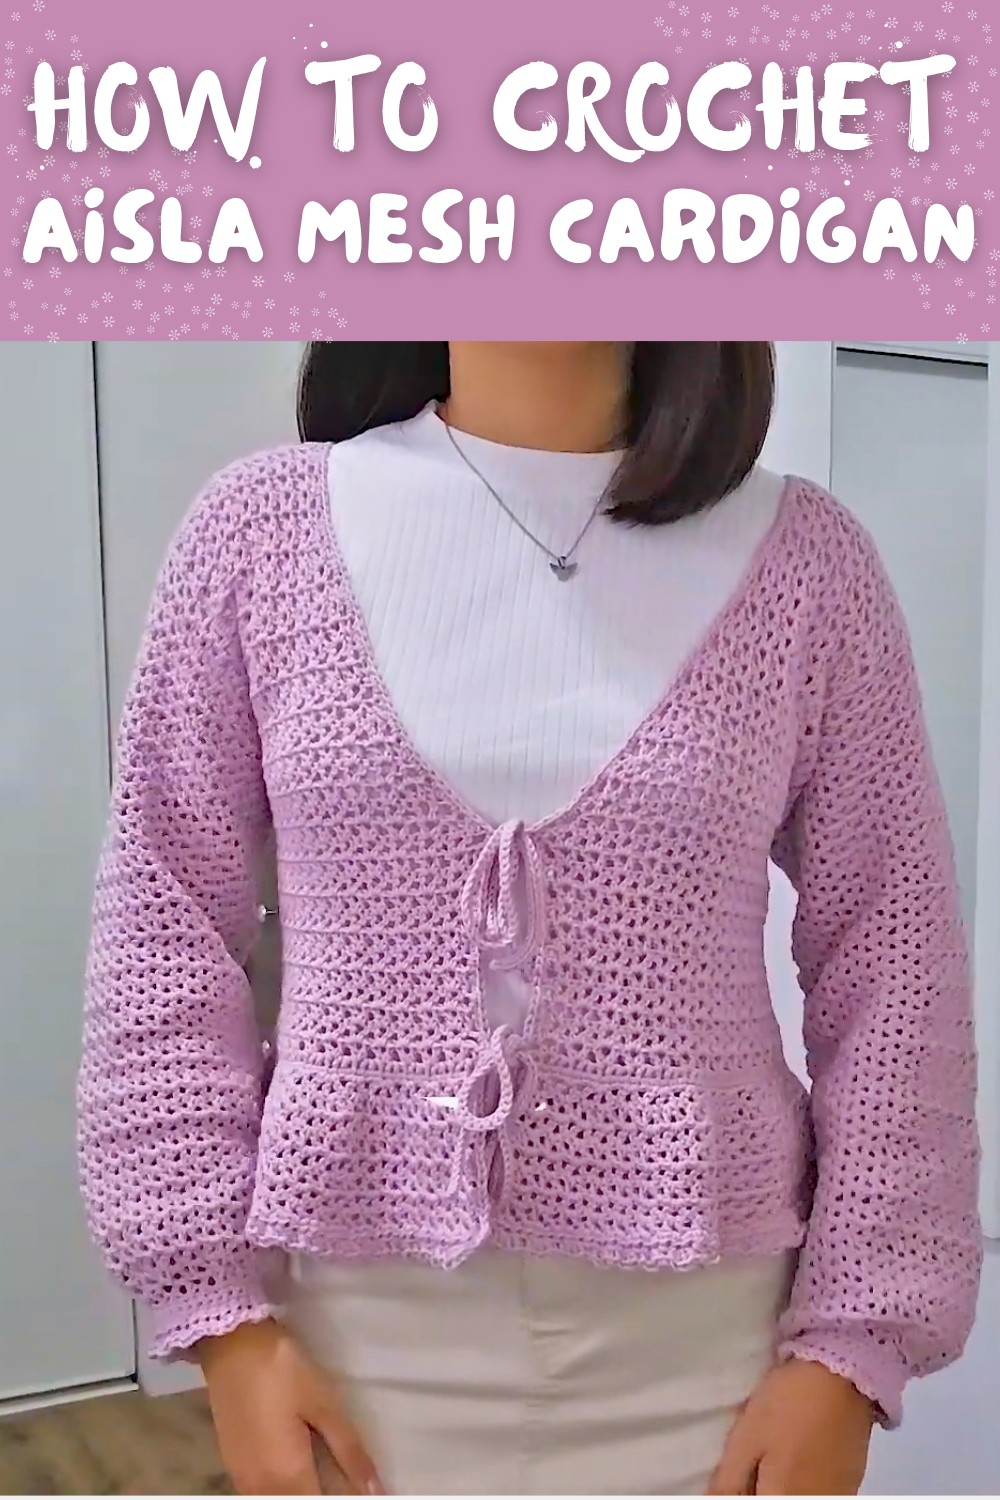
ISA Mesh Cardigan Crochet Pattern - Puff Sleeves, Front Ties & V-Neck Shaping
Before You Begin
- Yarn Recommendation: Use Bernat Softy Baby Cotton yarn or any weight 3 yarn for softness and drape. Approximately 500 g needed for the full cardigan.
- Hook Size: Use a 4.5 mm crochet hook or slightly larger than the recommended size for your yarn to achieve a flowy, drapey fabric.
- Tools Needed: Tape measure, darning needle for weaving ends and seaming, stitch markers for marking places (e.g., armholes, shoulder area), scissors.
- Measurements: Have your body measurements ready, especially bust circumference, for a made-to-measure fit.
- Tension Awareness: Avoid very tight stitches; loose enough for beautiful mesh V-stitch fabric but firm enough for the garment to hold shape.
- Understanding Pattern Construction: This cardigan uses three main panels built from bottom to top-two front panels and one back panel, followed by attaching panels, making a puff peplum, front ties, and puff sleeves.
- Patience is Key: Pay close attention to decreases shaping the V-neck and sleeve puff shaping; they are crucial for fit and aesthetics.
Important Pattern Notes
- Panels are worked from the bottom up; first front panels, then back panel.
- Uses Foundation Single Crochet for base rows to prevent curling and provide stretch.
- V stitch pattern formed by double crochet, chain 1, double crochet in the same stitch, works the airy mesh texture.
- V stitches decrease at edges to shape v-neck (decreases involve double crochet two together clustered stitches).
- The peplum section is created with flare-increasing rows of V stitches.
- Front ties are stretchy chains with slip stitches for neat finishing.
- Sleeves are crocheted in rounds, starting at armholes, with decreases to form puff shape; sleeve cuffs are ribbed rounds of single and half double crochet.
- Seam assembly can be done by whip stitch or slip stitch, depending on preference.
- Consistent turning of work during sleeve rounds avoids angled seam lines-creates vertical seams.
How This Project is Constructed
- Step 1: Begin with Foundation Single Crochet row for bottom width of front panels.
- Step 2: Work multiple rows of V stitches, counting rows to desired peplum start.
- Step 3: Shape V-neck with stacked single crochet and double crochet 2 together decrease rows on one side only (mirror decrease for opposite panel).
- Step 4: Make a small shoulder panel with even V stitches (no decreases).
- Step 5: Work a final single crochet row at the top of front panels.
- Step 6: Create back panel using calculated stitch count and row length (double width of front panel plus extras), no decreases.
- Step 7: Seam shoulder panels together.
- Step 8: Seam sides with openings for puff sleeves based on stitch markers.
- Step 9: Add peplum flare starting at foundation row with increase rows of V stitches followed by even rows.
- Step 10: Work edging on peplum and inner edges; add front ties via chain and slip stitches.
- Step 11: Crochet sleeves in rounds from armholes with decreasing V stitches to puff shape; finish with ribbed cuffs.
Skill Level
- Intermediate: Suitable for crocheters familiar with working with V stitch patterns, shaping through decreases, and assembling garments by seaming.
- Experience with foundation single crochet (FSC) and stitching in chain spaces helpful.
Finished Size
- Customizable made-to-measure design.
- Example given fits approximately 34" bust, 8½" front panel width.
- Lengths adjustable by number of V stitch rows and peplum height.
- Sleeve length adjustable by rounds crocheted.
Required Materials
- Approximately 500 g Bernat Softy Baby cotton yarn or any light dk (weight 3) yarn in desired color.
- 4.5 mm crochet hook (or hook to suit gauge and drape).
- Tape measure.
- Stitch markers.
- Darning needle.
- Scissors.
Sizing Instructions
- Measure your bust circumference; subtract about 2" for fitted look or keep actual measurement for looser fit.
- Divide resulting number by 4; results in front panel width. Example: (36" - 2") ÷ 4 = 8.5" front panel width.
- The final number dictates number of foundation single crochets.
Gauge Information
- Gauge varies with yarn and hook size; match tension to create desired fabric drape and fit.
- Foundation single crochet row counts towards width control.
- V stitches work into chain spaces rather than stitches themselves.
Stitch Abbreviations
- ch = chain
- dc = double crochet
- sc = single crochet
- sl st = slip stitch
- st = stitch
- fsc = foundation single crochet
- V st = V stitch (dc, ch 1, dc in the same space)
- dbl dec = double crochet 2 together (decrease)
- ss = slip stitch
Special Stitch Descriptions
Foundation Single Crochet (FSC):
Creates a row of single crochet and foundation chains simultaneously, giving elastic, non-curling base. Insert hook under the back ridge of the chain instead of the whole chain.
Stacked Single Crochet:
Two single crochets worked one on top of the other in the same stitch to substitute starting double crochet while maintaining height.
V Stitch:
( dc, ch 1, dc ) all worked into the same stitch or space to create mesh.
Double Crochet 2 Together (dbl dec):
Partial double crochets in two stitches worked together into one stitch to decrease.
Complete Crochet Instructions
Part 1: Foundation Row for Front Panels
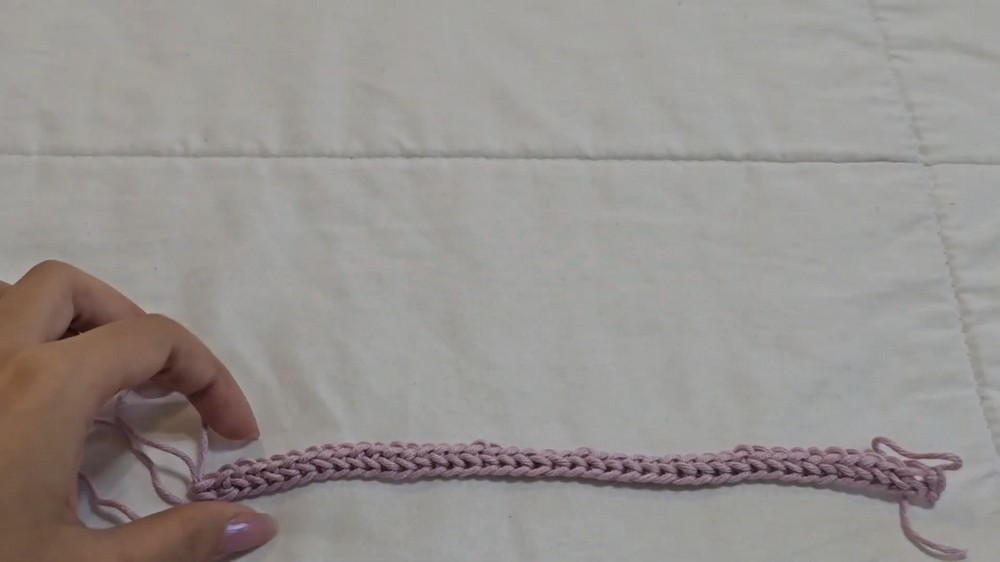
- Ch 2 (counts as first fsc).
- Work foundation single crochet along chain bottom to your calculated width by using a multiple of 3 + 2 stitches (example: 41 fsc).
- Turn.
Explanation: Foundation row gives a stretchy, stable base for your panel width.
Part 2: Create Rows of V Stitches to Desired Length Before V-Neck
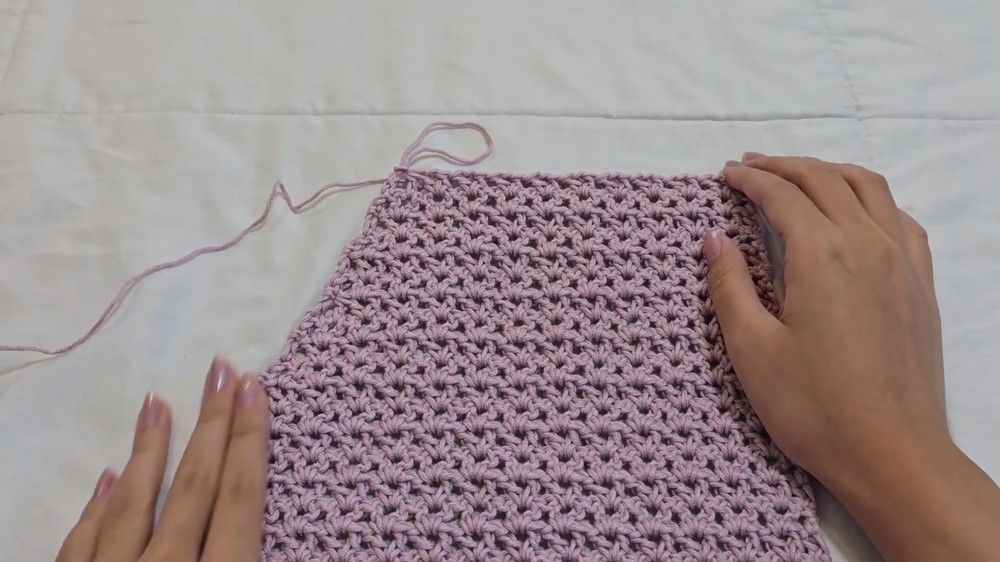
- Start each row with a stacked single crochet.
- Skip the next stitch; in the following stitch, work a V stitch: dc, ch 1, dc in same stitch.
- Skip 2 stitches between subsequent V stitches along the row.
- End each row with a dc in the last stitch (top of stacked single crochet).
- Turn work and repeat this row pattern until reaching desired peplum start height.
- Typically, 12 rows as example.


Beginner-friendly tip: Count holes formed by V stitches to verify row count.
Part 3: Shaping the V-Neck with Decreases
- Begin decreases only on one side for right front panel:
- Each row start with stacked sc.
- For first two V stitches, work a decrease with double crochet 2 together.
- Chain 1, dc in same chain space.
- Continue normal V stitches across row.
- Decrease at start or end alternatively for left front panel to mirror.
- Make decreases every 3rd row or as preferred for desired neckline depth and slope.
- Between decreases, work regular V stitch rows.
- Continue until neckline reaches desired depth (example: 6 decreases over 16 rows).
Tip: Keep decreases carefully spaced for even shaping.
Part 4: Shoulder Panel Construction
- Work even V stitch rows with no decreases to create shoulder panel length (approx. 8 rows).
- Finish shoulder panel with a final row of single crochet across all stitches, chain 1, fasten off leaving yarn tail for seaming.
Part 5: Back Panel Assembly
- Calculate back panel width as twice the front panel stitch count plus extras (example: front 13 V stitches × 2 + 2 = 28 V stitches).
- Ch foundation single crochet accordingly: (V stitches × 3) + 2 (example: 86 fsc).
- Work straight rows of V stitches matching front panel height, no decreases.
- Finish with a final row of single crochets. Fasten off.
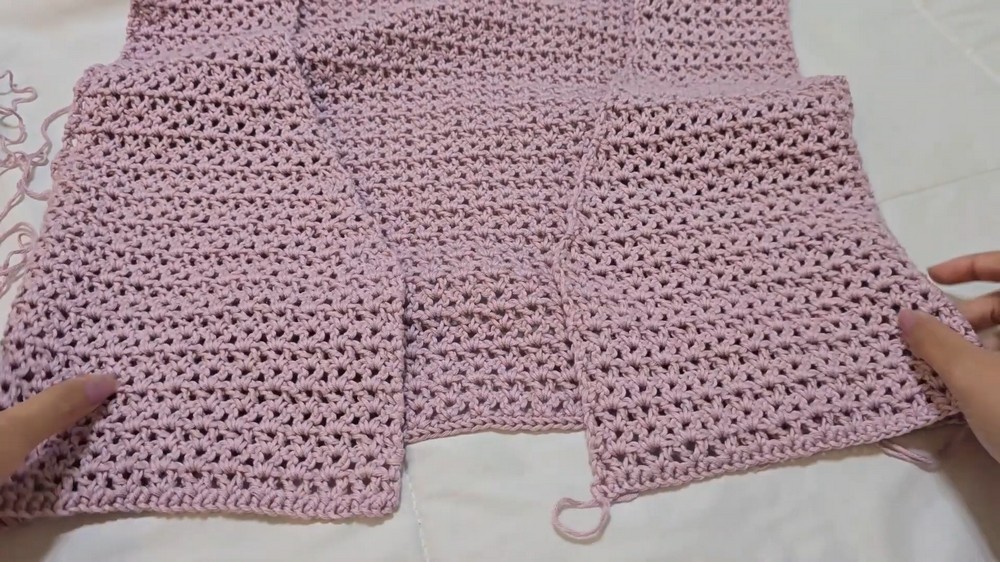
Part 6: Seaming Front Panels & Back Panel
- Seam shoulder panels together with right sides facing (whip stitch or slip stitch).
- Try on cardigan for fit; place stitch markers for desired armhole size.
- Seam side panels up to armhole markers, leaving arm opening.
- Ensure rows align for neat finish.
Part 7: Begin Peplum - Bottom Edge
- With right side facing and working yarn attached, single crochet evenly across bottom edge (foundation row).
- Turn work.
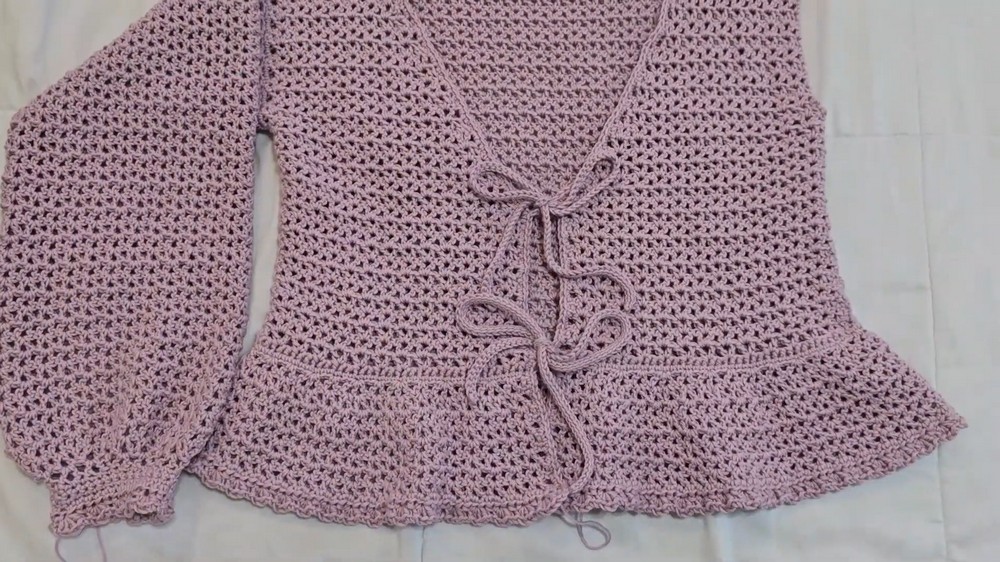
Part 8: Peplum Flare Row (Increase Row)
- Start with stacked single crochet.
- Work one regular V stitch in next chain space.
- Make an increase: V stitch (dc, ch 1, dc) with an extra dc (3 dc total) in same stitch to flare.
- Skip 2 chain spaces between V stitches.
- Repeat pattern across, adjusting increase frequency per desired flare.
- End row with dc.
Part 9: Peplum Even Rows
- Work even rows of normal V stitches without increases (stacked sc start, V stitches in chain spaces).
- Continue until peplum reaches desired length (example: 8 rows, approx. 3" long).
Part 10: Peplum Border
- Work a round of half double crochet (hdc) into each stitch and chain space along peplum bottom edge.
- Chain 1, turn, then work an edging row:
- One hdc, two dc, one hdc into same stitch, ch 1, skip 2 stitches.
- Repeat edging along entire peplum bottom, ending with dc in last stitch.
Part 11: Border Along Neckline and Front Edges With Ties
- With right side out, place stitch markers where ties are wanted (e.g., 2 on each side).
- Work a row of single crochets along neckline and front edges, placing two sc into each dc stitch on dc rows, one sc on hdc rows for neatness.
- At tie markers, chain desired length (example: 66 ch = 10"), then slip stitch back up chain in back loops to form tie strings.
- Continue edge sc down the front edge. Repeat for all ties.
Part 12: Sleeves - Attaching and Working in the Round
- Attach yarn at bottom of armhole; work 1 sc in each stitch around armhole, including seam stitches.
- Join with sl st; count stitches for matching second sleeve.
- Work rounds of V stitches in circular fashion:
- Chain 4 (counts as dc + ch 1), V stitch in every third stitch around.
- Join round with sl st into 3rd chain of starting ch 4.
- Turn work every round (to avoid slanting seam): chain 1, chain 3, make V stitches in chain spaces going opposite direction than previous round.
Part 13: Sleeve Decreases for Puff Shape
- After desired sleeve length, begin decrease rounds:
- Work 1 regular V stitch, then decrease (dc2tog cluster) in next two V stitches, chain 1, dc in same space.
- Alternate between decrease rounds and regular V stitch rounds, adjusting to desired puff fullness.
- Finalize puff sleeve shape by working single crochet cuffs.
Part 14: Sleeve Cuff Finishings
- From last decrease round, work several rounds of sc evenly around cuff.
- Work 1 or 2 rounds of hdc with decorative stitch pattern like peplum border: hdc, 2 dc, hdc, ch 1, skip 2 stitches.
- Fasten off and weave in ends.

Assembly and Finishing Details
- Weave in all yarn ends neatly.
- Sew shoulder seams with whip stitch or slip stitch inside out.
- Seam sides leaving armholes unseamed as per markers.
- Block garment lightly to even fabric and shape garment.
- Add buttons to front ties if desired.
Troubleshooting Guide
- Panel curls or warps: Check your stitch tension especially for foundation single crochet; loosen or adjust hook size.
- Uneven V-neck shaping: Count your decreases, ensure mirror shaping on both panels.
- Sleeve edges puckering or tight: Adjust decrease rounds frequency and final cuff length.
- Peplum flare too dramatic or flat: Add or subtract increase frequency in the peplum flare row accordingly.
Other Uses for V Stitch & Peplum Techniques
- Lightweight summer tops or tank tops with similar mesh texture.
- Flowing cowls or scarves with airy drape.
- Decorative shawls or wraps featuring puff shoulder detail.
- Sweater dresses featuring fitted top panels and flowy peplum skirts.
- Accessories like mesh ponchos or cropped cardigans.