Crochet Cactus Coaster Free Pattern with Foldable Holder Idea
Enjoy making an adorable and fun cactus coaster that is perfect for adding a pop of color and a playful vibe to your table and home with ease.
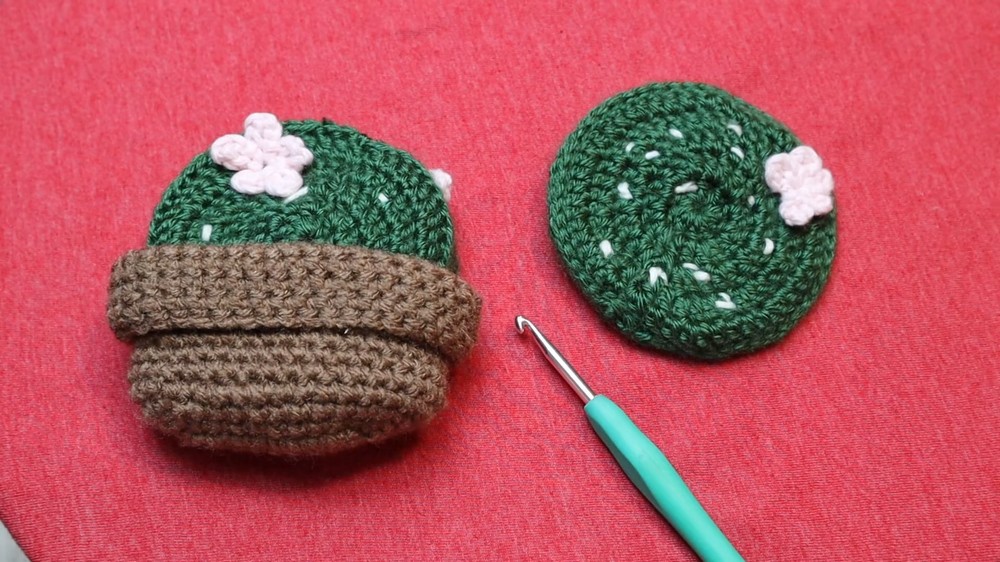
Adding a touch of fun and creativity to your table with a colorful and adorable cactus-shaped coaster. This unique handmade piece is not only beautiful but also practical, keeping your table safe from spills and heat. A crochet cactus coaster features charming details that look like a tiny, cheerful plant, perfect for brightening up any room.
Easy Free Crochet Pattern for Cactus Coaster Featuring Cute White Accents

It is lightweight, easy to make, and can be customized with different colors and designs to match your style. Its textured appearance makes it stand out while providing a fun activity for crocheting lovers of all ages. Whether you're using it for a party, as daily table decor, or gifting it to someone special, this coaster is sure to grab attention and bring smiles. It is fun, trendy, and a great way to combine style with function in your home.
Crochet Cactus Coasters and Holder - Step-by-Step Pattern
Materials List
Yarn:
- Brown Yarn: Red Heart Super Saver (for the coaster holder).
- Green Yarn: Caron Simply Soft (for the cactus coasters).
- Pink Yarn: Loops & Threads Cream Cotton Yarn (for flowers).
- White Yarn: Loops & Threads Cream Cotton Yarn (for specks).
Tools:
- Crochet Hook: 4.0mm.
- Scissors: For cutting ends.
- Tapestry Needle: For attaching flowers and creating white specks.
Gauge
Gauge is not critical for this project, but maintain tight tension to ensure clean edges and sturdy results.
Finished Size
- Coasters: Approximately 4-5 inches diameter.
- Coaster Holder: Sized to fit 3-5 stacked coasters comfortably.

Special Techniques
- Magic Circle: Used to create seamless, tight centers.
- Slip Stitches: For connecting edges and creating texture.
- Joining Pieces: Using slip stitches for clean seams.
Pattern Instructions
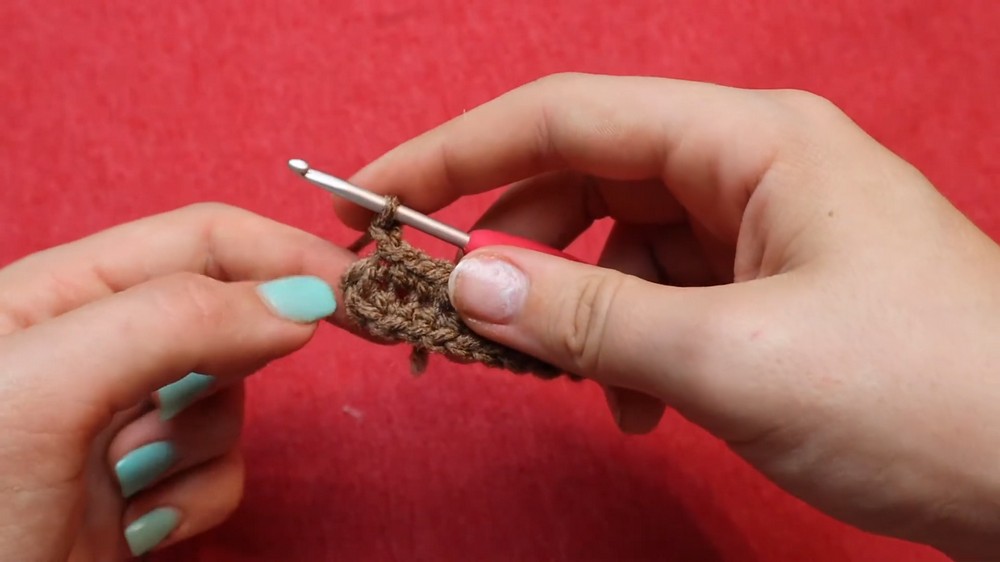
Step 1: Coaster Holder (Brown Yarn)
Foundation Chain:
- Chain 10: Create a slip knot and chain 10.
Row 1: Base Oval Formation:
- In the second chain from the hook, work 2 single crochets (sc).
- Work 1 sc into the next 7 chains.
- In the last chain, work 3 sc (for rounding the edge and turning the oval).
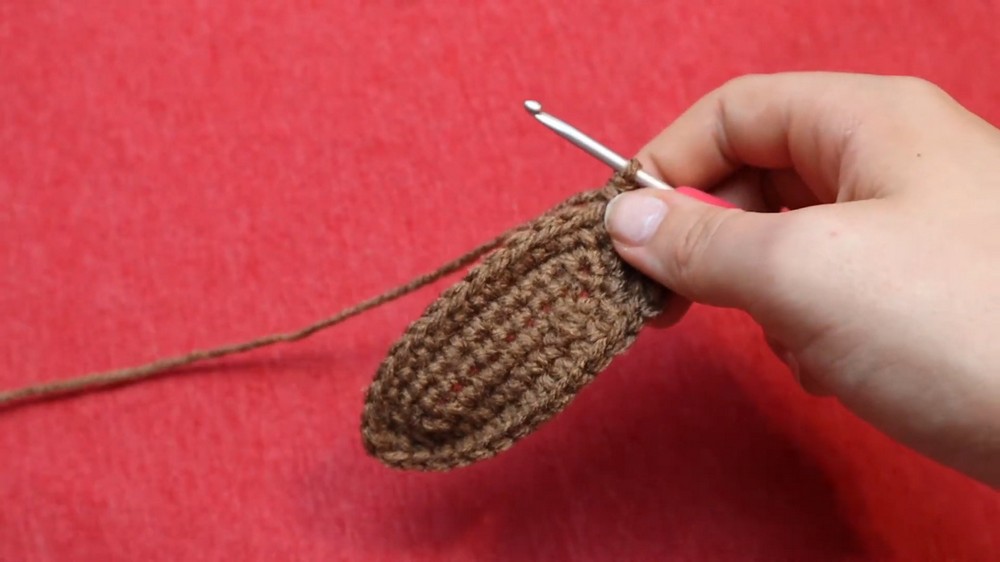
Work the Bottom Side:
- Turn your work and begin working along the opposite side of the chain:
- Work 1 sc into the next 7 chains.
- Finish the row by working 1 sc into the starting chain.
Join:
- Slip stitch (sl st) into the first single crochet to finish the round.
Row 2:
- Chain 1, then work 1 sc into the same stitch.
- Work 3 sc in the next stitch (increase).
- Work 1 sc into the next 9 stitches.
- In the last stitch of the round, work 3 sc for rounding the edge.
Join:
- Slip stitch into the first single crochet.
Row 3:
- Chain 1, work 1 sc into the same stitch.
- Work 1 sc into the next stitch.
- Work 3 sc (increase) into the third stitch.
Work Across the Long Side:
4. Work 11 single crochets (sc).
- Work 3 sc in the next stitch (increase).
Work Across the Short Side:
6. Work 11 sc.
Row 4 (Final Increase):
- Chain 1. Begin working sc evenly around.
- Work 3 sc increases at each end/rounded edge.
- Ensure the long sides and short sides maintain even spacing.
Repeat rows as needed to achieve the desired oval size for holding coasters.
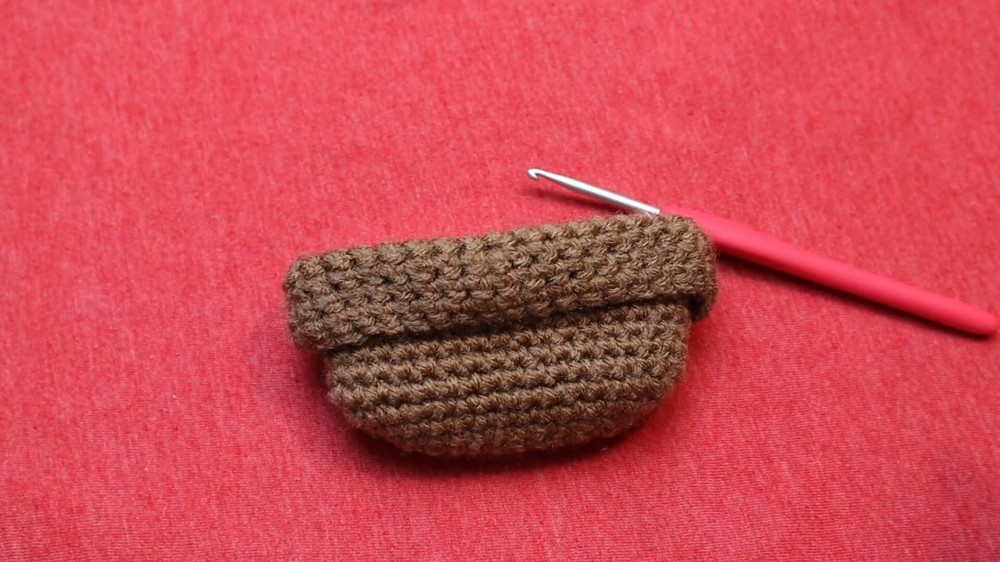
Side Walls:
- Chain 1. Begin working one single crochet in each stitch around.
- Repeat for 13 rows to make the side walls.
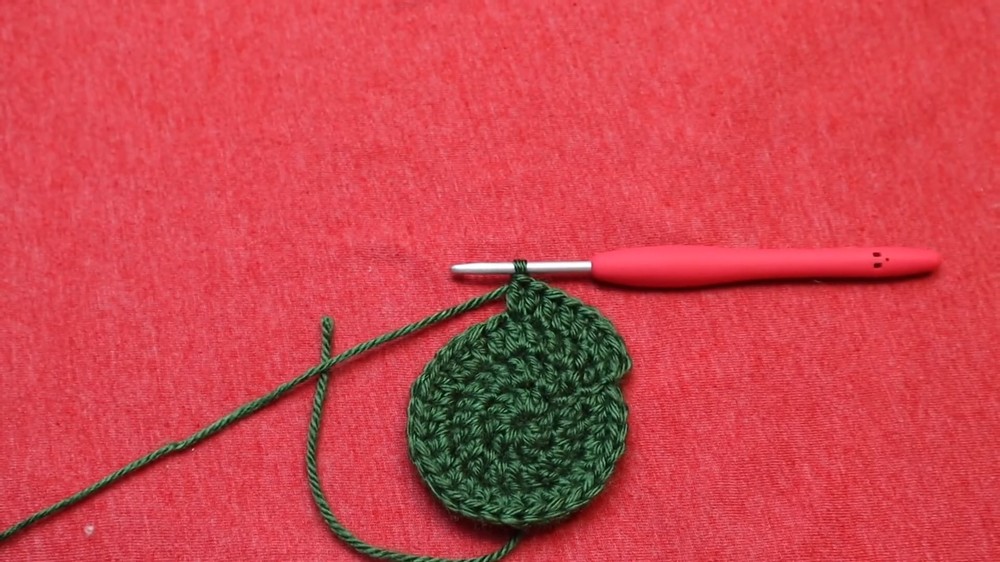
Step 2: Cactus Coasters (Green Yarn)
Round 1:
- Start with a magic circle.
- Chain 1 (does not count as a stitch).
- Work 10 double crochets (dc) into the circle.
- Pull the yarn tightly to close the magic circle.
- Slip stitch into the first dc to close the round. (10 dc)

Round 2:
- Work 2 dc into each stitch around. (20 dc)
Round 3:
- (1 dc, 2 dc in next stitch) repeat around for proper increases. (30 dc)
Round 4:
- (1 dc in each of the next 2 stitches, 2 dc in next stitch) repeat around. (40 dc)

Round 5 (Final Round):
- (1 dc in each of the next 3 stitches, 2 dc in next stitch) repeat around.
- Work neatly around for the final increases. (50 dc)
Fasten off, leaving a long tail for sewing or joining edges (if connecting double-layer circles).
Step 3: Adding White Specks (Optional)
Use white yarn and a tapestry needle to stitch scattered white specks across one side of the coaster.
- Pull the yarn through from the back, leaving a tail.
- Stitch small random lines or dots resembling cactus spines across the surface.
- Tie the stitches securely at the back, ensuring the threads remain invisible.

Step 4: Connecting Coaster Layers (Optional)
If making double-layered coasters for thickness:
- Place the white-specked coaster on top of another solid green coaster.
- Use slip stitches to join the edges:
- Insert your hook sequentially through both layers, sl st all around the edges.
- Fasten off and weave in ends.
Step 5: Flower Accent (Pink Yarn)
Flower Petals:
- Chain 5.
- Insert your hook into the first chain and work a slip stitch.
- Repeat: Chain 5, sl st into the same chain to form the next petal.
- Work 5 petals total, arranging neatly around the central chain.
Attach the Flower:
- Use a tapestry needle and pink yarn to sew or tie the central flower securely onto the coaster near the edge.
- Alternatively, attach it with fabric glue.

Customization Ideas
- Colors: Experiment with pastel greens for a softer look or brighter pinks for floral accents.
- Borders: Add edging to the coasters with contrasting yarn or decorative stitches.
- Personalization: Embroider initials, words, or additional designs.
Tips for Success
- Tension Consistency: Ensure even tension, especially for the magic circle technique, to avoid gaps.
- Slip Stitch Seam: Use slow and careful slip stitching to achieve clean edges when joining layers.
- Accessories: Add beads or sequins to the flower for extra flair.
Conclusion
Congratulations! Your Cactus Coaster Set is complete! This project is both functional and decorative, perfect for protecting surfaces while brightening your space with a playful, desert-inspired aesthetic.

Important Remarks
The coaster holder doubles as a creative storage solution, keeping your coasters organized while adding personality to your table. Whether you choose single-layer or double-layer coasters, this design offers endless opportunities for personalization and gifting.