
Crochet Christmas Flower Pattern for a Memorable Festive Touch
Brighten your celebrations with an easy free crochet Christmas flower pattern that combines beauty and creativity for the season's best decor.
One of the nicest things about the holidays is pulling out handmade decorations that tell a story, and this free crochet Christmas flower pattern feels exactly like one of those special pieces. It starts very simply, with just chains and single crochet stitches, but slowly the petals grow in little "steps" until you see a full, layered poinsettia-style flower in your hands. The beauty of this pattern is in its shape and texture: bold red petals, a golden stitched or beaded center, and deep green leaves that frame everything perfectly. You can use this flower as a table centerpiece, to decorate wreaths, on gift wrapping, on cushions, or as an accent on Christmas runners and wall hangings.
The design mainly uses single crochet (SC) and easy increases, so it's friendly for beginners who know the basics and want to try something prettier than a simple square. With these same stitches, you can also make appliqués, coasters, garlands, motifs, keychains, mug rugs, and decorative patches for bags, blankets, or hats. The leaves follow almost the same logic as the petals, just longer, so once your hands memorize the movement, the rest of the project becomes relaxing and repetitive in a good way.
From this pattern you will learn how to shape petals using controlled increases, how to work back and forth in rows while leaving small "steps" that give the petal its form, and how to layer and sew separate pieces into a 3D flower. You'll also see how simple embroidery-style stitches with golden thread or pearls turn a basic center into something very festive. After finishing this flower, you'll feel more confident adapting the idea into other items like floral centerpieces, brooches, hair clips, napkin rings, or even a full garland of flowers for your Christmas decor.
Free Crochet Christmas Flower Pattern to Bring Joyful Texture to Your Holidays

Step-by-Step Guide: Free Crochet Christmas Flower Pattern
Get ready to crochet a beautiful and festive Christmas Flower with this detailed step-by-step pattern based on the video tutorial linked above! This crochet project is a great way to enhance your holiday decorations and create something truly unique with your own hands. The combination of vibrant colors, textured layers, and a golden center make it a stunning piece that you can use as a centerpiece, wall decor, or even to customize holiday wreaths and gift wraps.
Let's dive into the process of creating this masterpiece - perfect for beginners with clear instructions and a touch of creativity.
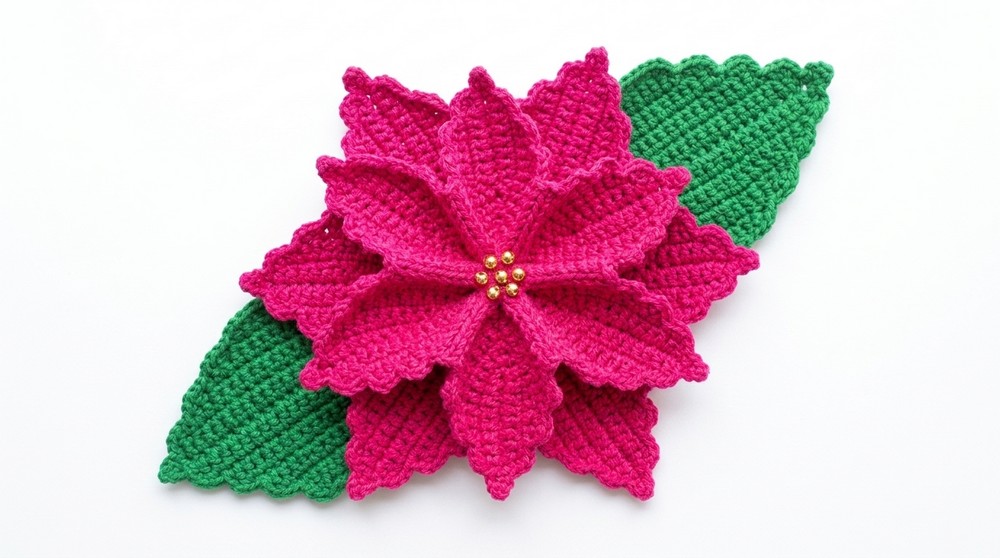
Table of Contents
- Introduction to the Pattern
- Materials Required
- Abbreviations Used
- Step-by-Step Instructions
- Making the Larger Petals
- Creating the Smaller Petals
- Assembling the Flower
- Adding the Center Details
- Making the Leaves
- Special Features & Techniques Used
- Tutor's Suggestions
- Tips for Success
- Conclusion: My Thoughts on this Pattern
Introduction to the Pattern
This Free Crochet Christmas Flower Pattern is beginner-friendly and perfect for crocheters of all skill levels. The design involves crafting layered petals of varying sizes, sewing them together for a three-dimensional bloom, and adding a decorative center with embroidery or beads. Inspired by festive poinsettias, this flower is not only versatile for home decor but also a thoughtful handmade gift.
The pattern uses primarily single crochet stitches (SC) along with basic techniques like increasing stitches and working in rows. Even if you're new to crochet, you'll find this tutorial easy to follow, as the steps are repetitive and simple to learn.
Materials Required
To recreate this stunning Christmas Flower, gather the following materials:
- Yarns:
- Red yarn (8-weight thread) for the larger petals.
- Dark green yarn (8-weight thread) for the leaves.
- Gold embroidery thread or yarn (thin or thick) for the center.
- Crochet Hook: 4 mm hook recommended.
- Tapestry Needle: For finishing and sewing.
- Scissors: To cut yarn.
- Stitch Marker: Optional, for marking increases and decreases in petals.
- Golden beads (optional): Pearl beads (size #6 or #8) for the flower center.
Abbreviations Used
- CH: Chain
- SC: Single Crochet
- ST(s): Stitch(es)
- INC: Increase (2 SC into the same stitch)
- DEC: Decrease (Skip one stitch or work 2 stitches together)
Step-by-Step Instructions
1. Making the Larger Petals
- Foundation Chain:
- Begin with a slip knot.
- Chain 16 CH tightly.
- Row 1:
- Insert your hook into the second chain (skipping the first) from the hook.
- Work 1 SC in each chain across.
- When you reach the last chain, work 3 SC in the last stitch to form the petal tip.
- Turn your work.
- Row 2 Onward:
- Repeat SC across the row as before.
- When 2 stitches are left at the end of the row, stop and turn.
- At the turning point, increase at the tip of the petal by working 2 SC into the middle stitch to form the curve of the petal.
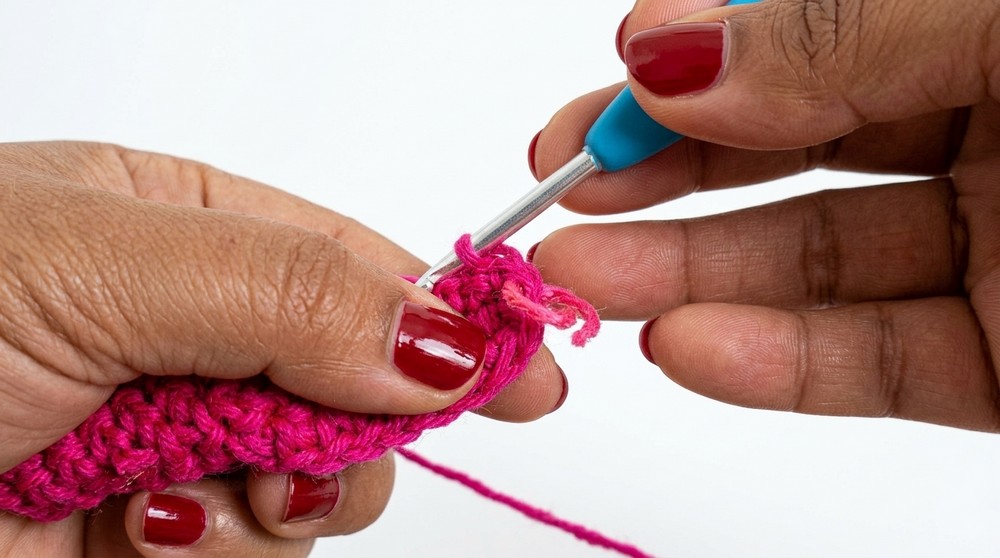
- Repeat this process until you see 5 to 6 raised levels (or "steps") on the petal, representing the rows.
- Finishing:
- Once the petal is complete, cut the yarn, leaving a tail for sewing later.
- Make 7 of these larger petals.
2. Creating the Smaller Petals
- Follow the same process as above, but this time:
- Chain only 11 CH for the foundation row.
- Only 6 petals are required for this layer.
- The process is otherwise identical to the larger petals.

3. Assembling the Flower
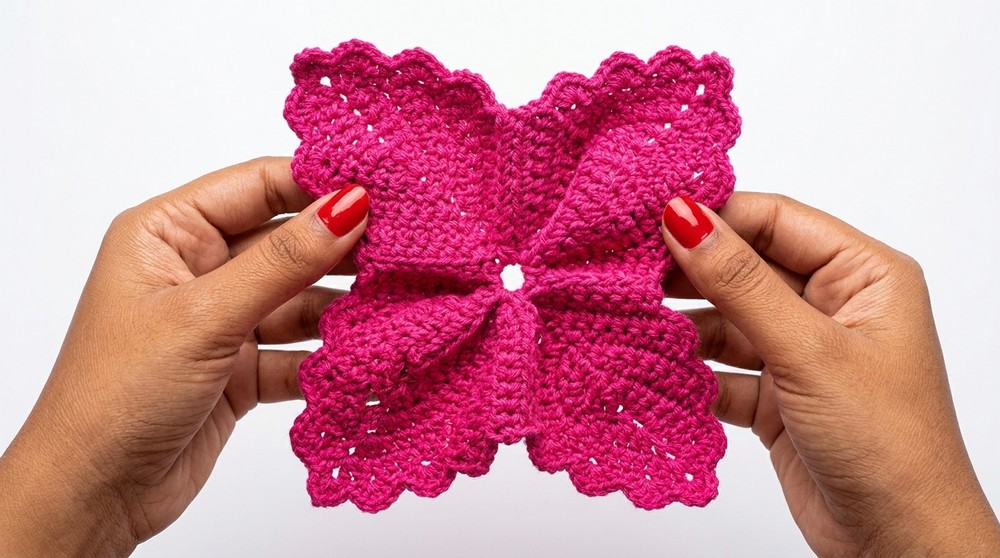
- Lay the seven larger petals together in a circular formation. Ensure the petal tips are evenly spaced.
- Using the tail left on one petal, sew the edges of each petal together, creating a flower base. Make sure to overlap the edges slightly for a natural rounded look.
- Repeat the same sewing process with the six smaller petals to form the second layer.
- Attach the smaller petal layer on top of the larger petal layer by sewing them in place. Align the petals so they alternate and do not directly overlap.
4. Adding the Center Details
- Use gold embroidery thread or yarn to add decorative "stitch dots" in the center of the flower.
- Insert the needle into the flower's center, creating small stitches that radiate outward. Use the same entry point each time to form a circular gold center.
- Optional: Replace embroidery thread with golden beads to create an elegant center.
5. Making the Leaves
- Use green yarn, following the same steps for creating the larger petals.
- For leaves: Change the foundation chain to 19-21 CHs, depending on your preference for size, and adjust the number of rows accordingly (approximately 8 to 10 rows).
- Work single crochet stitches with gradual increases at the edges, as done for petals, to create leaf curves.
- Make 3-5 leaves to attach around the flower's base.

Special Features & Techniques
- Layering Petals: Gives the flower a realistic three-dimensional look.
- Gold Center Details: Adds an elegant festive touch.
- Customizable Sizes: Adjust the chain length and number of petals/leaves to fit your project needs.
Tutor's Suggestions
- Use golden beads for the center if golden thread is unavailable for a luxurious look.
- Feel free to make additional leaves for a fuller design.
Tips for Success
- Keep your tension consistent: Ensure even stitching for a polished look.
- Use a stitch marker: Especially when you're increasing at the petal tips or turning rows.
- Customize the colors: Try experimenting with white, pink, or metallic yarn for a different take on this Christmas-themed flower.
Conclusion: My Thoughts on this Pattern
This Free Crochet Christmas Flower Pattern is an excellent project for beginners looking to create something special for the festive season. The repetitive steps make it easy to follow, and you'll end up with a beautifully textured flower that looks much more intricate than it actually is.
What I Learned from This Pattern
- The importance of precise increases and alignments to ensure symmetry.
- How layering simple petals can create a stunning 3D effect.
- The use of contrasting center details (gold embroidery) to elevate the design.
This pattern is perfect for decorating your home, adorning presents, or gifting as thoughtful handmade decor. Whatever you choose to use it for, this Christmas Flower will surely bring charm and warmth to your holiday creations.
