
Crochet Daisy Flower Tote Bag for Stylish Storage - Free Pattern
Stitch a Crochet Daisy Flower Tote Bag that combines charm with practicality and uses delightful floral details to give your everyday carry a unique touch.
With its charming daisy motifs and practical functionality, the Crochet Daisy Flower Tote Bag is both eye-catching and useful. This project allows for playful customization through the choice of colors and textures, making each piece truly unique. Not only does it serve as a stylish accessory, but it's also spacious enough to carry groceries, beach essentials, or personal items for daily errands.
Free Crochet Daisy Flower Tote Bag with Beautiful Details

The repetitive motion of crocheting daisy flowers can be meditative, turning the process into a relaxing experience. Each daisy motif can also stand alone as a decorative element for other projects, such as coasters, wall hangings, or gift toppers.
This bag strikes a perfect balance between functionality and creative expression, appealing to those who enjoy practicality with a touch of artistic flair. Whether used for everyday purposes or given as a thoughtful handmade gift, this tote brings a sense of joy and utility to anyone who carries it.
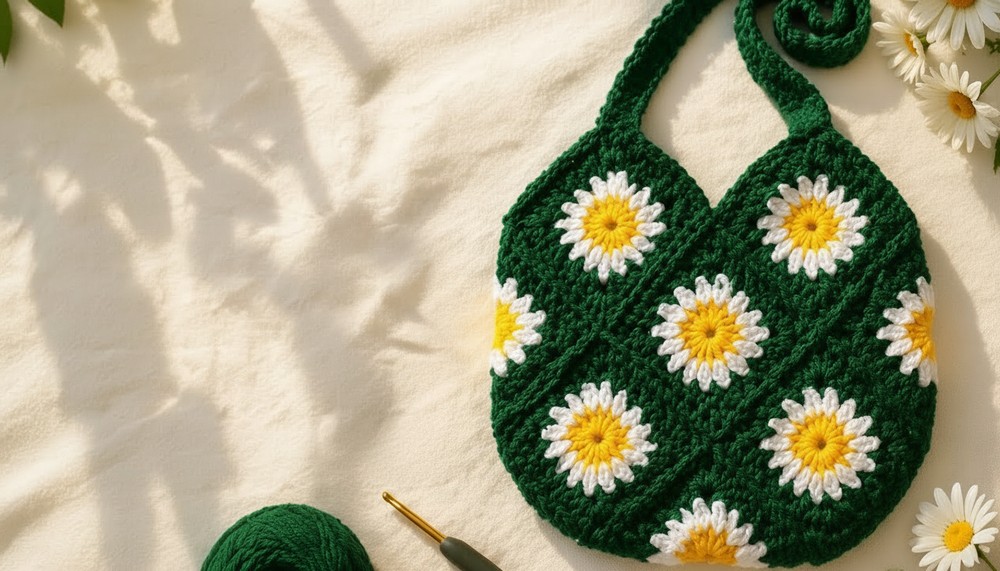
Daisy Flower Tote Bag - Step-by-Step Crochet Pattern
Skill Level
Intermediate to Advanced
- Requires knowledge of basic crochet stitches and techniques, such as the magic ring, slip stitch, double crochet, treble crochet, and assembling granny squares.
Materials
- Yarn:
- Mustard Yellow (#4 Medium Yarn): For the daisy centers.
- White (#4 Medium Yarn): For the daisy petals.
- Jungle Green (#4 Medium Yarn): For the granny square background and bag body.
- Crochet Hook: 4.5 mm.
- Tapestry Needle: For weaving in ends.
- Scissors.
- Optional Materials:
- Stitch markers (helpful during assembly).
- A button (for tote closure).
Abbreviations
- ch: Chain.
- sl st: Slip Stitch.
- sc: Single Crochet.
- dc: Double Crochet.
- tr: Treble Crochet.
- st: Stitch.
- sp: Space.
- MR: Magic Ring.
Special Notes
- US Crochet Terminology: This pattern follows US terminology. Stitches such as "double crochet" (dc) and "treble crochet" (tr) align with US terms.
- Gauge: Exact gauge is not necessary, but consistency is important for uniform granny squares.
- Customizable: You can adjust the number of squares and rows to increase or decrease the tote's size.
Daisy Granny Square Pattern
Step 1: Daisy Center (Mustard Yellow)
- Create a magic ring (MR).
- Round 1: Ch 3 (does not count as a stitch). Work 12 dc into the ring. (12 dc)
- Pull the yarn tail tightly to close the magic ring.
- Complete the round with a sl st into the first dc. Ch 1 and cut the yarn, pulling it through to secure.

Step 2: Daisy Petals (White)
- Attach white yarn to any dc using a sl st.
- Round 2 (Petals):
- Ch 4 (counts as the first tr).
- Work 3 tr into the same stitch (cluster of 4 tr, including ch-4).
- Pull the working yarn slightly and sl st into the top of the ch-4 to form the petal. Ch 2.
- Work one petal in each of the remaining 11 dc spaces. (12 petals total)
- To finish the round, sl st into the sl st of the first petal. Ch 1, cut the yarn, and secure.


Step 3: Granny Square Body (Jungle Green)
- Attach green yarn to the base of any petal using a sl st.
- Corner Creation:
- Ch 4 (counts as the first tr).
- Work 2 tr into the same space. Ch 2. Work 3 more tr into the same space. (First corner created.)
- Next Spaces: Work 3 dc into each ch-2 sp around the base of each petal.
- When you reach the next chain space at a corner, work another corner: 3 tr, ch 2, 3 tr.
- Continue this sequence:
- Corners: 3 tr, ch 2, 3 tr.
- Sides: 3 dc in each ch-2 space.
- End the round with a sl st into the beginning ch-4.
- Round 2:
- Slip stitch into the next tr and into the corner space.
- Work 3 tr, ch 2, 3 tr in each corner.
- Work 3 dc in each space along the sides.
- Finish the round with a sl st into the top of the starting ch-4. Ch 1, cut the yarn, and secure.

Assembly of Granny Squares
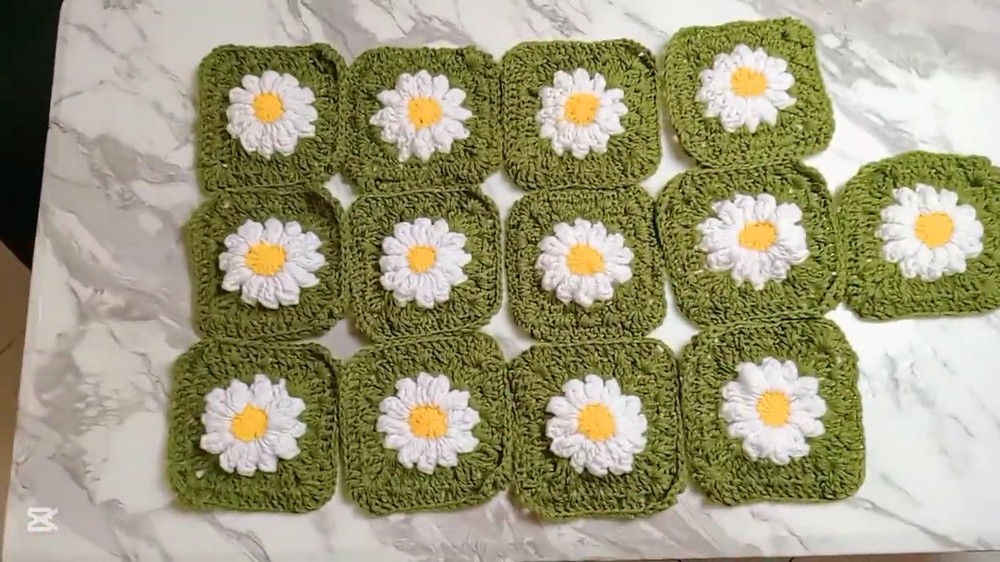
- Make 13 Squares:
- Create 13 identical daisy granny squares by repeating the pattern above.
- Weave in all ends as you go.
- Arrange the Squares:
- Lay the squares out in the desired pattern.
- Reference the video or create your own layout.
- Joining the Squares (Right Sides Facing):
- Place the first two squares with right sides touching.
- Use a slip knot to attach the green yarn at the corner ch-2 spaces, joining the two squares.
- Use sc stitches to join by working through the back loop of the first square and front loop of the second square.
- Work evenly across the edge of the squares.
- Work Row by Row: After joining a row, return the squares to the pattern layout before moving to the next row.
Bag Assembly
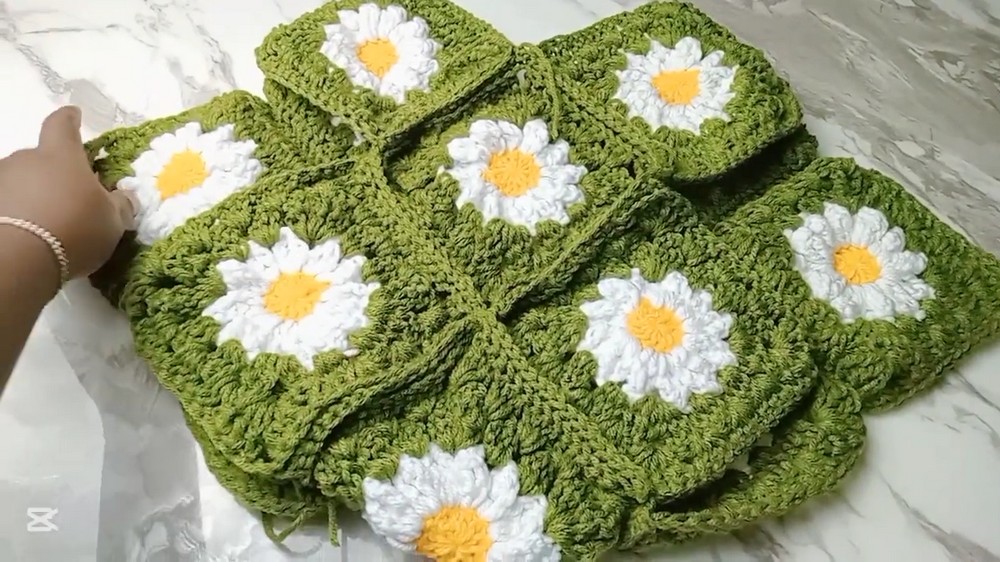
- Once all squares are joined, shape the granny squares into a tote bag structure:
- Fold the edge squares inward to create the sides of the bag.
- Ensure the seam lines are on the wrong side for a smooth exterior.
- Continue joining the edges of the squares using the back loop/front loop method to create the top of the tote bag body.
Straps
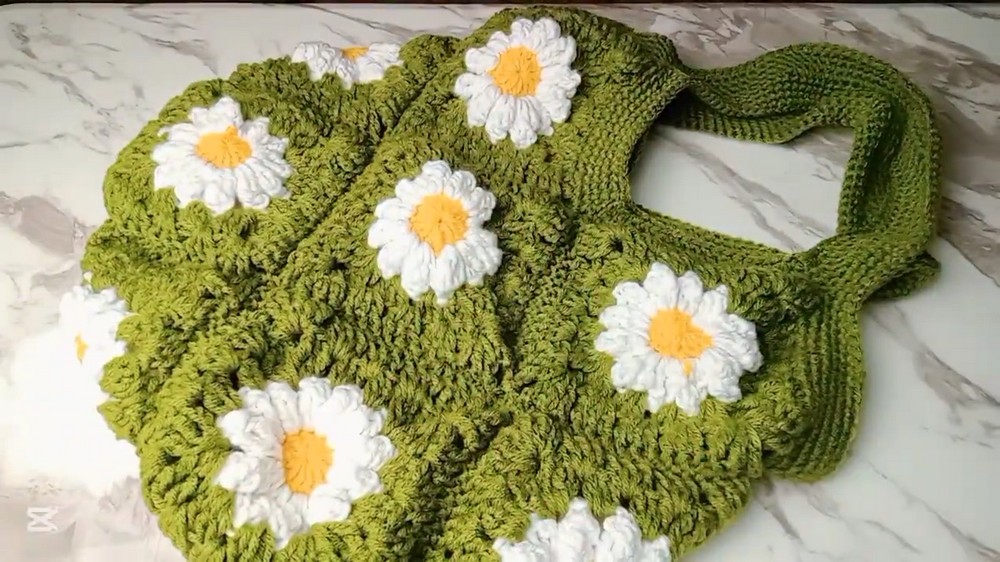
- Step 1: Attach yarn in the corner of the bag's top edge using a sl st.
- Step 2: Work one round of sc stitches evenly along the top edge of the bag, placing 2 sc stitches in each corner ch-2 space.
- Step 3: For the handle attachment points:
- At a corner of the tote, work 60 chains (or desired handle length).
- Attach the chain to the next corner with a sc stitch.
- Repeat for the second strap.
- Step 4: Work 4 additional rows of sc around the top edge and along the chains to thicken and strengthen the straps.
Button Closure
- Locate the center top edge of the tote.
- Attach yarn with a sl st. Chain 16 (or enough to wrap around the button).
- Attach the chain to the adjacent corner to create a loop.
- Work sc stitches along the chain for added thickness.
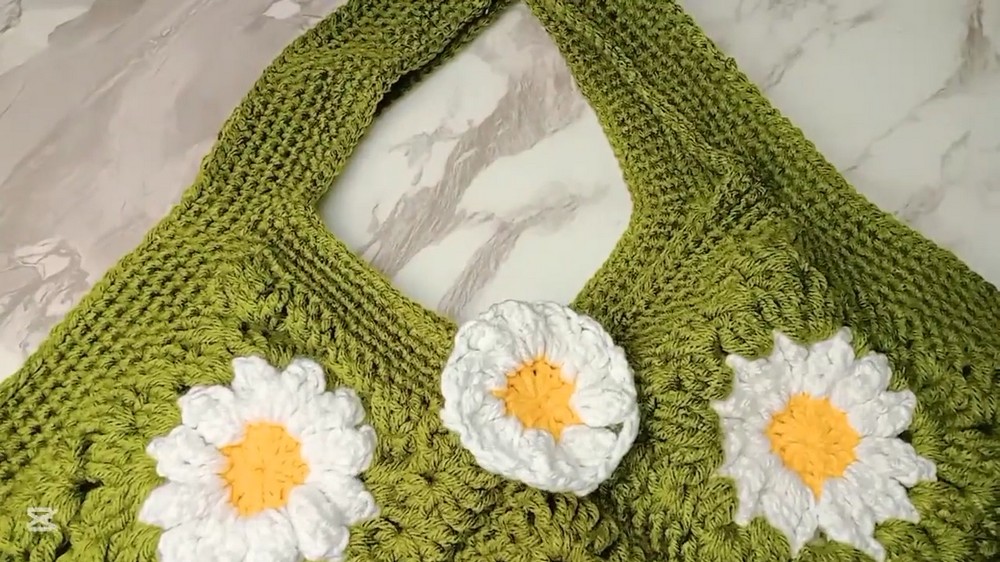
Finishing
- Sew a button to the front of the tote bag so the handle loop secures over it to close the bag.
- Weave in all loose ends with a tapestry needle.
- Block the bag if necessary to shape the granny squares and secure uniformity.
Conclusion
Congratulations! You've completed the Daisy Flower Tote Bag. This bag highlights your advanced crochet skills and offers room for creative customization. It's both functional and stylish, making it a versatile piece for carrying essentials or adding charm to your outfit.

Pattern Notes and Corrections
- If your squares are not lying flat, ensure you've maintained consistent tension while crocheting.
- The granny square's transitions between sides and corners should flow smoothly; double-check your ch 2 spaces.
- Handle length is customizable depending on your preference.
Tips for Success
- Weave in the ends as you go to save time during finishing.
- If using another yarn weight, adjust hook size to create neat and secure stitches.
- For added durability, line the tote with fabric (a video for lining is mentioned in the transcript).