
Free Crochet Drawstring Bag Pattern Everyone’s Obsessed With
Wrap your essentials in style with this soft, durable, and easy to make crochet drawstring bag pattern that's perfect for everyday use.
This crochet bag is simple to make and looks stylish! You can create a strong and colorful drawstring bag using basic tools like yarn, a crochet hook, and scissors. It's perfect for everyday use, whether for carrying your favorite items or for gifting. The bag features double crochet in the main body, single crochet for the edges, and beautiful cross stitches for a decorative finish. To make it even more special, add wooden beads on the drawstring for a nice touch. The hidden features make it unique, allowing these stitches to give the bag a sturdy and secure look while remaining soft to the touch.
Free Crochet Drawstring Bag Pattern to Add to Your Collection

The outline starts with making chains of about 30 centimeters in length. Once completed, double crochets are worked over these chains to build a strong base. The edges are rounded with extra stitches, making the bag durable and spacious. You then move to the body, using alternating rows of basic and decorative stitches to create the beautiful texture that makes the bag stand out.
Finally, sturdy handles are added by working chains for 30 centimeters each and reinforcing them with multiple rows of single crochet. This ensures the bag feels firm yet comfortable when held. The rounded base and expanded outline make it ideal for carrying coins, candies, or even small notebooks.
This crochet bag is not just simple but also beautiful and practical. You can use it daily or gift it to someone special. If you love handmade items, this pattern will make you smile every day.
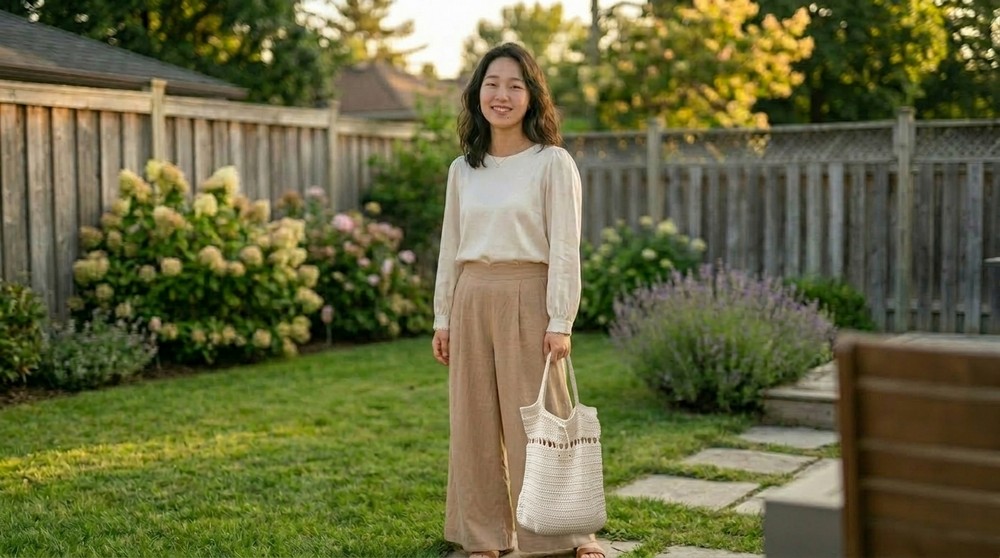
Crochet Eco Bag Pattern
Materials Needed
- Yarn: #6 cotton yarn or #8 cotton yarn (you can choose the weight based on your preference).
- Hook: 4.5mm crochet hook (or an appropriate size for your yarn choice).
- Accessories:
- Scissors
- Ruler (to measure lengths like straps, base size, and height)
- Stitch markers (optional, but very helpful for marking the handles and base points)
Gauge
- Gauge Swatch: Work in double crochet (dc) to achieve 10 cm = 10 rows and 14 stitches.
- Adjust your hook size if needed to match the gauge and achieve the correct finished size.
Finished Size
- Base length: 40 cm (approx.)
- Width: 10 to 12 cm depending on the tension.
- Height: 35 cm (without handles).
- Handle length: 30 cm each.
Special Techniques
- Invisible Join for Rounds: To make your transitions between rounds seamless, use a slip stitch followed by chain stitches to begin a new round.
- Working in Curves: Evenly space increases at rounded corners to achieve a smooth curve.
Pattern Instructions
1. Bag Base (Oval shape)
- Foundation Chain: Chain 40 stitches, ensuring your chain measures 30 cm. This will form the base of your bag's oval.
- Row 1 First Round:
- Chain 2 (acts as the first double crochet on one side of the chain).
- Work 1 double crochet (dc) into each chain stitch across.
- When you reach the end of this chain, work 5 dc into the last chain to form the curve.
- Rotate work and begin crocheting along the underside of the foundation chain by working 1 dc in each chain across.
- At the other end, work 5 dc into the last stitch to form the second curve.
- Join with a slip stitch to the first chain 2.
Stitch Count: 40 dc + 10 increases (total = 50 stitches).
- Row 2 Increasing the Curve:
- Chain 2. Work 1 dc into each stitch along the straight side. At the curved ends of the oval, work 2 dc in each stitch of the curve (totaling 10 increases in each round).
- Repeat this method until you achieve a base size of 40 cm in length.
Tip: Note that the number of increases at the curve stays constant across rows to maintain an even oval.

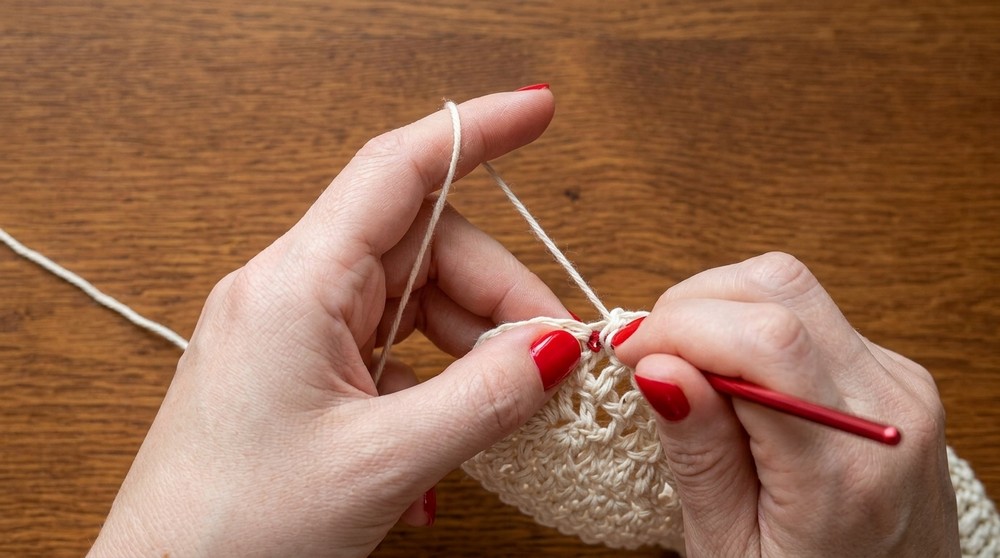
2. Body of the Eco Bag
- Transition to Straight Body Rounds: Begin working 1 dc in each stitch in continuous rounds without increases. Use a stitch marker to mark the first stitch of each round if useful. Continue this for approximately 30 rows to reach the desired bag height (around 35 to 40 cm).
- Optional Customization: Adding Width: After every 4 rows of the straight body, you can add a single round with increases at the curve (e.g., every fourth stitch gets an extra dc). This will create a gradual flare, making your eco bag a bit wider at the top.

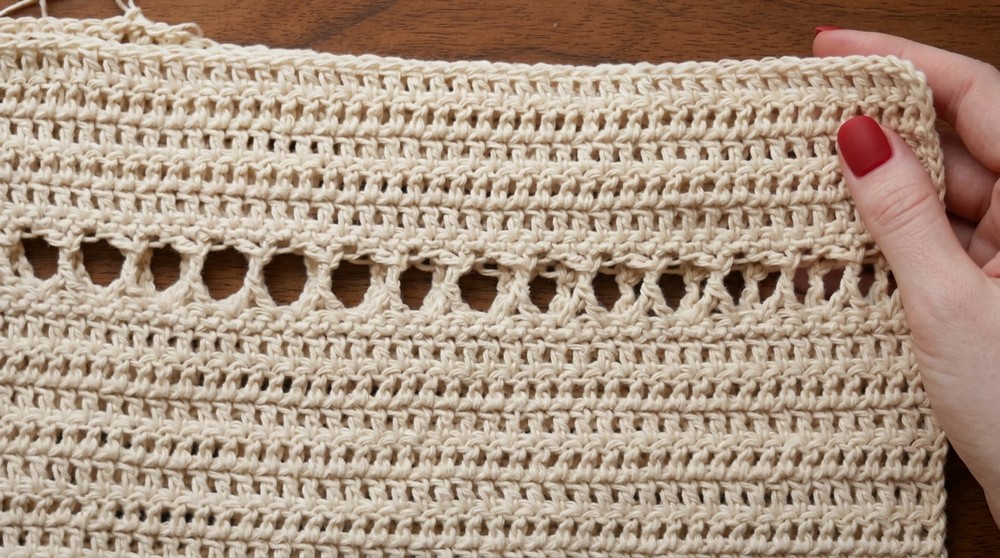
3. Stylish Border with Patterned Stitch (X Pattern)
- Single Crochet Preparation Row: Work 1 round of single crochet (sc) along the top edge to prepare for the patterned border. Join with a slip stitch, chain 1, and turn.
- "X" Stitch Round:
- Chain 1. Skip the first stitch; work 1 double crochet (dc) in the next stitch.
- Come back to the skipped stitch and work 1 dc into it, forming an X shape.
- Repeat this X stitch pattern across the round. Join with a slip stitch, chain 1, and turn.
- Final Single Crochet Row: Complete the border by working 1 round of single crochet (sc) evenly over the X stitch row to reinforce.
4. Bag Handles
- Marking the Handle Placement: Spread the bag flat, and mark 10 to 15 cm sections on either side of the top opening for where the handles will be attached. Leave a gap of 20 cm on each long side between the handles.
- Creating the Handles:
- Attach your yarn at one marker, and chain 46 stitches (or adjust to reach 30 cm).
- Skip the gap marked for the handle and attach to the next marker with a single crochet.
- Repeat this for the second handle.
- Reinforcing the Handles:
- Work 4 rows of single crochet over each handle and along the entire upper edge of the bag to make the handles strong and durable.
- Join with a slip stitch; fasten off and weave in the ends.

Finishing Touches
- Weaving in Ends: Secure all loose ends firmly to ensure longevity during washing and use.
- Optional Details: Add decorative elements like wooden beads or a tassel threaded through the top edge for added charm.
Customization Ideas
- Size Customization: Adjust the foundation chain to make a larger or smaller bag. For example, start with 50 chains for a wider base or 30 chains for a smaller bag.
- Color Options: Experiment with color blocking or create stripes using different yarn colors.
- Strap Design: Opt for braided or woven yarn straps instead of single crochet for a creative touch.
Tips for Success
- Always measure your work as you go to ensure the dimensions match your expectations.
- Use a sturdy yarn like cotton for durability, especially if you plan to use this eco bag for carrying groceries or books.
- If you find it challenging to work the curved base, place stitch markers at the increase points to remind yourself.

Conclusion & Final Look
This elegant crochet eco bag is practical for daily use and visually stunning, thanks to the stylish "X" border and reinforced handles. The bag is easy to make with a sturdy base and smooth curves, ensuring it can hold everything from groceries to books while retaining its shape.
If done correctly, the result is a sleek, reusable, and sustainable accessory you'll be proud to carry. Share your creations with your friends and family, and experiment with colors and beads for a personalized look.