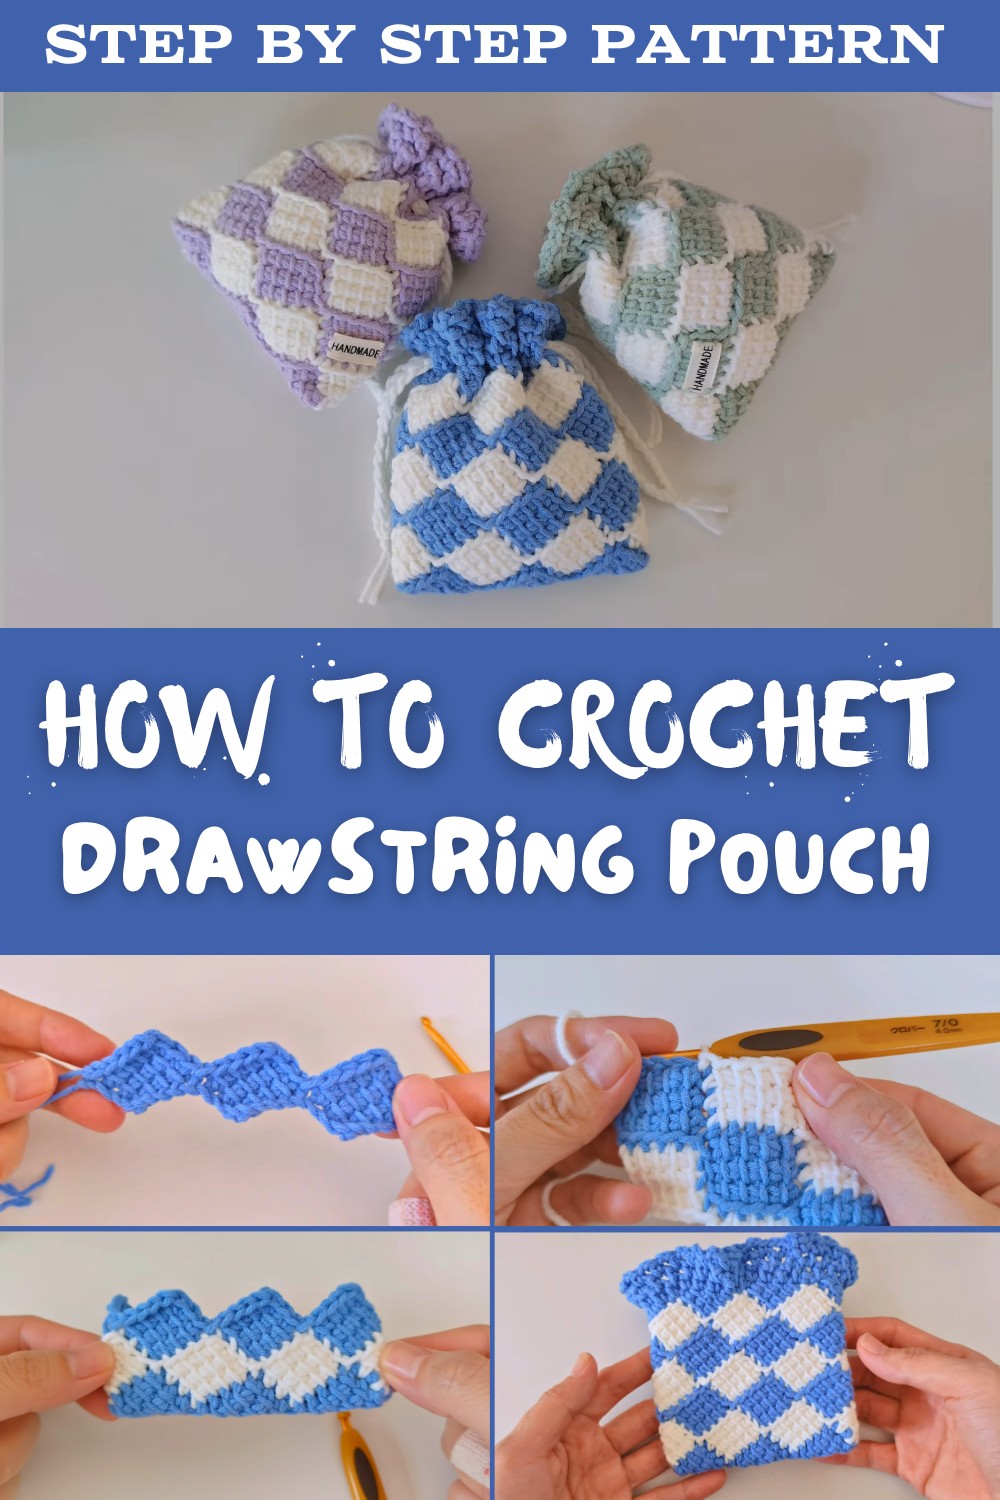
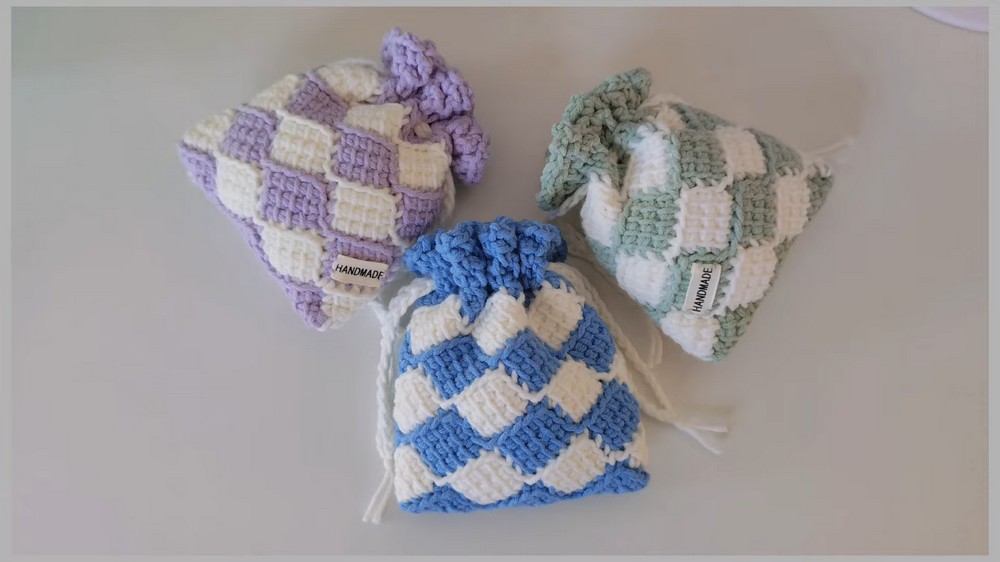
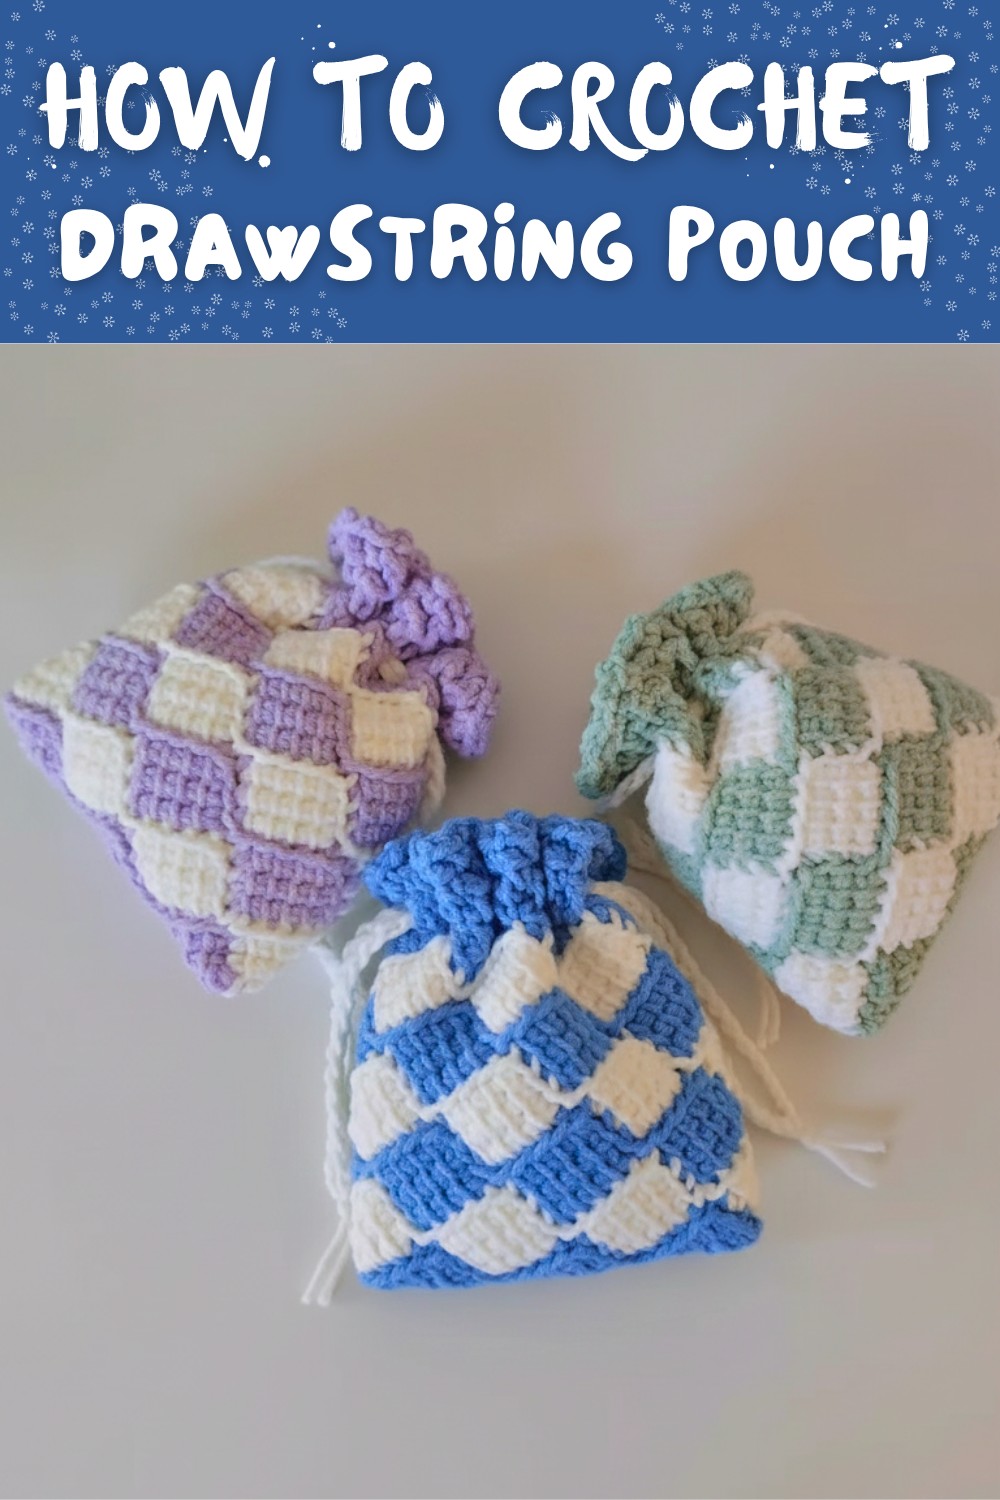
Crochet Drawstring Pouch Free Pattern – Perfect for Small Essentials
Create a gorgeous crochet drawstring pouch effortlessly with this free pattern that's for storing tiny treasures or gifting something handmade and special.
Looking for a stylish way to keep small essentials organized? A free crochet drawstring pouch pattern offers the perfect solution, blending beauty and function into a single accessory. Made with soft textured stitches, this pouch brings charm to everyday moments, whether it's holding coins, keys, or little keepsakes. The drawstring closure ensures everything stays secure while adding a lovely design element that sets the pouch apart.
Drawstring Pouch Free Crochet Pattern
Its appearance can be easily customized with gentle pastels for a subtle touch or bold, vibrant hues for a standout look. Lightweight and portable, this pouch is as practical as it is adorable, fitting comfortably in your bag or adding flair when carried on its own. A piece like this not only serves a purpose but also becomes something special, bringing creativity and personal style into your everyday routine.

Tunisian Drawstring Pouch Crochet Pattern
1. Materials List
Yarn
- Recommended Yarn: Happy Cotton Yarn (by Woolclub)
- Note: Choose lightweight (Category 2 or 3: DK weight) cotton yarn. This yarn comes in multiple colors, allowing for personalization.
- Use contrasting or complementary colors for the blocks and drawstring.
Hook Size
- Crochet Hook: 4mm Tunisian crochet hook.
- A regular crochet hook may work, but ensure it has no ergonomic handle if using Tunisian stitches.
Optional Items:
- Yarn needle (for weaving in ends).
- Handmade tag or charm (for decoration).
- Scissors.
2. Skill Level
Intermediate to Advanced
- Requires basic knowledge of Tunisian crochet stitches and simple crochet techniques.
3. Key Abbreviations
Note: Pattern uses US crochet terminology.
- ch: Chain
- sc: Single crochet
- sl st: Slip stitch
- yo: Yarn over
- Tss: Tunisian Simple Stitch
Special Note: The pattern involves forward and return passes in Tunisian crochet. Always pull through 2 loops at a time during the return pass.
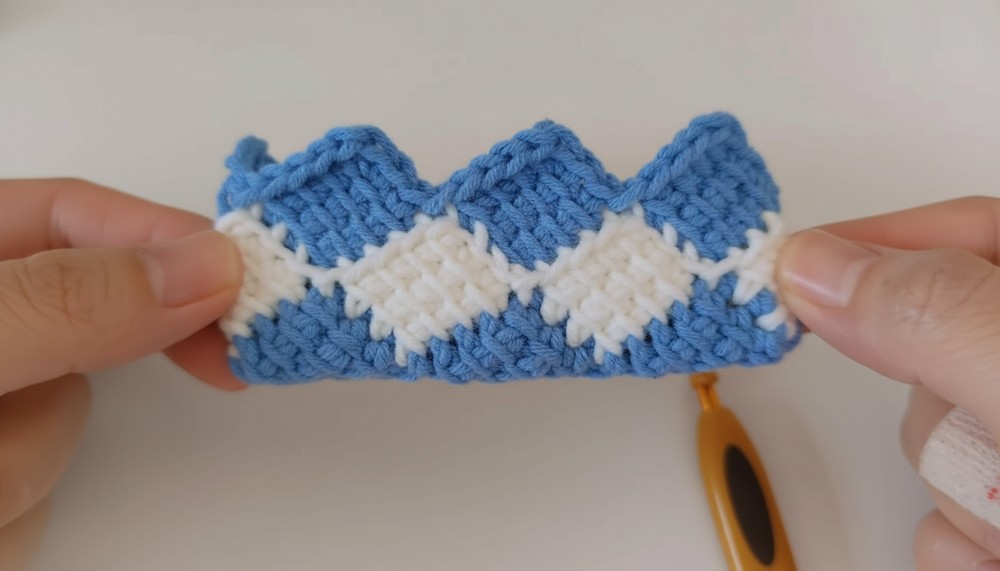
4. Pattern Overview
The pouch is constructed with Tunisian diamond blocks for the base, worked upward until desired height. A drawstring section is added to form neat eyelets, and chain cords are used for functionality. The final piece can be customized entirely based on size preference.
Finished Size
- Approx. Height: 6-8 inches (customizable).
- Approx. Width: 5 inches (customizable).
5. Step-by-Step Pattern Instructions
Step 1: Foundation Chain
Using your chosen yarn:
- Chain 25 (this accommodates 3 diamond blocks).
Formula for a larger base: (rows across + rows up) × number of blocks + 1 = total number of chains. Adjust the block count or rows to make the pouch bigger or smaller.
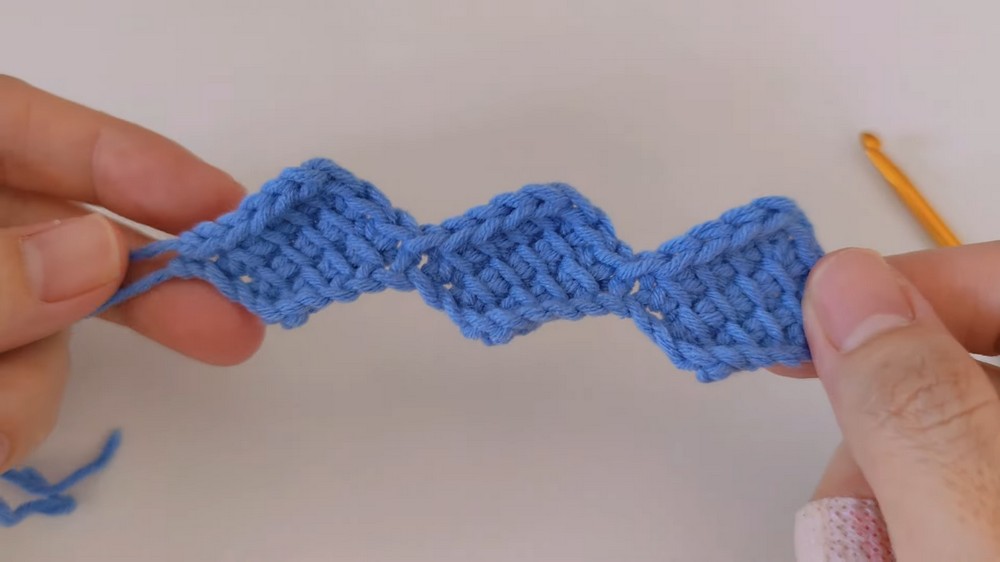
Step 2: Base - Diamond Blocks
The base consists of 3 diamond blocks, each with 3 rows up and 5 rows across. Follow these instructions for each diamond block:
Diamond Block 1
Start from the foundation chain:
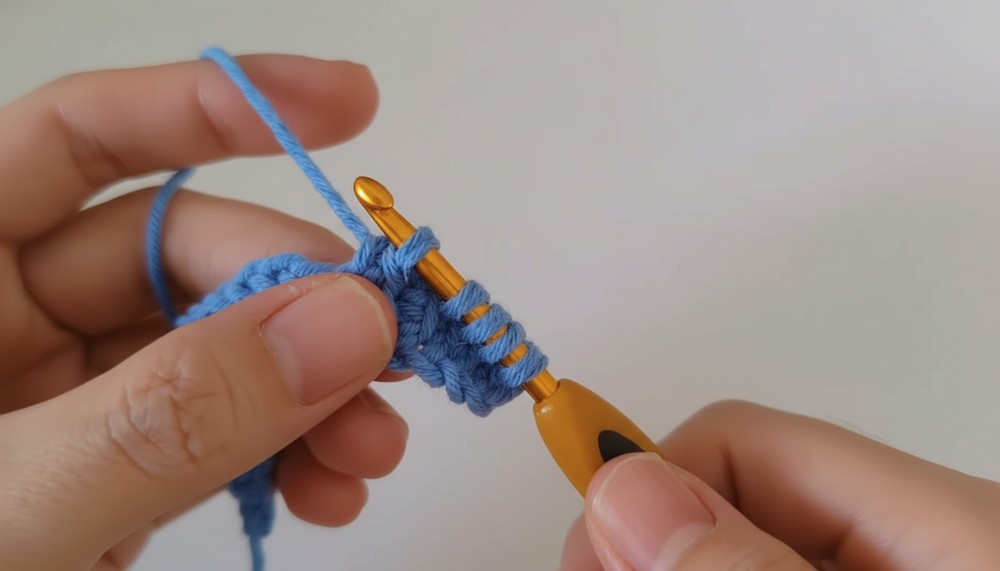
- Row 1 - Forward Pass:
- There is already 1 loop on the hook.
- Insert your hook into the second chain from the hook, pull up a loop.
- Pull up 1 loop from each of the next 4 chains.
- You should now have 6 loops on the hook.
- Row 1 - Return Pass:
- Yarn over, pull through 2 loops (including the first time).
- Repeat until 1 loop remains.
- Row 2 - Forward Pass:
- Skip the first vertical bar (the loop already on the hook).
- Insert the hook under the next 4 vertical bars, pulling up a loop from each.
- Then, insert the hook into the next unused chain from the foundation chain, yarn over, pull up a loop.
- You should now have 6 loops.
- Row 2 - Return Pass:
- Yarn over, pull through 2 loops at a time until 1 loop remains.
- Row 3 - Forward Pass:
- Skip the first vertical bar.
- Pull up a loop from the next 4 vertical bars.
- Insert the hook into the next unused chain and pull up a loop.
- You now have 6 loops.
- Row 3 - Return Pass:
- Yarn over, pull through 2 loops at a time until 1 loop remains.
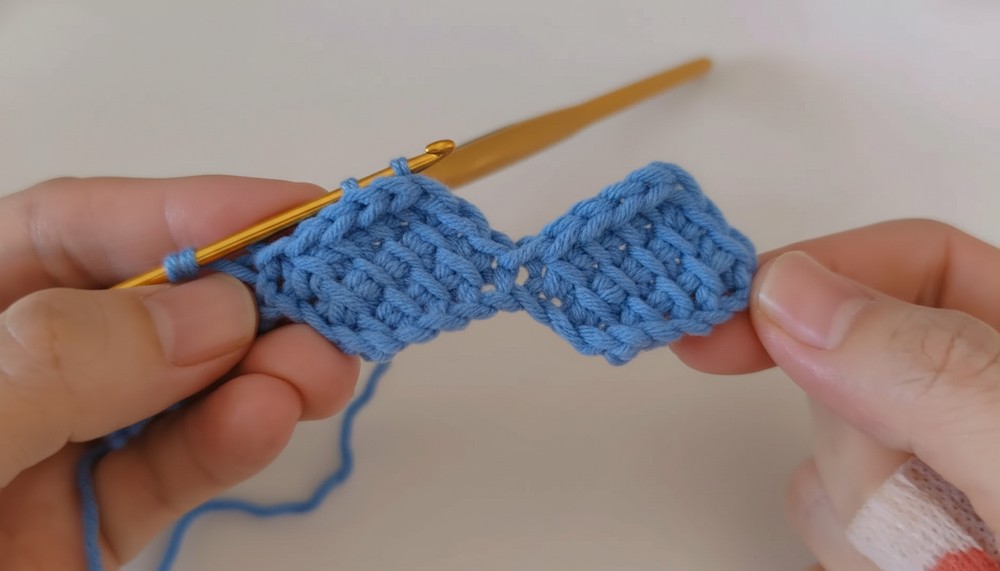
- Bind-off Row:
- Insert your hook under the first vertical bar, yarn over, pull up a loop, and immediately pull through the loop on your hook (like a sl st).
- Slip stitch into each of the next 3 vertical bars.
- Insert your hook into the next unused chain on the foundation chain, pull up a loop, and sl st to finish the diamond.
Diamond Blocks 2 & 3
Repeat all steps for Diamond Block 1, starting from the next unused chain in the foundation chain for each subsequent block.
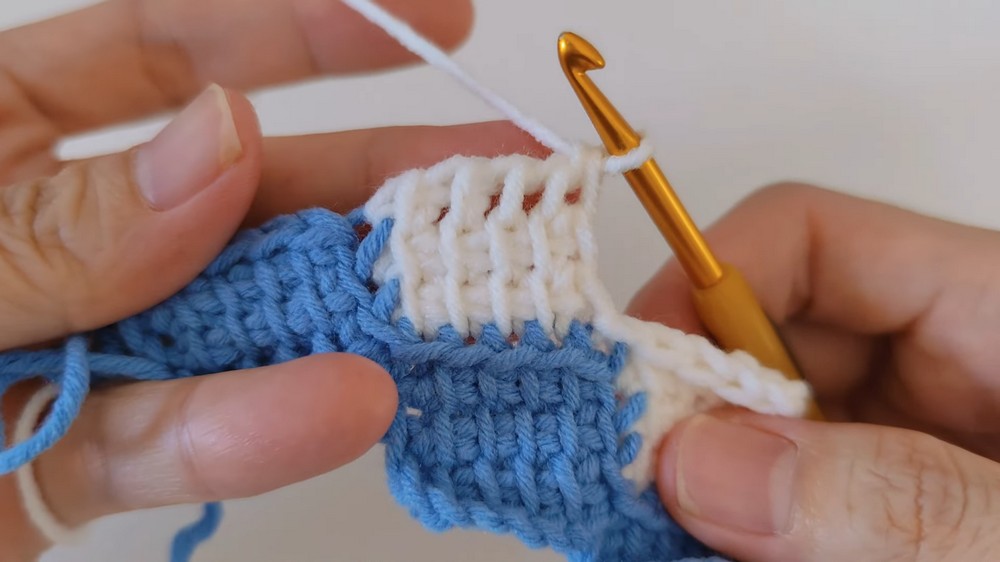
Step 3: Continue Adding Diamond Blocks
Continue adding diamond blocks upward in rows until the pouch reaches the desired height. Each block is worked similarly to the base.
Once you reach the height you want, move to the half diamond block section.
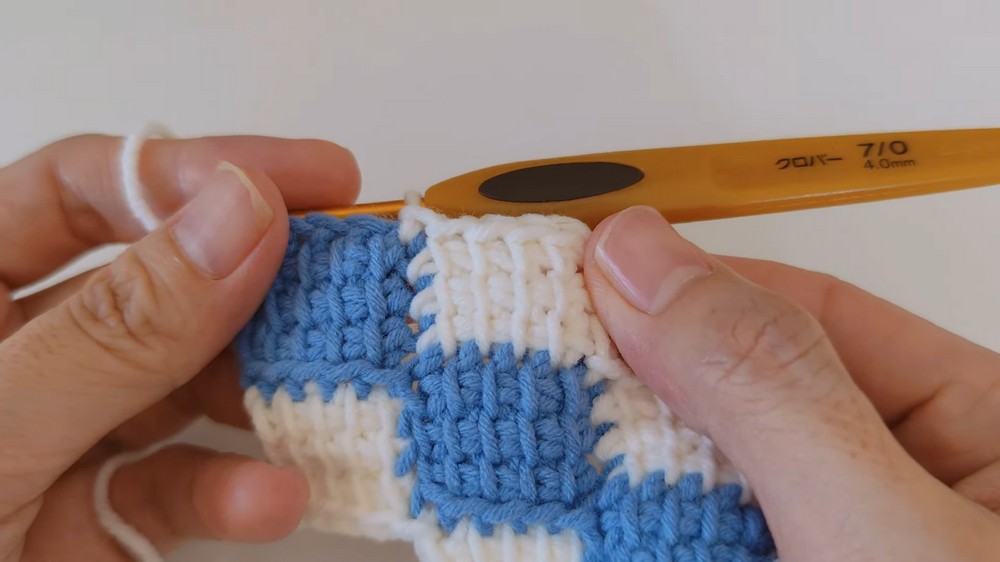
Step 4: Half Diamond Blocks (Straight Opening)
Follow these steps to crochet half diamond blocks along the top of the last row:
- Row 1 - Forward Pass:
- Insert the hook and pull up one loop from each of the next 5 stitches.
- You should now have 6 loops on the hook.
- Row 1 - Return Pass:
- Yarn over and pull through 2 loops repeatedly until 3 loops remain.
- Yarn over and pull through all 3 loops at once to create the triangle's tip.
- Row 2 - Forward Pass:
- Skip the first vertical bar (loop on hook).
- Skip the next vertical bar (reducing the loop count).
- Pull up loops from the next 3 vertical bars.
- Insert your hook into the next stitch and pull up a loop.
- You should now have 5 loops on the hook.
- Row 2 - Return Pass:
- Yarn over, pull through 2 loops at a time until 3 loops remain.
- Yarn over and pull through all 3 remaining loops.
- Row 3 - Forward Pass:
- Skip the 1st vertical bar.
- Pull up loops from the next 2 vertical bars.
- Insert the hook into the next stitch and pull up a loop.
- You should have 4 loops on the hook.
- Row 3 - Return Pass:
- Yarn over, pull through 2 loops until 3 remain.
- Yarn over and pull through all 3 loops.
- Bind-off Row:
- Skip the 1st vertical bar, then sl st to bind off each vertical bar.
Repeat for all gaps along the top edge of the pouch to level it into a straight opening.
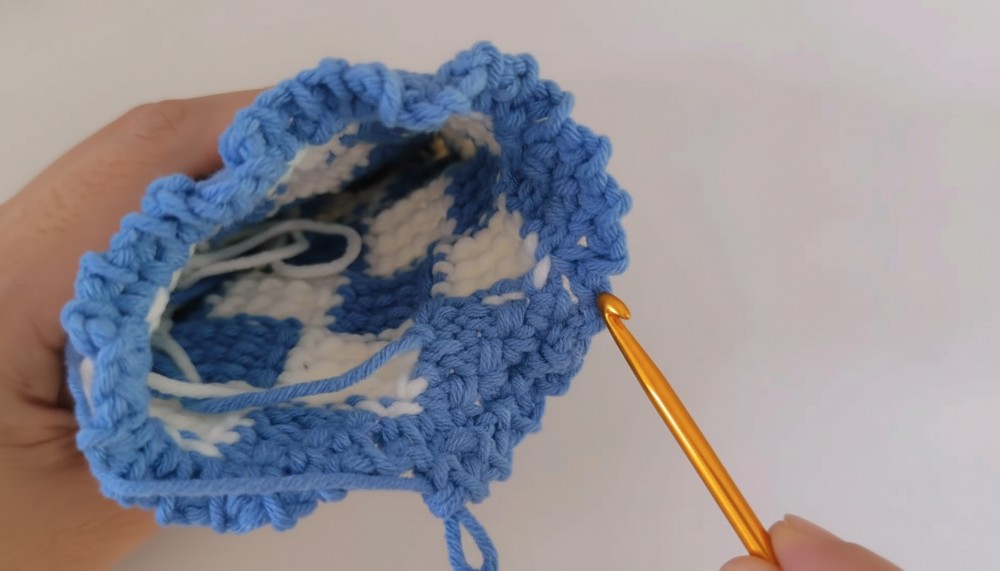
Step 5: Drawstring Section
Add neat eyelets for the drawstring:
- Round 1:
- Work single crochet, chain 2, single crochet into each stitch.
- Repeat around the top edge.
- Slip stitch into the first sc to join.
- Round 2:
- In each chain-2 space from Round 1: Single crochet, chain 2.
- Repeat around. Slip stitch into the first sc to join.
- Round 3:
- Repeat Round 2.
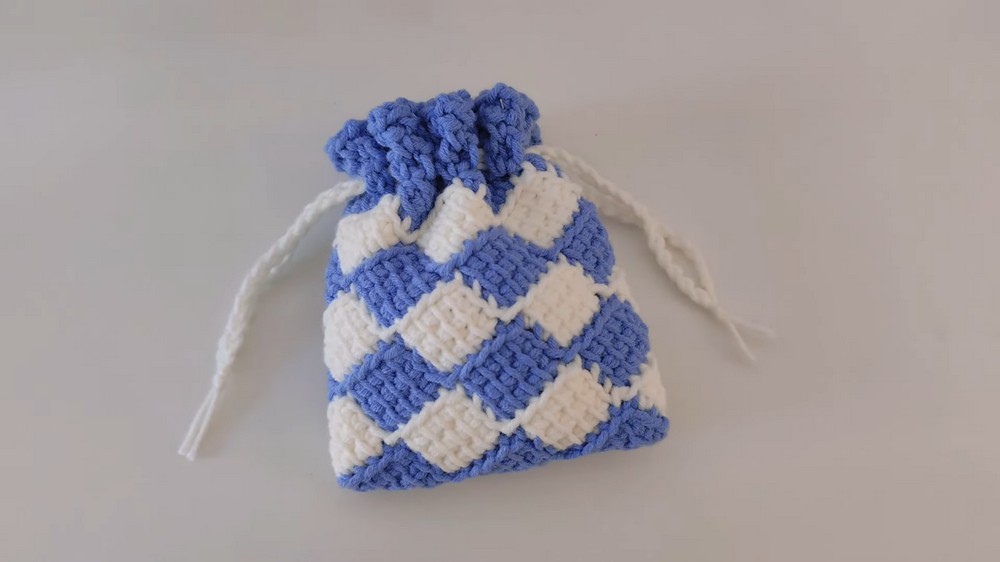
Step 6: Drawstrings
- Crochet two chain cords (approx. 50-60 chains each).
- Weave the two cords through the eyelets from Round 1, one from the right and one from the left.
- Let the cords meet and tie at opposite ends.
6. Special Notes & Tips
- Keep your tension loose with Tunisian crochet to prevent tightness; this will make the blocks lay flat and reduce curling.
- Customize the height and width of the pouch using the base formula:
(rows across + rows up) × blocks + 1 for foundation chain.
7. Conclusion
Your Tunisian drawstring pouch is now complete! Add decorative charms, tags, or embellishments to make it unique. This elegant pouch is suitable for small storage, memorable gifting, or showcasing your crochet skills.
This pattern offers scope for customization, allowing you to vary the size, color combinations, or even stitch textures.