
Free Crochet Glasses Case Pattern For Travel Protection
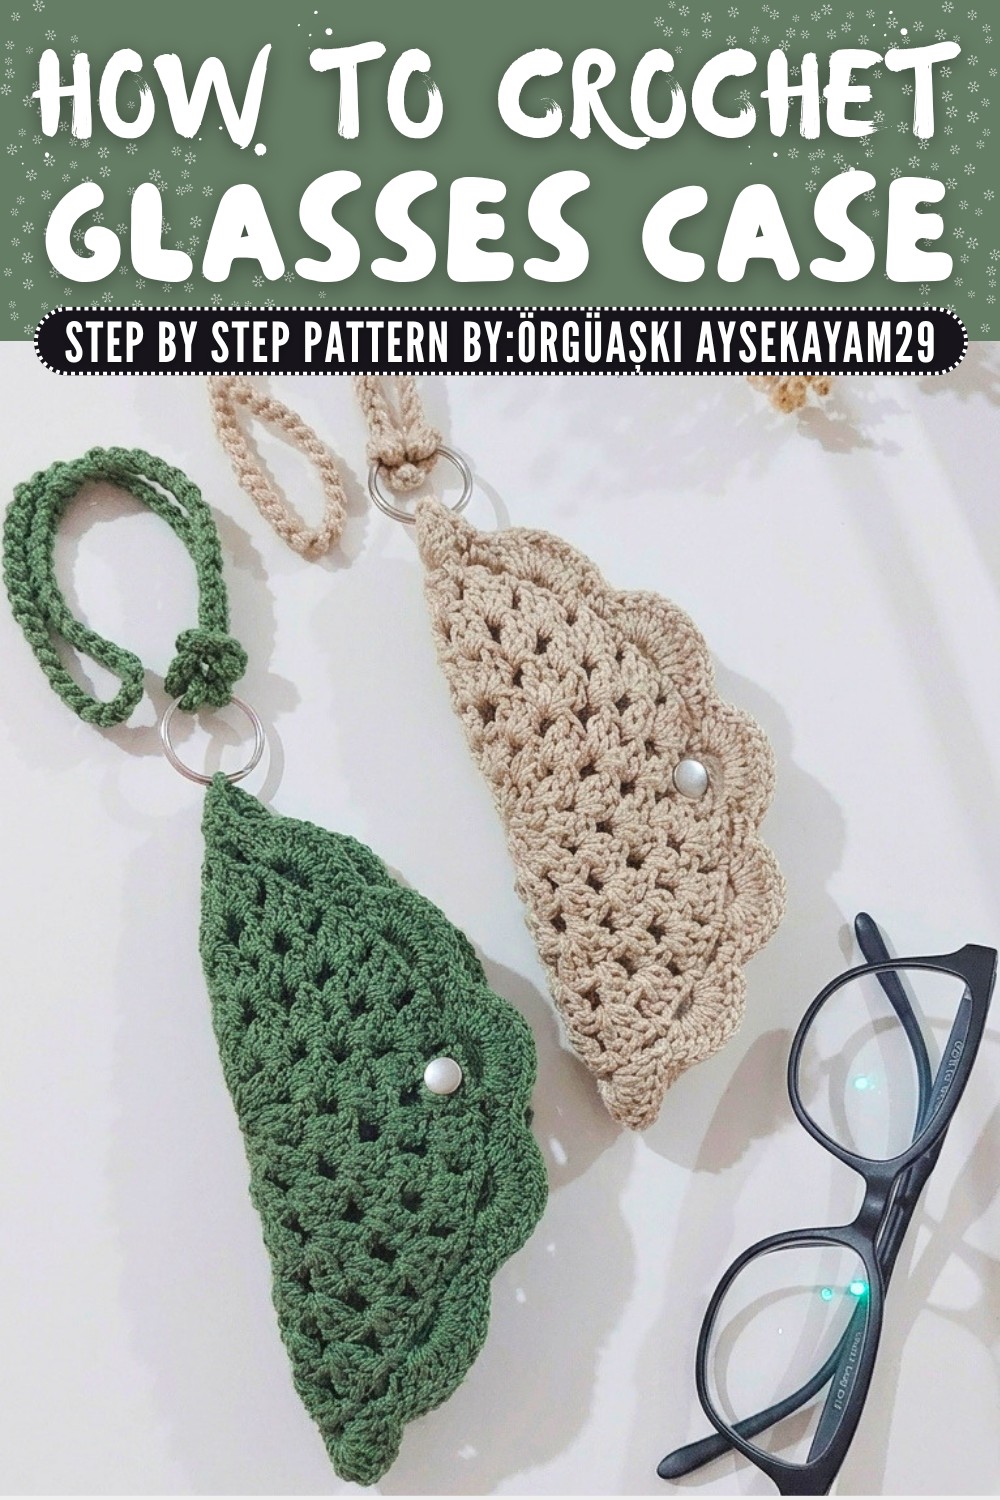
Protect your favorite glasses with this Free Crochet Glasses Case Pattern, a stylish and soft cover that adds charm and is perfect for daily use.
Glasses are an essential part of our life, helping us see clearly and protecting our eyes from dust and sunlight. So why not create something beautiful and unique to keep them safe? A handmade crochet glasses case is not only practical but also adds a touch of style and personality to your everyday life. This easy and fun project allows you to crochet a soft, protective cover for your glasses while showing off your creativity. You can choose any color you love, and the design works for different types of yarn. The case has charming details like rivets, beads, or pearls, which make it more decorative and personal. You can even add lace edges to make it look extra fancy and stylish.
Fun and Functional Free Crochet Glasses Case Pattern for Book Lovers

The features of this glasses case make it special. It is soft yet sturdy, made with strong stitches like double crochets and a magic ring. The lace edges are simple to create, and the case is double sided, giving you more ways to use it. There's also a small rope at the top that lets you attach it to a keychain or bag, making it easy to carry everywhere.
This glasses case is perfect for keeping your glasses safe from scratches. It's lightweight, and its small size means it can fit into any purse or pocket. The round design makes it even sweeter and easier to open and close.
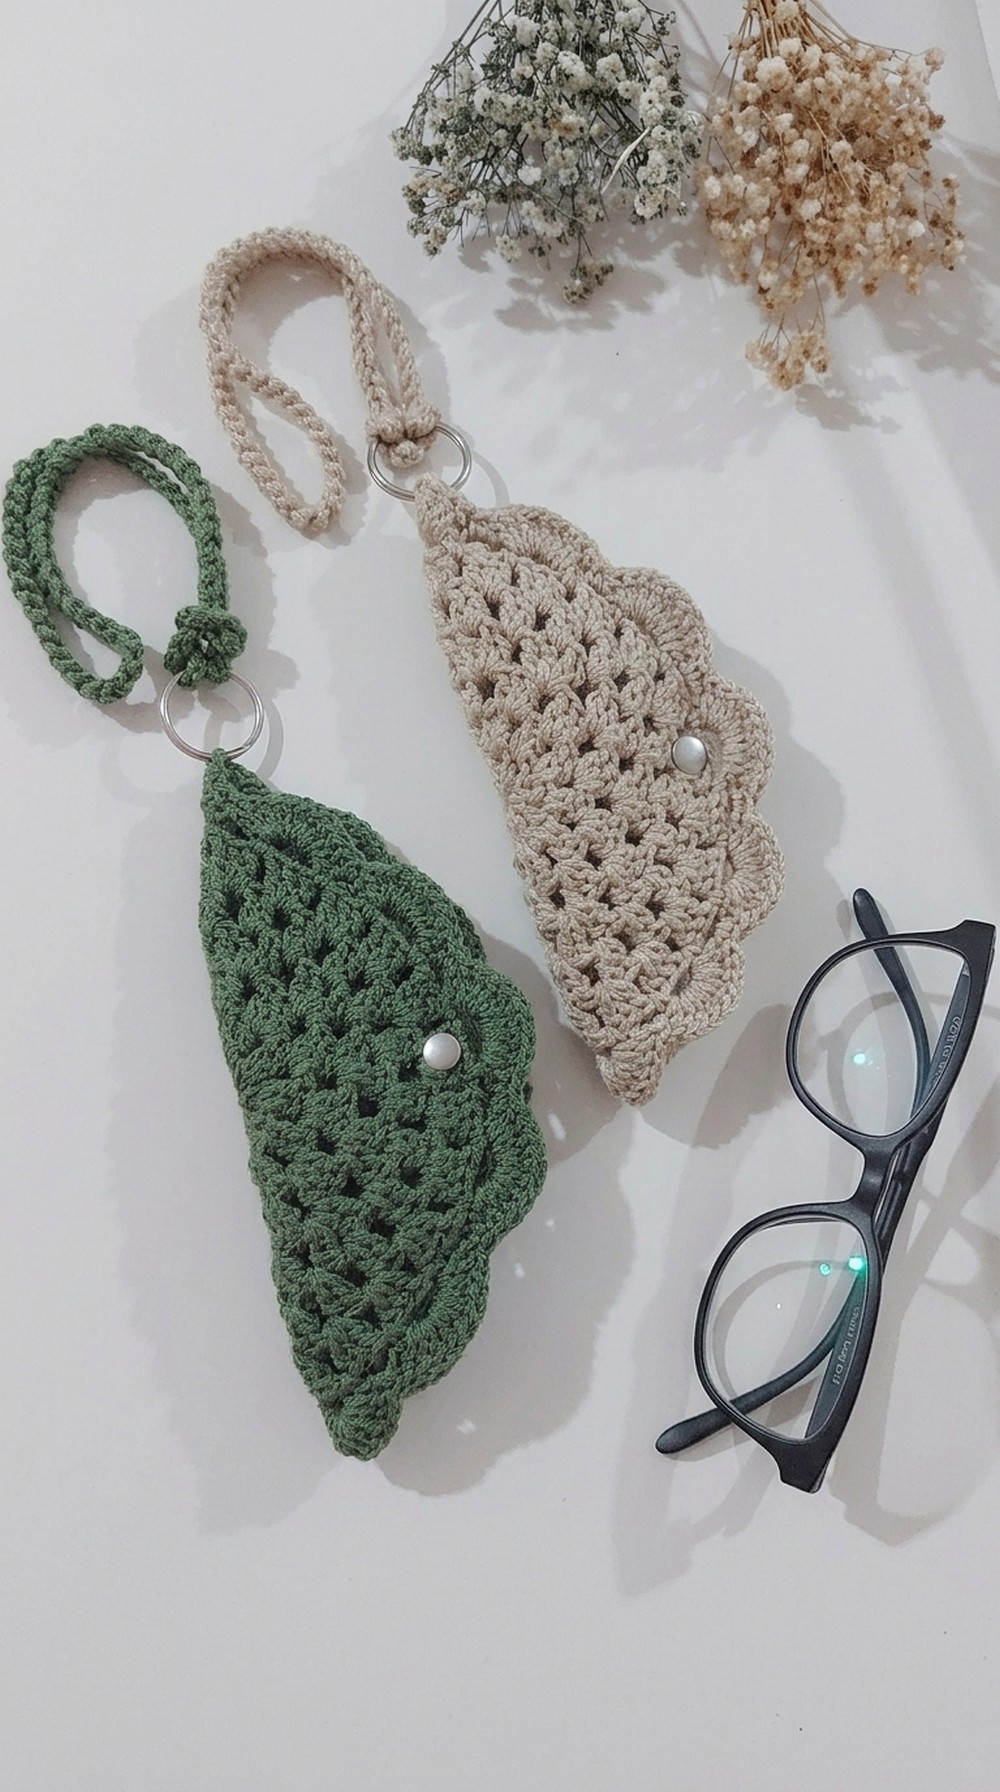
Crochet Glasses Case Pattern
Materials
- Yarn
- Nako Diamonds (or similar fingering/light sport weight acrylic or cotton yarn).
- Hook
- 1.75 mm crochet hook (called "size 2" in the pattern).
- Notions / Accessories
- Rivets, snap fastener, or button (for closure).
- Keychain ring or carabiner style ring (for attaching to bag/keychain).
- Scissors.
- Tapestry needle.
- Optional: Lighter (to slightly melt synthetic cord ends, if used).
Special Techniques Used
- Magic Ring (Magic Circle)
- Double Crochet (dc) in Two Passes
- Slip Stitch (sl st)
- Working in Chain Spaces
Pattern Instructions
Part 1 - Round Base (Body of Glasses Case)
Round 1 - Foundation Slots
- Make a magic ring.
- Chain 4:
- First 3 chains count as 1 double crochet.
- The 4th chain counts as a chain space.
- Into the magic ring:
- Work 1 dc, chain 1.
- Repeat (dc, chain 1) until you have 12 dc separated by chain 1 spaces, including the first dc created by the chain 3.
- Join with a slip stitch into the 3rd chain of the starting chain 4 (top of the "dc" part).
- Pull the yarn tail to close the ring tightly.
You now have 12 "slots" (chain 1 spaces) around the center.
Round 2 - Two Double Crochets per Slot
- Chain 3 (counts as 1 dc).
- Work 1 dc into the same chain 1 space (the first slot).
- Chain 1.
- Next slot: Work 2 dc into the chain 1 space, chain 1.
- Repeat (2 dc in each space, chain 1) around.
- At the end, join with a slip stitch into the top of the starting chain 3.

Each slot now holds 2 dc, still separated by chain 1 spaces.
Round 3 - Three Double Crochets per Slot
- Slip stitch into the first chain space to position your hook in the middle of the slot.
- Chain 3 (counts as 1 dc), work 2 dc in the same chain 1 space (total 3 dc in this slot).
- Chain 1.
- Next slot: Work 3 dc into the chain space, chain 1.
- Repeat around: 3 dc in each slot, chain 1 between clusters.
- Join with slip stitch into top of starting chain 3.

Now you have 12 groups of 3 dc, separated by chain 1 spaces.
Round 4 - Increasing Slots Again
From the transcript, the pattern alternates between rounds where you simply increase the number of double crochets in each space and rounds where you increase the number of spaces. Here the goal is to reach 24 spaces.
- Slip stitch to the next dc and then to the next chain space to start in a space.
- Chain 3 (counts as dc), work 1 dc into the same space (2 dc total), chain 2, work 2 dc into the same space again.
- This turns each space into two separate spaces because of the chain 2 in the middle.
- Chain 1, move to the next space:
- Work 2 dc, chain 2, 2 dc into the same space.
- Repeat this pattern around the circle.
- Join with slip stitch into the top of the starting chain 3.
You have now increased the number of slots/spaces: about 24 spaces around.
Round 5 - Stabilizing with Two Double Crochets per Space
From this row, the model returns to "2 dc per space" but over the expanded number of spaces.
- Slip stitch into the next chain space to start.
- Chain 3, work 1 dc into the same space (total 2 dc).
- Chain 1.
- Next space: Work 2 dc, chain 1.
- Repeat (2 dc, chain 1) in each space around.
- Join with slip stitch into top of starting chain 3.
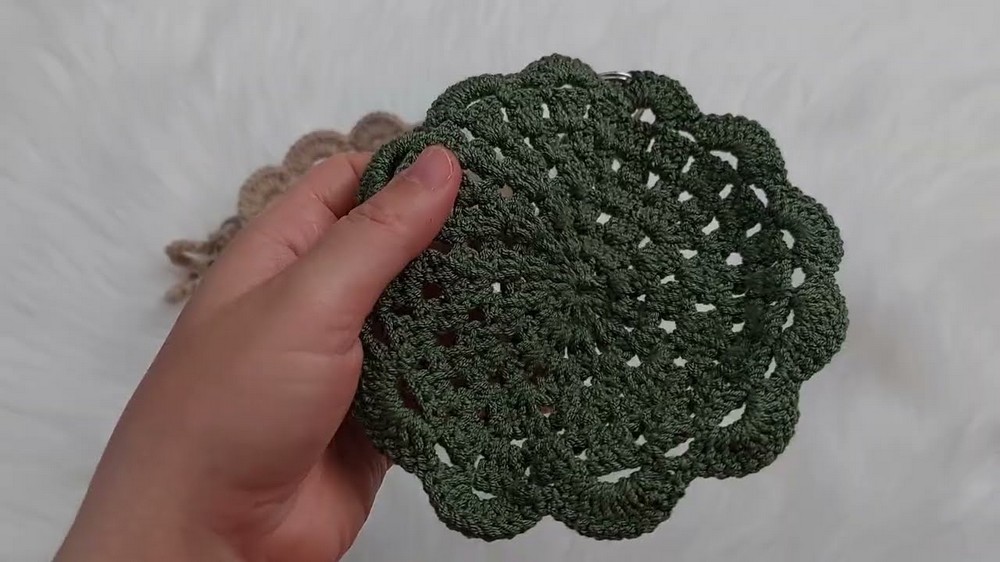
At this point, there are 24 spaces, each with 2 dc between chain 1 spaces. This forms a wide enough round body to cover the glasses lengthwise once folded.
Round 6 - Three Double Crochets per Space Again
- Slip stitch into the next dc and then into the next space.
- Chain 3, work 2 dc into the same space (total 3 dc).
- Chain 1, move to next space.
- Next space: Work 3 dc, chain 1.
- Continue 3 dc, chain 1 in each space around.
- Join with slip stitch.
This round adds height and prepares the base for the decorative edge.
Part 2 - Chain Loops for Edging
Round 7 - Chain 5 Edge Loops
- After joining Round 6, slip stitch into the next dc, then into the following space, so you are working from the chain space.
- Chain 5.
- Skip to the next space and secure with 1 single crochet (sc).
- Chain 5 again, sc into the next chain space.
- Repeat (chain 5, sc into next space) all the way around the circle.
- At the end, join with slip stitch into the first chain space where you began.
You now have evenly spaced chain 5 loops around the circumference. These will form the base for the scalloped lace edge.
Part 3 - Lacy Edge
Round 8 - Scalloped Edging (9 dc per Loop)
- After joining, chain 2 (this helps position the yarn, but as the crocheters notes, she does not count these 2 chains as a full dc in the first scallop).
- First loop:
- Work 8-9 double crochets into the first chain 5 loop.
- For the very first loop, she works 9 dc because the initial chain 2 is not counted as a dc.
- Secure the scallop by working 1 sc into the next chain 5 loop.
- Next loop: Work 9 dc into the loop, then sc into the next loop.
- Repeat around: 9 dc in each loop, sc in the next loop, until all 12 loops have scallops.
- At the end, join with a slip stitch into the top of the small chain section where you began.
- Cut yarn and pull through. Weave in this end.
The round base with lacy edge is now completed; this is the main "middle section" of the glasses case.
Part 4 - Cord (Lace Tie)
- Cut a long piece of yarn, approximately 2 meters, and double it if you want a thicker cord.
- Attach yarn to your hook and chain about 80 chains (the pattern mentions 70-80 depending on how long you prefer).
- When you reach your desired chain length (around 80):
- Find a point roughly opposite your starting point on the round piece.
- Attach the end of the chain using a slip stitch through a suitable part of the scallop or the gap between "rails" (dc clusters) so that the cord is anchored at both ends to the circle.
- Cut yarn and secure, weave ends if needed.
- Optionally, slightly melt the synthetic yarn ends with a lighter to prevent fraying (do this carefully and only if yarn is suitable).
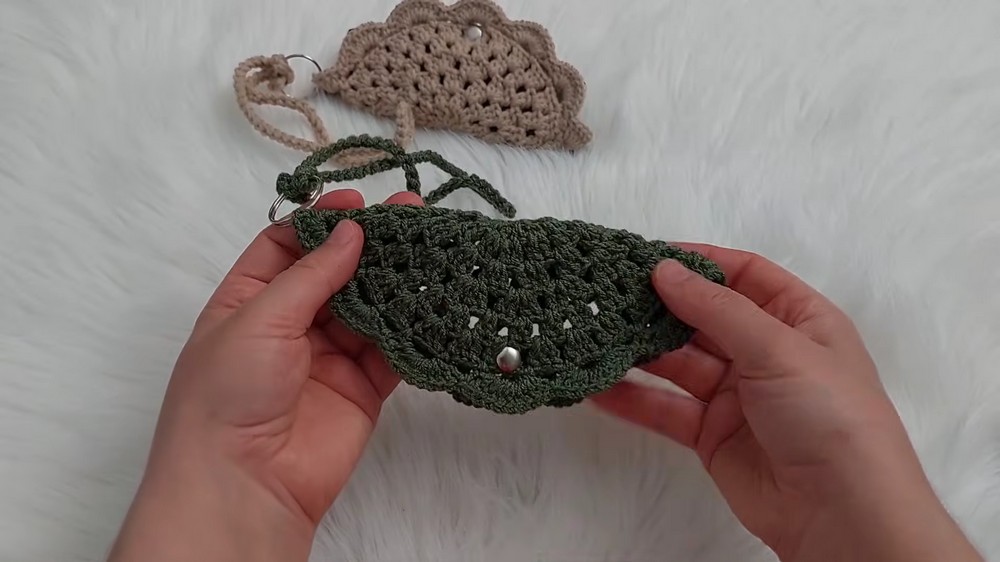
This cord will be threaded across the center when you fold the piece around your glasses, acting as the closure.
Part 5 - Attaching Rivet / Button / Keychain Ring
- Rivet/Button
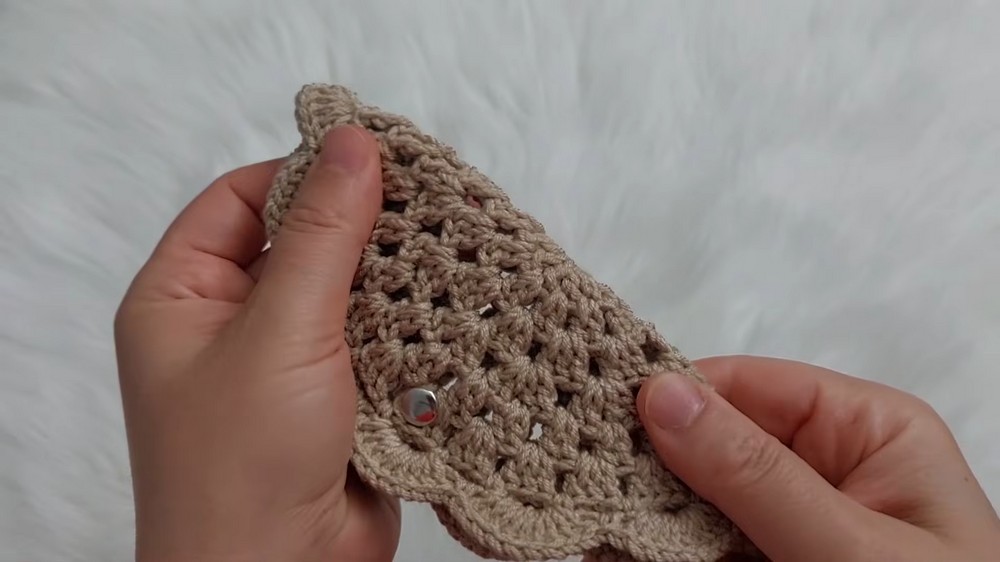
- Place your glasses inside the round piece, fold it over like a taco or envelope so the edges meet in the middle.
- Decide where the closure point should be (center front).
- Attach rivet halves or sew on a button or decorative bead/pearl at the meeting point so the two sides can be fastened.
- Keychain Ring
- Choose a lower corner or a spot on the outer edge that will be at the bottom when the case is hanging.
- Use a bit of yarn or the end of your cord to pass through the keychain ring and secure firmly with knots and/or sewn through stitches.
Finishing
- Weaving in Ends
- Use a tapestry needle to weave in all loose ends on the wrong side of the work. Trim excess.
- Shape and Test Fit
- Place your glasses inside, fold the piece, pull the cord across the middle and close with the rivet/button.
- Ensure the glasses fit snugly but not overly tight.
- Blocking (Optional)
- If your circle is slightly wavy, you may lightly steam block it: place a cloth over the piece and apply gentle steam, shaping with your hands to smooth the lace.
Tips and Suggestions
- Length of Cord: If you prefer the case to hang lower from your bag, increase the chain length. For a short closure just around the case, 70-80 chains are sufficient.
- Yarn Choice: Using a slightly firmer yarn helps the case hold its shape. Softer yarn gives a more flexible, pouch like feel.
- Closure Variations: If rivets are not available, you can use:
- Sew on snaps.
- A loop and button arrangement.
- Tied bow using the same cord.
Final Words
This round, lacy glasses case is both functional and elegant. The simple increases, chain spaces, and scalloped edge make it an enjoyable project that showcases beautiful texture. With a customizable cord, choice of closure, and option to attach a keychain ring, you can adapt this design to your personal style and everyday needs.