
Crochet Ruffle Skirt Pattern – So Easy and Free
Twirl into fun fashion with this free crochet ruffle skirt pattern featuring playful layers, soft comfort and a lovely look every day.
If you love crochet and want to create something stylish and unique, this Free Crochet Ruffle Skirt Pattern is perfect for you. It's simple, fun, and gives you the chance to make a beautiful handmade skirt that looks amazing. This skirt isn't just pretty-it's practical too. You can wear it for casual outings, special occasions, or add it as a playful touch to your wardrobe.
One of the best features of this pattern is the ruffles. They give the skirt a light, flowy look that adds elegance and movement. You can also customize the design with different colors, making it as bold or as simple as you like. Soft cotton or acrylic yarn is recommended for comfort, and the 5 mm crochet hook ensures the skirt has the perfect balance of stretch and structure.
Exclusive Free Crochet Ruffle Skirt Pattern Everyone Loves

The waistband is designed to fit snugly while allowing flexibility, so it's both comfortable and secure. The waistband's stretch is a great feature that lets you adjust the fit to suit your body. For those with bigger hips or smaller waists, you can easily adapt the pattern by adding increases in the skirt as needed. Plus, if you want an extra snug fit, you can weave a string belt or tie for added style and functionality.
Another stunning element of the ruffle skirt is its layered design. By using multiple rows and colors, the ruffles create amazing dimension and texture. It's not just a skirt-it's a fashion statement. And don't worry if you're new to crochet-this pattern is beginner friendly with straightforward stitches and easy to follow steps.
Create your own Free Crochet Ruffle Skirt today. Its beauty, versatility, and handmade charm make it a must try project. Get creative, have fun, and enjoy the satisfaction of wearing something made with love.
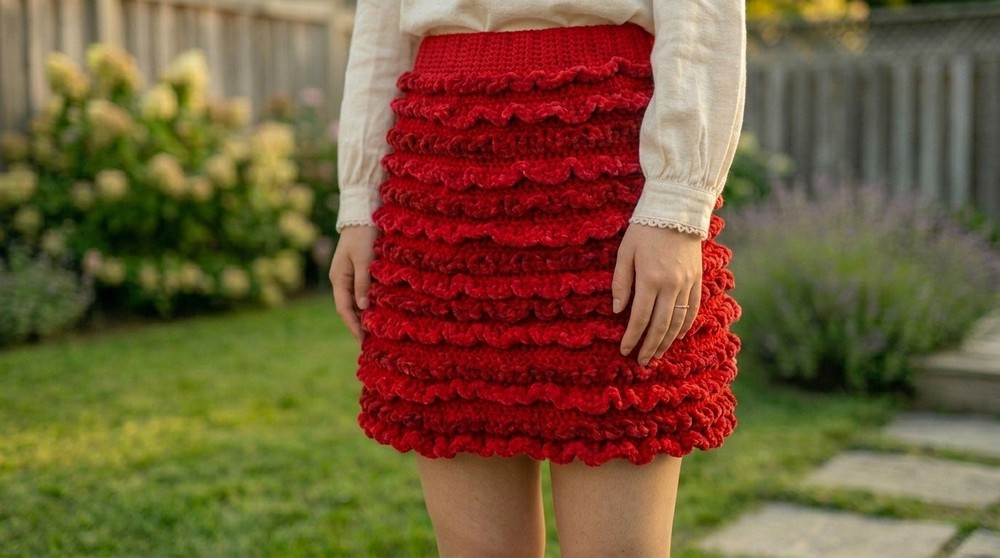
Crochet Ruffle Skirt Pattern
Materials Required
- Yarn:
- Acrylic or cotton yarn (approximately 3 to 4 skeins of 120 yards each, depending on skirt size and length).
- Multiple colors for a varied design if desired.
- Crochet Hook: 5 mm (US H/8) hook.
- Measuring Tape: To measure your waist and hips.
- Stitch Markers: To help with increasing and marking sections.
- Scissors.
- Tapestry Needle: For weaving in loose ends.
Special Techniques
- Half Double Crochet (hdc):
- Yarn over, insert hook, yarn over, and pull through all loops on the hook.
- Double Crochet (dc):
- Yarn over, insert hook into stitch, yarn over, pull through, yarn over, pull through two loops, and then yarn over and pull through the remaining two loops.
- Working in the Back Loop:
- Instead of inserting your hook under both loops, insert it under only the back loop of the stitch. This creates texture and elasticity for the waistband.
Pattern Instructions:
Step 1: Waistband
- Measure Your Waist:
- Decide where the skirt will sit (waist or hips) and measure this area. Subtract 1 to 2 inches from your measurement, as the waistband will stretch. For example, a 38 inch waist should start at approximately 36 inches.
- Begin with a Slip Knot:
- Using your 5 mm hook, create a slip knot.
- Foundation Chain:
- Chain 7. (This determines the thickness of your waistband.) Adjust the chain by removing or adding stitches if you want a thinner or thicker waistband.
- Row 1:
- Half double crochet (hdc) into the second chain from the hook and every chain across. (6 hdc total.)
- Row 2:
- Chain 1, turn your work, and hdc in the back loop only to maintain stretchiness. Repeat this for every stitch across the row.
- Repeat Rows:
- Repeat Row 2 until your waistband's length matches your adjusted waist measurement (e.g., 36 inches). Stretch to measure as you go.
- Join the Waistband:
- Fold the waistband in half, ensuring it's not twisted.
- Use single crochet (or slip stitch) to join the two sides together. Now, your waistband should form a loop. Avoid fastening off.

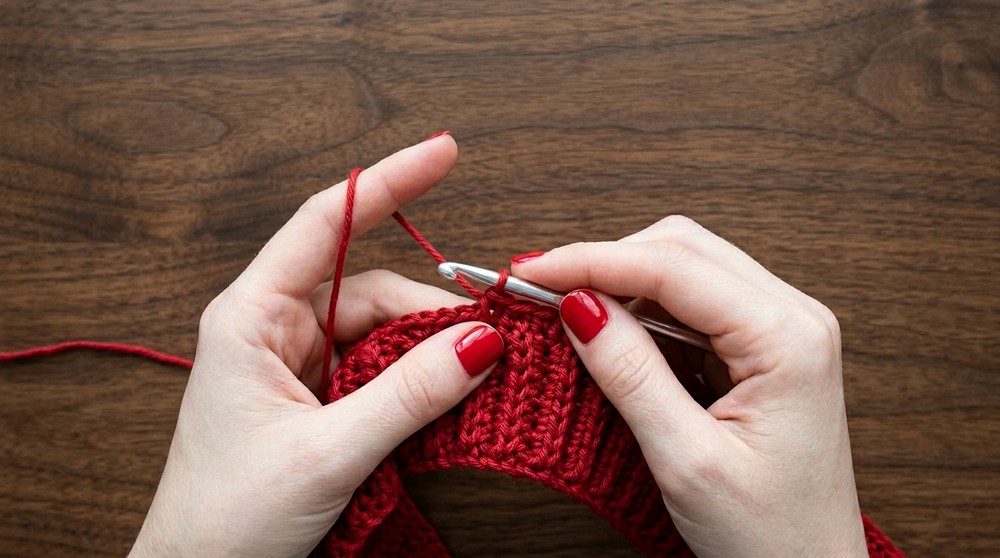
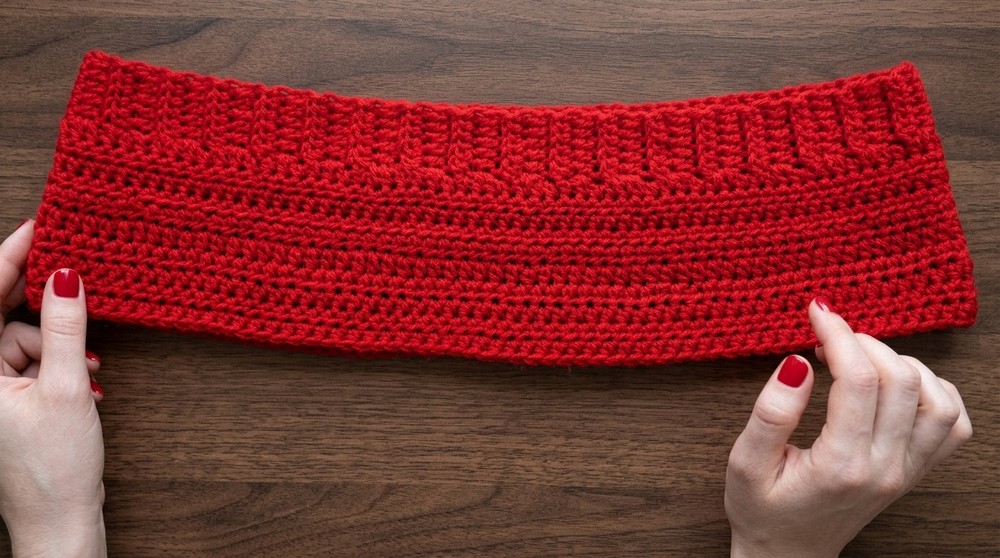
Step 2: Foundation Row for the Skirt
- Foundation Double Crochet:
- Chain 1 after joining the waistband, then start evenly spacing double crochets (dc) along the edge of the waistband's long side.
- Use the gaps in the stitches as a guide but keep spacing consistent to avoid unevenness.
- Check Fit:
- Once you've gone around the entire waistband, slip stitch into the first dc and turn your work. Try the waistband on to ensure it stretches comfortably over your hips.
Step 3: Body of the Skirt
- Determine Skirt Length:
- Decide how long you desire the skirt to be. Remember that standard lengths like mini, midi, or maxi will require different amounts of yarn.
- Rows for Skirt Body:
- Chain 1, turn the work, and half double crochet (hdc) in every stitch around.
- Use the same process for each row, turning at the end of each round to avoid a slanted seam.
- Increasing Stitches (Optional):
- If your hips are wider than your waist, increase stitches on the sides of the skirt to ensure a proper fit.
- Use stitch markers to mark the center points on each side of your skirt. Place 2 hdc in marked stitches to create subtle increases.
- Repeat increases every 1 to 2 rows until the skirt accommodates your hips comfortably.
- Continue:
- Crochet in this manner until your skirt height matches your desired length, excluding the ruffles (add extra rows if you plan to make a heavily ruffled skirt).

Step 4: Adding the Ruffles
- Choose Rows for Ruffles:
- Use the middle row of each colored block for the ruffles.
- Attach Yarn:
- Use a slip knot to attach a new yarn color to your chosen ruffle row. Insert the hook under the stitches of the row and pull the yarn through to start.
- Crochet the Ruffles:
- Work 2 to 3 double crochets (dc) under each stitch. If you want heavily ruffled layers, add 3 to 4 dcs per stitch.
- Continue Around the Skirt:
- Go all the way around the row, keeping the ruffles evenly spaced. Slip stitch into the first dc to complete the round.
- Repeat for Additional Colors:
- Start each new ruffle row the same way. Use the middle row of each color block for your new stitches, adding 2 to 3 dcs under each stitch.
Step 5: Finishing
- Weave in Ends:
- Use a tapestry needle to weave in all loose ends securely.
- Optional Tie Belt:
- If the waistband is slightly loose, use a contrasting or matching yarn to create a chain (equal to 2 to 3 times the waist circumference). Weave the chain under, over, and through the waistband to create a drawstring effect.
- Block the Skirt:
- Lightly steam or block the skirt to relax the stitches and ensure evenness. Use a blocking board or secure the skirt on a flat surface for drying.
Final Words
Your crocheted ruffled skirt is now complete. This customizable pattern allows endless creative possibilities-experiment with colors, lengths, and ruffles. Whether it's a playful statement piece or a simple one toned garment, this pattern is adaptable to your personal style.

Tips for Maintenance
- Washing: Hand-wash or machine wash on a gentle cycle in cold water. Use a mild detergent.
- Drying: Lay the skirt flat to dry to maintain its shape and prevent stretching.
- Storage: Store folded rather than on a hanger to avoid distorting the waistband.