
Cute Amigurumi Horse Keychain – Free Crochet Pattern
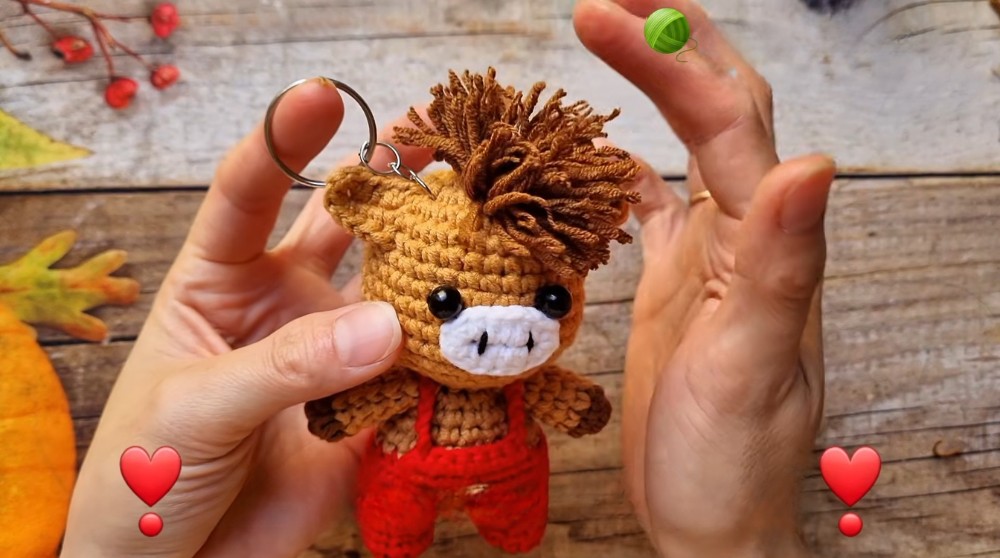
Crocheting a horse keychain is a fun and beginner-friendly project that combines creativity and practicality. With just a small amount of yarn, a little time, and some basic crochet skills, you can create a cute and charming horse for your keys, backpack, or as a thoughtful handmade gift. The process is satisfying because you get to watch a simple bundle of yarn transform into a miniature horse, perfect for animal lovers and crocheters looking for something unique and personal.
Free Crochet Horse Keychain Pattern - Amigurumi

This crochet horse keychain pattern stands out because of its beautiful features-like its expressive face and fluffy mane. You can use classic horse colors (like brown, white, or black), or get creative with playful mane shades such as pink, blue, or even rainbow. The main stitches used are single crochet and slip stitch, making it easy for beginners to follow along.
What's exciting is that, with a few minor changes (like adjusting the ear shape or adding a horn), this pattern lets you create other adorable animals, think donkeys, unicorns, or even cows! The final keychain usually measures about 3 to 4 inches, making it perfectly sized to carry wherever you go.
Important Steps You Can't Forget:
- Carefully read the entire pattern before starting.
- Select the correct hook size (typically 2.5mm-3.5mm for keychains).
- Stuff the head and body evenly for a neat finish.
- Attach all pieces securely; double knot if needed.
- Make sure the keychain ring is attached firmly so it won't fall off.

some issues you might face include uneven stitches, difficulty joining tiny parts, or the yarn splitting. These can be fixed by working slowly, counting every stitch, and choosing a soft, quality yarn. If you get stuck, simply re-watch the relevant part in the video and work step by step. Size is important, too-aim for your finished horse to be about 3 to 4 inches tall, similar to the one in the tutorial.
Following this pattern helps boost your confidence and opens up endless creative possibilities. Soon, you'll have a beautiful, sturdy crochet horse keychain and the skills to make even more adorable projects.

Crochet Cute Little Horse (Amigurumi Keychain) Pattern
Materials List
- Yarn: Light DK weight cotton or acrylic in main/body color, mane color, nose color, accent color (try using 2-4 colors)
- Hook: 2.25-2.75mm (US B/1-C/2)
- Stuffing: Polyester fiberfill or similar
- Notions: Scissors, tapestry/darning needle, stitch marker, keychain ring (optional), comb (optional for mane)
- Optional: Safety eyes, hot glue
Skill Level
Intermediate
Confident beginners can attempt! Includes shaping, simple color changes, basic sewing and assembling.
Key Abbreviations (US Terms)
| Abbreviation | Stitch Name |
|---|---|
| MR | Magic Ring |
| ch | chain |
| sl st | slip stitch |
| sc | single crochet |
| inc | single crochet increase (2 sc in same st) |
| dec | single crochet decrease (sc2tog) |
| hdc | half double crochet |
| st(s) | stitch(es) |
| rep | repeat |
Special Notes:
- Pattern is worked in continuous rounds unless stated otherwise.
- Use stitch marker to mark first stitch of each round.
- Stuff parts as you go for proper shaping.
- Where color change is needed, always crochet over yarn tails.
Detailed Step-By-Step Pattern
Horse Head & Body
Head
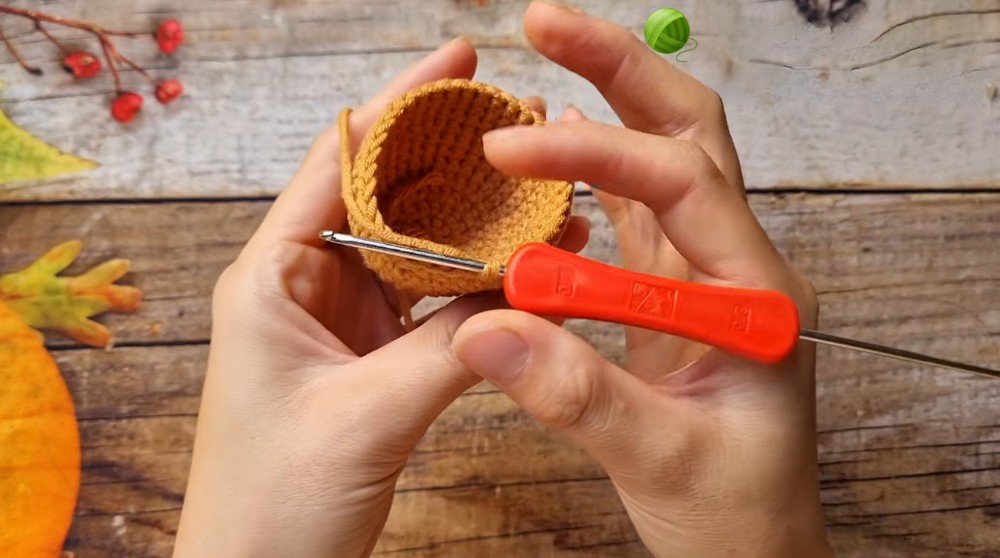
Step 1: Head Base (Magic Ring Start)
- MR, ch 1. Work 8 sc in ring.
Pull tight, sl st to first sc to close.Start your horse with a magic ring and 8 single crochets. This makes a nice, round base for the head and helps avoid holes at the center.

2: Increasing Rounds
- Round 2: Inc in each st around. (16 sc)
- Round 3: (Sc in next st, inc in next st) rep around. (24 sc)
- Round 4: (Sc in next 3 sts, inc in next st) rep around. (30 sc)
- Round 5-7: Sc in each st around. (30 sc per round, 3 rounds)You are building the head shape. Each round widens the head and then keeps it even to build height and depth.
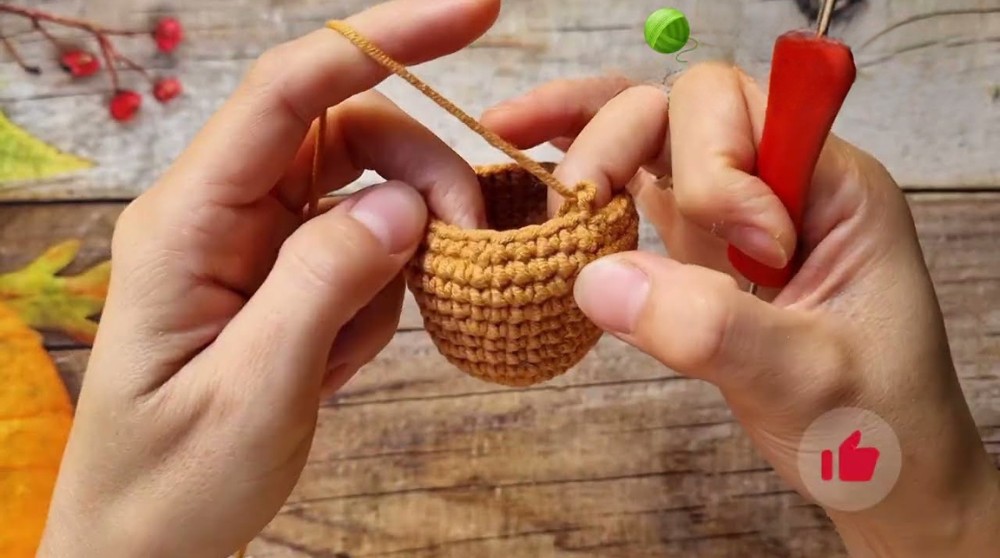
3: Cheek Shaping
- Round 8: (Sc in next 4 sts, inc) rep around. (36 sc)
- Round 9-11: Sc in each st around. (36 sc per round, 3 rounds)Increase a little more for the cheeks, then crochet even for three rounds to create a fuller, 'chubby' head.
4: Snout & Jaw Tapering (Decreases)
- Round 12: (Sc in next 4 sts, dec) rep around. (30 sc)
- Round 13: (Sc in next 3 sts, dec) rep around. (24 sc)
- Round 14: (Sc in next 2 sts, dec) rep around. (18 sc)
- Round 15: (Sc in next st, dec) rep around. (12 sc)To form the snout and jaw, narrow the head by decreasing stitches. This gives the face a rounded shape and prepares for stuffing.
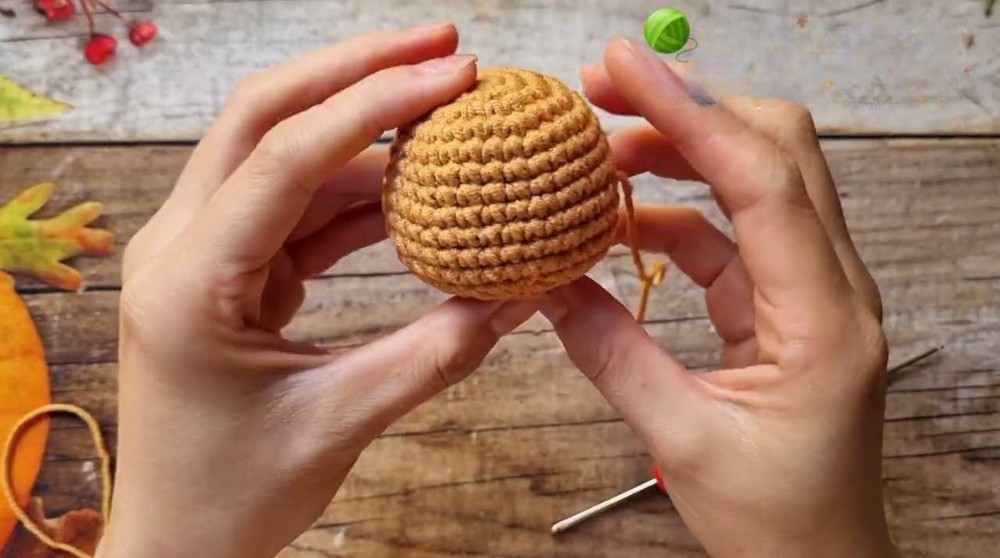
5: Closing Head
- Round 16: Dec in each st around. (6 sc)
- Finish off, stuff head firmly before closing.
- Use the yarn tail and tapestry needle to weave through the last 6 sts, pull tight to close the hole.
- Hide yarn tail inside.Stuff the head now before it gets too tight, then cinch closed for a neat finish.
Body
Legs (Make 2 for Bottom Legs):
6: Leg Base
- MR, work 10 sc in ring.
Sl st to first sc to close. Change color if you wish (for hooves). - Rounds 2-3: Sc in each st around. (10 sc per round)
- Finish off, leave tail for sewing.Start legs with a magic ring, then keep them even for a short round leg. Color change at the end for hooves if desired.
7: Joining Legs
- Crochet 3 ch between the two legs.
- Join second leg to first leg with a sl st and ch, forming one round.
- Round 4: Sc around both legs and the 3 ch between. (Count: 10 sts per leg × 2 = 20, plus 6 sc (3 per spacer), for 26 sc)You connect the legs by crocheting chains between them, then work all the way around to make the hips.
8: Build Body Tube
- Rounds 5-8: Sc in each st around. (26 sc per round)
- Change color if you want to make a 'bib' or accent strip.Continue working in the round to build the body - you can add color changes to make your horse look unique.

9: Body Tapering
- Round 9: (Sc in next 3 sts, dec) rep around. (21 sc)
- Round 10: Sc in each st around. (21 sc)
- Round 11: (Sc in next 2 sts, dec) rep around. (16 sc)
- Round 12: Sc in each st around. (16 sc)
- Round 13: (Sc, dec) rep around. (12 sc)After building depth, decrease to taper the body. Stuff as you go, but leave enough space at the top.
10: Finishing Body
- Stuff the body firmly.
- Sew head to body by matching the last round of body with bottom of head, making sure they are centered. Use whip stitch or similar with yarn needle. Hide end.Stuff and sew the head onto the body, making sure the pieces line up evenly. This makes the horse's body look solid and cute.
Legs (Front/Upper Legs, Make 2)
Step 11: Arm Base
- MR, work 8 sc in ring.
- Rounds 2-7: Sc in each st around. (8 sc per round)
- Change color for hoof after round 2 if desired.
- Finish off, stuffing lightly.Working top legs is just like the bottom legs, but slightly thinner (8 sc, not 10). Make two legs this way and sew to body sides.
Ears (Make 2)
Step 12: Ear
- Ch 5.
- Turn, sc in the first ch, hdc in next three, 2 sc in last ch.
- Ch 1, turn, 2 sc in first st, hdc in next three, sc in last st.
- Finish off, leave tail for sewing.Create a simple small ear shape by chaining and making single/half-double crochets. Fold and sew to head.
Mane (Fringe Style)
Step 13: Mane
- Cut multiple strands of yarn, each 3-5 cm long.
- Fold each strand and sew them together along the top center of head with a yarn needle, tying securely.
- Fluff mane with a comb for volume.Use cut yarn strands to create a fluffy, wild mane. Comb or fray for style.

Tail
Step 14: Tail
- Ch 7 (or desired length).
- Turn, sl st in each ch back.
- Cut 4-5 yarn strands, each 5-7 cm, fold in half.
- Attach strands to base of tail by looping through with a yarn needle, then sew tail onto body.Make a simple tail from a chain, adding yarn strands for frayed effect, then sew onto the horse's bum.
Nose (Muzzle)
Step 15: Nose
- Ch 5.
- Turn, hdc in next 4, 2 hdc in last st, ch 1, turn.
- 2 hdc in first st, hdc in next three, hdc in last st.
- Finish off, sew nose to head front.
- Embroider two nostrils with black thread/yarn.Quick chain and half-double crochet for the nose. Sew and embroider for added detail.
Eyes
Step 16: Eyes
- Use safety eyes, beads, or embroider two eyes near the nose/muzzle, about one row below the mane.Sew or glue on eyes for more personality. Try experimenting with placement for the cutest look.
Assembly and Finishing
- Sew all parts securely to the body and head.
- Add a keychain ring to the ear or the mane if desired.
- Hide all ends inside, trim excess yarn.Finish up by sewing all parts together and tidying yarn ends. Add your keychain ring to turn it into an accessory!

Conclusion
You have completed a charming crochet horse keychain. This pattern lets you personalize your horse using different colors and proportions. The 3D shaping and simple part construction are perfect for learning or gifting.

Pattern Corrections & Tips
- Check rounds and stitch counts: If your shape looks lopsided, recount your stitches and even them out.
- Stuff as you go: Don't overstuff legs and arms, but make the head and body firm!
- Seam securely: Use whip stitch for joining, and always hide ends neatly inside.
- For beginners: If you struggle with magic ring, start with ch 2, then 8 sc in second ch from hook.
Expert Tip
Change colors where desired for realistic hooves, mane, nose, or markings. If making for a child, securely attach all small pieces and use embroidery for eyes.