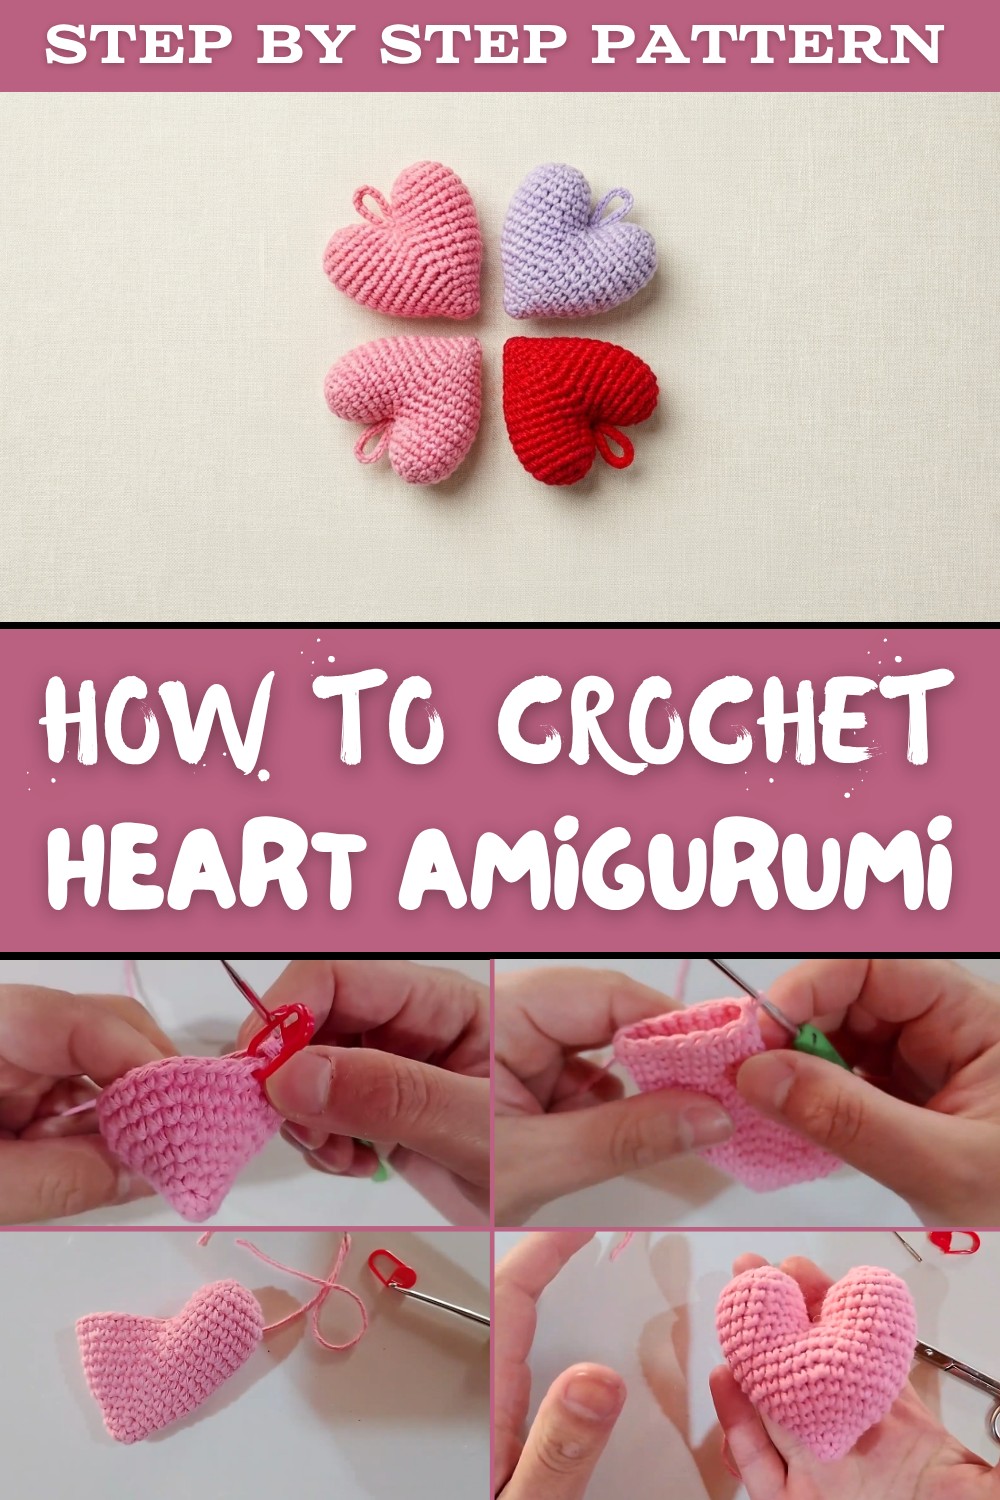
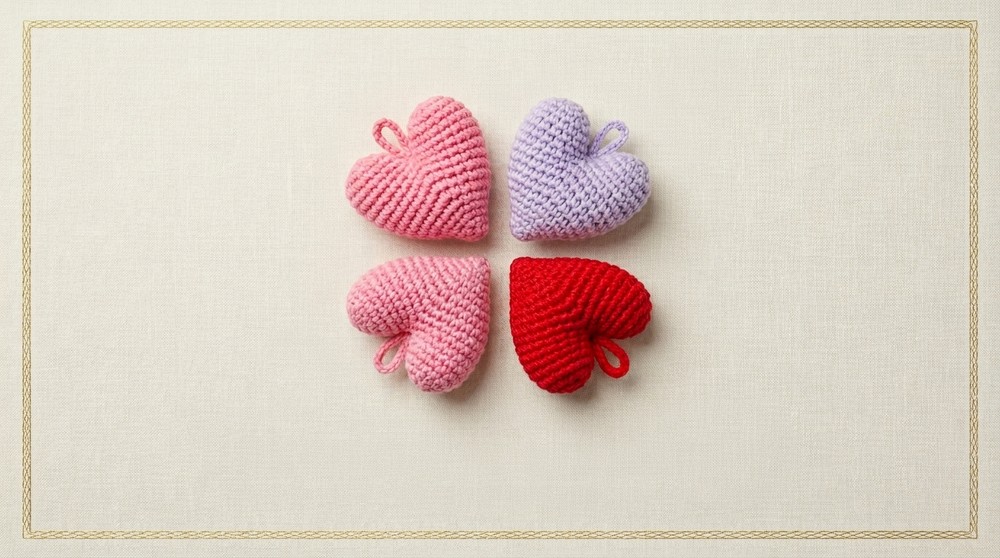
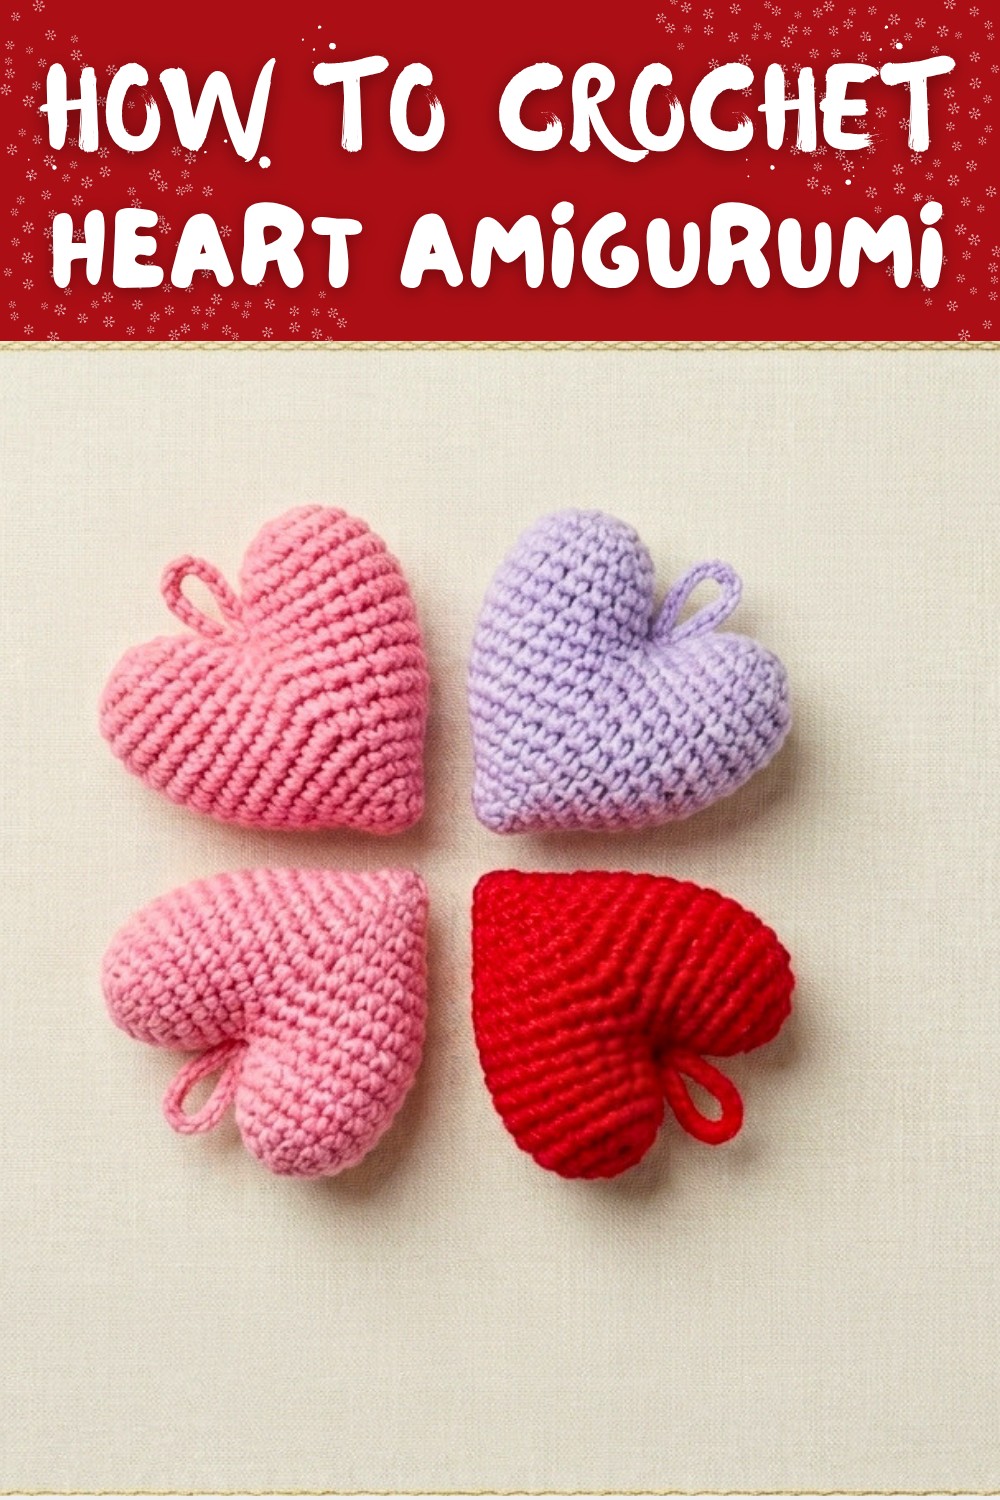
Cute Crochet Heart Amigurumi Pattern for Decor & More
Refine your skills with this free crochet heart amigurumi pattern, perfect for graceful keepsakes, heartfelt gifts, and stylish decorations.
Few things feel as heartfelt as handmade touches, and this crochet heart amigurumi pattern offers an easy way to make something truly special. These lovable hearts can be used for a variety of purposes, including charming gift additions, cozy home decor accents, or thoughtful tokens of celebration for holidays and special occasions. Perfectly suited for beginner crocheters yet appealing to seasoned enthusiasts, this pattern requires minimal time while yielding impressive results.
Free Crochet Heart Amigurumi Pattern for Keychains and Gifts
Soft, lightweight, and customizable in size and color, this crochet pattern combines functionality and creativity in the most delightful way. Whether you want to personalize a project or brighten someone's day with a handmade gift, their versatility knows no limits. The process itself is relaxing and enjoyable, requiring only basic stitches and accessible materials.
Once completed, these durable hearts can be repurposed for garlands, ornaments, or cute accessories that add extra charm to your space. Every finished piece carries a touch of personality and warmth, making it much more than just a simple crochet. Perfect for spreading joy or expressing emotions in a unique way, this pattern invites you to add thoughtful elegance to any setting with the timeless appeal of crochet artistry.
Materials Needed:
- Cotton yarn: Medium thickness.
- Crochet hook: 2.5 mm (a 2 mm hook can also work).
- Stuffing: Siliconized polyester filling.
- Tapestry needle and scissors.
- Stitch marker: Optional, for tracking rounds easily.
Special Features:
- Skill Level: Beginner-friendly.
- Technique: Amigurumi method (working in rounds).
- Versatility: The completed heart can be used as a decoration, an accessory, or even stitched into larger projects like blankets or garlands.
Crochet Pattern Instructions:
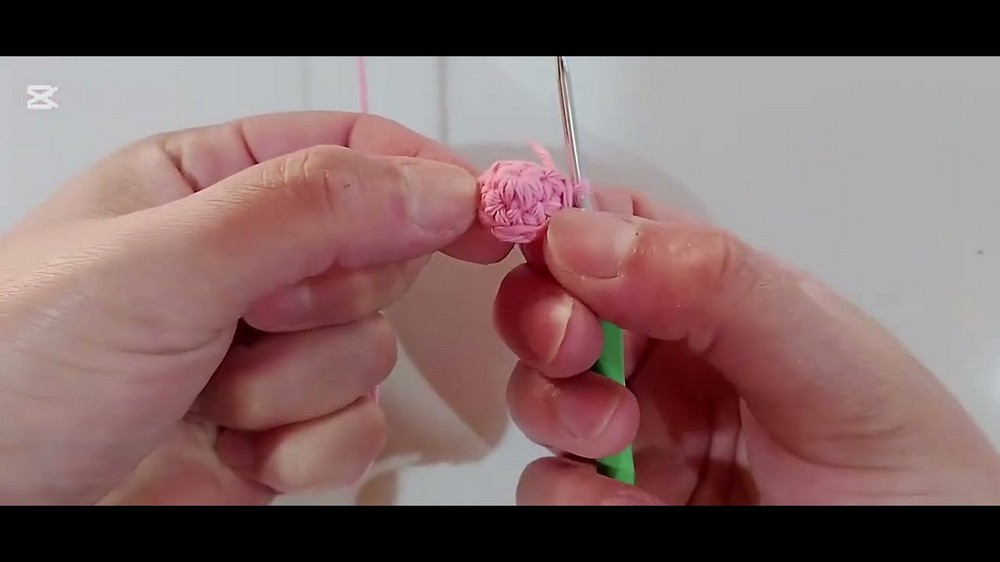
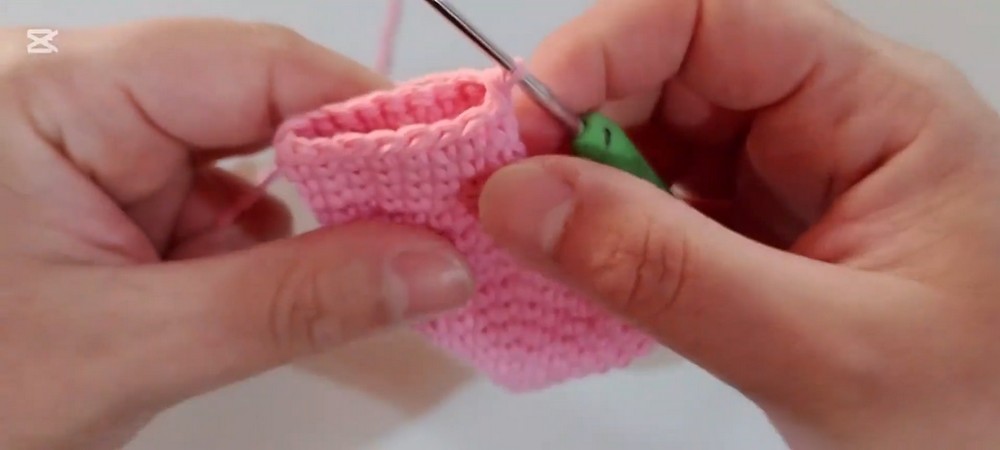
Step 1: Start with a Magic Ring
Make a magic ring and crochet 6 single crochet stitches (SC) inside the ring. Pull the loose tail to close it tightly. This forms the first round.
Step 2: Round 2
Make 1 single crochet (SC) in each stitch from the previous round. You should have 6 SC total.
Step 3: Round 3 - Increase Round
Make an increase in every stitch, which means crochet 2 single crochets into one stitch. At the end of this round, there will be 12 SC.
Step 4: Round 4
Make 1 single crochet in each stitch. Keep your count at 12 SC.
Step 5: Round 5 - Alternating Increases
Now, alternate between making 1 single crochet and 1 increase (2 SC in 1 stitch), and repeat this pattern until the round ends. This round should finish with 18 SC.
Step 6: Round 6 - Continued Increase Pattern
Alternate making 2 single crochets and 1 increase, repeating this pattern throughout the round. By the end, you'll have 24 SC.
Step 7: Round 7
Make 1 single crochet in each stitch, maintaining 24 SC throughout.
Step 8: Round 8 - Final Increase Round
Alternate between 3 single crochets and 1 increase for this round. When complete, you'll have 30 SC.
Step 9: Round 9 and 10
Work 1 single crochet in each stitch for two consecutive rounds. Each round should have 30 SC.
Step 10: Round 11 - Alternating with 4 SC and 1 Increase
Alternate between 4 single crochets and 1 increase throughout the round. At the end of this round, you will have 36 SC.
Step 11: Round 12
Repeat 1 single crochet in each stitch all around, keeping 36 SC.
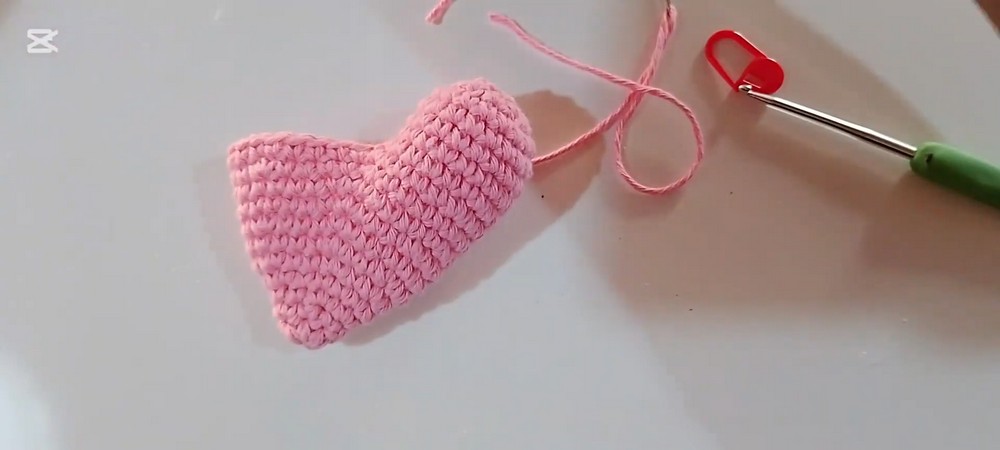
Step 12: Divide the Heart
Split the 36 stitches into two sections of 18 stitches each to form the top halves of the heart. Work on one half first and then the other.
Steps for Each Heart Half:
Step 13: Rounds 1-4 of First Half
Work 18 single crochets for 4 rounds. Repeat 1 single crochet in each stitch, maintaining stitch count and shape.
Step 14: Shaping the Heart Bubble
Once 4 rounds are complete, alternate between 1 SC and 1 decrease (invisible decrease) throughout the next round. This begins the tapering of the heart shape.
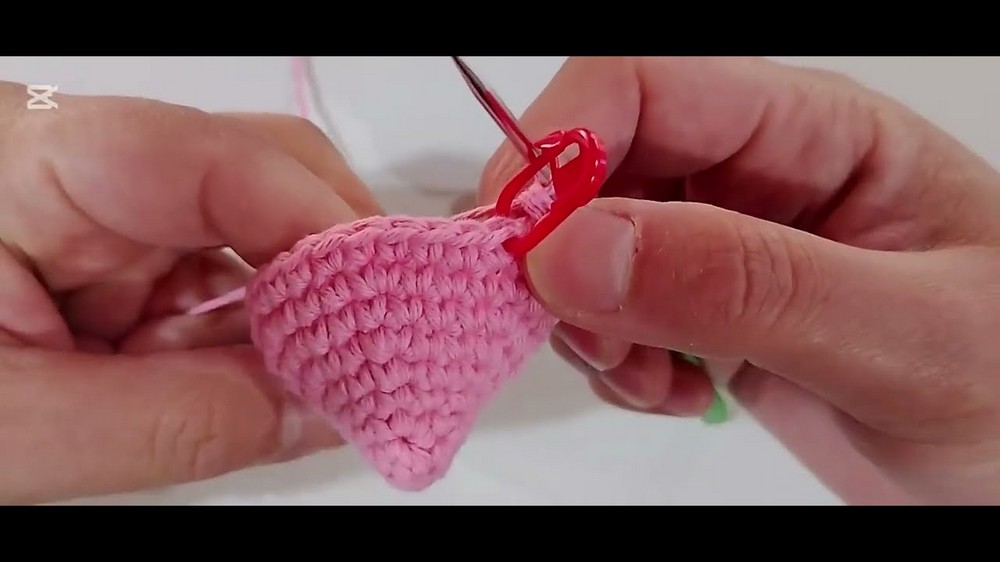
Step 15: Closing the Top Bubble
In the next round, work 6 invisible decreases across all stitches. Begin stuffing this section lightly before fully closing it.
Step 16: Assemble
Finish off the first half by sewing the top edge tightly using your tapestry needle and stuffing each bubble firmly.
Repeat Steps for the Second Half:
Follow the same instructions for rounds, decreases, stuffing, and sewing to complete the second half. Finally, sew the two halves together at the center using the excess yarn.
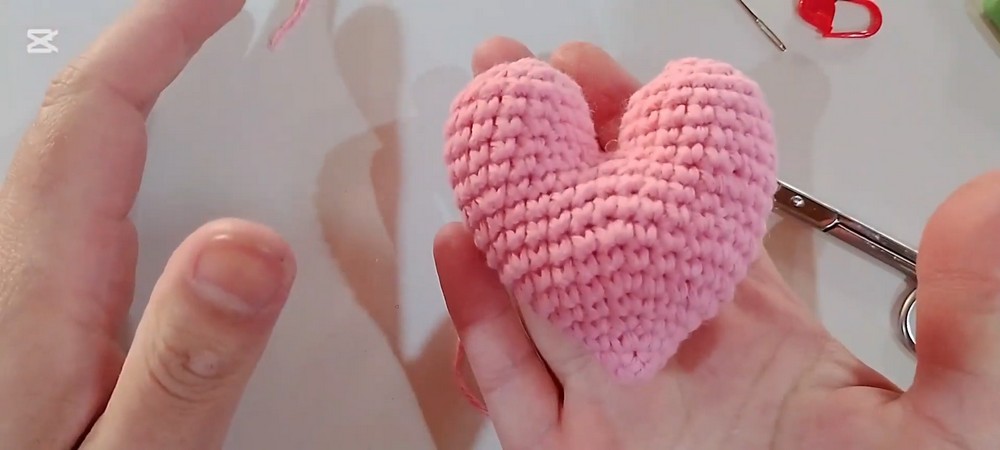
Finishing Touches:
- Smooth out the shape by adjusting the stuffing.
- Hide any remaining yarn tails with the needle.
- Close any visible gaps between the seams of the two halves for a polished look.
Uses:
- Decorations: Hang it on walls or use it for seasonal decor.
- Keychains: Attach a loop to transform it into a trendy daily accessory.
- Gift Toppers: Pair it with cards or even larger projects as a cheerful accent.
Tutor Suggestions:
- Beginners should use a stitch marker to ensure round accuracy.
- Adjust the hook size based on personal tension preferences to keep the stitches tight.
- Be patient while working on the tapering rounds, as the project becomes delicate near the end.
Crochet Tip:
For super neat decreases, use the invisible decrease method by picking up the front loops only of two consecutive stitches-it blends perfectly without leaving gaps!
Conclusion:
This crochet heart amigurumi is a satisfying project that offers the joy of creating something meaningful and versatile. Whether for gifting or decorating, this cozy little heart will bring warmth and beauty.