
Easy Free Crochet Daisy Coaster Pattern for Spring Decor
Stitch a pretty table accent with this free crochet flower daisy coaster pattern that adds color, charm, and a touch of joy to every drink you enjoy.
Perfect for beginners and fun for everyone, this Flower Daisy Coaster is a wonderful way to add a touch of beauty to your home. The coaster is shaped like a daisy, with soft, delicate petals and a neat, round center. The result is a simple yet charming piece that is as pretty as it is practical. The process is easy to follow. You start by making a magic circle for the center of the flower and then work on the petals using simple crochet stitches like single crochet, half double crochet, and double crochet. The petals grow layer by layer, creating a full and vibrant daisy.
Free Crochet Daisy Coaster Pattern That's Perfect for Any Home

This coaster isn't just beautiful-it's also super useful. You can place it under a mug, cup, bowl, or even a vase to protect your table from heat and water stains. It's lightweight, flat, and easy to clean, making it perfect for daily use or special occasions. It also makes a thoughtful, handmade gift, whether it's for a birthday, Mother's Day, or a housewarming.
One special feature is the option to add a decorative border. You can keep the look simple, or use long single crochet stitches in a different color to outline each petal for a more striking, bold look. With just three colors of yarn and a 4 mm crochet hook, you can turn leftover yarn into a functional and beautiful accessory. This daisy coaster brings charm to your table and lets you enjoy the beauty of handmade décor while learning new skills.
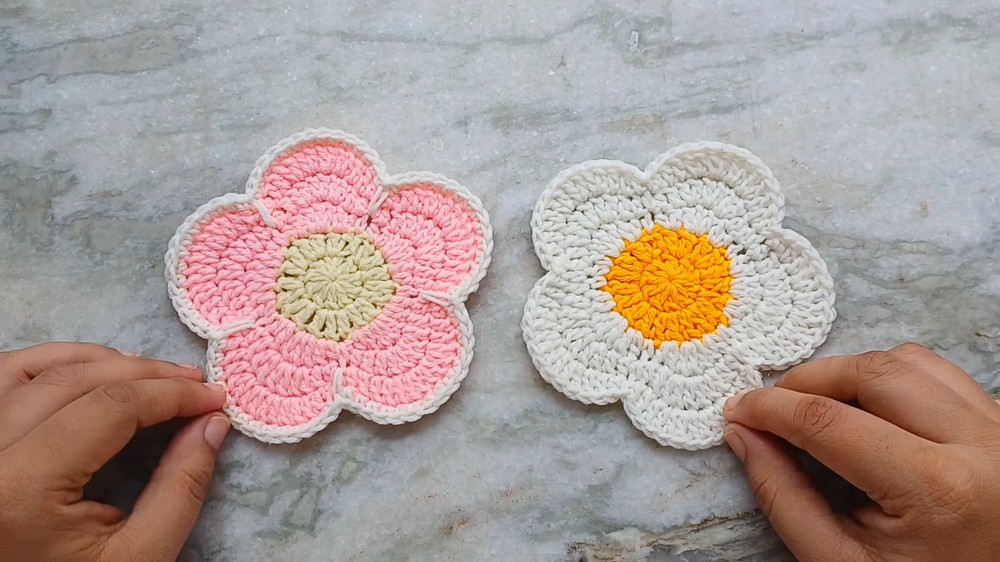
Crochet Daisy Coaster Pattern
Finished Size:
The completed flower coaster is approximately 5 inches (13 cm) in diameter, depending on your yarn and tension.
Necessary Materials:
- Yarn:
Three colors of 4 ply yarn:- Color A: Center of the flower.
- Color B: Flower petals.
- Color C: Border (optional).
- Crochet Hook:
4.0 mm crochet hook (recommended for 4 ply yarn). - Other Supplies:
- Scissors.
- Tapestry needle for weaving in ends.
Gauge:
Gauge is not crucial for this project, but for reference:
- 10 double crochets and 4 rounds create about 2 inches in diameter with the specified materials and hook size.
Special Techniques Explained:
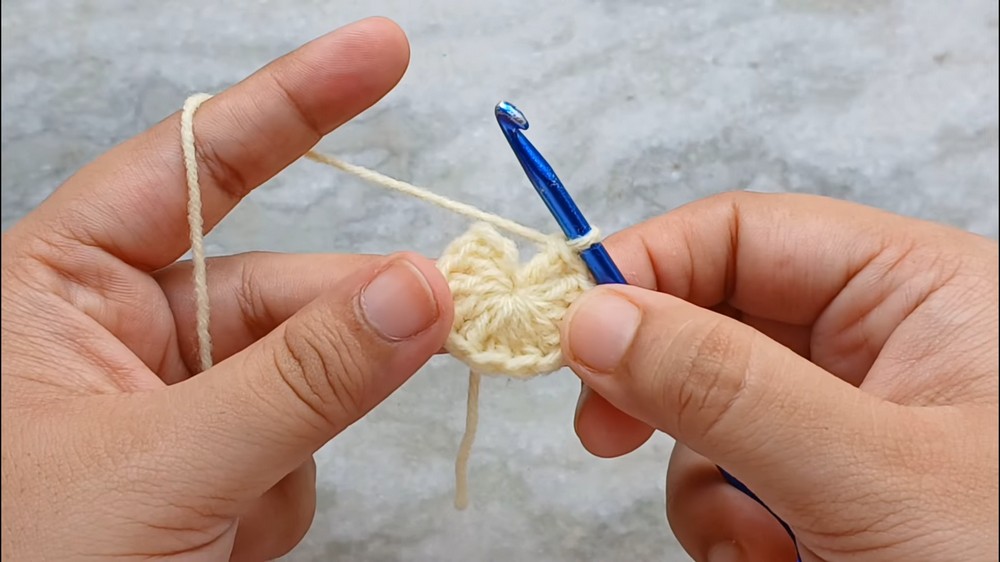
- Magic Circle:
- Wrap your yarn around your finger to form a loop, crossing at the front.
- Insert your hook under the loop, grab the yarn, and pull through.
- Yarn over and pull through again to secure the circle.
- Double Crochet (dc):
- Yarn over, insert the hook into the stitch, yarn over, and pull up a loop (three loops on your hook).
- Yarn over, pull through the first two loops.
- Yarn over, pull through the remaining two loops.
- Half Double Crochet (hdc):
- Yarn over, insert the hook into the stitch, yarn over, and pull up a loop (three loops on your hook).
- Yarn over and pull through all three loops at once.
- Long Single Crochet:
- Instead of working into the stitches of the current round, insert your hook into a stitch two rows below (as directed), pull up a loop, and complete as a regular single crochet.
Pattern Instructions:
Round 1: Creating the Center
- Using Color A, create a magic circle.
- Chain 2 (this does not count as a stitch).
- Work 10 double crochets (dc) into the magic circle.
- Pull the tail of the magic circle to tighten and close the loop snugly.
- Slip stitch into the first double crochet to close the round.
- Fasten off Color A and weave in the end.
Round 2: Expanding the Flower Base
- Join Color B to any stitch of Round 1 with a slip stitch.
- Chain 2 (this does not count as a stitch).
- Work 2 double crochets into each of the 10 stitches from the previous round. (You'll have 20 double crochets in total.)
- Slip stitch into the first double crochet to close the round.
- Fasten off Color B, leaving a small tail for weaving in.

Round 3: Creating Petal Bases
- Join Color B to any stitch from Round 2 with a slip stitch.
- Begin a petal sequence:
- In the first stitch: Work 1 half double crochet (hdc) and 1 double crochet (dc).
- In the next stitch: Work 3 double crochets (dc).
- In the next stitch: Work 1 double crochet (dc) and 1 half double crochet (hdc).
- In the next stitch: Work 1 single crochet (sc).
- Repeat the above sequence 5 times in total around the coaster.
- Slip stitch into the first single crochet to close the round.
Round 4: Building the Petal Curves
- Chain 1, and begin working into the first hdc from the previous round:
- Work 1 half double crochet (hdc).
- In the next stitch (dc):
- Work 1 double crochet (dc).
- In each of the next 3 stitches (dc cluster):
- Work 2 double crochets into each stitch (6 total double crochets for this section).
- In the next stitch (dc):
- Work 1 double crochet (dc).
- In the next stitch (hdc):
- Work 1 half double crochet (hdc).
- In the next stitch (sc):
- Work 1 single crochet (sc).
- Repeat this sequence 5 times around the coaster.
- Slip stitch into the first single crochet to close the round.

Round 5: Accent Layer (Optional):
- Join Color C to the middle of any petal from Round 4.
- Start working single crochets (sc) into every stitch of the petal except for the slip stitch junctions.
- When you reach a slip stitch intersection:
- Go down two rows (to Round 3) and make a long single crochet (lsc) into the stitch directly below.
- Continue single crocheting around the next petal.
- Repeat this process for each petal around.
- Slip stitch into the first single crochet to close the round.
- Fasten off Color C, leaving a long tail for weaving in.


Finishing Techniques:
- Weaving in Ends: Use a tapestry needle to weave in all remaining yarn tails on the back of the coaster. Work securely to prevent unraveling.
- Blocking (Optional): For an even and polished look, block the flower coaster by pinning it into shape and lightly steaming or dampening it. Allow it to dry completely before use.

Tips and Customization Ideas:
- Experiment with Colors: Use pastel shades for spring vibes, bold colors for a festive look, or neutral tones for a more elegant aesthetic.
- Add Glitter Thread: Incorporate a thin metallic or glitter thread alongside your main yarn for a sparkly effect.
- Change the Size: Increase the size of the coaster by adding more rounds, following a similar increasing sequence outlined in the pattern.
- Use Cotton Yarn: If creating cup coasters, consider using 100% cotton yarn to ensure they are absorbent, durable, and heat resistant.
Conclusion and Final Remarks:
This cheerful and easy to make Flower Coaster is the perfect crochet project for all skill levels. The charming flower design is versatile, making it a great gift for any occasion, from birthdays to housewarmings. The dual version pattern (with and without a border) ensures you can customize it to suit your preferences while exploring new techniques like the magic circle and long single crochet.
Once completed, you'll have a delightful functional piece that doubles as a decorative touch for coffee tables, desks, or dining areas. Whether you make one or a colorful set, this coaster is sure to bring handcrocheted joy to your everyday life.
